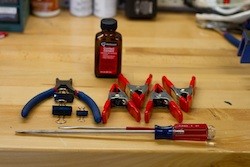
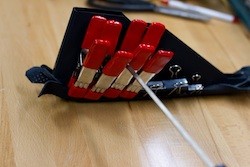
- Long flat blade screwdriver.
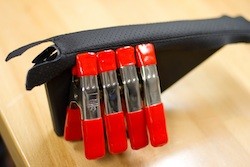
- Clamps (4 or more).
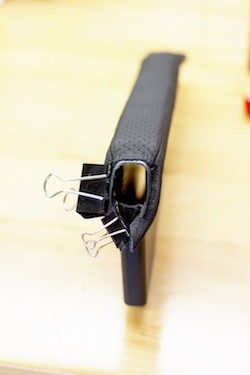
- Binder clips (multiple small and medium sizes).
- Diagonal Cutters (used for trimming and cutting leather).
- Thin metal blade for manipulating leather.
You must be logged in to rate content!
9 minute read

E-Brake covert DIY
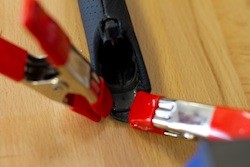
1. Remove the ebrake handle and boot. This is very simple, on the underside of the handle there is a tab that must be pulled out. This is easily done with a small set of needle nose pliers or a small flat head screwdriver. Taking a picture of it installed is difficult, however if you look at this picture you will see how it attaches with the tab in the removed position.
Once you pull/pry the tab out of the hole you can simply grab the handle and pull it off towards the front of the car. After you remove the handle you can remove the lower (boot) portion of the e-brake cover assembly by pulling it off toward the front of the car as well.
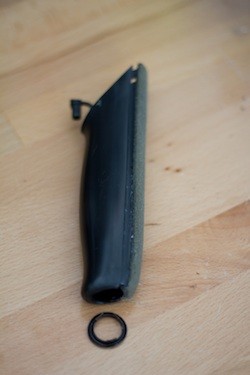
With your e-brake parts removed we can begin the re-covering process. Let's start with the handle. Remove the old leather from the handle. There is plastic underneath the leather so don't go too crazy with a knife. Take your time and remove it cleanly, paying attention to how it is installed/folded/glued as you remove the old leather.
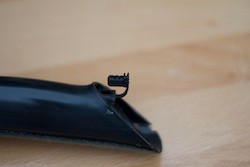
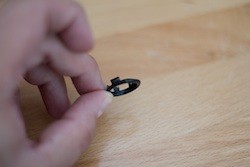
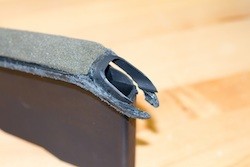
2. Pay close attention to the black metal grommet at the front of the handle. This will need removed and will be re-used. It is VERY easy to bend and scuff this piece. Use caution and take your time removing it. The grommet is held in place by 4 thin metal tabs that are bent to hold it in place. You can easily straighten them by inserting a long flat blade screwdriver through the back end of the handle and gently prying them up. Pay attention to the orientation of the tabs as the grommet is fitted in a specific orientation. You can see the grommet in the pictures. Once you have the grommet removed, set it aside for safe keeping.
3. You should now be looking at your plastic e-brake handle with a thin foam coating on the top side. You need to leave the foam in place but clean off any bits of leather attached to it. I was able to simply rub it clean with my thumb using light pressure. The idea is to get the foam clean of any dried up bits before installing your new cover.
4. Take the new leather cover and test fit it a couple times (taking it completely on and off) to make sure you understand how you are going to put it on. It is a tight fit. You will want to look closely at the seams of the leather to make sure they are straight. You may want to consider marking the backside of the overlap portion leather with alignment marks to help you in the next step. Once you understand how the leather slides over the plastic handle you are ready to begin gluing. I applied a thin layer of contact cement over the plastic portion of the handle but did not apply it to the foam. Do not use too much contact cement.
5. Re-install the new cover and quickly align it. The contact cement does not set instantly but gets tacky fairly quick. Once you have the cover in place set it aside for at least 20 minutes before proceeding.
6. Once the contact cement has dried the next step is to wrap the remaining leather around the back end and glue it. Do NOT try to do this all at once. Do one side at a time and finish with the top side and corners. For the long side parts simply apply a thin layer of contact cement, fold the leather over and clamp it down.
7. Corners can be a bit tricky so I suggest cutting fold lines into the leather. Do not cut all the way to the fold, you are only creating some relief points for the fold.
8. Glue and clamp the remaining leather and clamp it down.
9. Again, wait 20 minutes before moving on.

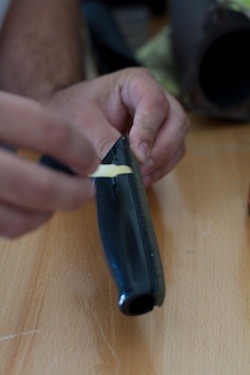
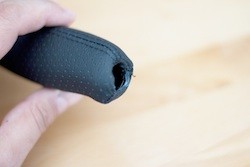
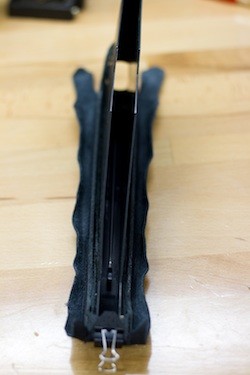
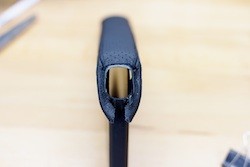
10. Now that your handle is starting to look nice again, it is time to finish up and install the grommet. This is the trickiest part of the install but is not too difficult. With this step you are aiming to pull the leather tight but remain under only the lip of the grommet. You will likely need to trim a small portion of the leather to get the fit exact. If you leave too much leather you will not be able to secure the tabs in place and the grommet will pop off when you install the handle in the car. My trimmed front section is shown in figure.
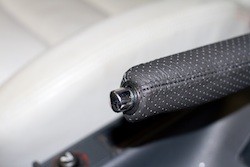
11. Install the grommet and hold it steady with a finger. Insert a long flat blade screwdriver through the back end of the handle and gently bend the tabs back into place. Once the grommet is secure, re-tighten the tabs a few times to be sure it is secure. Reinstall in your car to test the fit. The finished product should resemble this:
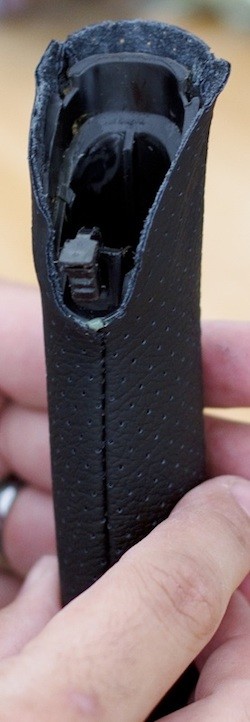
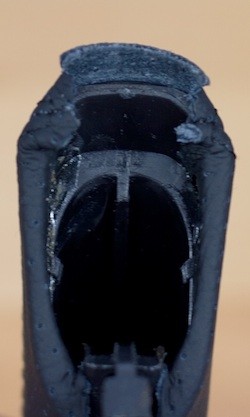
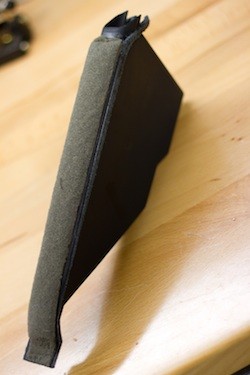
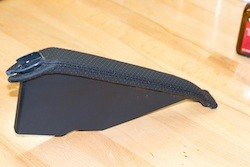
12. Remove plastic boot assy from the car as per step (1) above. As with the handle take care and use patience when removing the old leather. This part is very similar to the handle with foam under the leather cover. Once the cover is removed you should be looking at this:
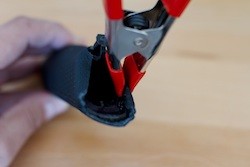
13. Be very careful around the ÔwingsÕ that go around the base of the handle shown in Figure. They are fragile.
14. Test fit your new cover and clamp it in place as shown in Figure. Pay attention to the seams in the leather. If you have re-covered your handle it would be beneficial to align the seams with the ones on your handle. You may want to mark the overlap portions of the leather to help with alignment. Remove the cover.
15. Before beginning the gluing, I highly suggest taking the time to painters tape the exposed plastic sides of the boot that will not be covered in leather to protect against errant application of contact cement. It will save the hassle of removal later. I did not do this and spent a half hour cleaning up my mistakes. Remember that the plastic sides are visible in your car when the e-brake is engaged.
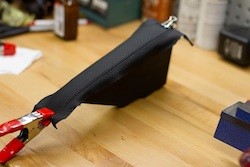
16. Begin by gluing the front and back of the cover using a thin layer of contact cement in place and clamping them down as shown. Wait 20 minutes before moving on. Do not glue the wings in place just yet. They will be last.
17. Once the front and back are glued the next step is to methodically glue your way around the perimeter of the boot in sections.
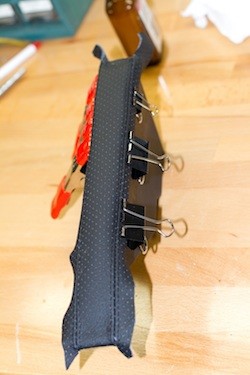
18. I had a limited number of clamps on hand so it took me about 5-6 iterations. Before starting on the perimeter clamp both sides in place to keep your seams even as you progress. Apply the contact cement to the plastic portions only where you will be clamping and do not apply it to the foam. Be sure to get the cement all the way around the plastic where the leather wraps (now you should see why you need the tapeÉ)
19. Once the perimeter is glued you can move on to the wings.
20. Do one at a time using the same approach as in the previous step but do not bother wrapping all the way around as excess leather will need to be trimmed.
21. This is what you should be looking at if you did this carefully.
22. Reinstall the boot and handle in your car and remember to secure the handle with the plastic tab. Enjoy your newly covered e-brake covers!!
Nice details
Posted by Diggymart on 5/18/20 @ 1:37:48 PM