You must be logged in to rate content!
9 minute read

How to install a leather Redline Goods armrest cover on your Audi B5 (1996-2001 A4, 2000-2002 S4)
The following pictures are of my U.S. 2001.5 Audi S4 with light gray factory interior, installing a black leather Redline Goods armrest cover.
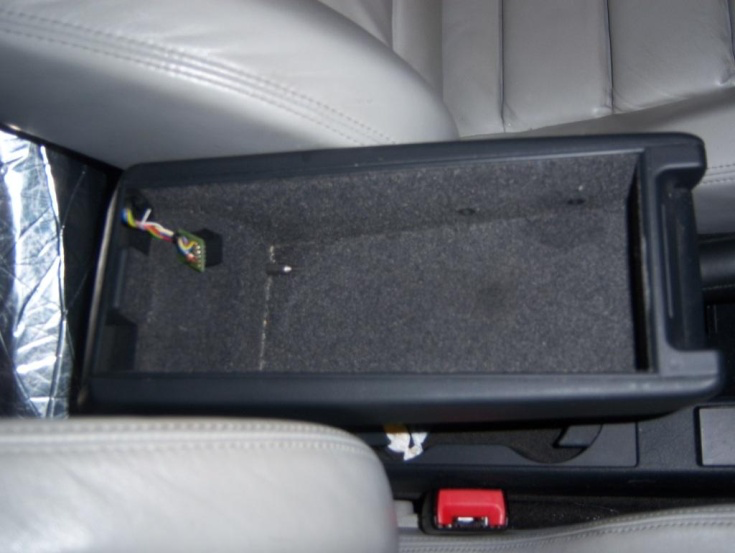
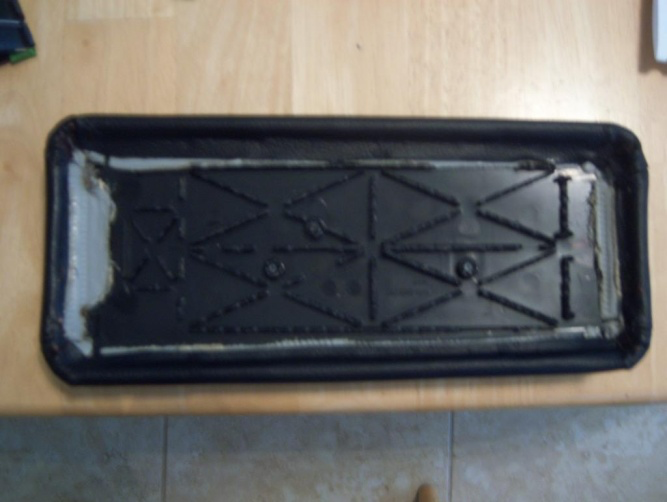
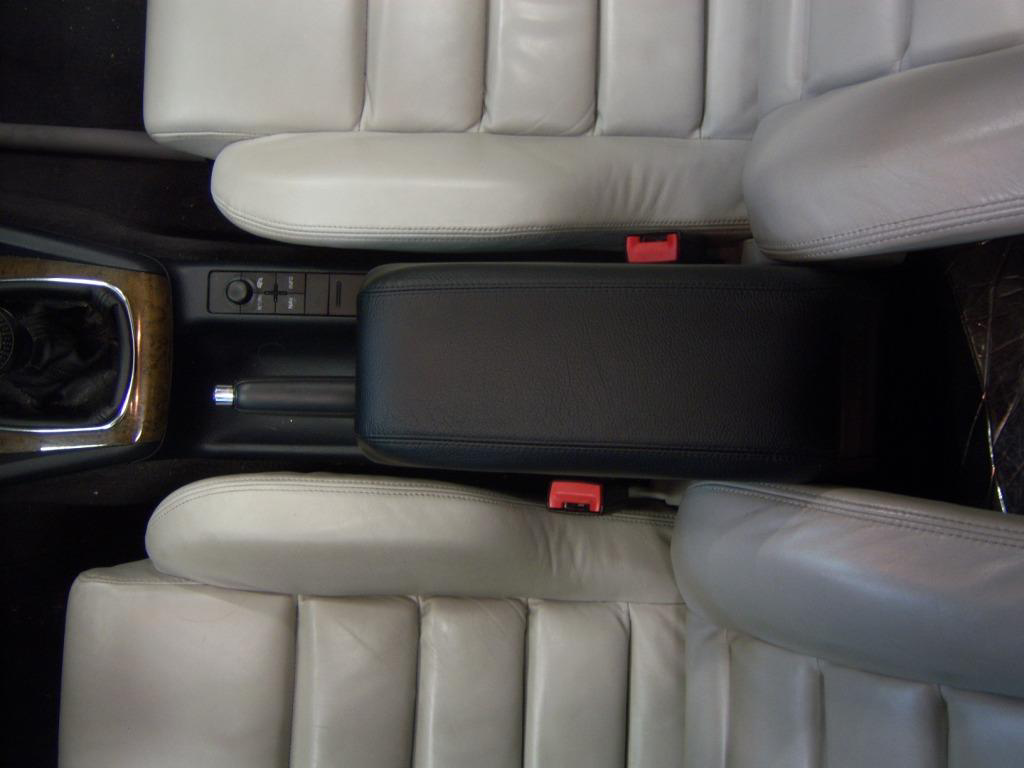
1. Remove your front center armrest cover/lid from your car. It comes off by simply squeezing the hinges together and swinging the armrest out. If you have a phone jack in your driver’s side hinge like I do, you’ll need to remove the little door (two size T-8 hex bolts) first and free the phone jack. Then squeeze the hinges together and remove the armrest lid from the car’s console. See picture below. Then find a nice clean, flat table or bench to perform the rest of the work.
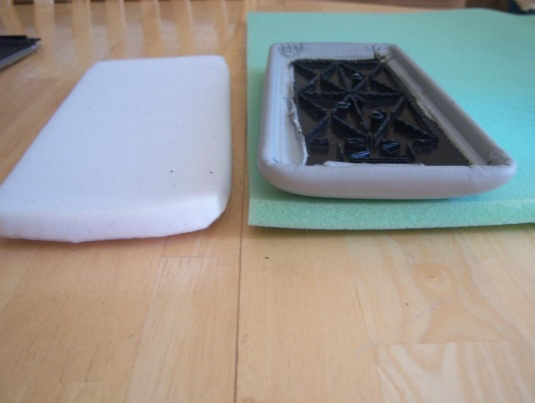
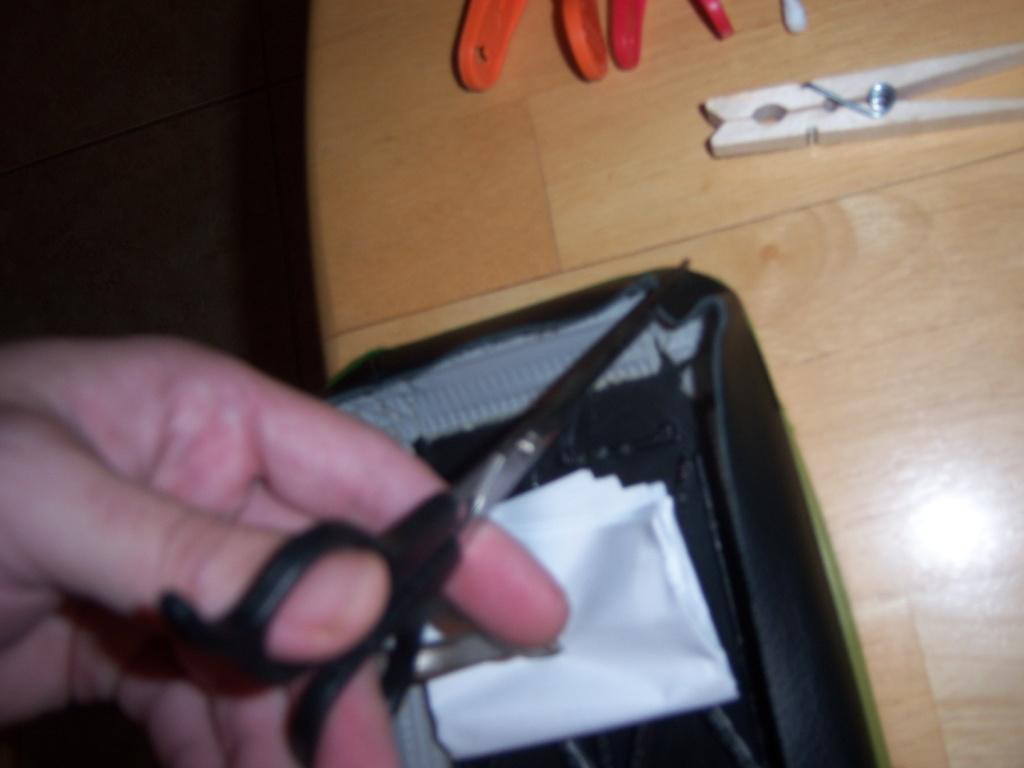
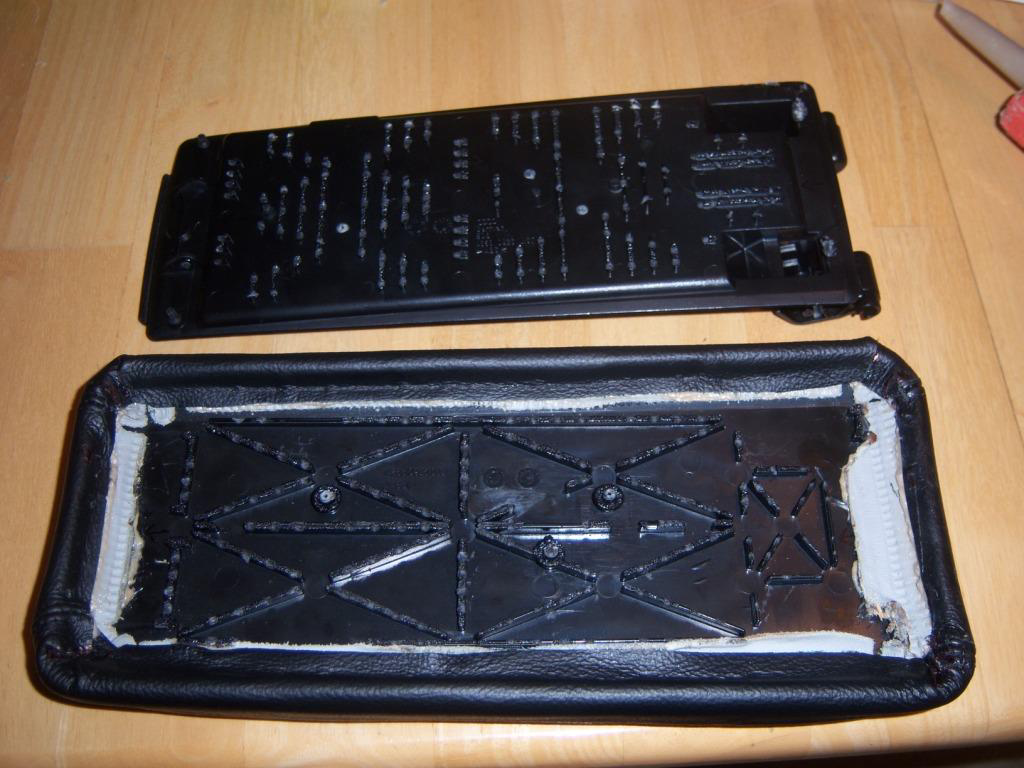
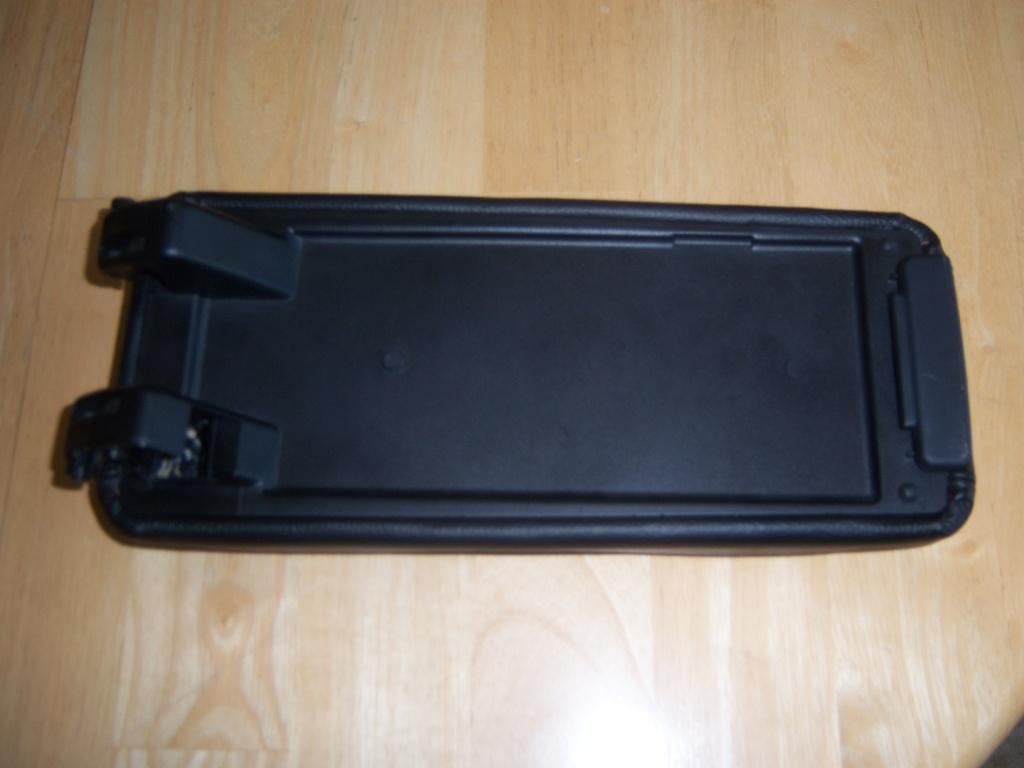
2. Once the armrest is out of the car, you’ll need to separate the outer/upper (leather) portion from the inner/lower (plastic) portion. Unfortunately, there are no screws. The two pieces are connected as one from the factory via “melded” plastic. The only way to separate the two halves is by using a long screwdriver (or equal) and slowly breaking away the plastic bond. See pictures below.
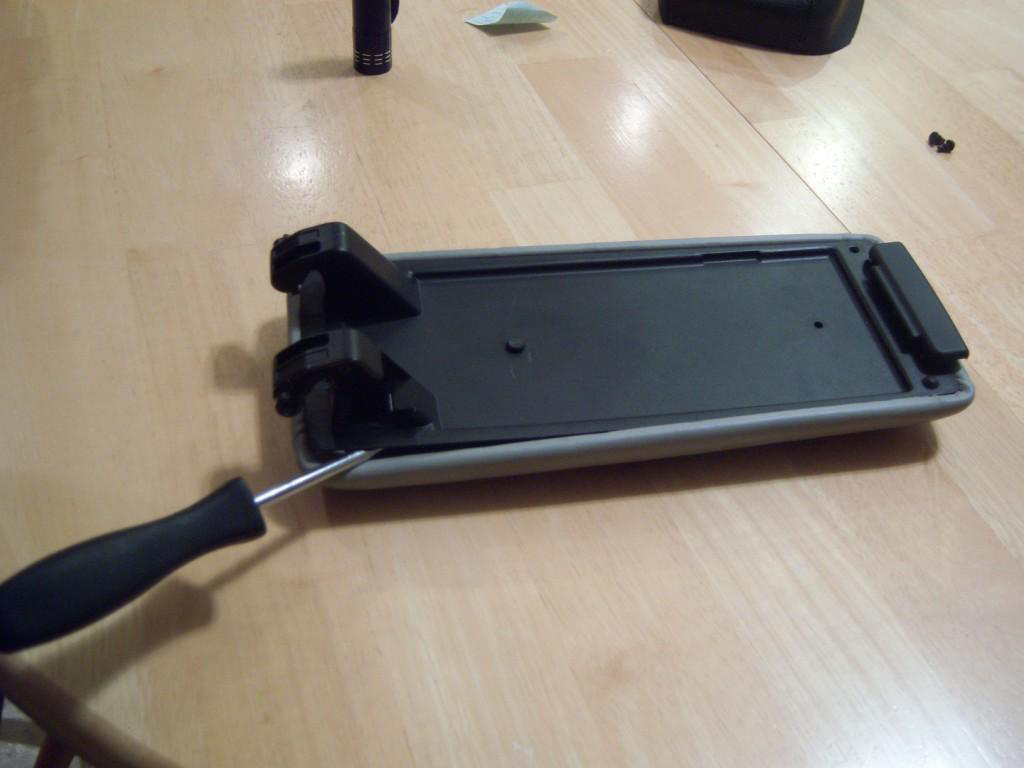
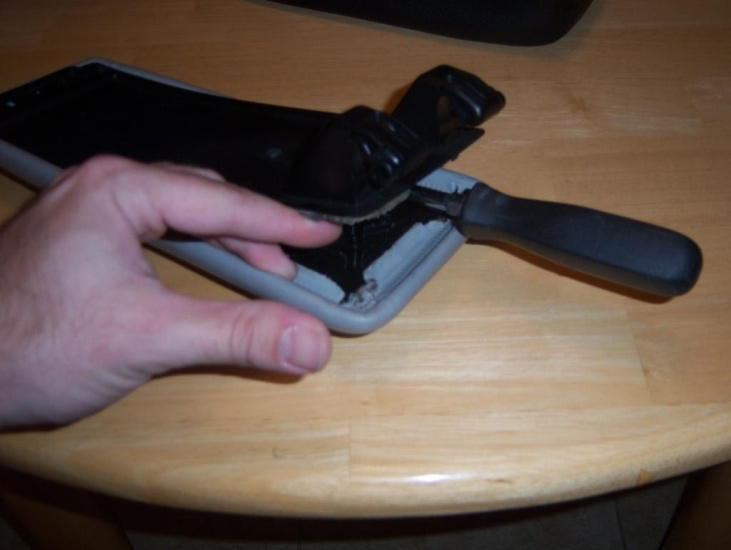
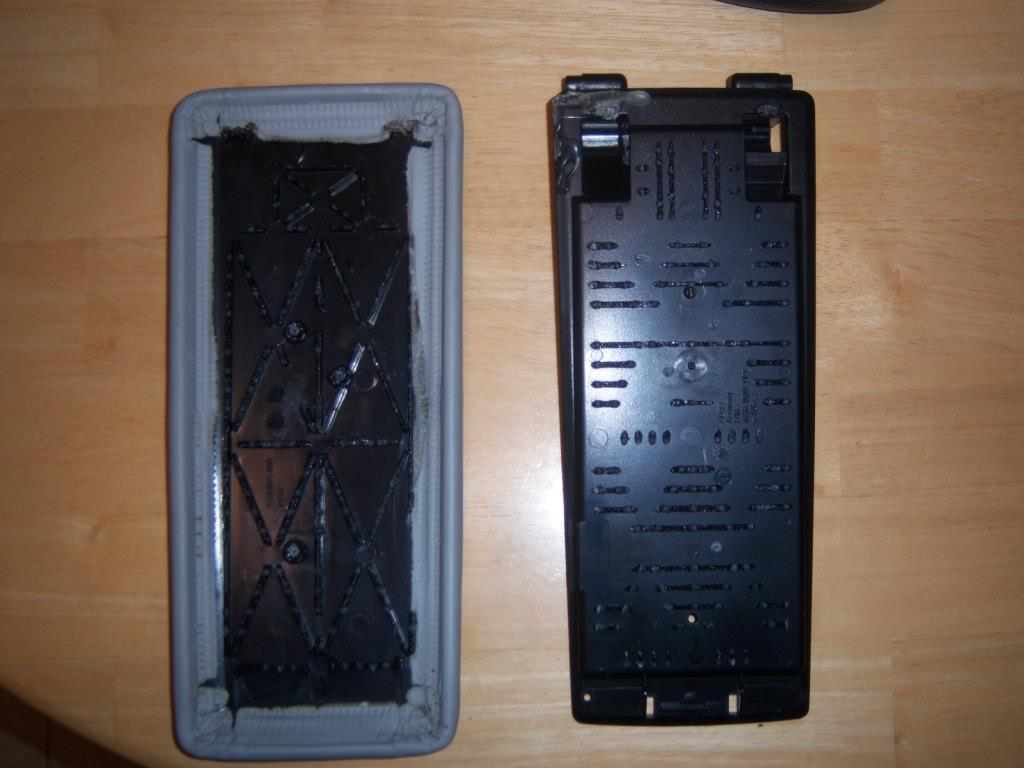
Go slowly and carefully. The sounds it makes when the plastic is breaking apart won’t sound pretty but, if you are careful, you will be able to separate the two pieces with no visible damage. When you break the entire plastic bond, your two pieces will look like this. See picture below.
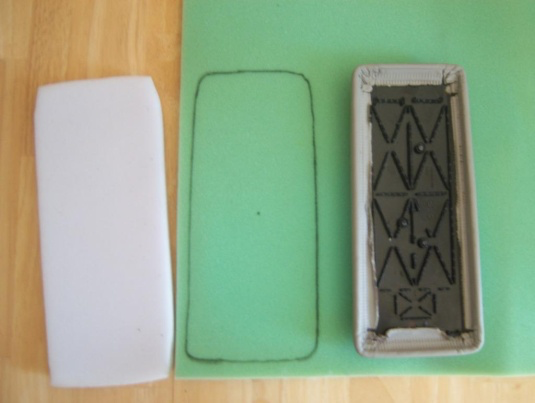
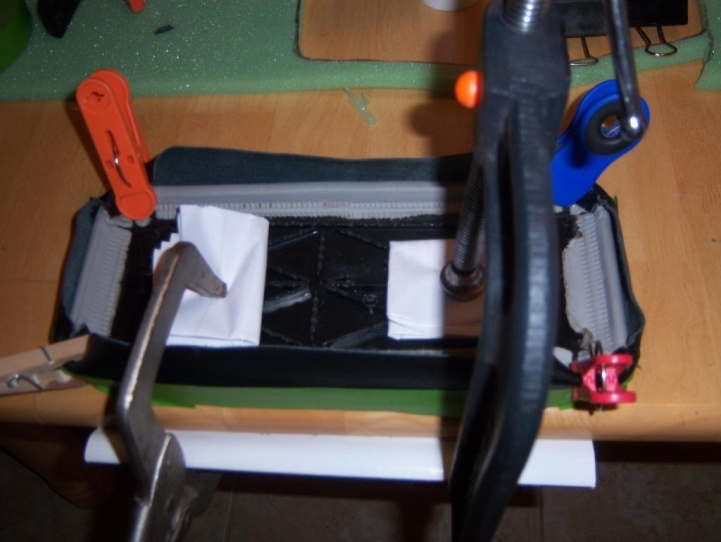
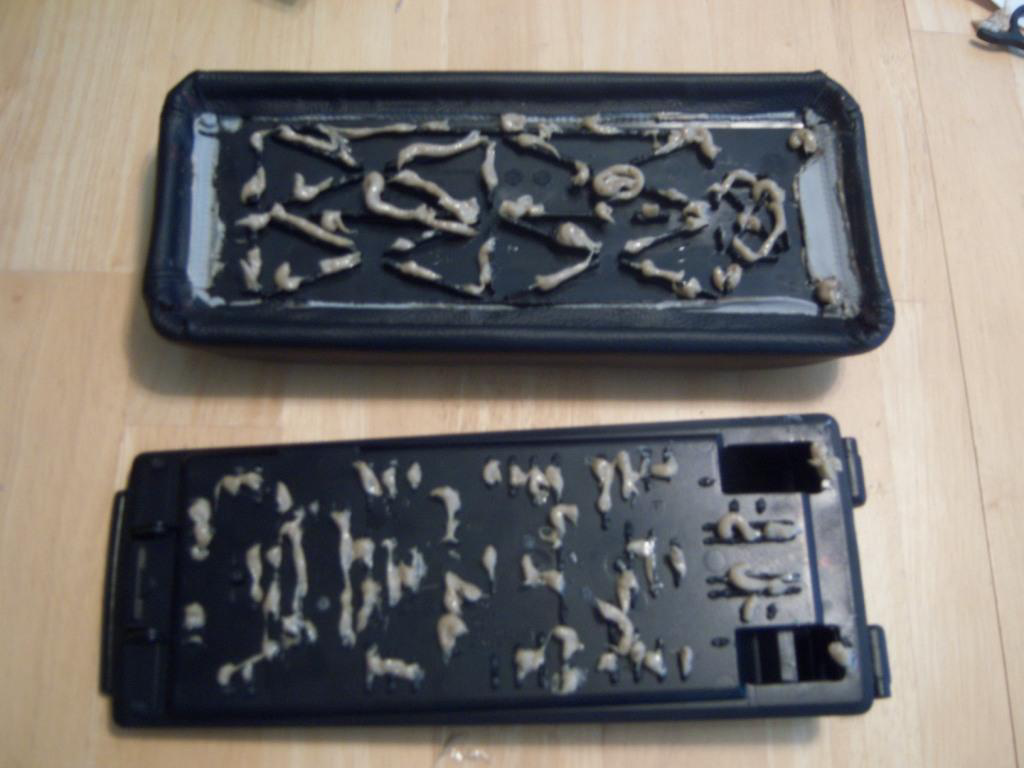
3. The next step is to prepare for gluing your new Redline Goods leather armrest cover over your factory armrest lid. Personally, I chose not to remove my factory/OEM leather. That choice is up to you. Also, I’d like to point out that, while I opted for Redline’s optional additional padding (white foam), in my humble opinion, I thought it was just a tad too thick. I’m sure most people will simply use what Redline provides but I used my own (green foam). See pictures.

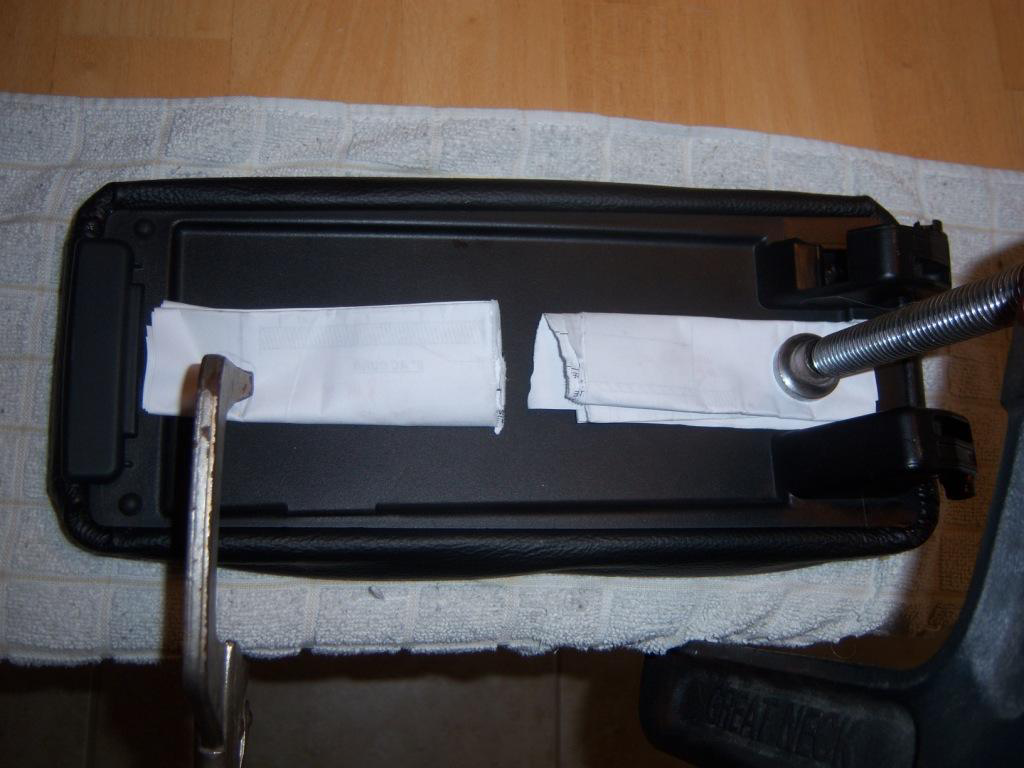
Otherwise, simply use Redline’s foam. Place your foam (if you are using foam) inside your new Redline Goods armrest cover and then place your factory armrest lid inside your new leather cover along with the foam. Use clamps to snugly pin your new leather cover, foam padding, and factory lid to a flat, firm surface. See pictures.
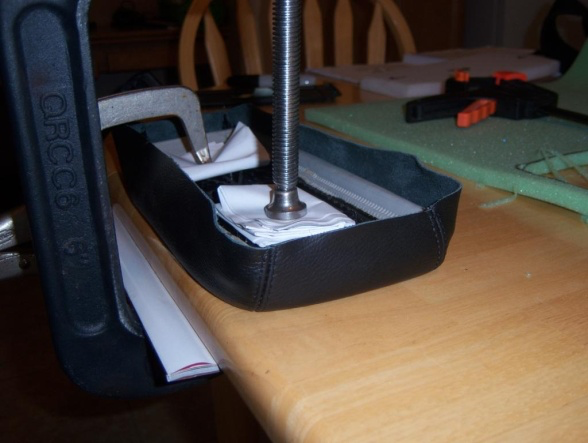
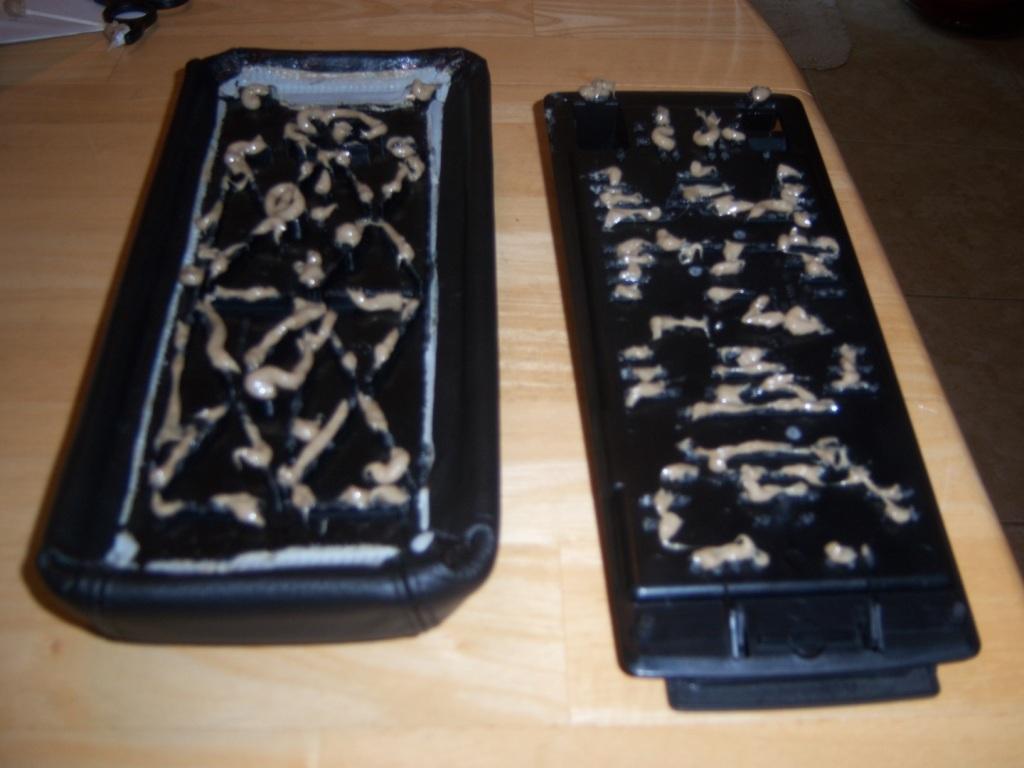
Before you glue the four sides down, you’ll want to make two slits in each corner so that the corners don’t bunch up when you fold them over to glue them down. See picture.
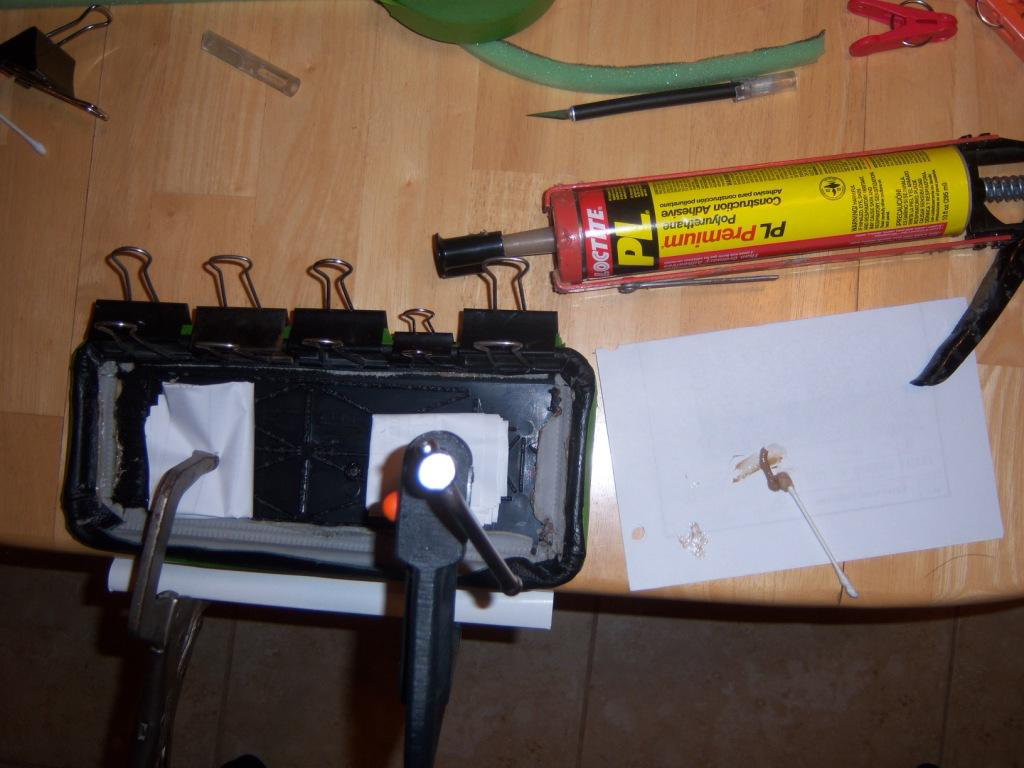
4. Now it is time to glue the perimeter of your new leather armrest cover to your factory armrest lid. I’m sure there are a multitude of glue/adhesive products out there. I purchased a general construction adhesive made by Loctite sold at Home Depot for ~$4 - $5. Just make sure that whichever glue you choose, its bond is compatible with leather and plastic. See picture.

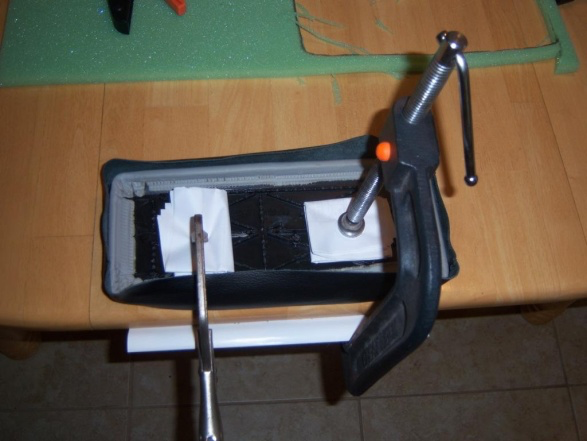
Next, start applying glue to the underside of the new armrest cover and/or to your armrest lid. Use a Q-Tip (or equal) to evenly spread the glue. Then fold the Redline Goods leather cover down over your lid and use little clamps or clips to keep the leather in place. Don’t attempt to glue the entire perimeter all at once. Do one section at a time. I started with all four corners first. See pictures.

Then, after allowing for the appropriate dry time (I allowed 24 hours before removing the clamps and moving on to the next area), continue to the next area. Spread your glue, fold down your new leather cover and clamp your work until the glue dries. Repeat this process until all four sides and corners are securely glued down. See additional pictures.
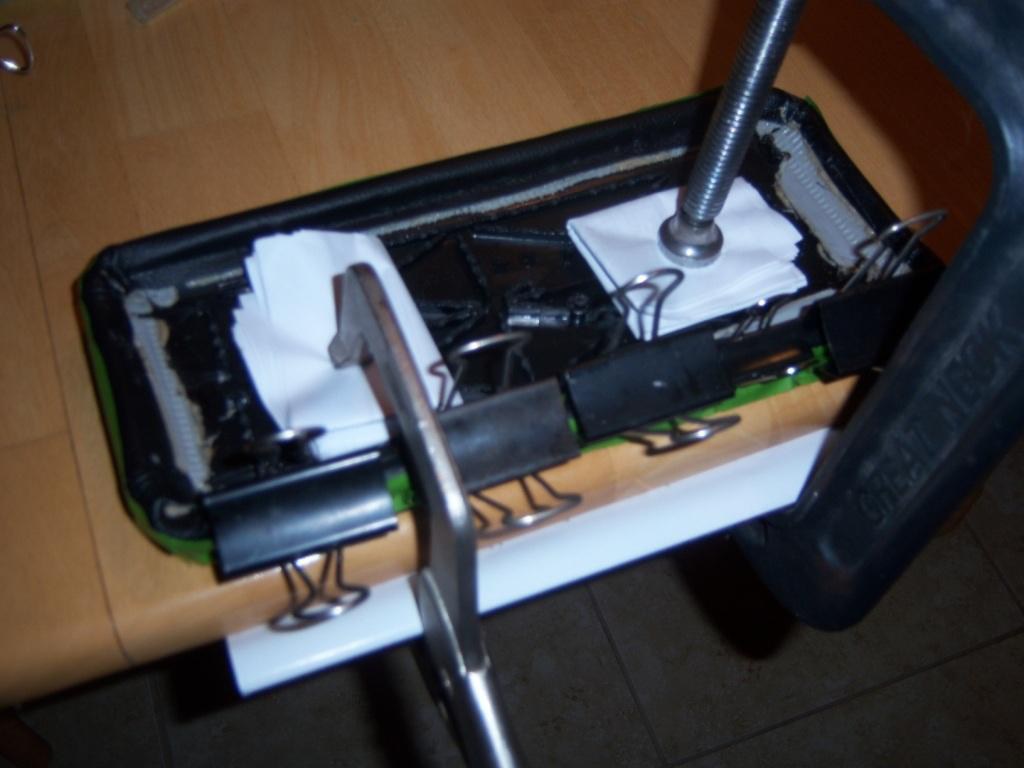
Note, as an extra added measure, I placed (green) painter’s tape along the outside of my new leather armrest cover just to ensure that the binder clip clamps I used didn’t leave a mark on the leather.
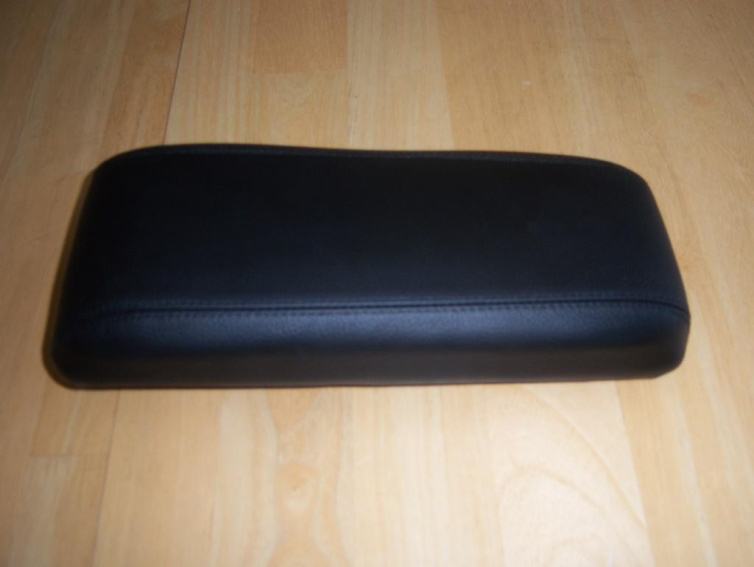
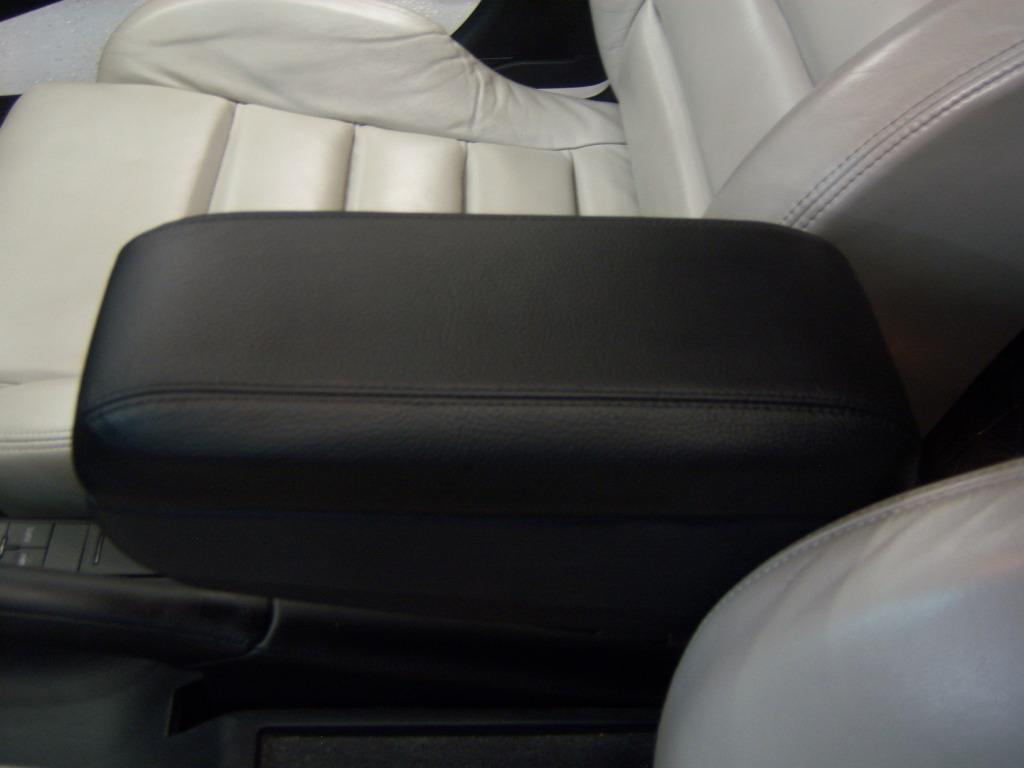
When all of the new leather perimeter is glued down and dry, remove the entire assembly from the clamps holding the lid to the table/bench. Below is the finished product from step #4. See picture.
5. Next, it’s time to glue the inside plastic which you separated in step #2 together with the leather wrapped and glued lid from step #4. Apply an appropriate amount of glue to key locations on both halves. Carefully place the inner plastic piece and the outer leather-wrapped lid together. Then, once again, place everything on a flat firm surface and re-clamp the assembly for ~24 hours. See pictures.
When the glue dries (again, I’d suggest waiting a minimum of 24 hours – I think I waited 48), undo the clamps. See pictures.
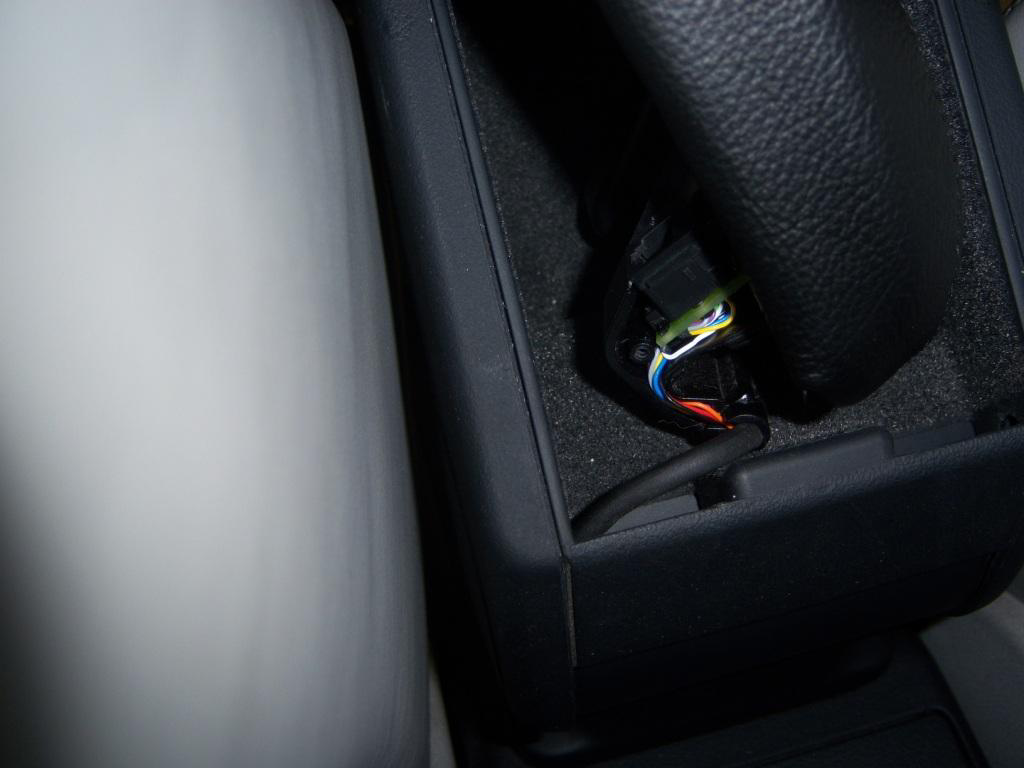
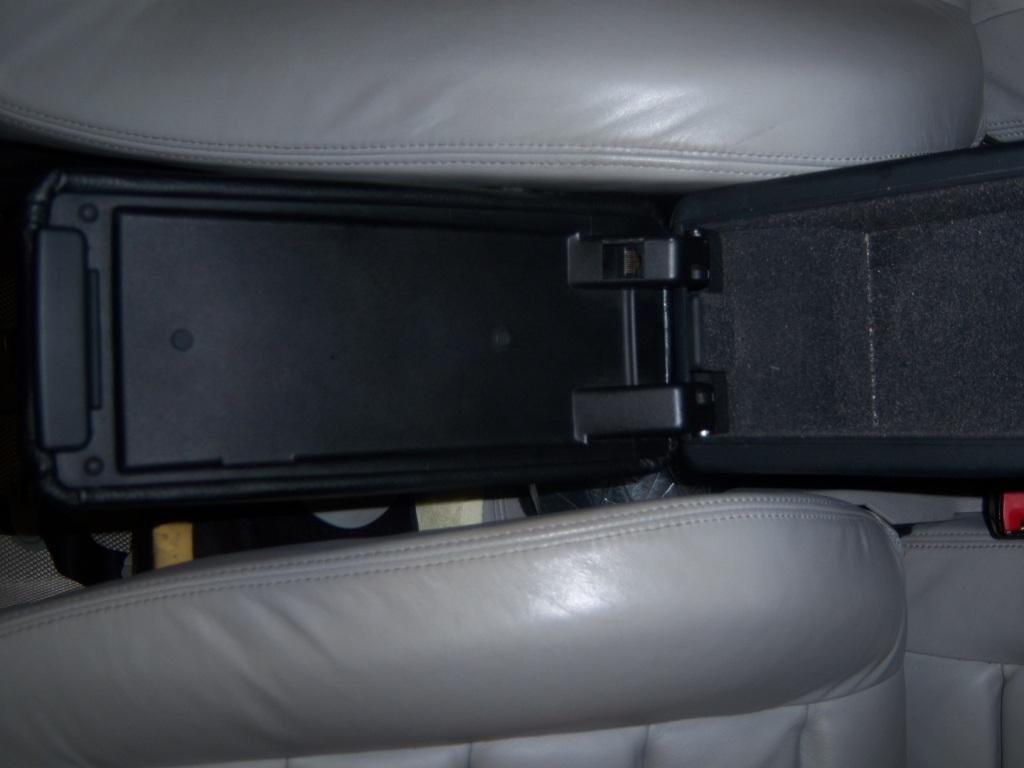
6. The final step is to re-install you newly leather-wrapped armrest lid back onto your car’s center console. This is obviously done in reverse order of the way you removed the lid in step #1. It’s an extremely simple procedure – unless you have the phone jack option like I do. It can be tricky feeding the phone wires into the track on the armrest lid’s hinge. A trick I discovered is to tilt your car’s armrest up high, toward the back seat. This will give you more slack in the phone wires. Once the wires are in the track, screw on the little side door with the two little hex bolts (size T-8). This picture might be helpful for anyone struggling with routing the phone wires through the track on the hinge. See picture.
Once the phone jack, wires and door are securely re-installed, or if you don’t have a phone jack to re-install, all you need to do now is re-install your armrest lid by simply inserting one hinge peg on the armrest lid into one of the side holes on your car’s center console, then squeeze the hinges together and swing the other side’s peg into its hole. Done.
Pictures of the finished product (my matching black seats and door panels are awaiting installation).

Very helpful ?
Posted by Diggymart on 5/18/20 @ 1:41:45 PM