You must be logged in to rate content!
5 minute read
S5 headlight removal pics
Compliments of Boston Driver @ audiworld.com
11-26-2007
Roswell and I met last week to try and do the clearcorner mod, but we were unsuccessful. I think Roswell was a bit nervous when we started, since I have never put my grubby little hands on an S5 before, but as I explained to him while we were working, I love to figure out how stuff comes apart )). Luckily, he is very trustworthy, so we continued.
Although we were unsuccessful in removing the amber signal reflector, if anyone else wants to open up the headlighthousing and take a look, here is how to remove the headlights.
First, open the hood. Remove the black plastic trim above and inside of the grille. There are four "pegs" that look like screws along the trailing edge of the cover, but these are just pegs than snap into place. Just pull up on the trim to remove the pegs. Here is a bad pic of the pegs...

Sorry, my picture of the pegs in place got nuked.
The cover is now just held in by three pegs that extend from the grille on the leading edge of the cover, and some flat tabs along the rearward edge of the grille's upper rail.
Left peg
Center peg
Right peg
Just pull up while pulling the cover towards the rear of the car to release the cover from the round pegs and flat tabs. Here is a picture of the cover removed, and you can see the four slots where the flat tabs hold in the cover...

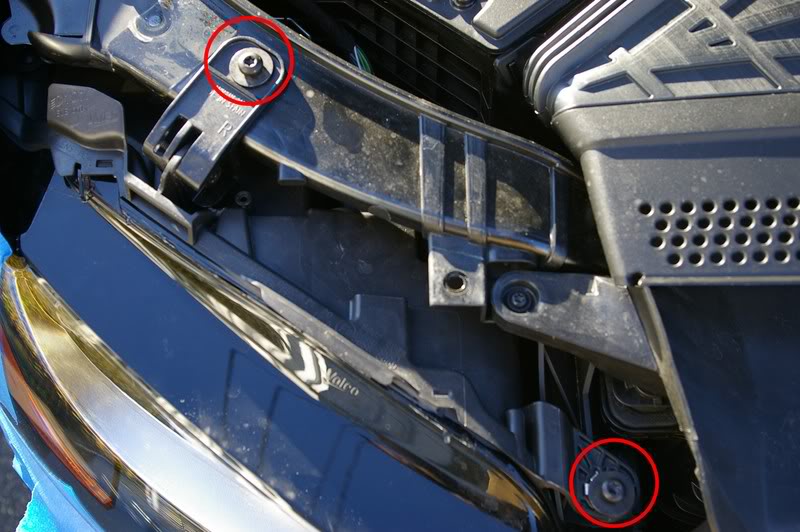
There are 3 Torx bolts that secure the headlight into place. Two are on top here, remove these...
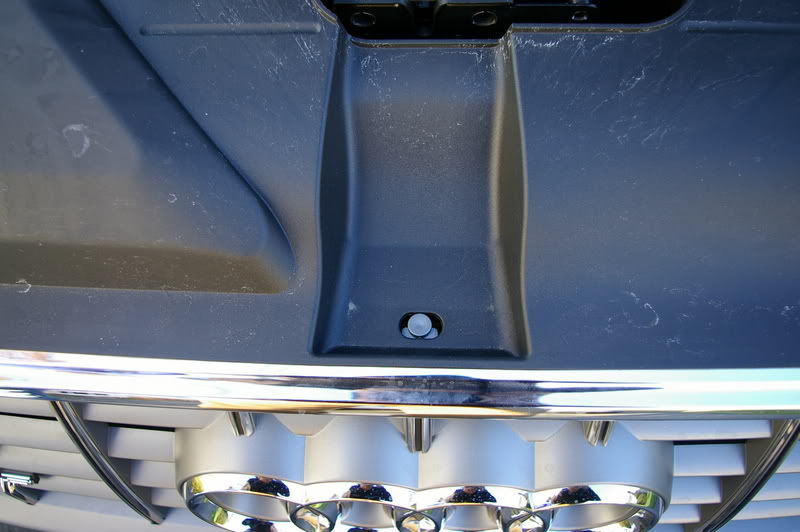
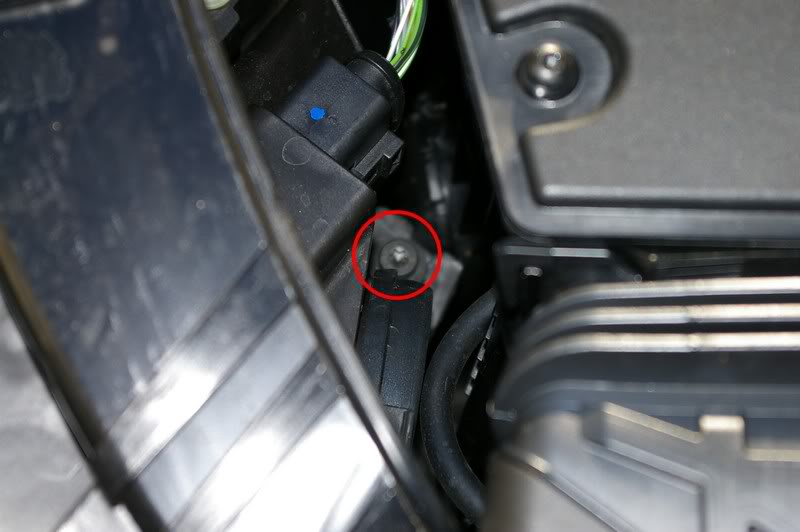
The 3rd bolt is tucked way dow on the rear of the housing and towards the middle of the car and under the wire connector. This bolt does NOT have to be removed, only loosened. The tab where this bolt is secured is slotted to allow the tab to slide out...
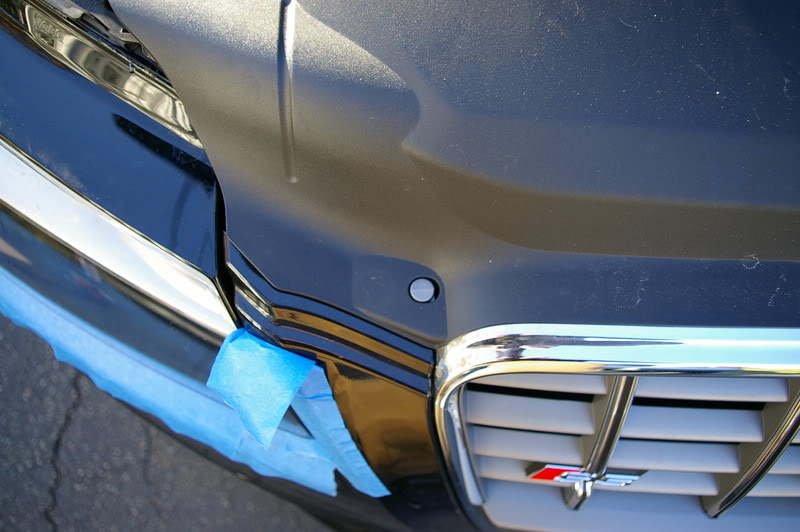
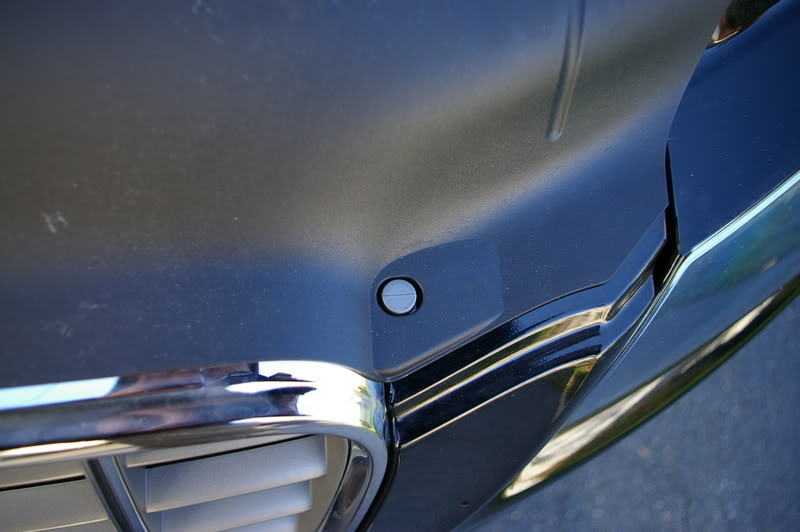
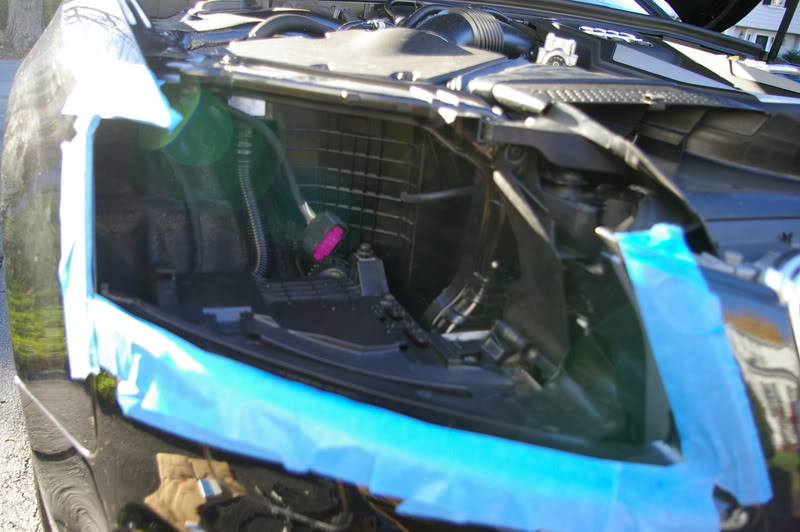
Line your painted surfaces surrounding the lens with painter's tape, with special attention to the sharp corner above the signal marker.
Disconnect the wire connector. If you do not know how to do this, it is fairly easy. I use my thumb to press the "button" of the wire connector while using a small flat screwdriver to gently pry the connector from the housing. I know this is not the recommended way becuase it is easy to damage the plastic connector, but it works, and I've had a lot of practive with this. Other methods involve rocking the connector back and forth to break the seal, but believe me, this thing is on TIGHTLY!
Housing removes by pulling forward, and rotating slightly upward to free up the housing that hangs down below the opening. This is why it is important to watch out for that sharp corner...I had a scary moment with Roswell's light when I thought I had scratched the lens (it was not scratched thank goodness!!!)
Headlight now removed:
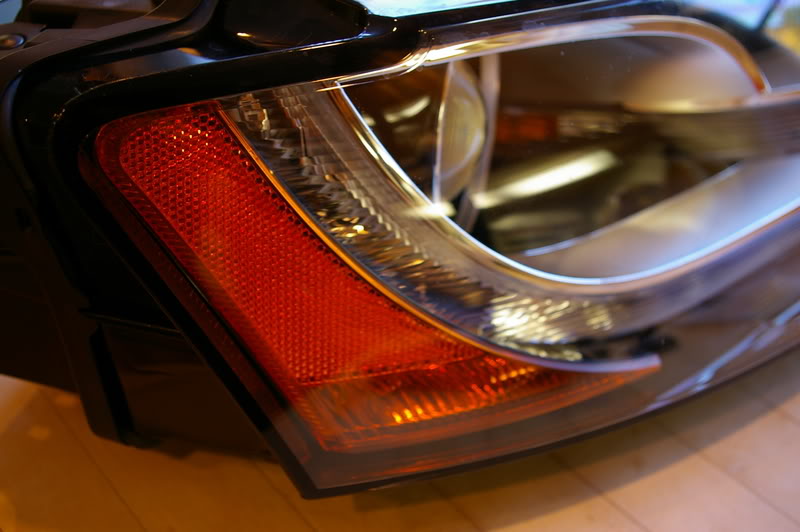
The offending reflector:
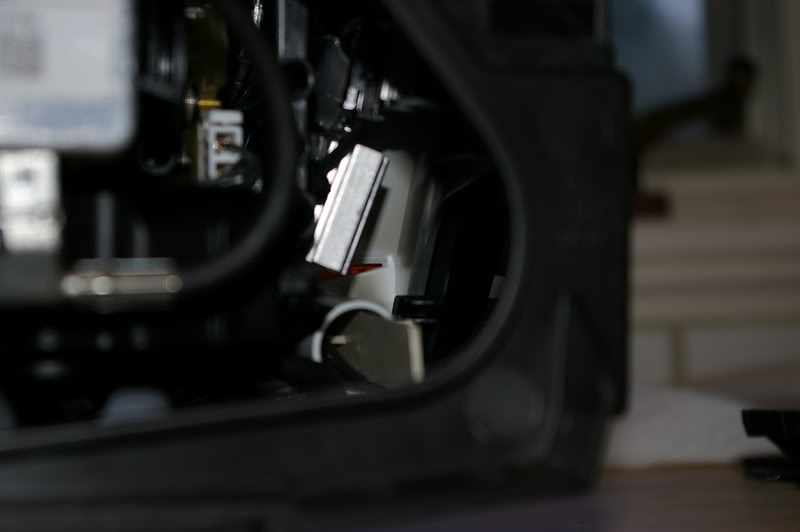
The inside of the headlamp was quite a mess. The adaptive projector appears to just be suspended, and it was difficult to determine exactly how this projector was secured to the housing.
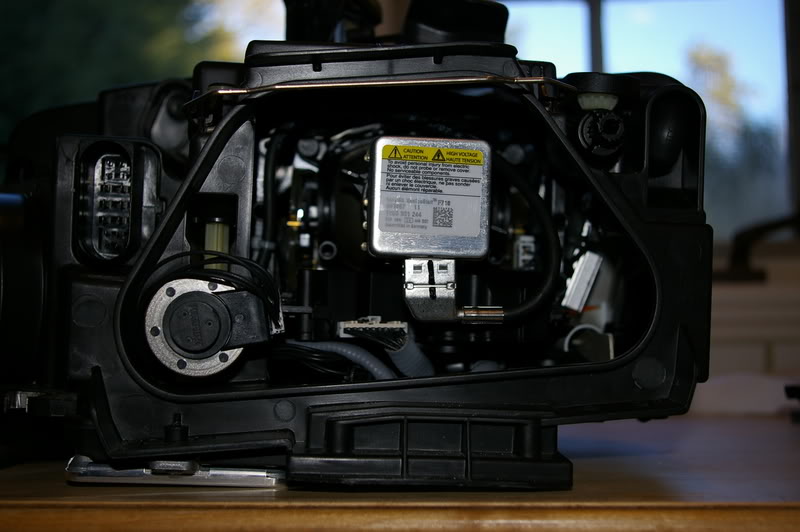
However, I was looking at the reflector itsself, and it appears that this gray/beige plastic tab to the lower outside corner of the housing cavity is part of the reflector setup...seemed to lead right to the back side of the reflector.
Just no way I can see to get that reflector out without taking apart the lens from the housing. Maybe when I feel a bit more brave (and if FinallyS5 or Roswell are brave enough to allow the experiment to continue), we can see if we can use a heat gun to soften the glue enough to pull the housing apart.
To be continued...