You must be logged in to rate content!
5 minute read

Rebuilding window switches
Compliments of Barry Wolk @ thelincolnforum.net
2-13-2010
There are several types of switches used on the '68 Lincoln as they serve different functions.
The (6) switches that control the front windows are current reversing switches. That's how DC motors work. Reverse polarity and you reverse direction. The (4) rear window switches are single-pole double-throw switches that control the up and down relays that do the power reversing. These switches should last forever as they only carry enough current to operate the coil in the relay. The third type of switch is the (1)single-pole window lockout switch and the last, (2) lighter duty single-pole switches for lighting.
This pictorial shows the current reversing switch that would be the most prone to failure from use, dirt and the fact that the switch carries the current directly to the motors and heats up as the motor tries to move window mechanisms laden with petrified grease. High consumption leads to burning of the contacts which leads to high resistance which leads to window failure. Replacing the grease in the switches is just as important as replacing the solidified grease in the window guides and gearboxes. Once everything is properly cleaned and greased the windows work like new.
To end all of your window frustrations the final touch is to rebuild your window and light switches. They are all basically the same.
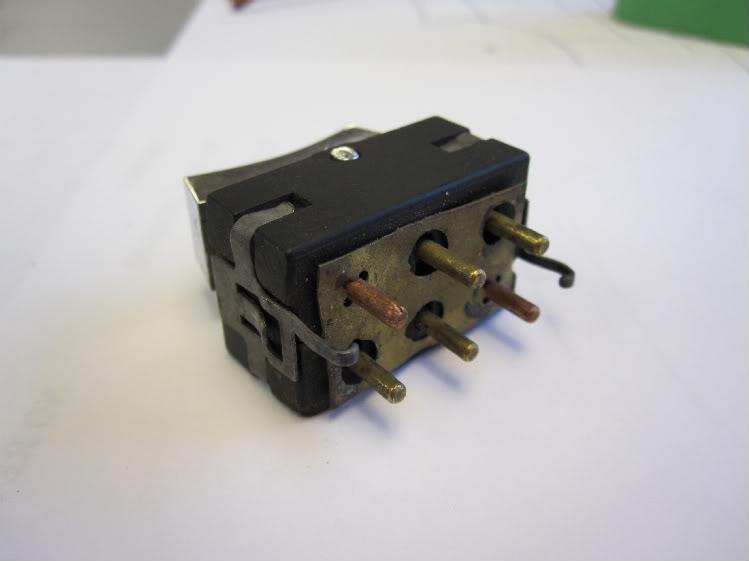
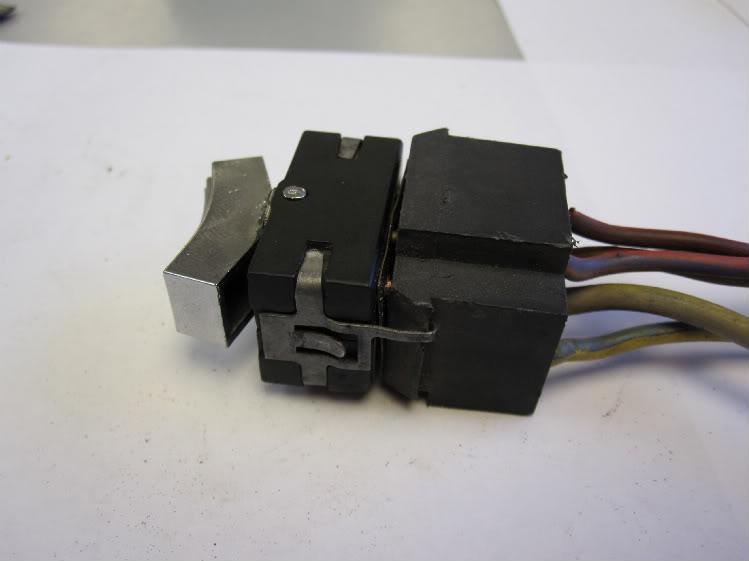
This is the appearance of all the switches. Looks can be deceiving. It is what is going on inside that counts. All of my switches were thrown in a box and all had a Ford logo but the part numbers were often missing. The first one I opened is this one, the current reversing switch used on the front door.
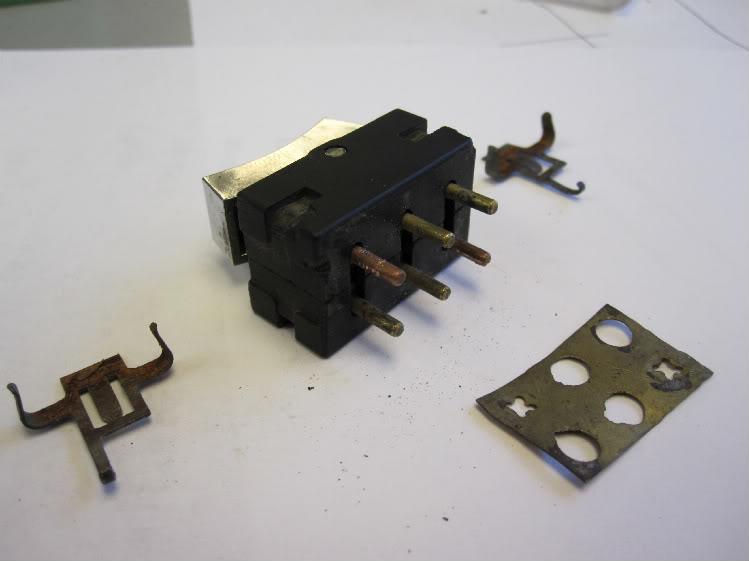
The metal clips hold both halves of the switch together are best removed with a small pic or dental tool (I get a packet of worn or damaged tools every time I get my teeth cleaned. They just throw them away when one end gets worn or damaged) and set aside. They will most likely be rusty as they are made of uncoated spring steel. They are too small to wire brush or sandblast, so I just scraped them clean. Using a curved dental pic I pried the brass terminal connector off the pins. I remove this part so the brass tangs can be flattened, restoring their ability to get a good bite on the power pins. This plate is designed to give power to both halves of the switch off of one power wire. It also allows you to use the switch in either of two possible ways. In other words, direction on installation doesn't matter.
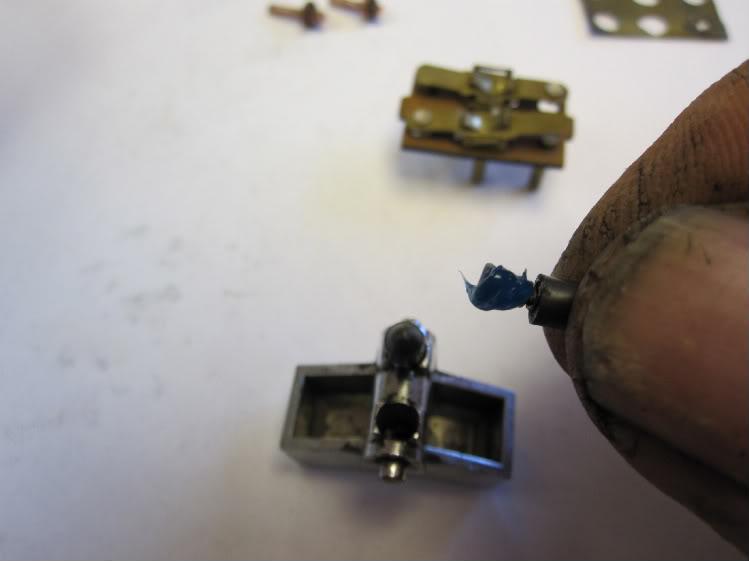
When the two halves of the switch come apart the spring-loaded handle will come off with two springs and nylon bullet-shaped trip tabs. These tabs can get gummed up, giving the switch a sticky feeling. New grease.
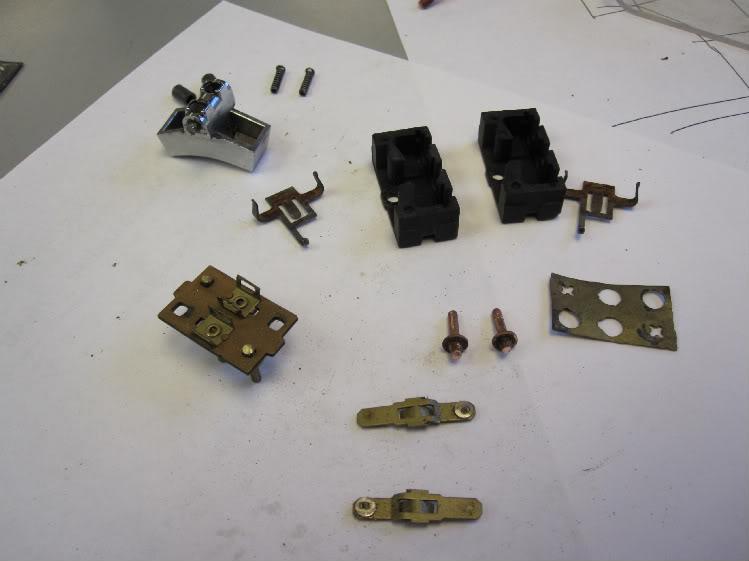
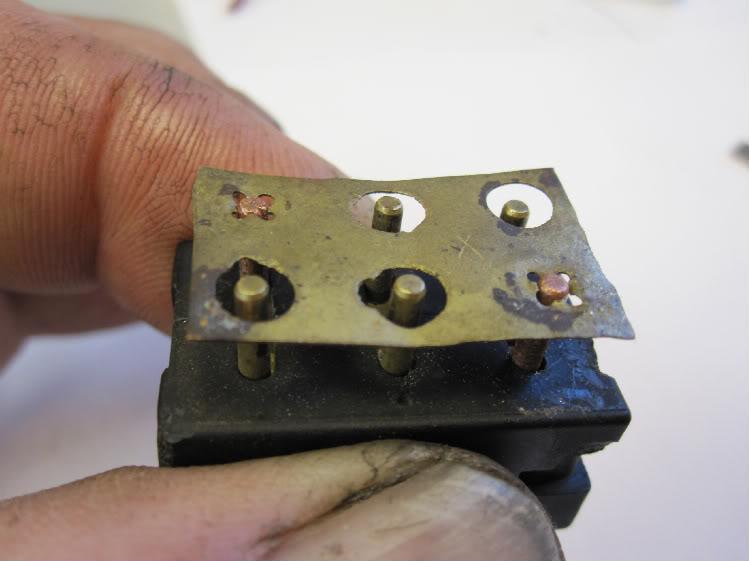
All of the constituent parts. You'll note that the copper-colored pins have a square shank that only fit in a square hole. Hard to mess that one up. These copper pins pass current to the silver contact on the switch which transfers current to the center conductor of the switch. The copper colored pins always attach to the brass plate while all other pins are isolated.
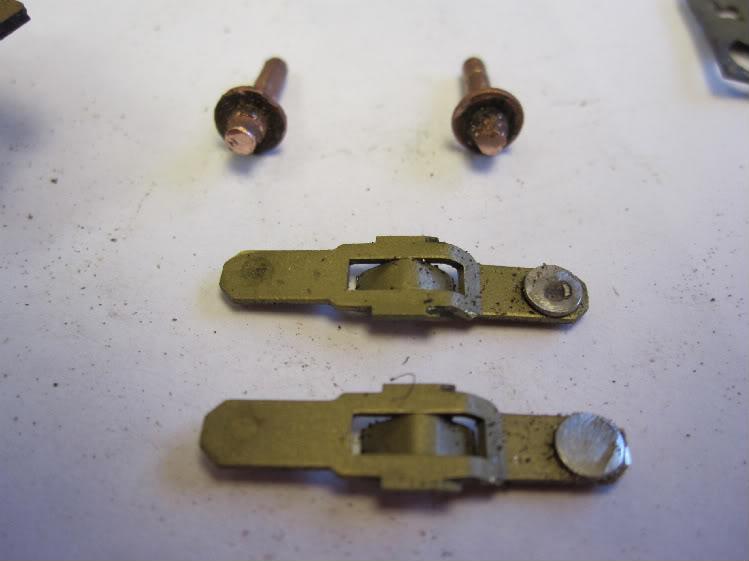
The square shanks come in handy as no one can perfectly file points by hand. By rotating the pin 90° you can usually get the silver contact to lie flat on the the pin for maximum contact and minimum arcing. File as flat and smooth as you can
On reassembly use a high-temp grease. I use the grease used in power tools. Grease the detent pins and the hols in the switch. Grease the rocker section at the center of the switch. It's identified by two brass tabs that stick up. Just a dab will do.
Once the pins are all back in their place the two halves of the switch can be slid almost all the way together. Keep them just far enough apart to slide the switch handle with its springs and tabs into its two axle holes and snap the retaining clips on.

The brass plate gets installed on the two copper pins. I used a needle-nosed pilers and pushed down on both sides of the pins a little at a time until the plate rested on the bottom of the switch.
The finished product. Good for another 40+ years.

Good stuff!
Posted by Diggymart on 11/13/21 @ 9:18:16 PM