You must be logged in to rate content!
7 minute read

98-02 MAZDA 626 SHIFT BOOT INSTALLATION INSTRUCTIONS
1. The first thing we will do is take off the shift knob. Just turn it counter-clock wise and it will thread off. It may take a little bit of effort depending on how "seized" on the knob is.
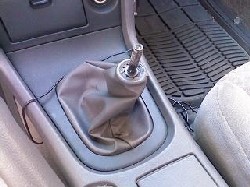
2. You must remove the face plate from the center console system. To do so, just reach behind the shift boot and pull it up gently until you feel and hear the clips pop out of their position. You can also pry the plate out, but it is not advised because you can easily scratch the plastic. When you pop the plate up, lift it up until the other 4 clips pop. Pull the plate back a bit to release the locking tabs from the front and pull the boot over the shift stick.
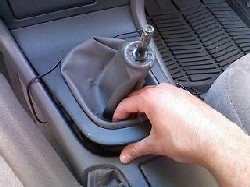
3. Next, remove the 2 retaining screws on the bottom side of the front part of the shift plate. After the screws are out, you have to lift a tab at the center of the plate on the back, and slide the boot retainer forward a bit because it has a little slide lock on either side.
4. Unfold the shift boot from the boot retainer and set aside. If you want, now would be a good time to install your new Shift Boot. To install it, just reverse the removal methods, but don’t put the shift plate back on your car yet if you are also installing the e-brake boot as well. We still need it off for the e-brake boot installation.
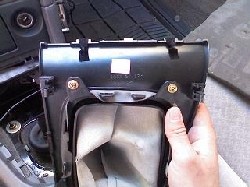
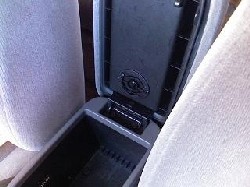
5. Open your armrest console all the way ( both compartments ). Next, remove the 2 screws holding the bottom hinge down and take the armrest off. I suggest putting the screws back in the holes in the console if you don’t want to lose them, or keep them where you will remember them. It’s your choice!
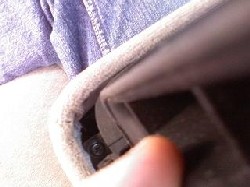
6. Remove the 2 screws at the front of the armrest that holds the latch of the actual armrest to the upper compartment. Pry the shell out a bit to take the latch out and pull it forward to expose the screws at the back of the armrest under the hinges.
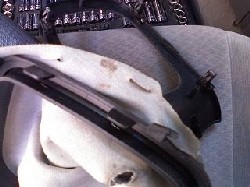
7. There are 2 screws holding the hinge to the armrest shell, to get to them the underside shell of the arm rest must be pulled forward a bit. It can be a bit trick but just get in there with your screwdriver and screw them out.
When you have the rest of the lid taken off, you can use a pick or a screwdriver to take the staples that are holding the fabric on, out. You can’t use some hot glue, to attach the tabs to the plastic shell, or another plastic adhesive of your choice. Once that is complete just put everything back together the opposite way you took it apart and you will be good.
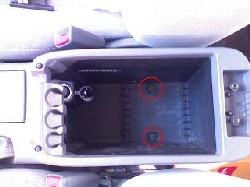
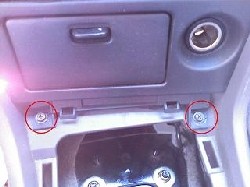
8. With the armrest cover either opened up or removed, take out the two screws that are in the bottom of the console in the CD tray/ holder.
9. Next, make sure your e-brake is pulled up and unbutton the snap and pull apart the Velcro on the brake boot.
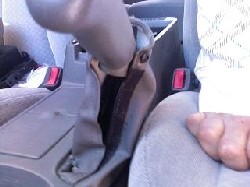
10. Pop out the push clips on either side of the front of the center console, you should be able to use your fingernails to pop it open, if not, use a pick or a small flat head screwdriver.

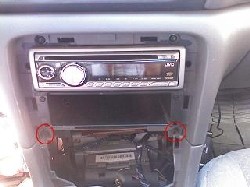
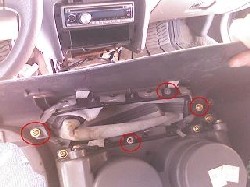
11. There are two screws under the front faceplate that hold the 12v power source and Stereo. Take these out and work your fingers up the plate, popping the clips out that hold it in and set aside. Remember to disconnect the 12v source.
12. Once the faceplate is removed, there are two more screws at the top of the center console that sit underneath the faceplate we just removed. Take them out and set aside.
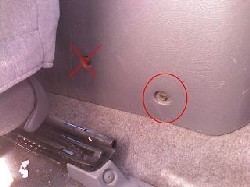
13. Push the seats back as far as they can go. Use an 8mm shallow socket to get the screws out on either side of the console that are hiding in the seat a bit. These ones can be a pain to get to, but they come out pretty easily.
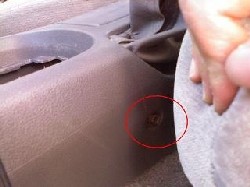
14. Now, move the front seats up and remove the screw that has an 8mm hexagonal head. Do this to both sides. You do not need to remove the screw in front of it with a plain round head. It's just used to hold the tray on the inside in.
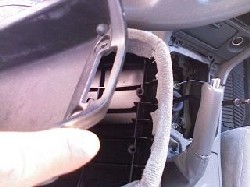
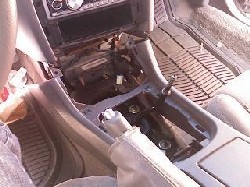
14. It is finally time to take out the center console. Pull the unit back a bit and tilt it forward. It may take a bit of time and working to get the unit around the emergency brake. When you have the console unit vertical, pull it out and turn it upside down to expose the boot retainer.
14. Remove the screws on either end of the retainer. There may also be some retainer washers that you need to take out, you can choose to put them back in if you wish. I’d suggest installing them back when you get the new boot in. When you take the boot out, the retainer will still be attached, remove the staples holding the boot to the plastic. When you put your new boot on, you can use hot glue to hold the tabs down for added security. You shouldn’t have to since its wedged in with the console and retainer but it’s up to you.
Put everything back together in reverse order and be proud of the wonderful upgrade you have fitted your car with!
ENJOY YOUR NEW LEATHER BOOTS!
Useful tip
You have installed a product made out of genuine leather. As you know, to maintain a leather product in good condition, you should take care of it. We suggest occasionally (every 4-6 week for example) applying some leather conditioner/UV protector to keep your leather from drying up in the sun and cracking.
Redline Automotive Accessories Corp. will not be held liable for any labor, incidental or consequential damages of any kind. Proceed at your own risk.