You must be logged in to rate content!
4 minute read

99-03 PROTEGE/PROTEGE 5 SHIFT BOOT/E-BRAKE/ARMREST INSTALLATION INSTRUCTIONS
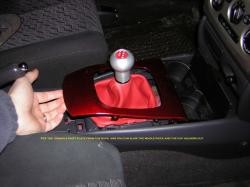
1. Begin by removing the shift knob. This is threaded, and should screw right off. Next, open the arm rest console, and remove anything that might be in it. The shift plate and the cupholder are all on piece. Tug from the end of the plate, lifting up and the whole plate will pop right off.
2. There are several screws you will need to remove. The first 2 being right on the stock boot itself and two others that hold the entire console down.
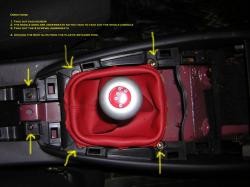
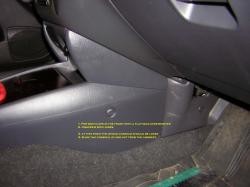
3. Unfortunately, in order to get to the other screws, you will have to remove the entire centre console. To do this pop off the caps both at the front and rear of the console. And remove the screws.
4. Check to make sure the console is loose and you have unscrewed everything. Remove the old shift boot and replace it with the new one. You can re-use the stock trim pieces from the top of the boot, or simply replace them with a zip-tie (which is useful for aftermarket shift knobs that have the bottom more narrow than the stock ones).
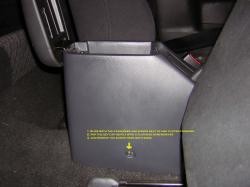
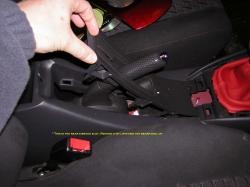
5. Pull up the e-brake cover. It will come off the center console.
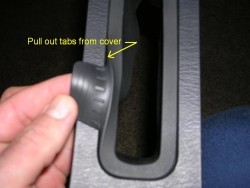
6. Pull the tabs from cover. Cut the leather to match the tabs in the rubber ebrake surround you have just removed. Pull the leather boot around the rubber surround and trim it to match the tabs - that's the easiest way. Glue the leather to the tabs if you want (Automotive GOOP works great - or any other epoxy-based glue).
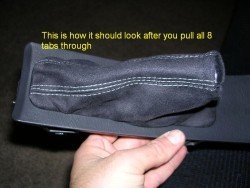
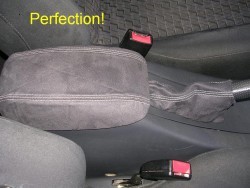
7. This is what it should look like.
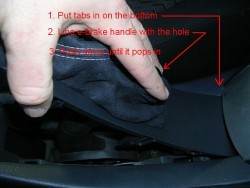
8. Reinstall the ebrake boot. Put the front-side tabs in, hold the ebrake boot and the center console piece together, slip the top of the ebrake boot over the handle and push the assembly back in until it pops into place.
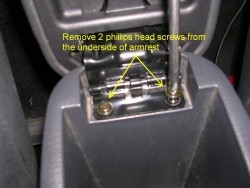
9. Open the armrest and remove the screws by the hinges.
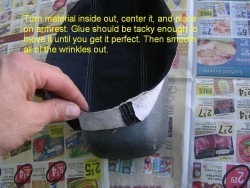
10. Spray the armrest with 3M spray-on adhesive. Turn the cover inside-out and place on the center of the armrest. The glue should be tacky enough to allow it to move until you get it on perfect. Work out the wrinkles to perfection.
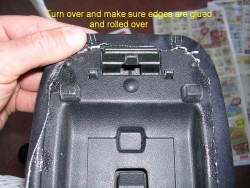
11. Turn the armrest over and make sure the edges are glued and rolled over.
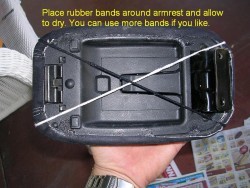
12. Use rubber bands to make the cover stay in place until the glue dries.
13. Reinstall everything in the reverse order of removal and ENJOY!
Useful tip
You have installed a product made out of genuine leather. As you know, to maintain a leather product in good condition, you should take care of it. We suggest occasionally (every 4-6 week for example) applying some leather conditioner/UV protector to keep your leather from drying up in the sun and cracking.
Redline Automotive Accessories Corp. will not be held liable for any labor, incidental or consequential damages of any kind. Proceed at your own risk.