You must be logged in to rate content!
3 minute read

ARMREST COVER Mazda 3 13-17 INSTALLATION
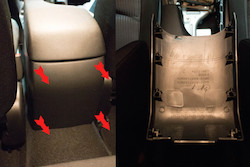
1. Open the armrest and remove the felt bottom to access the screws. Remove the two screws at the bottom for easier access to the back armrest panel.
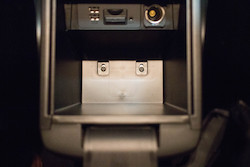
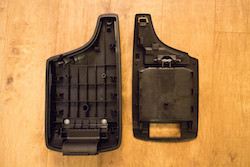
2. Removing the screws should allow you to get your fingers under the back panel from the bottom. Pull towards you to remove the back panel.
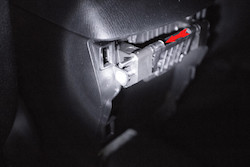
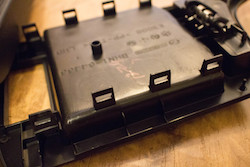
3. Locate the two hollow pins on the armrest hinge. Please note, NOT the screws. You will need a long thin solid object to push the pins out from the inside. I used a small screwdriver for electronics. You don't need to remove them completely, just enough so you can remove the armrest from the hinge.
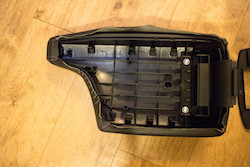
4. Gently using a large flat head screwdriver, pop out the center plastic piece of the armrest from the top rubber piece.
5. Please note the few clips in the middle and one in the front.
6. Fit your new armrest cover over the rubber top armrest piece and use the flat head screwdriver or creditcard to carefully tuck in the edges.
7. Loosely fit the middle plastic piece back and carefully work around the cover and tuck the edges in. This may take some effort, be patient. Firmly press the middle piece back onto the rubber top, firmly tap it back into place if needed.
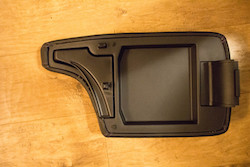
ENJOY YOUR NEW LEATHER BOOTS!
Useful tip
You have installed a product made out of genuine leather. As you know, to maintain a leather product in good condition, you should take care of it. We suggest occasionally (every 4-6 week for example) applying some leather conditioner/UV protector to keep your leather from drying up in the sun and cracking.
Redline Automotive Accessories Corp. will not be held liable for any labor, incidental or consequential damages of any kind. Proceed at your own risk.