You must be logged in to rate content!
8 minute read

MAZDA 3 2013+ SHIFT BOOT INSTALLATION INSTRUCTIONS
The first 12 steps are ebrake boot and manual shift boot. Scroll down for automatic shift boot and armrest cover instructions.
1. Remove shift knob by turning anti-clockwise, set aside.
2. Pull the emergency brake into the fully engaged position. Undo the button/velcro on the emergency brake boot, and unzip the zipper.
3. Pull upwards and towards the front of the car on the console. It will pop out of place near the rear of the console piece.
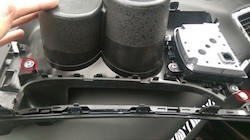
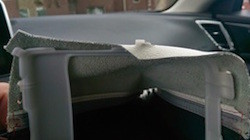
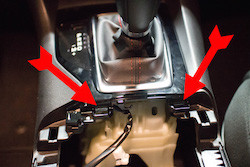
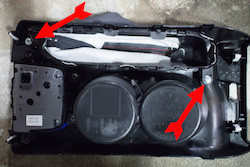
4. Next, pull upwards on the front part of the center console piece (see picture). BE CAREFUL as the stereo control unit is still connected. However, it may take a bit of effort to get it unclipped. (The center console will separate from the front part of the front console, as seen by the red circle.)
5. Next, lift the center console from the rest of the console. Beneath the stereo control unit, there are wires. Simply push on the clip, and lightly pull to remove it.
6. Now you can remove the center console unit. Simply pull upwards, and guide the emergency brake boot off of the brake.
7. On the bottom of the center console, there will be two screws holding in a plastic piece that holds the brake boot. Remove these two screws, and pull the piece and boot out from the bottom of the console.
8. You may then remove the boot from the tabs on the plastic piece. Install the RedlineGoods ebrake boot replacing the stock one by reversing this, and the previous step.
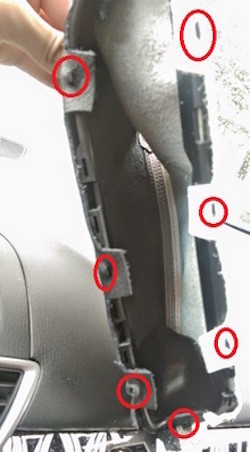
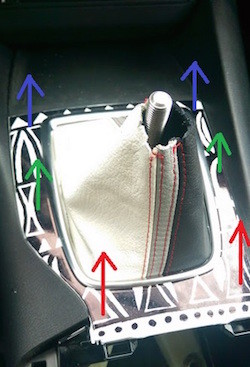
9. Now it is time to move on to the front trim and the shift boot. Pull upwards on the trim, while being careful not to break the clips. While the order you remove the clips doesn’t particularly matter, it is easier to do it in the order as shown, RED, GREEN, then BLUE.
10. Underneath the trim, there will be two screws. Remove the screws. Once done, you may pull out the plastic piece holding the shift boot in place.
11. Remove the shift boot from the tabs on the plastic piece. Your shift boot is now removed.
12. To install your new shift boot, follow these steps in reverse order, replacing your stock shift boot with your new one.
AUTOMATIC SHIFT BOOT AND ARMREST COVER
To prevent scratching of the shiny black trim you may want to protect it with some painters tape or some cloth.
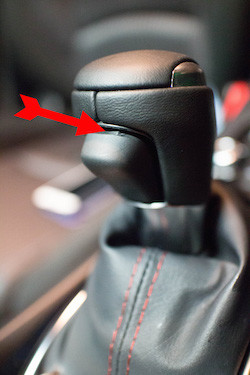
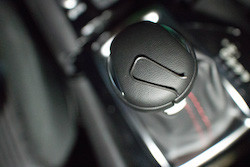
1. Fully engage the e-brake. To remove the automatic shift knob you will need to gently depress the top of lock button with a thin flat screwdriver to pop off the cover.
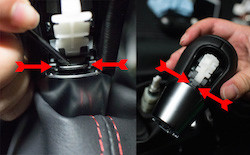
2. Next look at the bottom of the lock button underneath a grey plastic piece, you should see a metal spring. Hook the spring from one side with the small screwdriver, gently press down and pry it out slowly. Once the spring is removed, simply pull up to remove the shift knob. For easier access you may need to disengage the shift lock manually and shift to N.
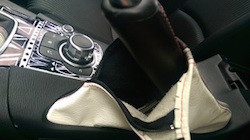
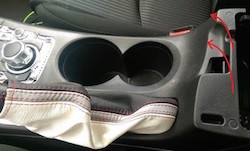
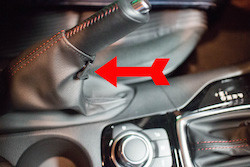
3. Unbutton the e-brake cover and unzip. Facing the rear of the car, starting from the armrest side of the cup holder console, grab the top two outside edges and pull up. This will require some effort.
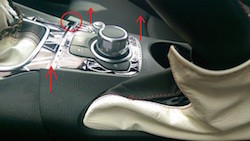
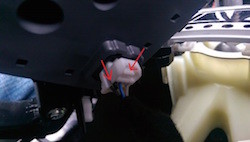
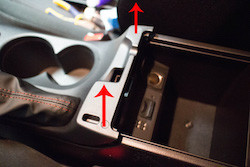
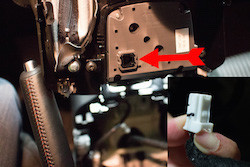
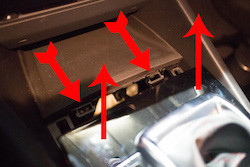
4. Move towards the middle of the cup holder piece and pop up the other clips, moving towards the shifter. Once you can access under the infotainment knob on the driver side, you will need to depress a clip on the passenger side and unplug the plug.
5. The last two clips attached to the shift area trim are more stubborn, it will be easier if someone can hold down the shift area trim while you pull up on the infotainment knob trim. Carefully lift the cup holder assembly clear of the e-brake and place it out of the way.
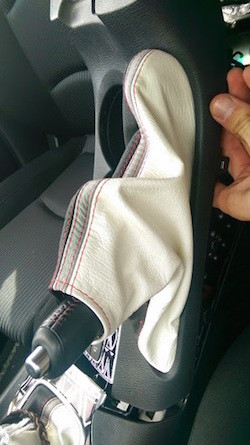
6. Grab the exposed shift trim edge with two hands and pull straight up to disengage the clips. Carefully remove the shift surround.
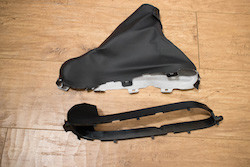
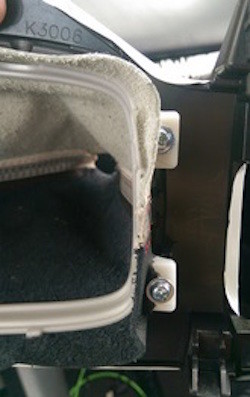
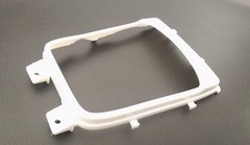
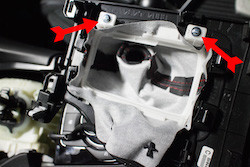
7. On the underside of the shift surround, there are two Philips head screws underneath you will need to unscrew. Separate the boot with the plastic retainer from the shift surround.

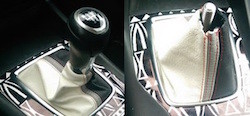
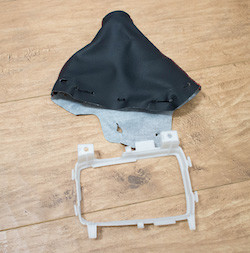
8. Remove the shift boot from the plastic retainer by easing the fabric tabs over the notches holding it in place. Line up the new shift boot and reverse the process to install the new boot. Screw the new boot and retainer back into the shift surround. Pop the shift surround back into place.
9. Replace the shift knob by putting it back on the lever. Reinsert the spring at the bottom and push it all the way in so it locks under the grey plastic piece.
10. Replace the lock button cover by hooking the bottom first and clicking the top part into place.
11. To install the e-brake boot, flip over the middle cup holder section and unscrew the two screws holding e-brake boot plastic retainer. Wiggle the plastic retainer away from the cup holder housing.
12. Remove the e-brake boot from the plastic retainer by easing the tabs over the notches holding it in place. Line up the new e-brake boot and reverse the process. Screw the new boot and plastic retainer back into the cup holder section.
13. Reinstall everything in reverse order of removal.