You must be logged in to rate content!
6 minute read
Eibach Pro-Kit Install Part III
Compliments of BestCS @ forum.miata.net
2-10-2009
Eibach Pro-kit Install Part III
Let's Replace the Rear Springs.
Before I get started on the final page of this great saga, I want to add a few items. I forgot to add a 3/8" universal joint (or swivel joint) to the tool collection and a torque wrench. You won't be able to do this job without them. You'll also need a short and long 3/8" extensions. Another very useful tool is a forked end clip remover. Also Redlugnut offered the suggestion of lubricating the underside of the rubber shroud that fits under the top hat on the front springs with WD-40. If the yoke of the shock doesn't line up with the lower control arm, this may help in its realignment.
The rear springs are a PITA for one reason which is removing all the plastic panels and floor mat in the trunk. Take out the mat which is held by two pins. The plastic panels are held in place by push pins. Let me tell you how to remove them without damaging them. Take a tiny screwdirve and pry up the center head. They'll then pop right out. To reinstall, pop the pin out with a large screwdriver and push the outside piece through the plastic and into the metal hole. Then reinsert the pin. I swear to God that I must of spent at least two hours on R&R (remove and replace).
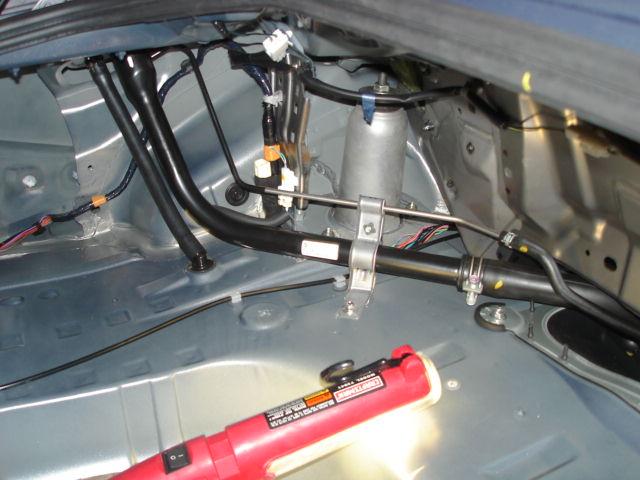
Next, remove the thin metal plate in the upper left corner of the trunk. Now you can see the top hat of both shocks. Note that there are two bolts sticking up through each hat with nuts that need to be removed. The closest ones will be easy to remove, but the two in the upper left and right corners will be difficult. I managed to loosen them slightly using a 14mm socket with the swivel joint using the long extension as a handle. I was then able to use my ratchet with a long extension, swivel joint, short extension, and finally a socket. Be very careful with these two nuts. If you round the heads you'll be crying in you beer for a long time. You're now done topsides.
Now take a floor jack and jack the car up by the center of the differential (under the deep fins). Next slide the ramps under the jacking points on each side using short 2 X 4s. Take the wheels off and lower the car letting the pinch welds rest on the 2 X 4s.
I did the disassembly working from side-to-side, so that will be a given as I describe only one side. First remove the vehicle wheel speed sensor and hang it up out of the way. Remove the sway bar end link. I had no trouble with the rear. Next up into the wheel well and into the circular cavity where the damper resides remove the bolt that secure the top hat to the floor of the vehicle.
Next remove the bolt that secures the rear upper control arm link to suspension structure. Finally remove the bolt that goes through the bushing on the lower end of the shock. Note that it has washers on both sides.
You are now ready to remove the shock. This can be a little difficult. Pull the damper off its lower mount and then lift it over the parts of the suspension that are in its way. Standing on the hub (here's where a buddy is handy) will help. Now you can draw the shock out.
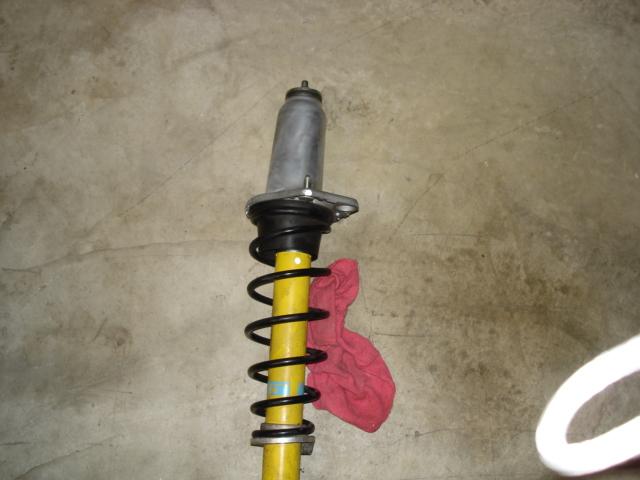
You are now ready to disassemble the damper. First, put some alignment marks on the top hat and body of the shock (see pic).The order of parts is exactly like the front. Compress the spring until the top hat moves and remove the nut. The spring doesn't require as much compression as the front. Again I used a hammer and box wrench beating on the handle with a hammer. I also had to use a 5mm Allen Wrench to prevent the piston rod from moving. Reassemble the damper using the new spring just like the front.
Stuff the damper up into its cavity in the wheel well. You'll have to get the top hat bolts aligned with their holes and then the lower end bushing over obstructions and onto the stud. BTW, my alignment was perfect this time. Reinstall the sway bar link, upper control arm (make sure the nut is in the metal clip) link, and the wheel speed sensor.
At this point snug down all the bolts and nuts. The bolts and nuts that hold the top hat and sway in place can be tighten by hand. The two remaing big bolts will be torqued to 65 Ft-Lbs. Jack the car up and put the wheels back on.
The two big bolts have to torqued with the suspension under load or the wheels on the ground. Unlike the proceedure used on the front, I did it with the wheels on the ground. First, take the ratchet and tighten the bolts as tight as you can by hand. Next finish the job with your torque wrench. This wasn't easy to do. There's very little room to move the wrench. The bolt throught the end link wasn't too bad, but the other was. I had to move the socket one click at a time to do it. One last note. I didn't use any locktite. The critical bolts did have plenty of the stuff remaining on them, and I've never known bolts with this much torque applied to them to come loose. Also the MS instructions made no mention of it.
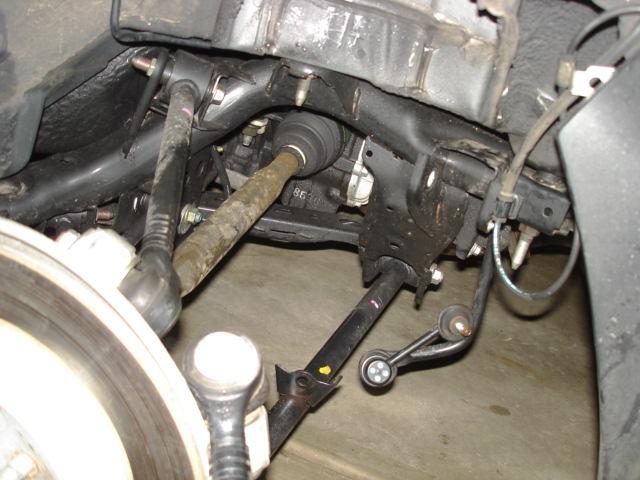
A couple more comments. If you need more room underneath to get leverage on the ratchet (and I did) put the floor jack under the black cone shaped structure which locates the lower link (you can see it in the pic). This is a safe jacking point to lift the car whatever distance you need.
After driving the car the last couple of days, I won't be getting an alignment. The car tracks, steers, and handles just fine. I will keep an eye on the tires just in case. Also, an R&R of the sways isn't necessary either. The car has minimal body roll in a turn, and it suits me just fine.