You must be logged in to rate content!
4 minute read

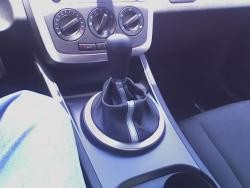
07+ MAZDA CX-7 SHIFT BOOT INSTALLATION INSTRUCTIONS
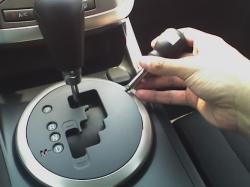
1. The base of the shifter is a simple plastic plate held down by three clips (@11 o'clock, 5 o'clock and 7 o'clock). Getting it off is simple; put your index finger into the top right corner of the shift post slot and pull gently up.

2. Doing so should give you enough space to insert a small flat-head screwdriver between the shift plate and the silver trim. If you slide the screwdriver clockwise around the trim (gently), you should be able to disengage the clips pretty easily. After removing the shifter plate remove the shift knob (righty-tighty lefty-loosey, but please make sure to wrap it with a towel before you use vice-grips on it because the grips will scratch it).
3. Now that you have the plate off, you want to insert it upside down into the shift boot. Mazda was helpful enough to put a white tab at the 6 o'clock position, so just make sure that lines up where you want the "bottom" of the shift boot to go.
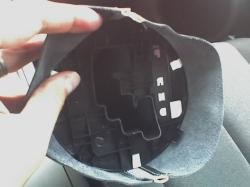
4. Push the shifter plate as far into the boot as possible, while still keeping it straight. Don't be shy here; the leather will need to be stretched in order to get the post back in, so don' worry too much about going too far.
Once you have the plate inserted as far as it will go, you will need to cut three slits into the shift boot where each of the clips go. A heavy duty pair of scissors will make the cuts nicely. Cut straight up to within about 1/4" of the shift plate, so that you have enough space for the boot to tuck when you install it. Once you make the vertical cuts, you will need to make a horizontal cut across where the clips sit as well. The final cuts should look something like an elongated upper case "T":
5. I found that starting with the car in [drive] (with parking brake on of course), was the easiest way to get the boot back on. Slide the shift plate and boot over the shift post and insert the top portion of the boot first. It will take some play to get it in, but I found using the small screwdriver to insert into the shift mechanism worked well.
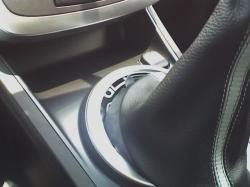
6. Once you finish the back, put the car in [Park] and do the same for the front. Just get the edges to insert around the perimeter first and then once there is a place for the leather to go, you can push the entire boot down into position. This took me some playing to get right, but take your time and it should eventually go in place. Press firmly down on the shift plate to re-engage the clips. Note: I could not get all of the clips to engage during the final install. The places where the leather is stitched is multiple layers, so it does not let the shift plate fit fully back into position. If you are so inclined, you could notch the shift plate to allow extra clearance in the stitched locations, but i decided it was not worth the extra work.
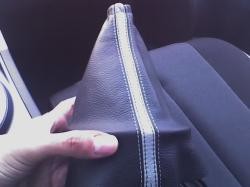
ENJOY YOUR NEW LEATHER BOOTS!
Useful tip
You have installed a product made out of genuine leather. As you know, to maintain a leather product in good condition, you should take care of it. We suggest occasionally (every 4-6 week for example) applying some leather conditioner/UV protector to keep your leather from drying up in the sun and cracking.
Redline Automotive Accessories Corp. will not be held liable for any labor, incidental or consequential damages of any kind. Proceed at your own risk.