- 1 Philips screwdriver
- 1 Stapling machine or a small flathead screwdriver
You must be logged in to rate content!
3 minute read

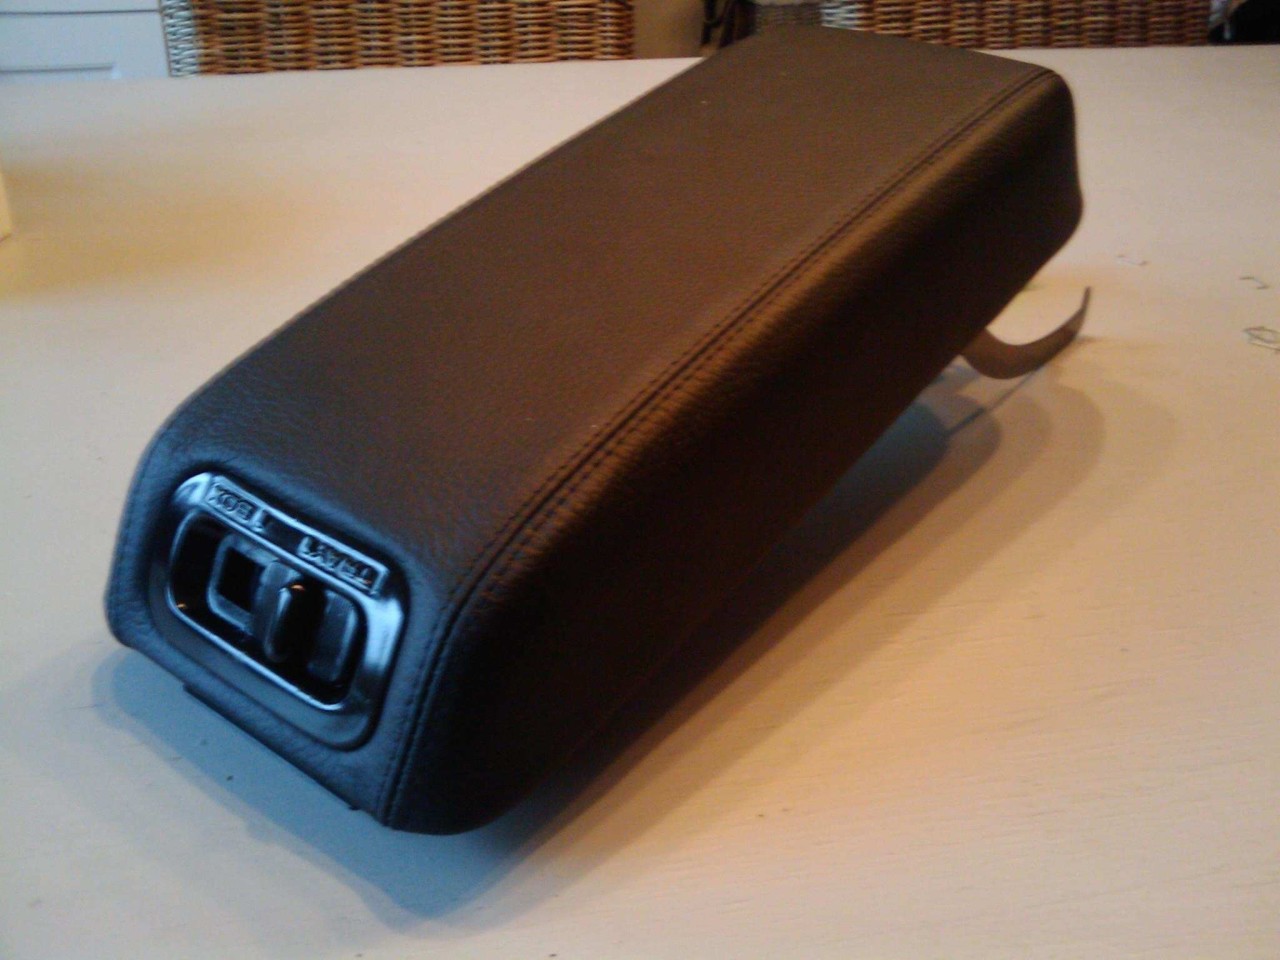
Installation Manual: Leather armrest cover for Mazda 626 GD
Step 1:
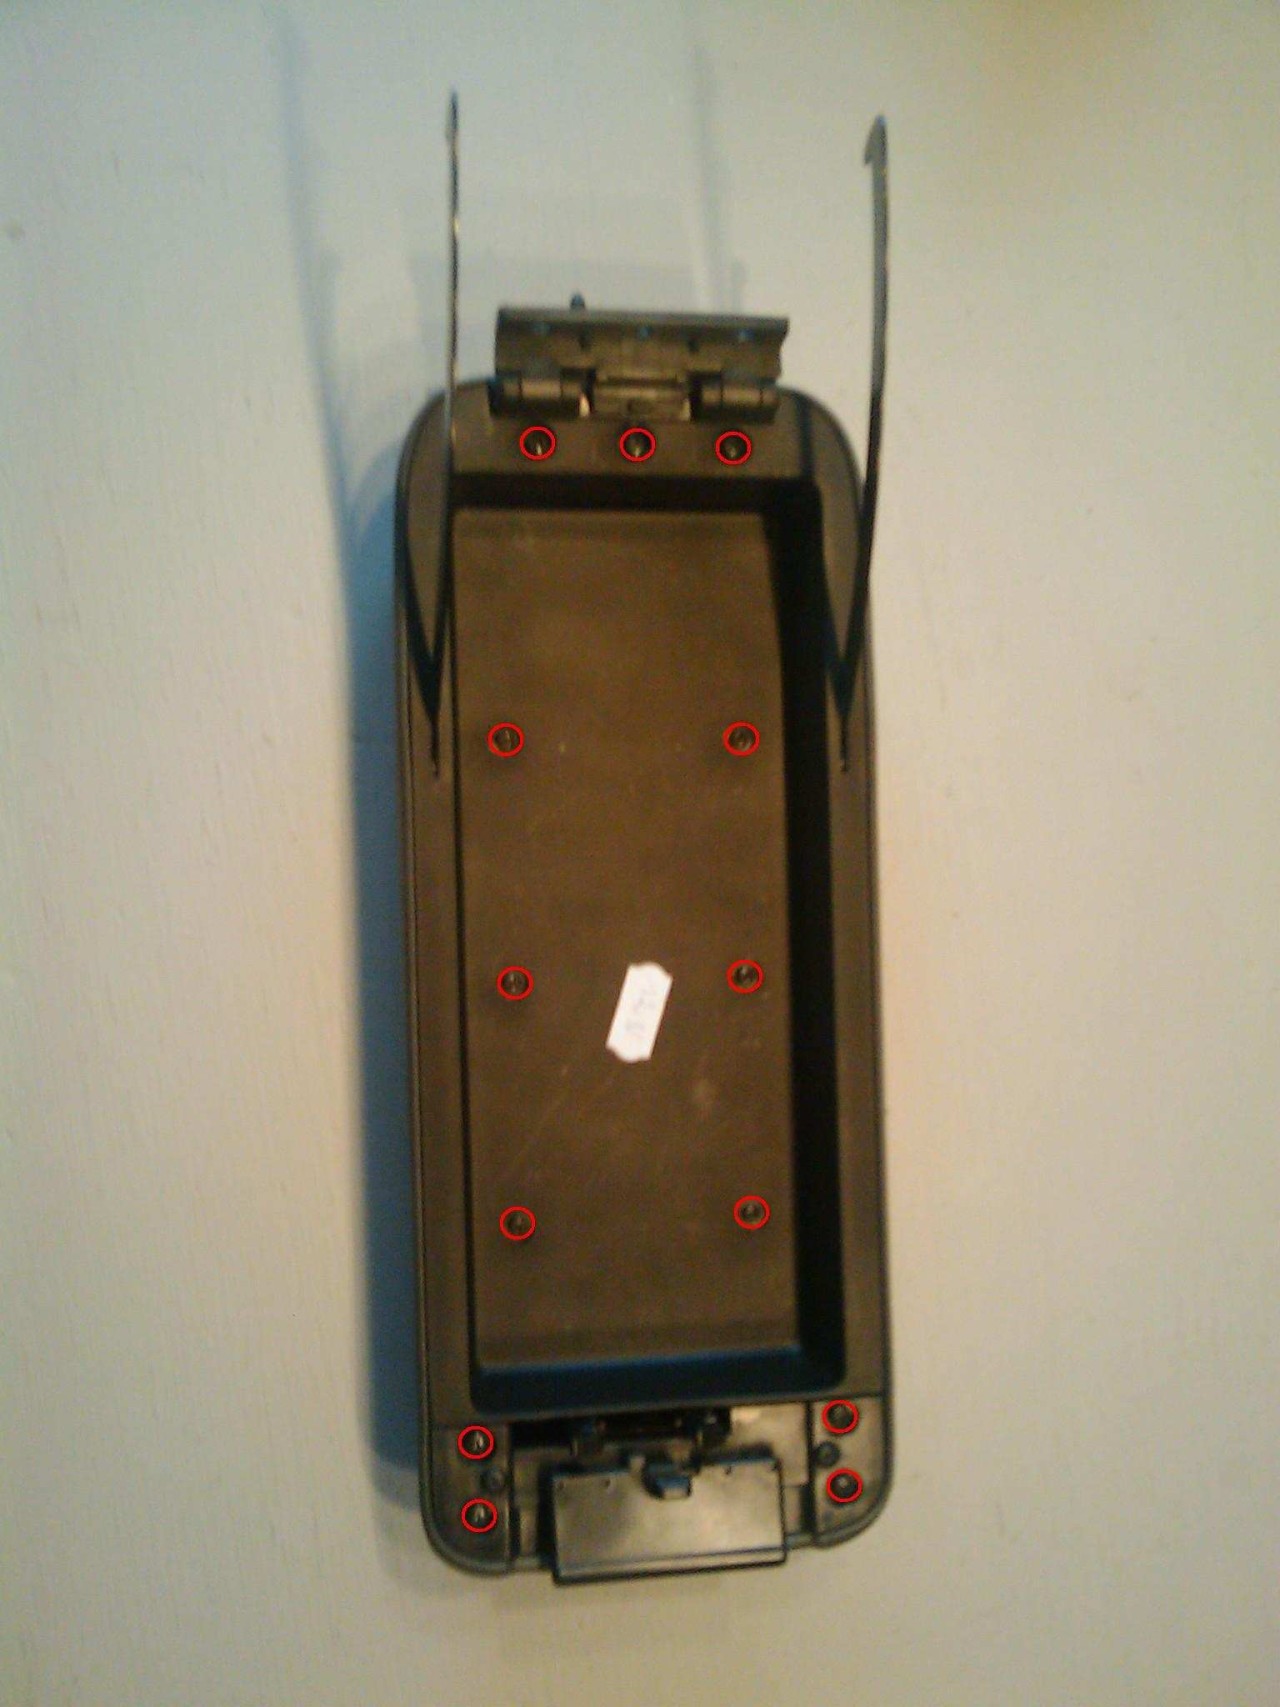
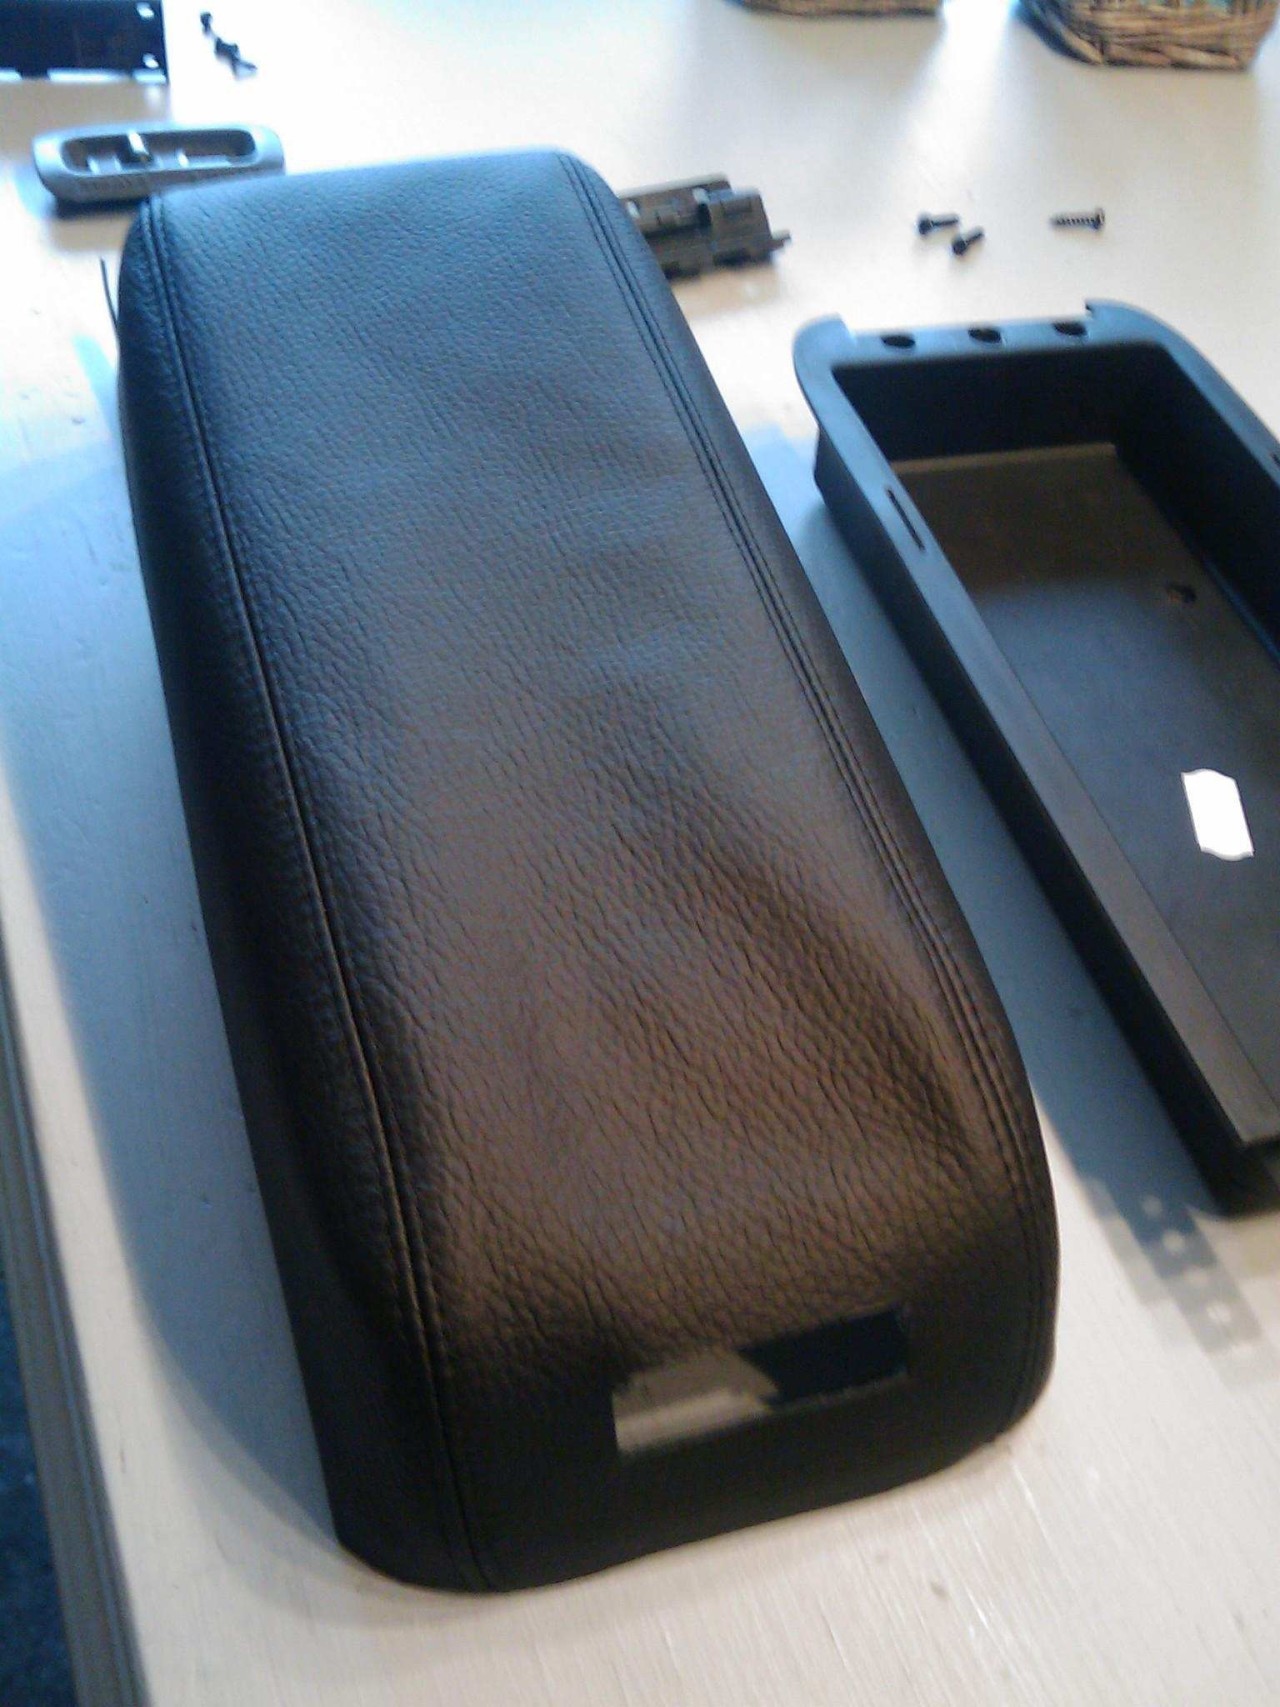
Flip the armrest over, then unscrew all the screws in sight (13 in total).
Step 2:
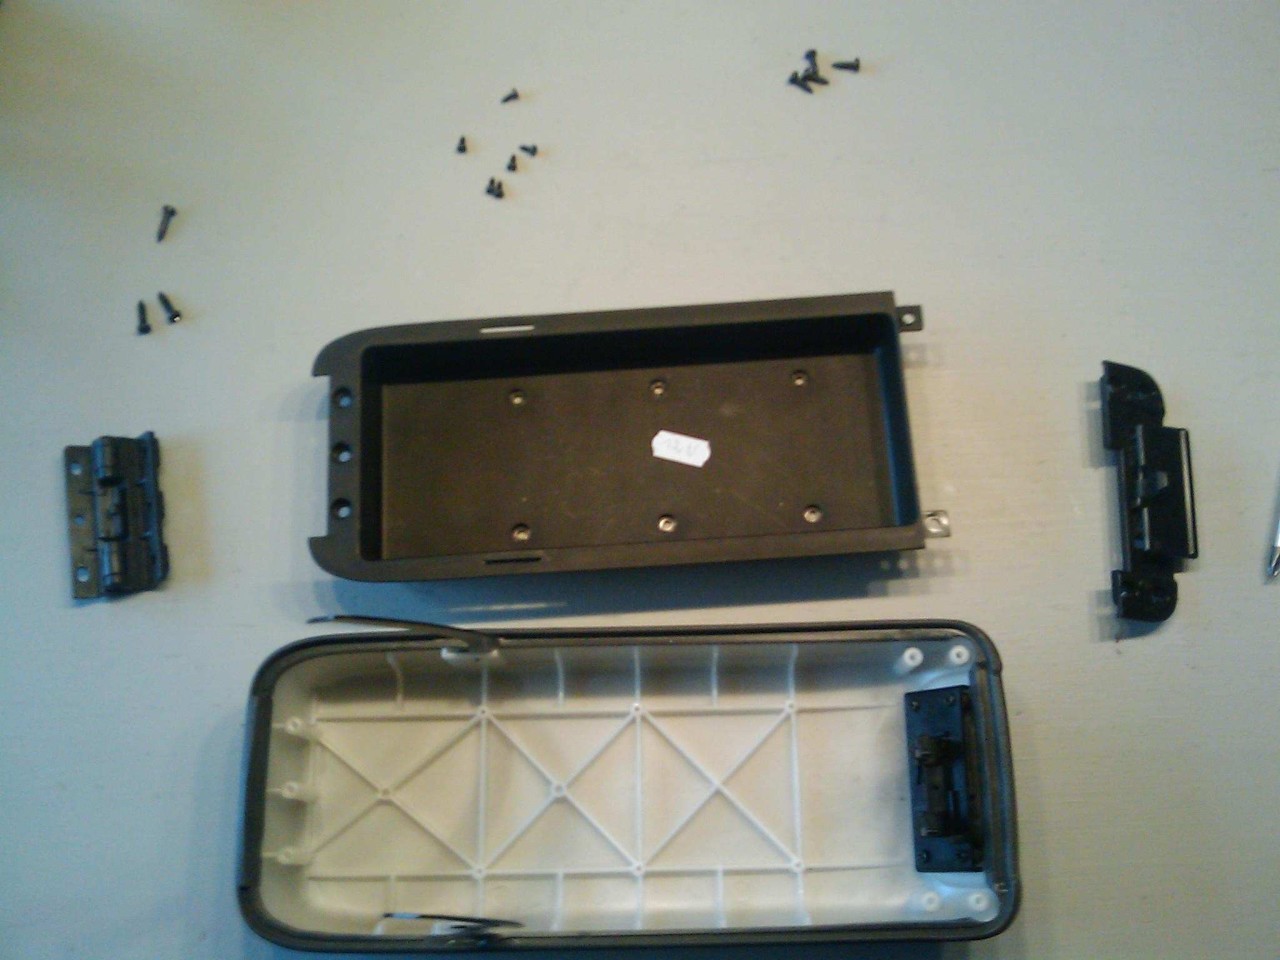
Take out the 3 plastic pieces that came loose when unscrewing everything.
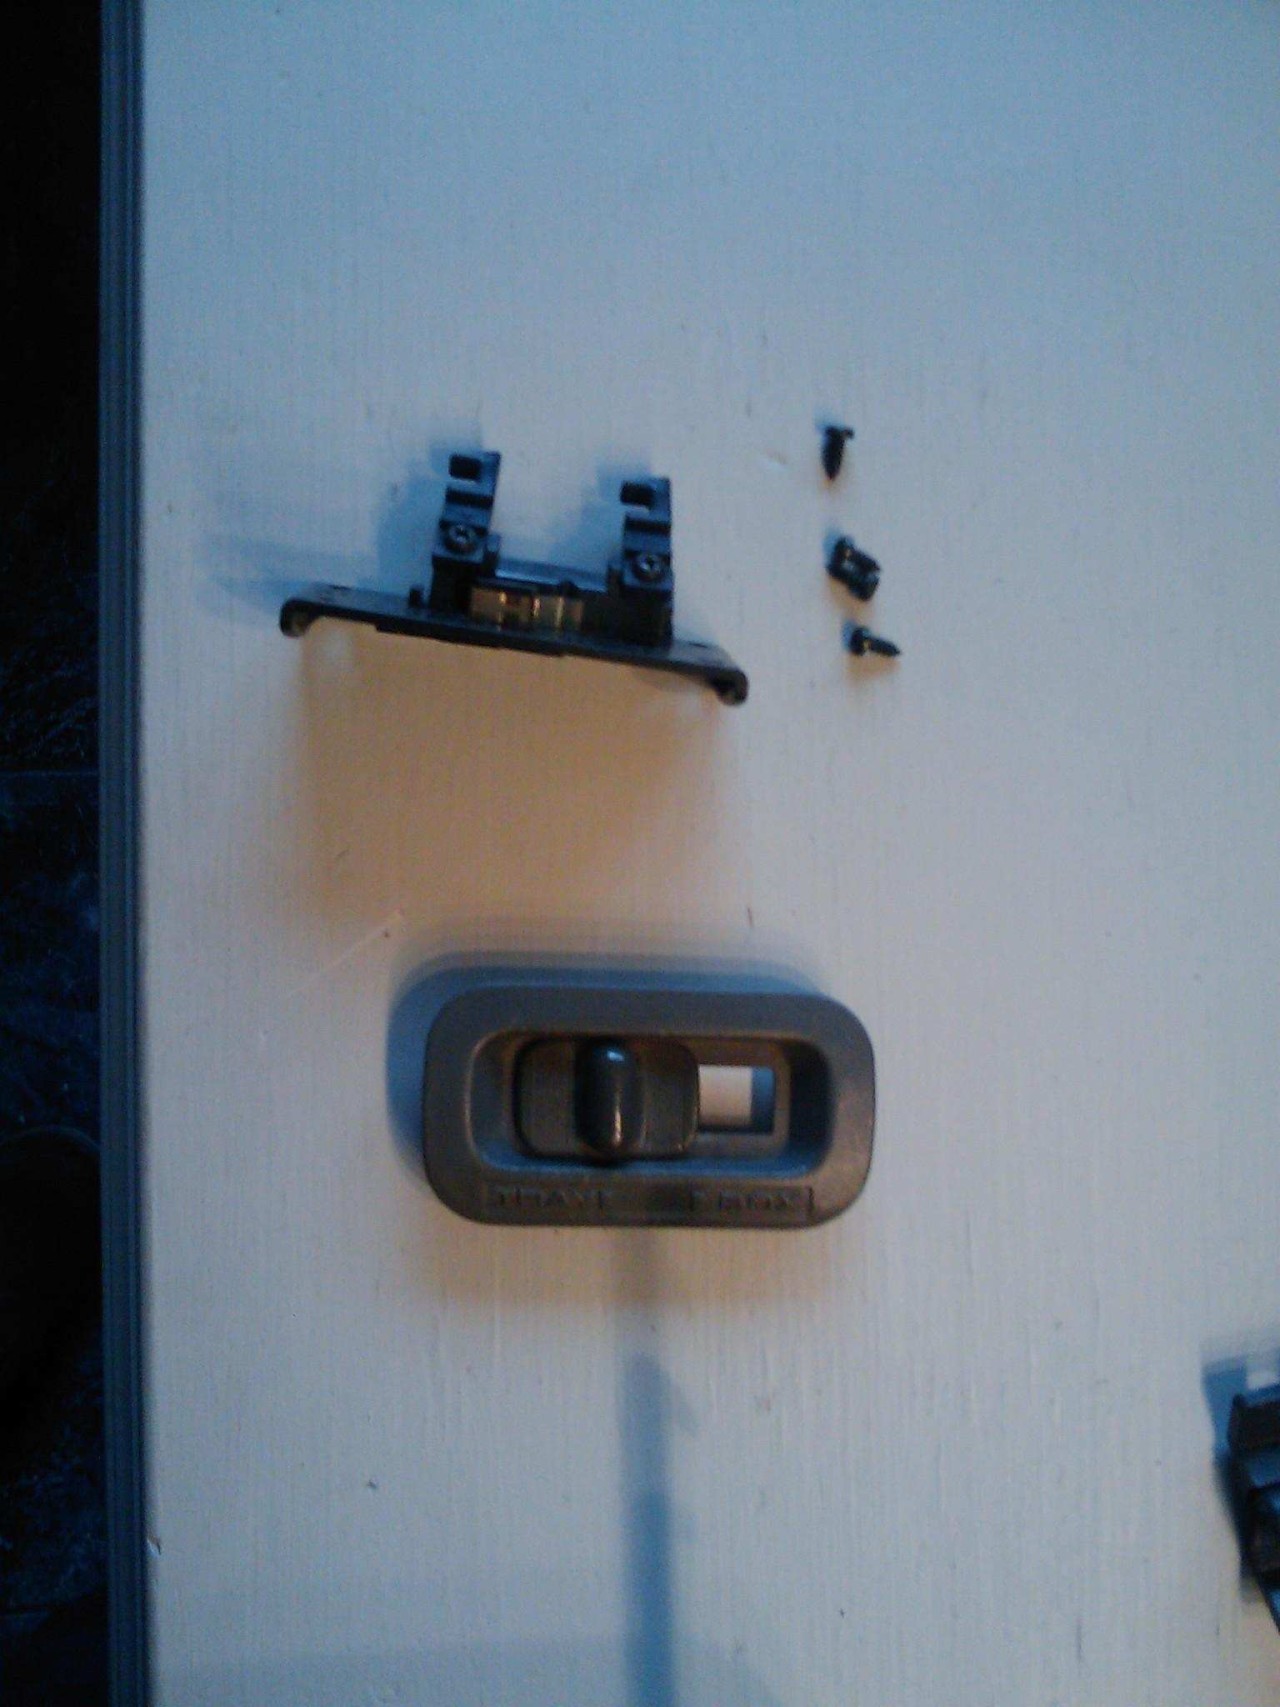
Step 3:
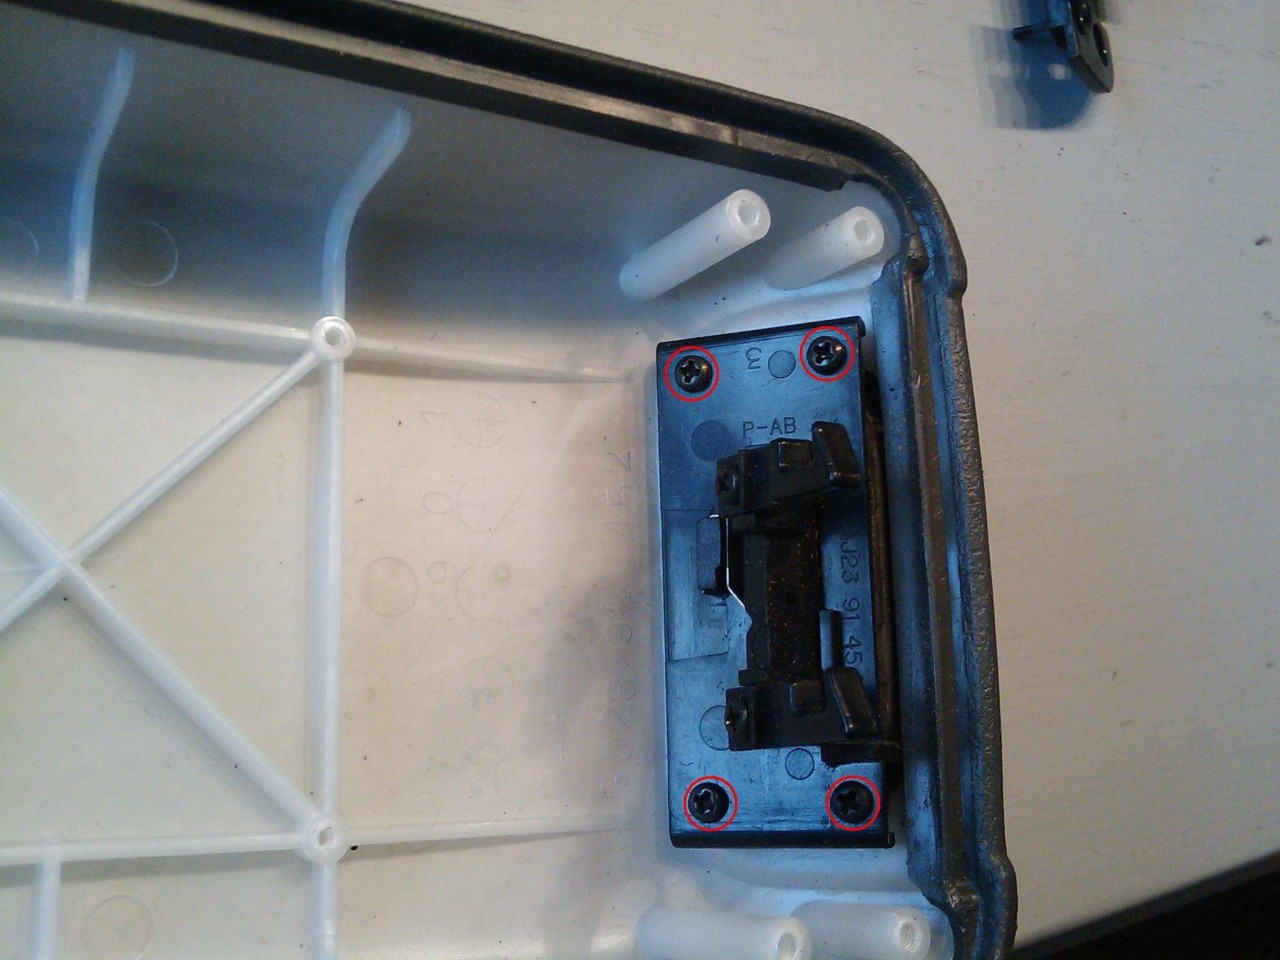
When you have taken out the three plastic pieces, 4 small screws become visible; unscrew those too.
Step 4:
When you have unscrewed the 4 small screws, take off the two plastic parts that came loose.
If you like, you can spraypaint the piece of plastic that is visible from the outside (the tray-box selecter) to match the color of your leather armrest. Just make sure that when you paint the piece you use some plastic primer, then spray the color on it and also use a clear coat to protect the paint.
Step 5:
Put the leather armrest cover over the existing vinyl one. You can use some spray-on adhesive if you want but it’s optional.
Step 6:
When the piece of plastic is painted in the desirable color, you can now put the two pieces of plastic together again and screw in the 4 small screws you’ve taken out in step 3.
Step 7:
The most convenient way to do this is if you have a stapling machine. Pull the leather over the armrest firmly and every few centimeters, secure the leather by stapling it to the original vinyl cover.
When having stapled the leather cover completely to the armrest, screw back the three plastic parts you’re taken out in step 2.

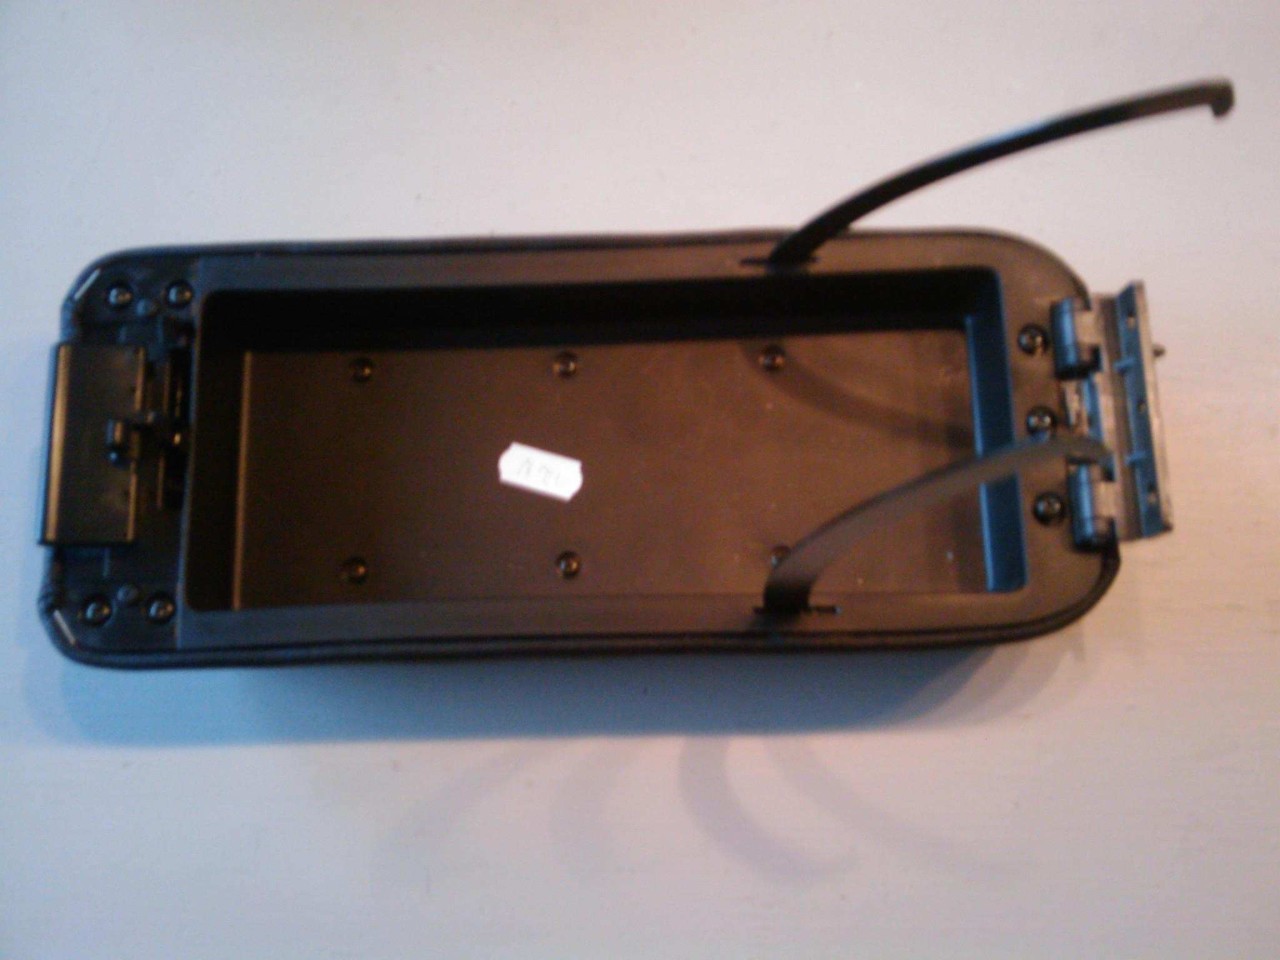
If you don’t have a stapling machine, you now have to put the three plastic parts (taken off in step 2) back into place and screw them back, but you need to make sure that you cram the leather in between the armrest shell and the plastic part to ensure a nice end result. This is where a small flathead screwdriver might come in handy to push the leather in, but be sure not to damage the leather with the screwdriver!
Step 8:
Once you’ve maken sure that you have screwed all screws back in (17 in total) tightly and the leather armrest has a nice finish to it, you’re done! You can now put it back into the car.