You must be logged in to rate content!
2 minute(s) of a 390 minute read
7-27-2013
Just a few small things today.
- Reclocking midpipe flange. The big Greddy almost bolted up to the downpipe. The angle is about 1 1/8" off on one side. Instead of messing with the downpipe, I just had the midpipe modified. I should have it back in a few days. Then the exhaust will be completely done.
- Refitted oil cooler fittings to eliminate small oil drips. Added new washers and teflon tape. Not sure why I didn't use teflon the first time, but it is all good now.
- Changed the oil
- Added finishing tape to fire sleeve on wastegate lines
- Tightened turbo coolant lines down more. I was a little apprehensive, but after looking at the tube nut, sleeve, and flares, I can see that the fittings are meant to lock down completely. No weirdness, just nice and snug.
- Tested ECU Aux outputs
I ran into an issue with Aux 4. It is setup to activate my water injection solenoid. As of now, it doesn't do anything. Every other aux port works perfectly. My "spring pressure" switch I setup works perfect. Idle valve snaps, and fan relays snap.
I posted up a thread on the Adaptronic Forum on troubleshooting the Aux 4. Not a big deal. Worst case scenario is something is fried in the ECU.
7-29-2013
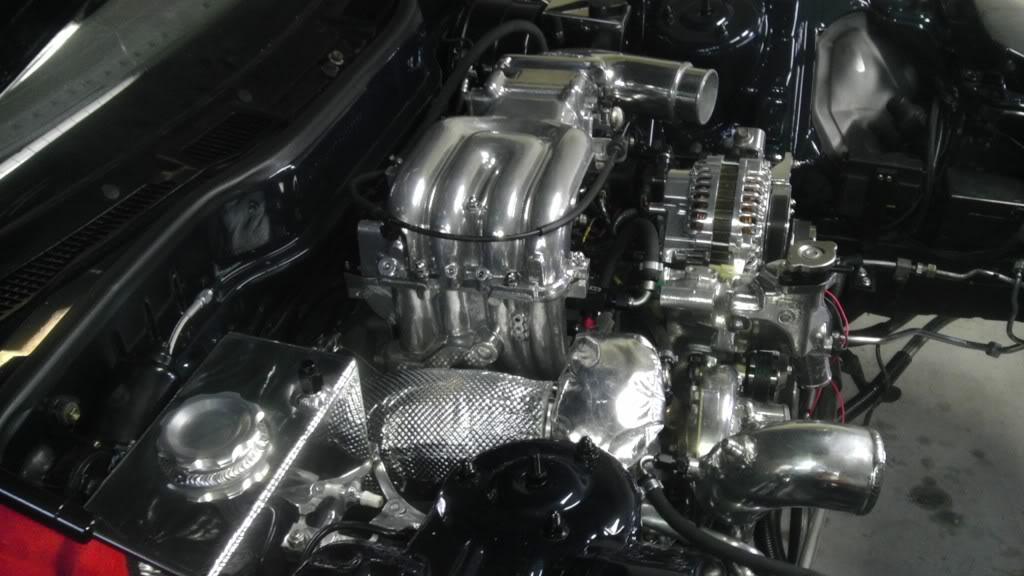
Thanks all. Trying to be as clean and methodical as possible.
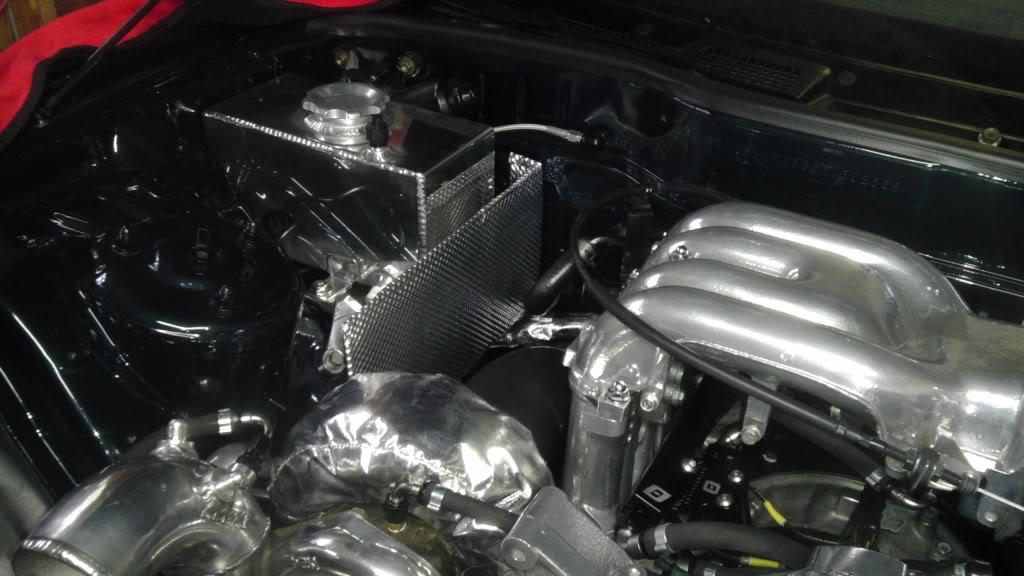
A mock-up of the new blanket and downpipe cover.
Mock-up of the 6" x 14" heat shield in place. Just need to fabricate a mounting bar. That factory coolant hose will also get a Fire Flex sleeve.
8-2-2013
I'm pretty excited about a recent part I purchased in the GB Section. Awaiting delivery, which should be pretty soon. I will fit it and then take it to be painted MB by the same shop that painted my car. It should fit up against the vmount perfectly.
The long section is being cut off, as indicated....