You must be logged in to rate content!
11 minute(s) of a 280 minute read
1-9-2011
INTERIO
Nearly everyone who has owned an FD for any time knows that the vinyl and plastic used in the interior are not first rate. The plastic or vinyl or poly-whatever that the doors and
other major interior panels are made of is very cheap looking and feels cheap to the touch as well. Many of us have fixed, strengthened the plastics, or completely redone them.
I did a complete job on my last cars plastics and knew starting this project that I wanted to completely remake the interior. I was going to remake the plastics, cover all of
the other poly-something-panels in high-quality leather, put in the best quality wool carpeting, and otherwise improve every element a component of the interior.
Leather-covered interior panels
I had a shop I have worked with in the past cover all of the interior panels doors, dash, rear quarters, console, hatch panel, hatch, and rear hatch sides and rear
in high quality black leather (Spinneybeck Sabrina as used by BMW). The only original panels not covered are the two small access panes on either side of the rear
hatch, I may remake these out of aluminum and cover them in leather someday, but otherwise you cannot add leather or the panels will not fit.
I chose not to add anything like contrasting stitching, because my intent was to keep the design the same as stock, but just upgrade the materials and finish on the
original design. This choice alone makes it very hard for anyone to notice that the interior is anything but stock.
The interior looks stock:

I love this photo taken behind the driver's seat. It all looks completely stock, but, again, it isn't. Everything is black leather (the same leather hides BMW uses), including the bins.
Covering the bin lids gave me the interior detail theme of "ribbing":
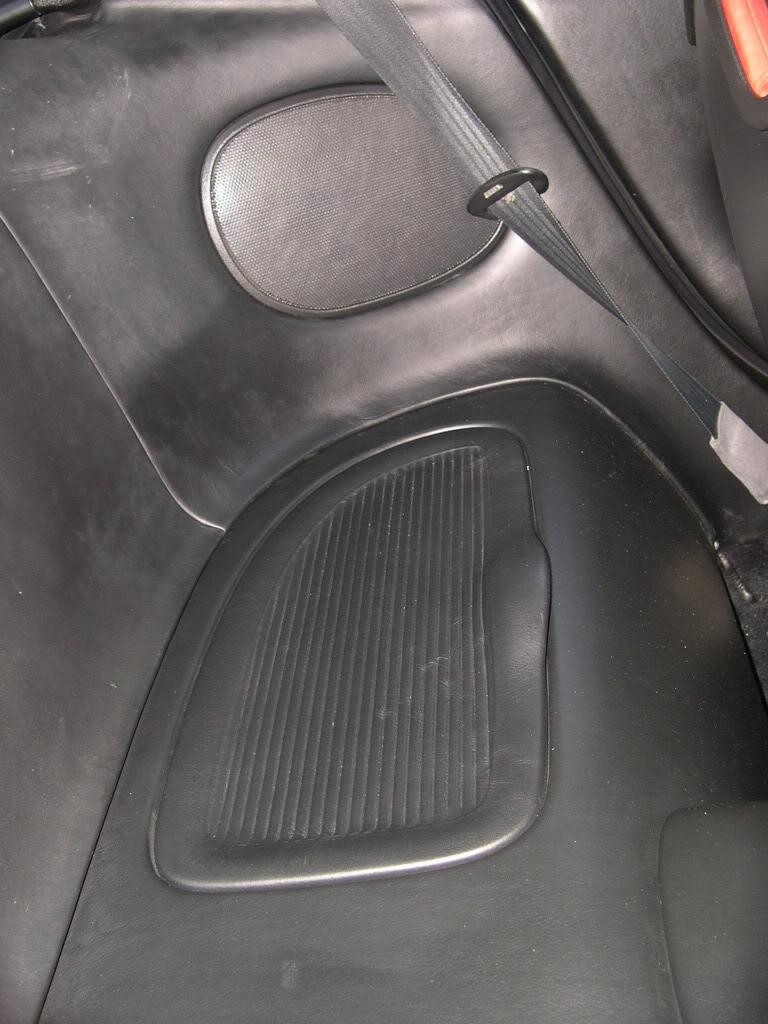
And I had them repeat the ribbing pattern from the bins in a few other places, like the subwoofer box in the rear:
The ribbing is also repeated on the drivers heel pad I had made and sewn to the custom wool carpet. Im not sure how it will hold up over time, but its ok till now and is one of the little touches I like about the interior.
Leather ribbed driver's heel pad:
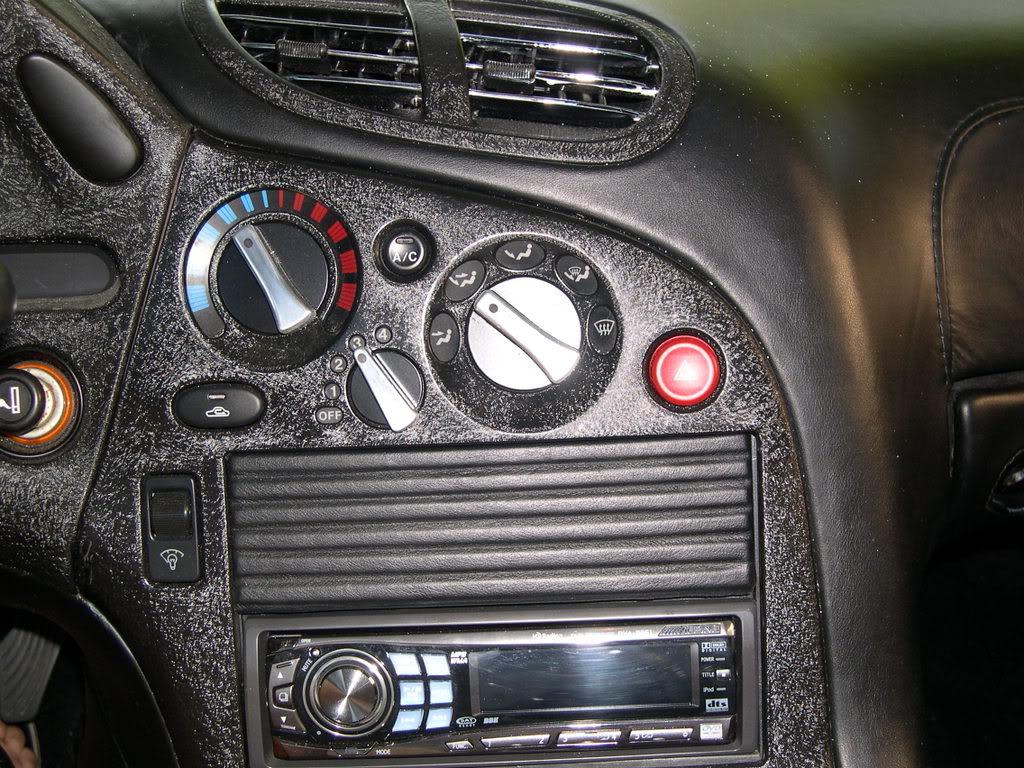
The ribbed pattern was also used on the small console cubbyhole door above the radio. I doubt if everyone who owns an FD knows that this was how they came. Most FDs by now have had the whole area redone when better stereos were installed and few still have this little push-to-open door.
Ribbed pattern repeated on cubby door:
_______________________________________
Heres the ribbed pattern on the top of the interior quarter panel where it meets the headliner:
I think the interior panels took about four 50 square foot hides and the seats took 3
hides. So, I may have added 50 pounds to the interior from just the leather. (The
metalizing of the plastics added another 5 pounds or so and the carpeting adding an
as yet unknown amount.) There is an unexpected benefit from adding all this leather
and the much better carpeting. The inside of the car is much quieter than stock and
much quieter than the improvement from just adding sound deadening, which I also
added, as well.
__________________
Customized Spirit R Seats
The Spirit R shell seats are a variant of the 90s Recaro competition seats used on
Porsche and Ferrari Cup cars and are very light when not abused by someone like
me. I chose the R's, because they are the only shell style seat that was actually
designed for the FD and fits perfectly centering the driver on the tachometer. (The
inside -- the tunnel side -- of the seats are cut out and shaped very differently than
the outsides of the seats.) I like the fact that they are a tilting, fixed bucket design,
which is very comfortable, yet provides better than stock lateral support.
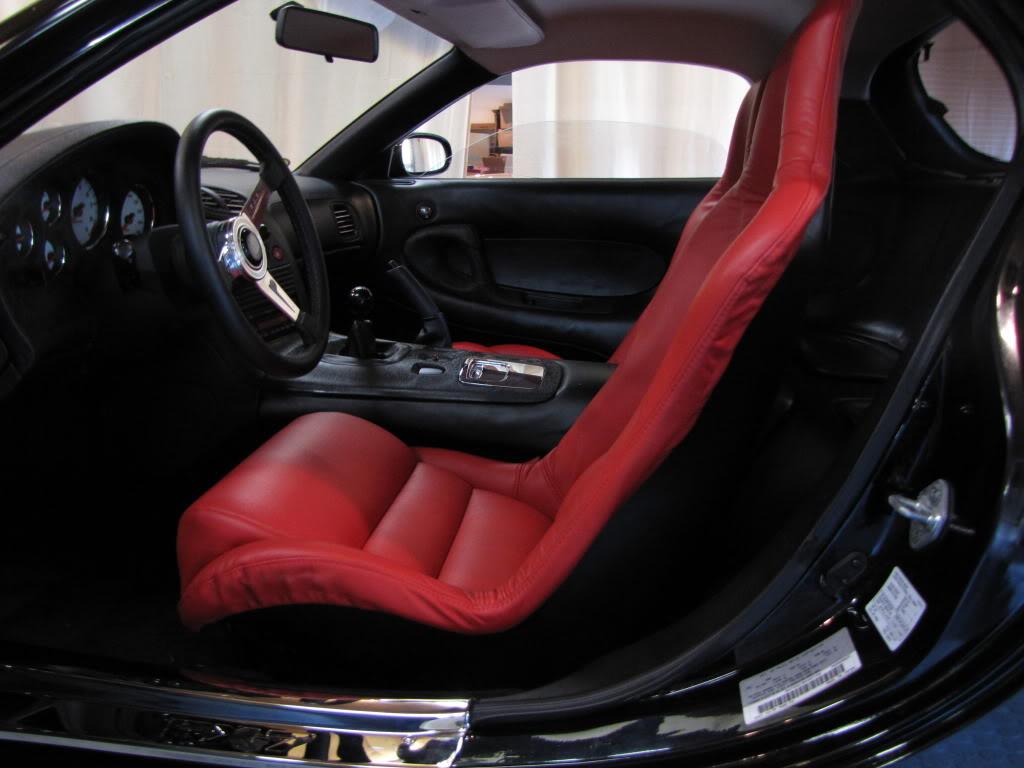
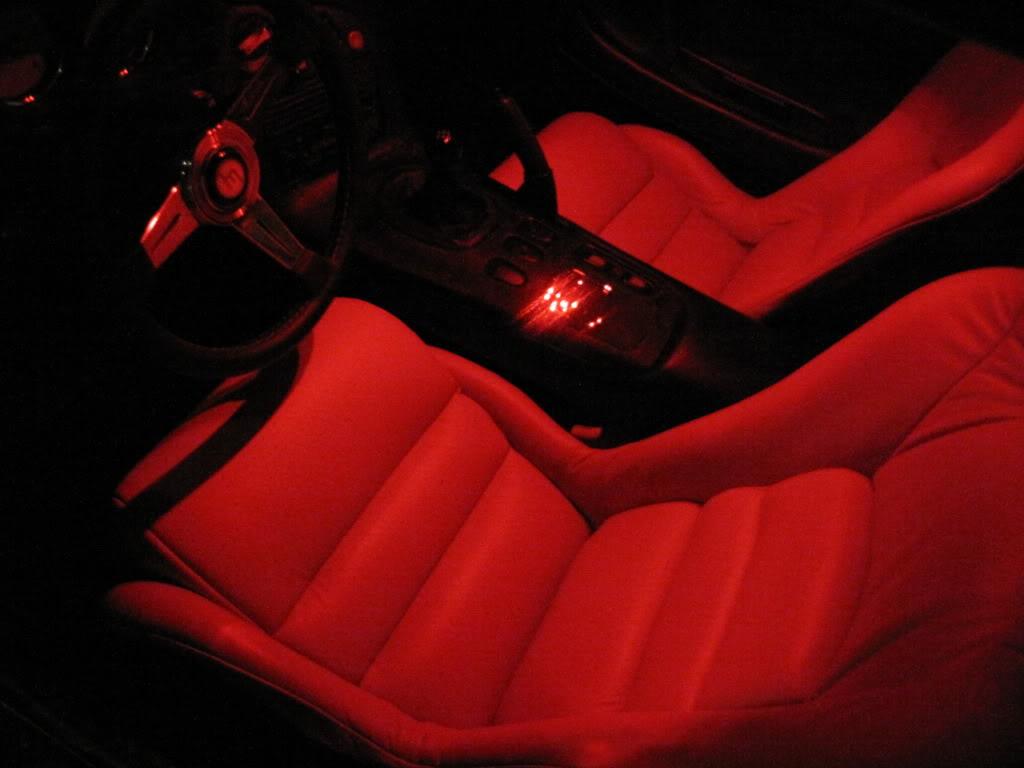
I also wanted to create a visual effect. I wanted the red leather bolsters and cushions
the fronts and edges of the seats to seem very thin and very red and the backs
of the seats to be black, just like the rest of the interior, so the seats would seem to
just be these very thin, very red seats "floating" in the all-black interior. However,
the shell is carbon fiber and the weave is yellow and black and very noticeable. From
a design perspective, its very busy to the eye and theres no way I could achieve the
floating-red-cushions effect I wanted with that carbon fiber on the back of the seats.
So, I covered the backs of the seats in black leather. The overall effect, especially at
night and with the red LED interior dome light on, is just what I wanted.
The original Recaro seats have a very busy yellow and black pattern...
__________________
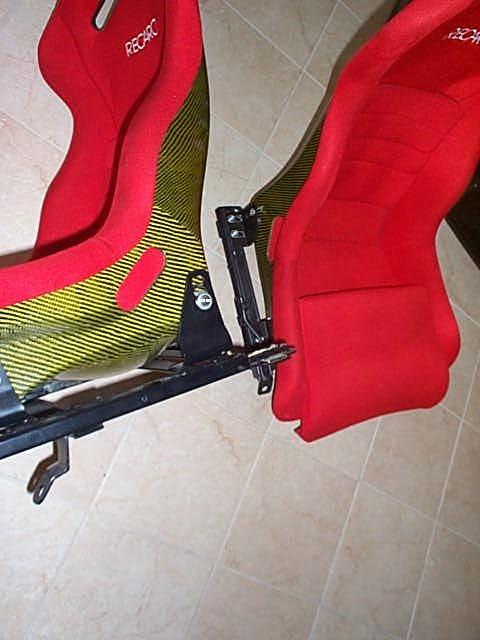
SZo I covered the carbon fiber seat backs in black leather:
This shows the “floatingâ€Â effect of the red fronts in an otherwise black interior:
_______________________________________
The Spinneybeck Sabrina black and red leather used on the seats and throughout the interior is the same leather that BMW uses in its
high-end cars. (There is quite a big difference in the quality of leathers: clear hides, tanning and dying being most important. Also, the
price is per square foot and you buy them as hides. The problem is that you can seldom cut the pieces you need from the shape of the
hide and you lose leather and money in the process.)
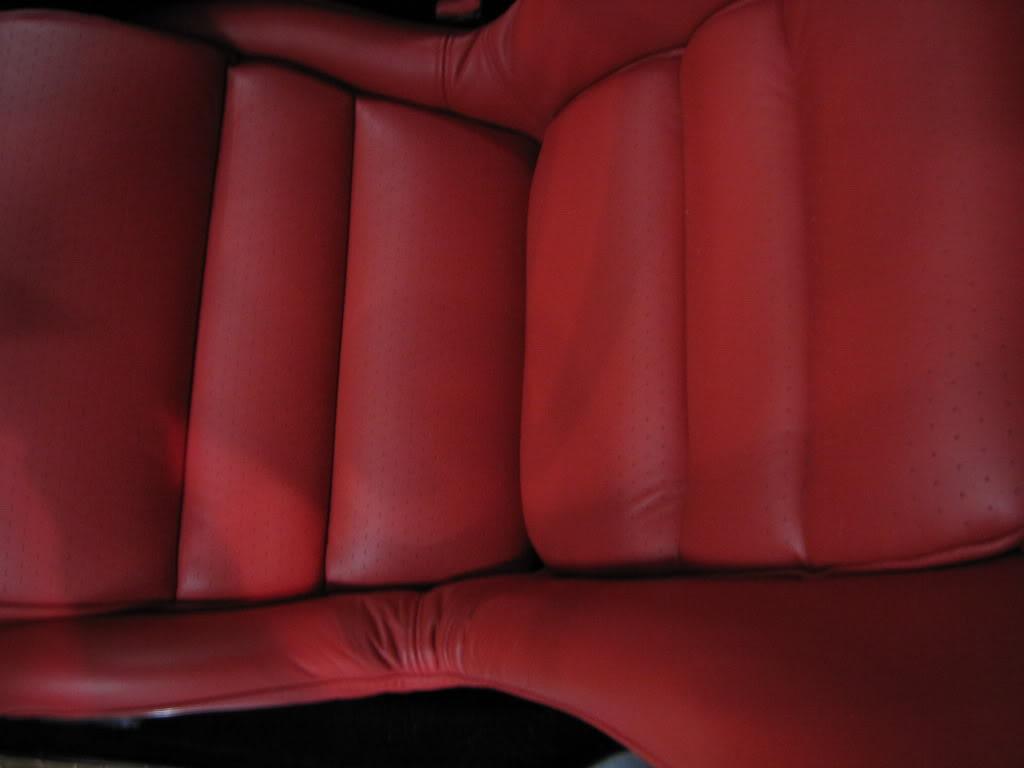
I wanted the seats to be very, very comfortable and to resemble the original R seat pattern in design. So, I had them redone in leather
and with new cushions made in a pattern that resembles the R pattern. The foam is also upgraded from the usual in that there are
two layers of foam with the outermost being memory foam.
This shows the two layers of foam being shaped and glued up before being covered in perforated leather:
_____________________________
_____________________________
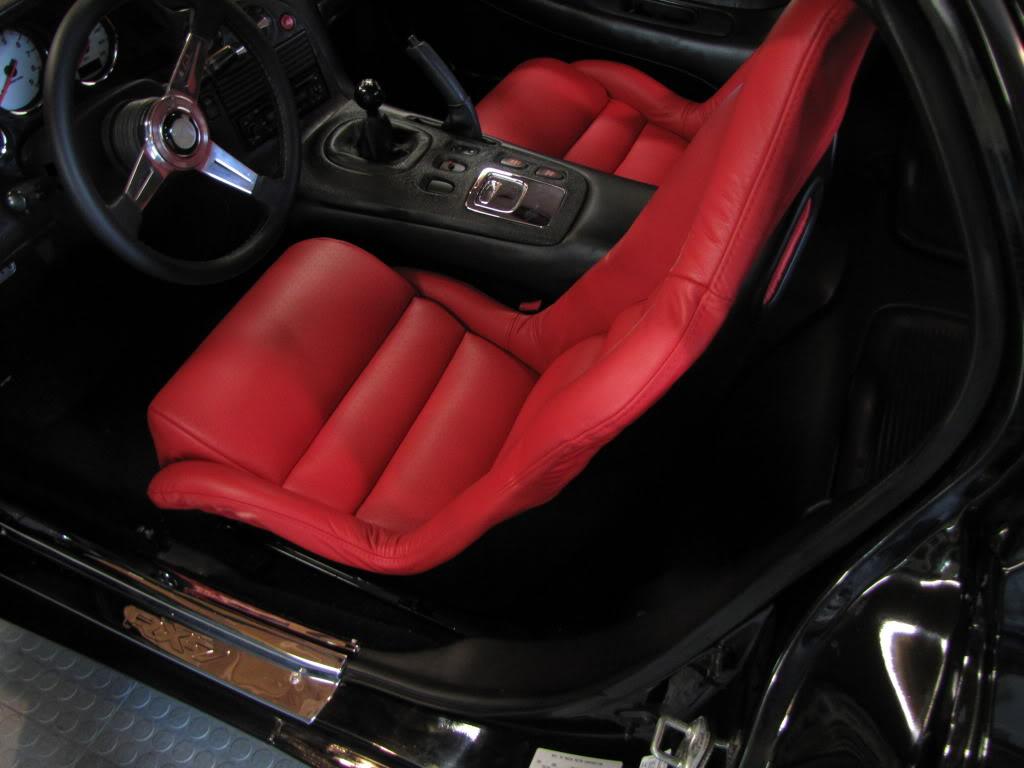
Heres an interior photo that shows the new perforated leather seats with more padding for my old bottom. You can't believe how com-
fortable these are, especially since they started as the RZ racing shells. I actually liked the Spirit RZ seats, but wanted something more
comfortable and luxurious while having more lateral support.
The interior looks fairly stock, though the materials give it a richer visual character :
_______________________________________
The leather is very nice and these are very comfortable seats:
(Continued in next post)
Transforming Interior Plastics
No one likes the plastic in the FD. Its been painted by some, fiber-and-duro-glassed, replaced, sworn at, painted with this or that rubberized coating and still no one likes it. I heard
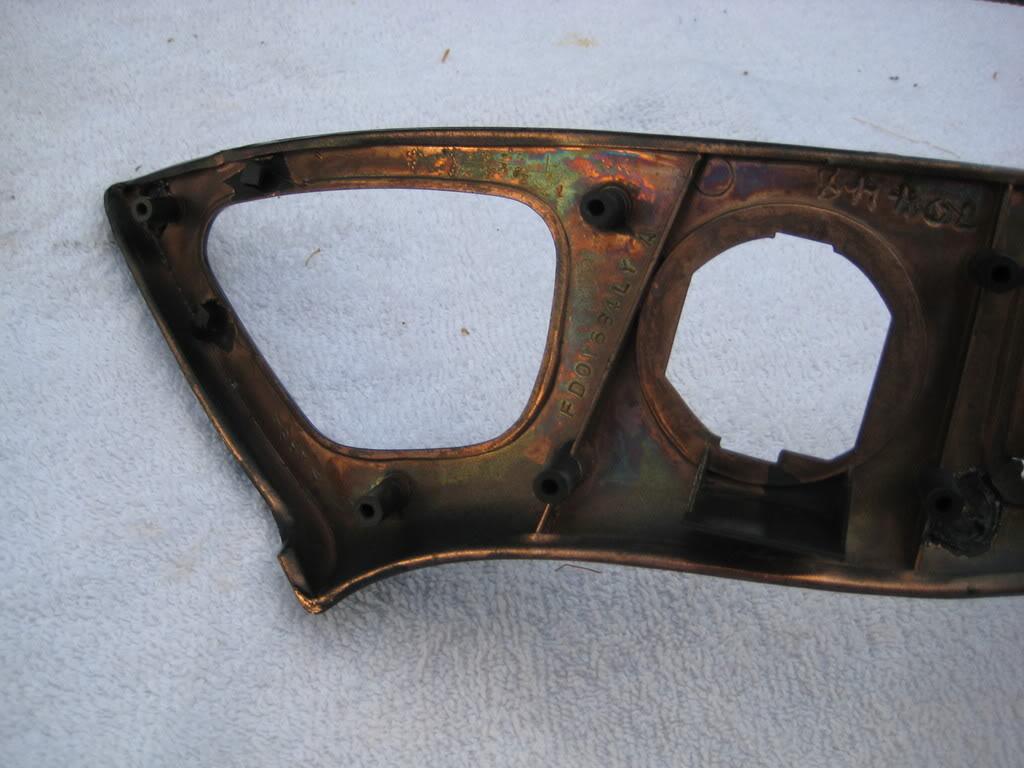
of a company in Pittsburg that was plating plastics in metal: Pauls Chrome. I sent them all my plastic dash, console, armrests, vents -- and had them plate everything. What
they do is shoot silver dust into the plastic, so that it becomes conductive. Then, they can plate it, just like it was a steel bumper.
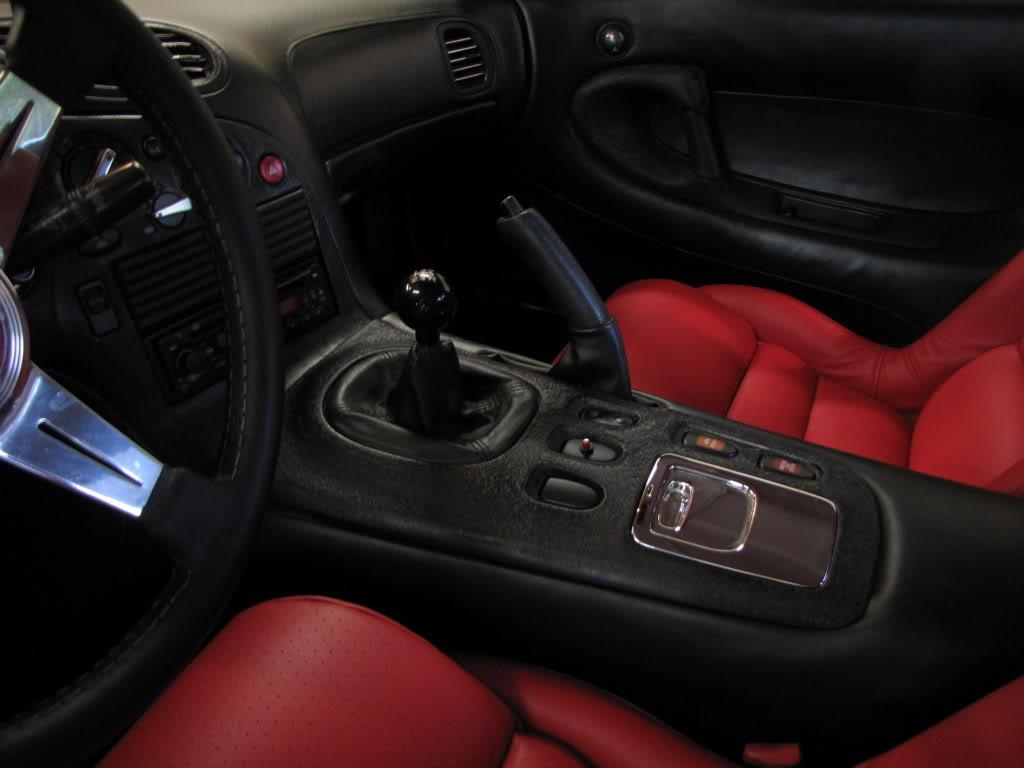
The console was "metalized in this way (shot with silver dust then copper and nickel plated) and then painted black. The ashtray was plated in copper, nickel, and then chromed.
(May be a bit much.) The short shift gearshift **** is a Voodoo aluminum **** that I had Joe Portas powder coat black with the shift pattern etched and filled in white.
I think the materials add a richness to the otherwise largely stock-looking interior:
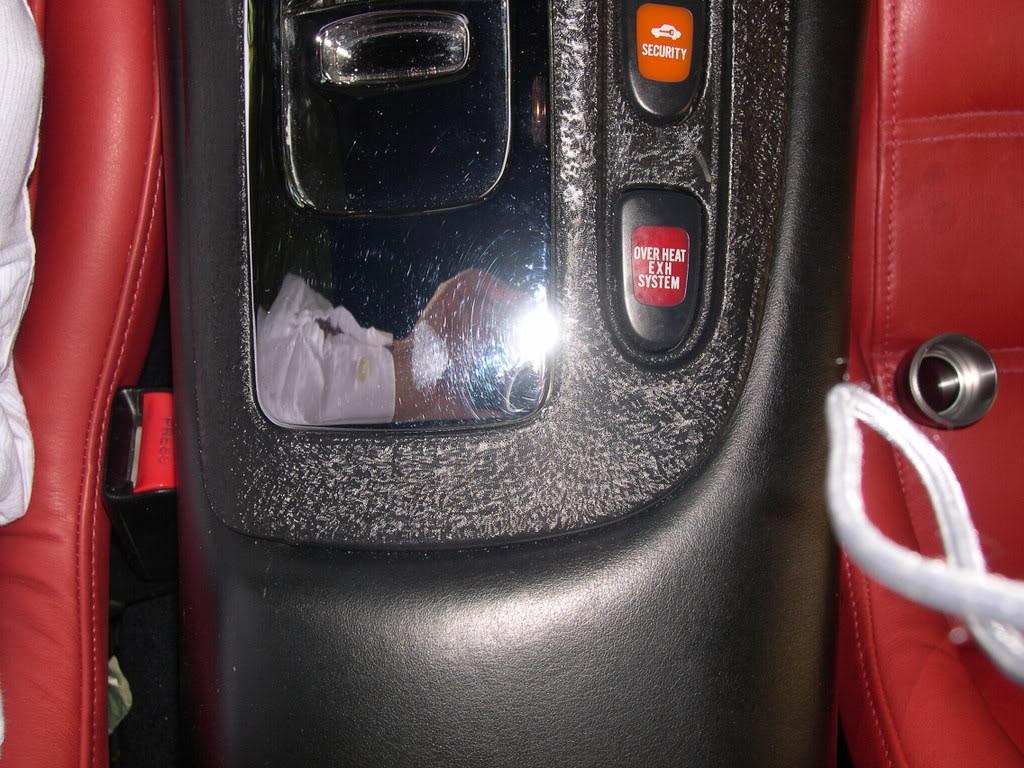
This closeup of the ashtray is interesting, because, while you can see that the ashtray is chrome, you don't notice that the entire console is metal as well, but painted black or that
the area surrounding the console is black leather or that the seats are red leather:
Here's the same shift console area showing it just after being plated and painted:
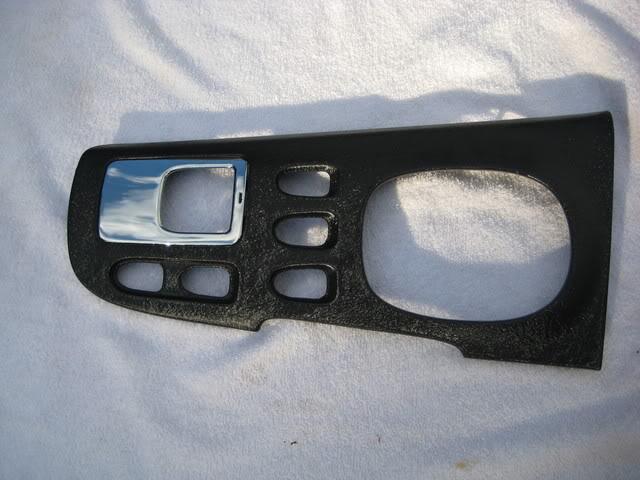
After the copper plating, each piece was nickel plated as well and then painted black:
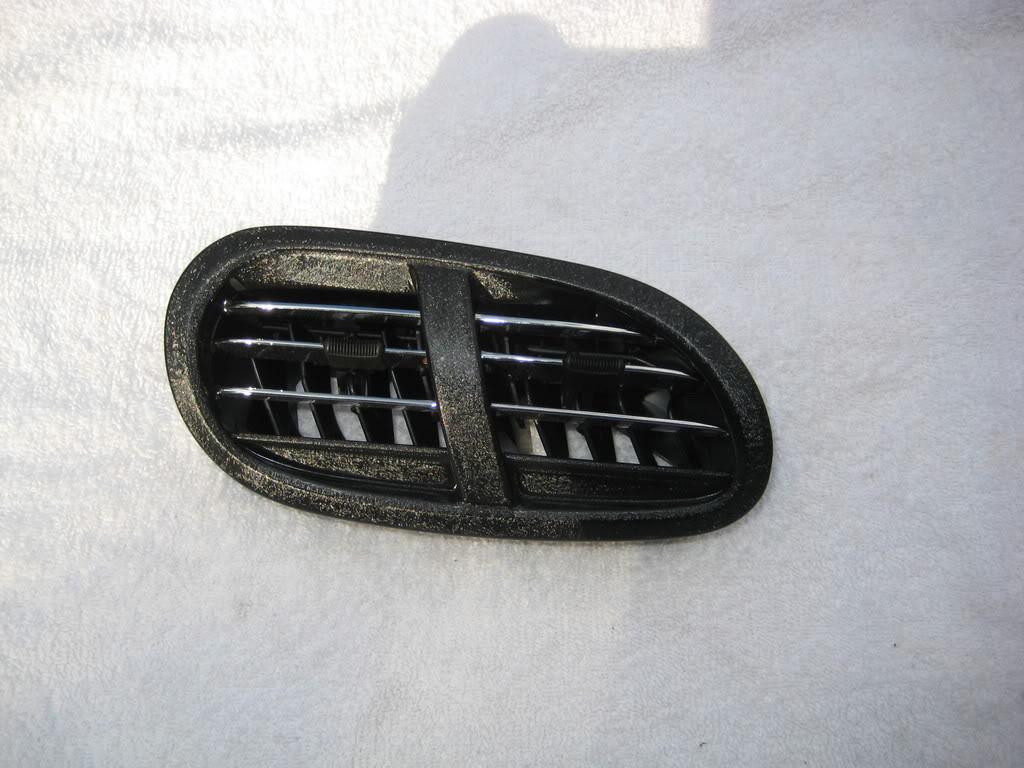
Even the plastic vanes in the air conditioning and heating vents were plated. I had them taken apart, and actually individually chromed and then reassembled. You don't notice
them very much, but you do notice them when you're driving it. The black plastic vent surrounds themselves are also metal plated and painted black:
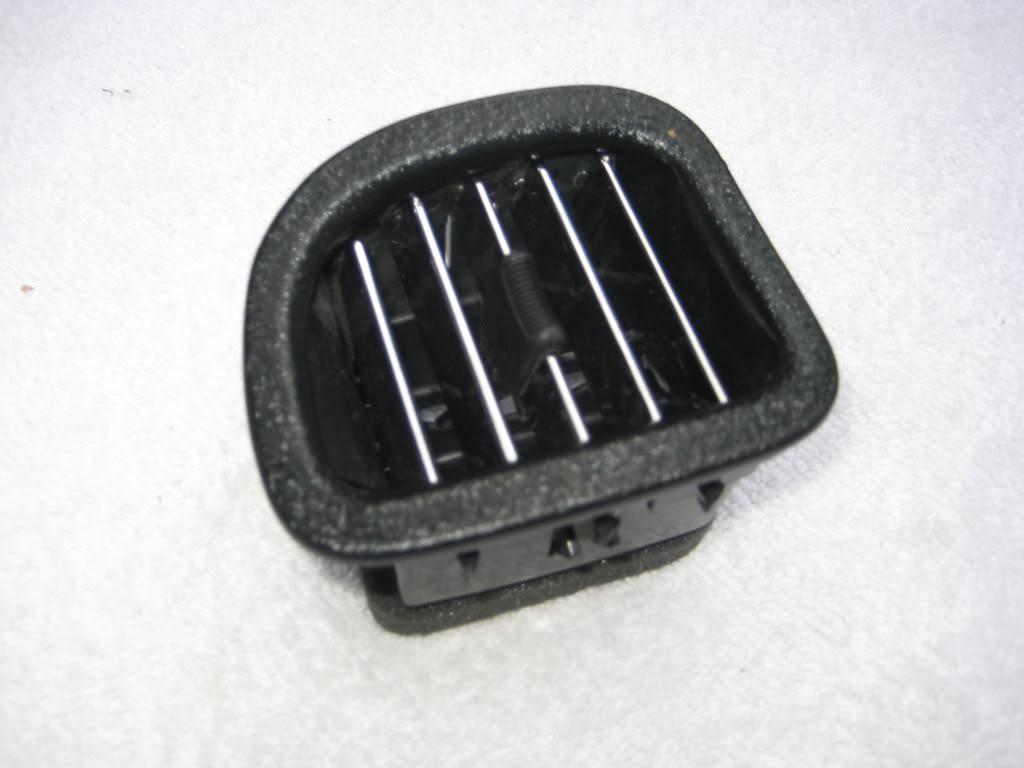
Although there's plastic underneath, everything you see and touch is metal plated:
_______________________________________
Leather Covered Headliner
Ive tried a few different headliner revisions. First, I covered the headliner and visors in black mohair broadcloth. Seemed to absorb a lot of sound echoes and the stereo sounded
great. But it was really too claustrophobic in there, so I decided to redo the headliner and visors in perforated cream white leather. It may not absorb the sound as well, but it
really opens up the small cockpit and makes it seem airy by comparison to any black headliner.
Here is a shot of the visors:
_______________________________________
LED lighting inside and out
A lot of people have been converting their lighting to LEDs recently and I have done some of it as well. I have not yet wanted to add LEDs to my Knight Sports HID Sleepy Eye headlights,
though I have ordered some LED taillights. Ive played with it all a bit and have upgraded LEDs in the front turn signals (white), interior dome lights (red), and rear license plate lighting
(red).
The most interesting thing about it was the effect of the bright red LED dome lighting on the interior at night. I had planned the look of red shell seats sort of floating in an all black interior
and thought that the red LED lighting would make this effect really pop at someone looking at it at night. Well, it does and even better than what I had hoped. What was most surprising,
however, was not the cosmetic effect I had expected, but that the interior was now so bright at night that I can read every marking on my radio with the domes on. Its very soothing on
the eyes. Its great. Its like a fighter cockpit. You could drive with the domes on no problem.
Nice job!
Posted by Diggymart on 3/13/19 @ 9:54:43 PM