You must be logged in to rate content!
5 minute read

93+ MAZDA RX7 ARMREST INSTALLATION INSTRUCTIONS
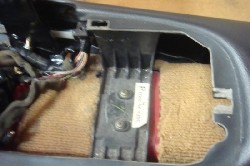
1. Start by removing the plastic panel that holds your ashtray, shifter boot, etc. There are 5 clips that hold it in place.
There's a phillips head screw on each side of the panel at the bottom around where the seat back rests. Remove each. You'll see the screw hole in the bottom portion of the panel.
Next remove the two screws from the bracket that attaches to the transmission tunnel.
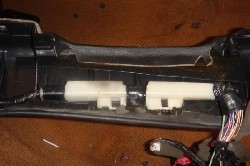
2. There is a bundle of wires that runs from behind the stereo.
The wires are attached to the console with this white clip. Slide the clip off and you should now have the console free from the car.
3. Set up a staging area because the adhesive sprays pretty well out of the can.
4. The adhesive is made by 3M and I bought it at Home Depot for $11.00. There are a few varieties. Make sure you get the #80 can that is made for headliners (for rubber and vinyl).

5. Clean the console with a little soap and water to ensure that nothing interferes with the adhesive.
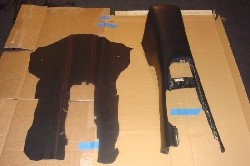
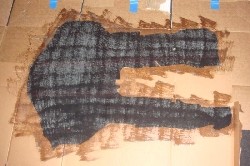
PRACTICE lining the leather up on the console. Decide where you are going to lay the leather on the console after the adhesive has been applied. Once you have sprayed this stuff and put the parts together, it's very tough to pull apart. The leather pattern is cut precisely. I felt the best place to begin is at the area in the middle - think about where your elbow rests. I have clothespins in this picture because I thought I would need them to hold the leather while the adhesive dries. They are not neded - this stuff is very tacky.
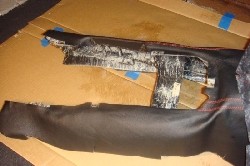
6. Spray the adhesive on the console and the back of the leather. Follow the directions on the can. Be careful that you don't get any on the front of the leather.

7. Don't worry if it looks like the adhesive seeps through to the finished side of the leather. It does leave some marks on the good side while it's wet, but that goes completely away when this dries in about an hour.
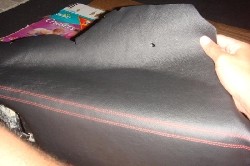
8. Line up the notches in the leather with the corresponding area on the console (what you practiced). Begin smoothing the leather from the edge and working your way toward the back of the console.
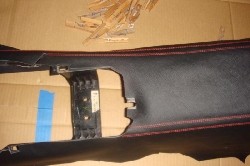
9. Smooth back and forth with one hand while holding the leather in the other. You don't want to drop the whole leather cover on the console because the alignment won't work. You'll have to press and smooth - but occasionally peel it back to keep it lined up. Use the red stitching as a guide - it should run along the edges of the console.
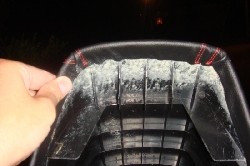
10. Once the top is done begin smoothing the sides. If the holes in the leather for the two screws don't quite line up - it's no big deal. Pay more attention to the red stitching lining up on the edges. You can punch a new hole for the screw if needed and you'll never see that area because the seat covers it.
Finally - work your way around the edge of the console and just fold the leather. The adhesive is tacky enough that it will hold just fine.
ENJOY!!
Useful tip
You have installed a product made out of genuine leather. As you know, to maintain a leather product in good condition, you should take care of it. We suggest occasionally (every 4-6 week for example) applying some leather conditioner/UV protector to keep your leather from drying up in the sun and cracking.
Redline Automotive Accessories Corp. will not be held liable for any labor, incidental or consequential damages of any kind. Proceed at your own risk.