You must be logged in to rate content!
3 minute read

MERCEDES 240D SHIFT BOOT INSTALLATION INSTRUCTIONS
1. This procedure describes and shows the steps to install a Redline leather shift boot on a Mercedes Benz 240D 4 speed manual transmission.
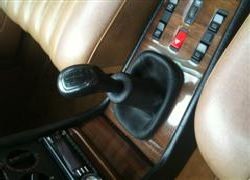
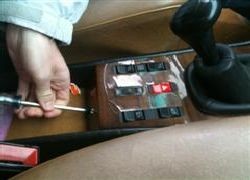
2. Release rubber shift boot from console and loosen shift jam nut
3. Remove shift knob by unthreading
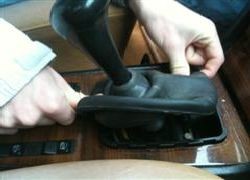
4. Inspect the shift boot...
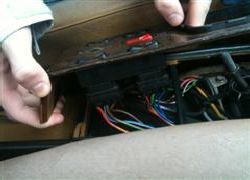
5. Now you will need to use contact cement to attach the leather boot to the center console. This can be done in the car, or for convenience I removed the center console to the warmth of my home to attach. Remove the attaching screw and switch wires.
6. The connectors easily come off the back of the switches. Leave the switches installed in the console
7. The console is ready for contact cement.
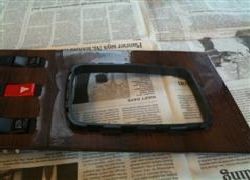
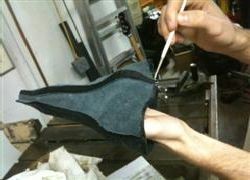
8. Tape off the wood veneer before applying cement for easier clean up. Using a thin brush apply coat of contact cement to the console boot ring.
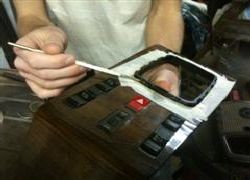
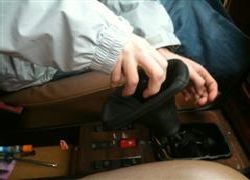
9. Then turn your new leather boot inside out and apply contact cement to a thin band (4mm) around the base of the boot.
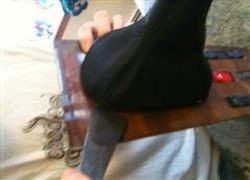
10. Let the contact cement dry per the manufacturers recommended time. Turn the boot correct side out and carefully attach to the console ring. Use a thin blade or scraper knife to push the leather boot in place.
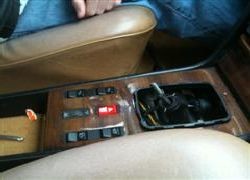
11. If you took the console out of the car, re-install it attaching the switch wires first, Thread on your shift knob (I installed a new knob), and secure the console screw.
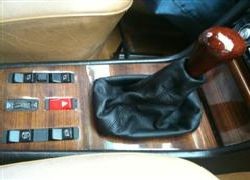
ENJOY YOUR NEW LEATHER BOOTS!
Useful tip
You have installed a product made out of genuine leather. As you know, to maintain a leather product in good condition, you should take care of it. We suggest occasionally (every 4-6 week for example) applying some leather conditioner/UV protector to keep your leather from drying up in the sun and cracking.
Redline Automotive Accessories Corp. will not be held liable for any labor, incidental or consequential damages of any kind. Proceed at your own risk.