You must be logged in to rate content!
5 minute read

ALTIMA 07+ DOOR ARMREST INSTALLATION INSTRUCTIONS
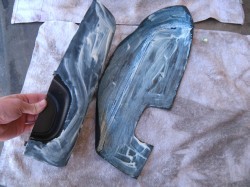
1. This is your armrest. It is covered in a thin film of cloth and underneath that a stiff foam.

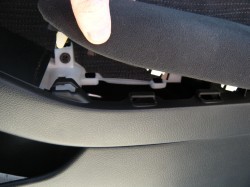
2. The armrest, both the front and back, are attached to the door panel via 4 clips that insert into the frame for the armrest. To remove, simply pry the armrest up with the cup insert and it should pop right off. For first time removal it may feel like it does not want to remove but it will!
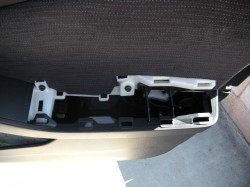
3. This is what your armrest frame looks like. Keep this in mind because later you will have to trim some leather so that the armrest still fits into the frame.
4. Before applying the cement, remove the cup insert via the three Phillips head screws underneath the armrest. It should pop right off.
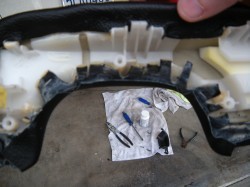
5. This is contact cement by Loctite. This is how you will attach the leather to the cloth armrest. On the piece of leather to be attached, make two slits into the leather approximately half an inch long (you may do this by eye as well). You need to cut it so that the leather will adhere without changing shape to the bottom of the armrest. If you still do not know why you need to do this, before applying the Loctite try to fit the leather to the armrest and screw in the cup and you will feel the reason (and see as well. Look at step 7 to see how the slits should look)). In this step you apply a layer of cement to the cloth armrest and also to the side of the leather to be attached (the unfinished side). Also please make sure to remove the cup pictured on the armrest—I removed my late and almost ran into troubles because of it—do not forget to remove!
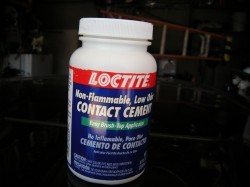
6. Make sure to apply an even coat of Loctite. You must wait 30 minutes for the Loctite to dry before applying the leather to the armrest and must not wait longer than 60 minutes or it will not adhere. I personally did a second coat at 30 minutes and waited another 30 before applying so that I got an even coat.
7. This is what the underside of your leather should look like (plus the slits). I personally got a clip and hangar and hung my armrest up to dry so I didn’t have to hold each armrest for an hour.
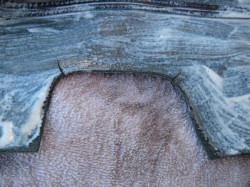
8. Attach the leather to the armrest. In this step you must be very careful as the contact cement will already begin to adhere to each other upon contact. I personally lined the edge of the armrest up into the crevice of the leather and used the stitching as a guide (it should go evenly along the edge of the armrest). You must use caution and a good eye in this step. This is how the cup piece of the leather should look upon adhesion. When applying the leather also make sure that the edges are TIGHT and that the leather goes underneath prongs or to put it another way make sure the leather goes between the edge of the armrest and the inserts along the bottom. When you are done you may also get a fabric roller or a big roll of duck tape and roll out any creases or lumps. Remember you only have 30 minutes of working time (and with contact cement the term “working time” is used very lightly) to make it just right.
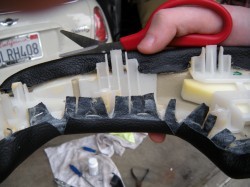
9.Allow your armrests to dry overnight. The next day you will need to get a pair of crafting scissors and cut the leather around the inserts along the bottom so that you can fit the armrest properly into place. You may do this before you apply the contact cement as well but I personally do not have that good of an eye to trim the leather beforehand but to each their own!
10. Reinstall the armrests into the car.
ENJOY!!
Useful tip
You have installed a product made out of genuine leather. As you know, to maintain a leather product in good condition, you should take care of it. We suggest occasionally (every 4-6 week for example) applying some leather conditioner/UV protector to keep your leather from drying up in the sun and cracking.
Redline Automotive Accessories Corp. will not be held liable for any labor, incidental or consequential damages of any kind. Proceed at your own risk.