You must be logged in to rate content!
5 minute read

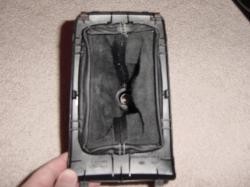
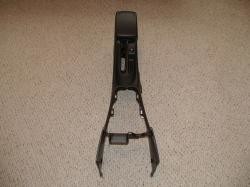
95-99 SENTRA SHIFT BOOT/E-BRAKE INSTALLATION INSTRUCTIONS
1. First step is to remove the old boot from the trim piece. You need to bend the metal bar from under the plastic clips around the trim.
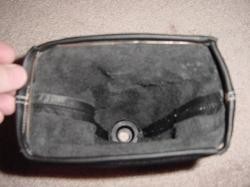
2. Turn the boot inside out, and remove the plastic cap, metal collar, and rubber band.
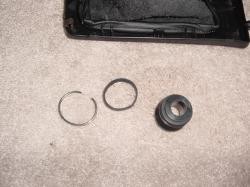
3. Next you need to remove the metal band from the old boot. Use a razor knife to cut the material. Here is the metal band removed. Notice the band is not a perfect rectangle. The smaller end faces the rear of the car.
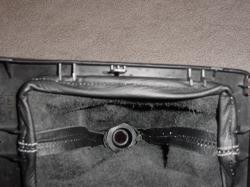
4. With the new boot, turn it inside out, and insert the plastic cap, with the concave side facing up. You might need to stretch the leather a little for it to fit. Then use the rubber band to hold the cap in place.
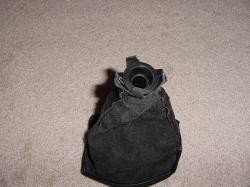
5. Turn the boot right side out, and insert the metal band into the boot. Try to line the band up with the folded over part on the boot.
Alternatively, which is more consuming but slightly more durable, use the folded over part for what it was made for - to slide the metal band into it.
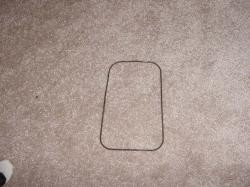
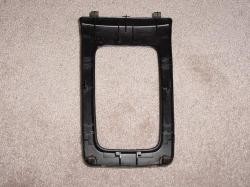
6. Look at the plastic trim. Notice the opening matches the metal band. Make sure to line the small end of the band up with the small end of the plastic trim.
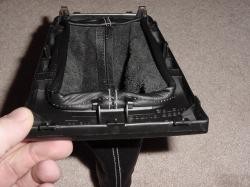
7. Now insert the boot into the plastic trim. Because the leather boot is thicker than the old one, it will be a tight fit. The boot will slip under the side clips, but not the front and back ones.
8. With some work, they will fit. Reinstall the center console piece and the shift knob unless you are installing the brake boot as well.
9. Remove the center console to fully expose the e-brake handle. To do that you need to remove 5 screws from console: 2 front, one under a small cover at the brake lever, 2 beneath the plastic cover at the rear by the cup holders. Then you need to pull off 2 plastic covers on each side underneath the dashboard, and the one around the cupholders, before taking the console up. After you lift the console, remove the cigarette lighter and other connections.
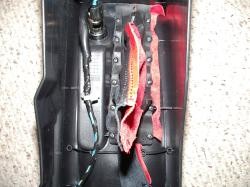
10. Pop out the rubber gasket surrounding the ebrake. Little buttons hold it on. We used only the 5 buttons from the rear down to hold it, because the boot won't reach reach the final 2 at the front. Turn the new boot inside out. Using the rubber as a guide, make slits about 8mm or so long corresponding to each button, about 5 mm from the edge of the boot. Use the slits to mount the boot with the buttons between the rubber gasket and the console.
11. Slide the new boot onto the e-brake handle top-first. Use a ZIP-tie to secure the top of the boot on the console.
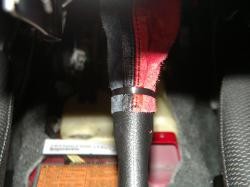
12. Pull the console and, with it, the e-brake boot as far as it will go and re-install the center console.

Useful tip
You have installed a product made out of genuine leather. As you know, to maintain a leather product in good condition, you should take care of it. We suggest occasionally (every 4-6 week for example) applying some leather conditioner/UV protector to keep your leather from drying up in the sun and cracking.
Redline Automotive Accessories Corp. will not be held liable for any labor, incidental or consequential damages of any kind. Proceed at your own risk.