You must be logged in to rate content!
6 minute read

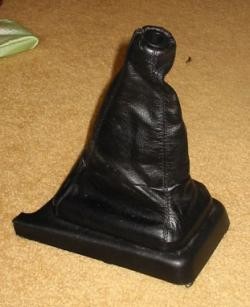
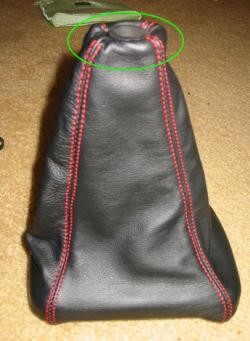
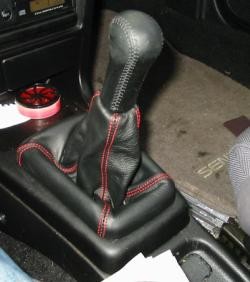
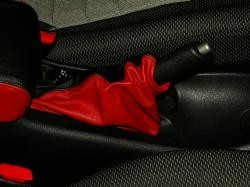
91-94 SENTRA SHIFT BOOT INSTALLATION INSTRUCTIONS
1. Remove shift boot assembly from the car.
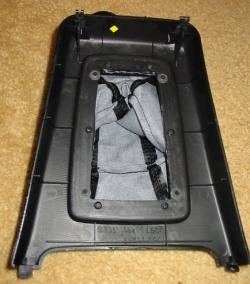
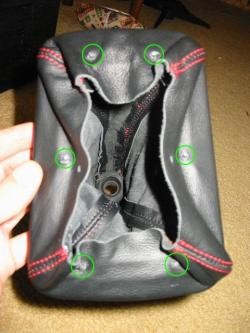
2. View from the underside:
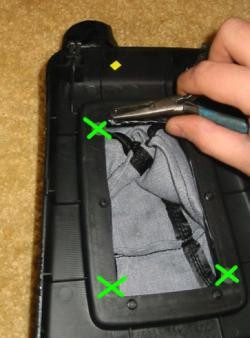
3. Break plastic melted bond on pictured pegs. Break pegs marked with green X's:
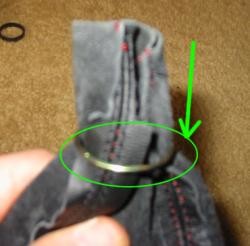
4. Remove original boot from plastic inner trim. Take note that boot leans toward driver. This is on the smaller side of the inner trim plastic:

5. Turn original boot inside-out and remove all plastic peices and snap-ring.
6. Turn the boot inside-out.
7. Trim excess leather on inner seams down 2 inches. Take care not to cut actual seams. Also take care no to cut the actual boot (just the excess material).

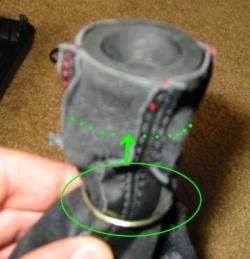
8. Slide snap-ring over top of inside-out new boot.
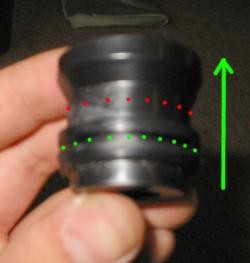
9. Note original plastic shaft "donut". The green arrow points to the top of the piece as it is installed with the inside-out boot. The green dotted line is where the snap-ring will go. The red dotted line is where the "rubber band" goes.
10. Put plastic shaft "donut" into inside-out NEW boot. With pliers, work snap-ring up to where the green dotted line would be inder the boot.
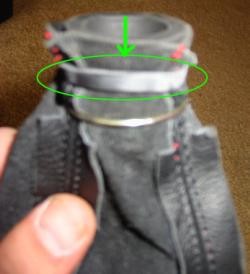
11. Install "rubber band" over, where red dotted line (from above illustration) appears.
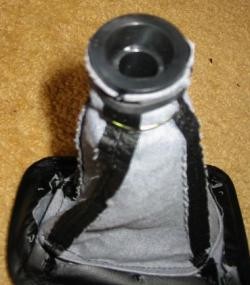
12. What it should look like:
13. Pull boot inside-out again.
14. Finesse the edge around the "donut" and the shift boot. Pull the boot down a bit. Work it, baby. The leather will conform to the shape a little better with time and pressure.
15. Insert inner plastic trim, noting angle of boot relative to trim. Work it by eye, see what you like.
16. Where pegs rest on boot, cut tiny slits where boots may lie. Cut about 1 cm beyond where it needs to be to stretch the material a little bit.
17. Hook boot onto the cut slits within the pegs (Encircled in green).
18. Drill holes as shown below with diameter that is greater than wood screw threads, but less than wood screw head.

19. Mate inner plastic trim (with boot) to outer plastic trim. Screw wood screws into pre-drilled outer piece. Tap into inner piece.
20. DO NOT tighten the screws just yet.
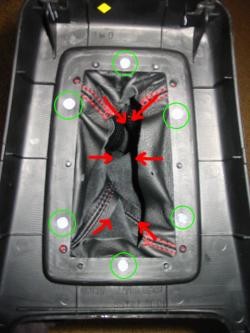
21. Once all screws are in place, tighten boot while inspecting the wrinkles which may be worked out of the outside of the trim. (See red arrows)
22. Once satisfied, tighten screws.
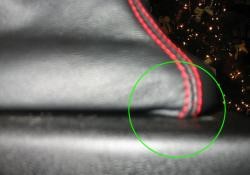
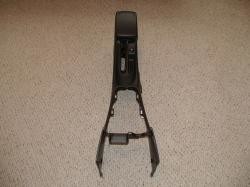
23. The picture on the right shows you what you want to avoid.
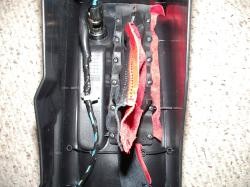
24. Reinstall the center console piece and the shift knob, unless you're installing the e-brake boot.
25. Remove the center console to fully expose the e-brake handle. To do that you need to remove 5 screws from console: 2 front, one under a small cover at the brake lever, 2 beneath the plastic cover at the rear by the cup holders. Then you need to pull off 2 plastic covers on each side underneath the dashboard, and the one around the cupholders, before taking the console up. After you lift the console, remove the cigarette lighter and other connections.
26. Pop out the rubber gasket surrounding the ebrake. Little buttons hold it on. We used only the 5 buttons from the rear down to hold it, because the boot won't reach reach the final 2 at the front. Turn the new boot inside out. Using the rubber as a guide, make slits about 8mm or so long corresponding to each button, about 5 mm from the edge of the boot. Use the slits to mount the boot with the buttons between the rubber gasket and the console.
27. Slide the new boot onto the e-brake handle top-first. Use a ZIP-tie to secure the top of the boot on the console.
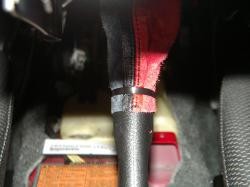
28. Pull the console and, with it, the e-brake boot as far as it will go and re-install the center console.
Useful tip
You have installed a product made out of genuine leather. As you know, to maintain a leather product in good condition, you should take care of it. We suggest occasionally (every 4-6 week for example) applying some leather conditioner/UV protector to keep your leather from drying up in the sun and cracking.
Redline Automotive Accessories Corp. will not be held liable for any labor, incidental or consequential damages of any kind. Proceed at your own risk.