You must be logged in to rate content!
5 minute read

2006+ SENTRA Interior Trim INSTALLATION INSTRUCTIONS
1. Pull gently on the dash around the shifter and it will come loose. There are four clips holding the dash piece down. Unplug the wires to the hazard button and unscrew shift knob and lift the boot and dash over the shifter.
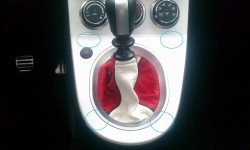
2. The boot is held in place by a metal ring inside the boot. just pop it out from the clips holding it in place. You will need to remove the ring to insert it into the new boot. This can be done without ruining the stock boot to keep it as a spare. The ring in the boot comes apart on one of the longer left or right sides. Feel for the metal connector holding the ring together. Cut the stock boot where you find the connector. You may need a pair of pliers to get the connector loose so that the ring opens. Pull the ring out of the hole you created and insert it into the new boot.

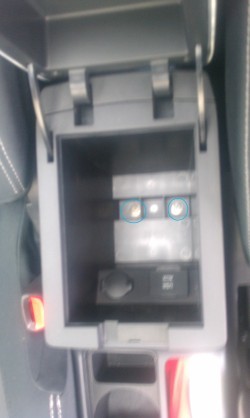
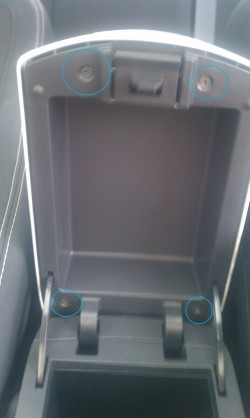
3. The center console assemply has to come out to install the Ebrake boot. there are 4 bolts to remove and a 2 wires to unplug from the electronics inside of the center console. Use a small flat head screwdriver to remove the cover for the front bolts.
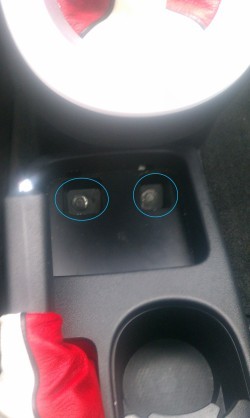
4. The other 2 bolts are inside the center console, open the arm rest and use your flathead to remove the bottem of the compartment as you did the fron and remove these bolts.
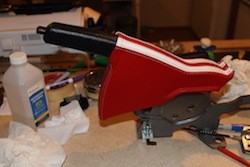
Fully remove the Ebrake handle. (2-15mms and unhook the 2 brake cables from the harness There are slots in the underside of the harness that allow the knots at the end of the cables to slip in and out). Do a test fit stretching the leather ebrake cover evenly and smoothly over the plastic housing. Tape the parts of the assembly that the ebrake boot won't cover to protect them from glue. Set the leather piece aside and clean the plastic cover with alcohol. Use spray glue to cover the plastic housing completely. Read your glue directions with regard to time and tackiness and wait till it is partially tacky. Carefully slide the leather over the stick and cover stretching and pushing as you go. A few clamps can help hold the tighter curves.
Reinstall everything in the reverse order of removal.
5. To remove the armrest lid there are four screws.
6. With this off you can slip the leather cover over it and glue it down to the rubber cover already on yours. There was no modification required here. Just make sure everything stays tucked and glued. With the console closed put the newly covered lid over it and press down to make sure it all goes on properly. Mine was a nice tight fit. Then open it up and hold pressure on the back to put the screws back on the inside of the lid.
7. All 4 door armrest use the same steps. I used a hot glue gun to hold all of the leather armrest covers in place.
Removal is easy just lift on the back of the armrest.
8. Just keep lifting here and all the clips holding it down should come free.
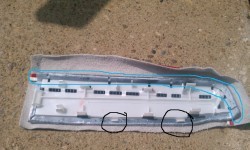
9. I did a little modifying to the covers sent and to my stock pieces to ensure a nice fit. Some of the leather covers had to be cut to allow some of the clips to go back into piece. The blue I cut all of the rubber hear from the edges . The black circles are where you will have to cut the covers to allow the clips to go back into place.
Glue the armrest on. You can use contact cement, a spray-on glue that will give you a while to do the final adjustments before it settles fully is recommended.
On the reattachment for the door armrests the front lip goes on first then just press down starting at the front and work your way back. The rest should just snap back down.
Useful tip
You have installed a product made out of genuine leather. As you know, to maintain a leather product in good condition, you should take care of it. We suggest occasionally (every 4-6 week for example) applying some leather conditioner/UV protector to keep your leather from drying up in the sun and cracking.
Redline Automotive Accessories Corp. will not be held liable for any labor, incidental or consequential damages of any kind. Proceed at your own risk.