You must be logged in to rate content!
5 minute read

95-99 240SX MANUAL TRANSMISSION INSTALLATION INSTRUCTIONS
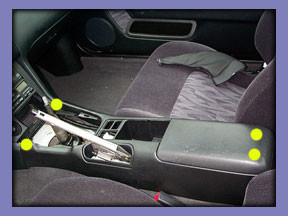
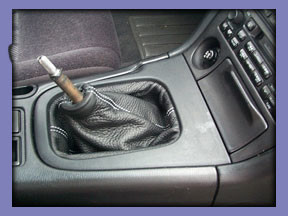
1. Remove the shifter knob. If you can't do it with bare hands, try vise grips with a towel to protect the shift knob from scratching. Remove the centre trim piece that holds the shift boot in (just pop it out). Or optionally remove the center console piece, which is held in place with four screws marked by green dots.
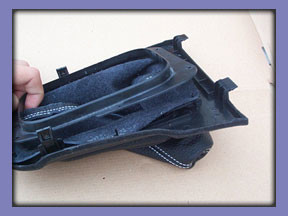
2. The shift boot is mounted to the center trim with a plastic frame. The frame is held to the center trim by 4 metal washers that sit on 4 thin plastic poles. To remove the old shifter boot, remove the 4 washers, pull the frame off and then pull off the old boot.
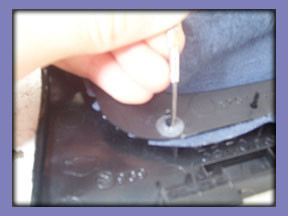
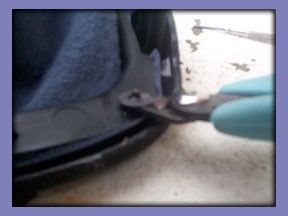
Removing the washers is a delicate operation. You don't want the plastic poles to break, therefore be very careful with applying force. The best way I've found to remove the washers is to lift them slightly with a swiss-army knife (or any other knife for that matter) and then pull them off wish pliers. Make sure to lift and pull evenly on both sides, so that the plastic pole doesn't bend - they're more prone to breaking if they're bent to either side. You can also loosen the washers buy going in with a small screwdriver and spearing it open. This will protect the plastic poles from getting deformed as you're pulling the washer.
Remove the top mounting (the metal bracket and the plastic ring) from the old boot. If you turn the old boot inside out, it's pretty obvious how to do it and it takes about 2 seconds. Pay attention to how you're doing it so that you can put it back on identically on the new boot.

3. Put the new boot on the center trim piece using the poles for alignment. Put the frame back on and push the washers back on the plastic poles. Flatten the washers for better grip like in the picture.

4. Put the top mount back on (when the boot is inside out, put the plastic ring on by pulling the leather stripes through the ring, bend the stripes around the ring and put the metal bracket back on).
5. Put the trim piece back in and re-mount the shift knob and you're done with the shifter boot!
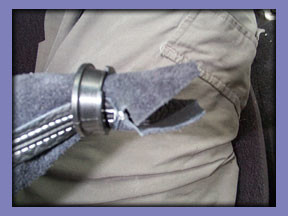
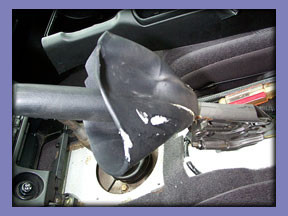
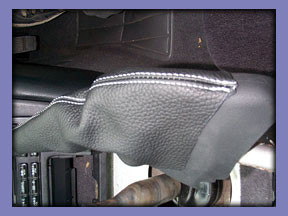
NOTE: We have changed the design of the ebrake boot to half-length. The pictures to the rigth show the old, full-length design though. The description, however, has been updated accordingly.
5. The easiest way to install the ebrake boot is to loosen the center console. There are two screws towards the back of it, and two up front on the sides. If you remove them, the console will start moving around.
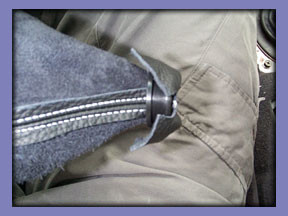
Alternatively (like on this picture) you can pull the ebrake boot OFF the handle, pull the leather onto it and slide it back on the ebrake handle.
6. If you chose the console loosening version (recommended), now that the console is loose, pull the e-brake up, pull the e-brake boot on it. Loosening the center console will allow you to grab underneath it and pull the bottom of the ebrake boot to where it should be, which would not be possible without access to the part of the ebrake which is underneath the center console. Reinstall the center console when done.
YOU'RE DONE! Congratulations!
Useful tip
You have installed a product made out of genuine leather. As you know, to maintain a leather product in good condition, you should take care of it. We suggest occasionally (every 4-6 week for example) applying some leather conditioner/UV protector to keep your leather from drying up in the sun and cracking.
Redline Automotive Accessories Corp. will not be held liable for any labor, incidental or consequential damages of any kind. Proceed at your own risk.