You must be logged in to rate content!
4 minute read

86-89 300ZX MANUAL TRANSMISSION INSTALLATION INSTRUCTIONS
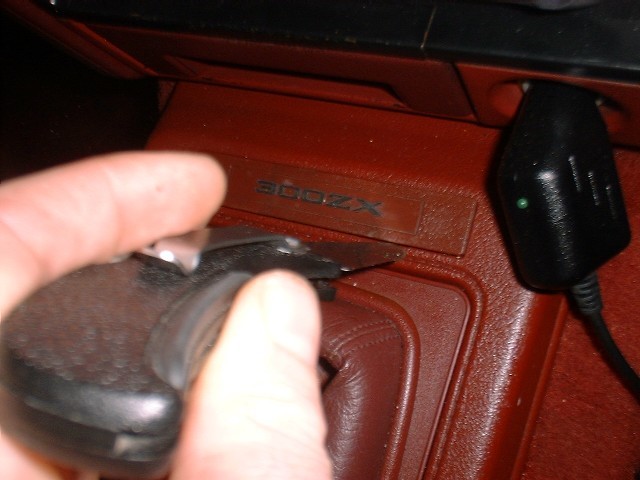
1. Unscrew shift knob. Mine came off very easily, if yours has never been off, we suggest wrapping a towel around the shift knob several times to protect the finish, then use a long pipe wrench or large vise-grips to remove it. Remove the 300ZX nameplate.
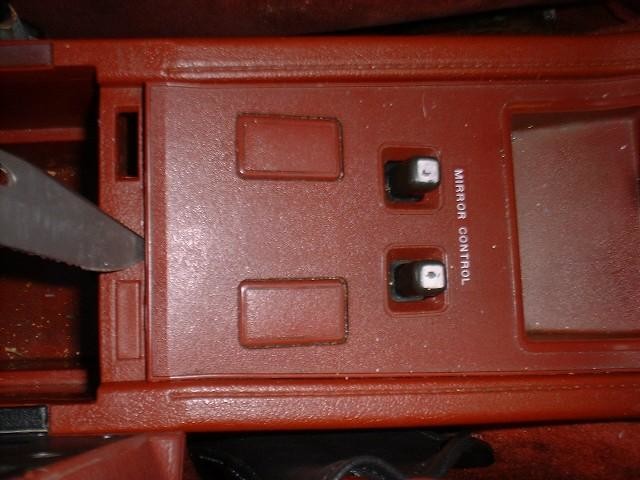
2. Remove the plastic trim piece surrounding power mirror adjustment knobs. We used a knife to remove these. Work slowly, this plastic is fragile. We suggest working your way around the trim pieces gradually instead of trying to remove the pieces in one shot. Place trim pieces to the side.
Take your time removing the plastic trim pieces, they are fragile, and will crack easily if you're not careful!.
3. Remove the carpet in the bottom of the center console. This is held in with double-sided tape. Once the carpet and trim pieces are removed, you should see six screws. Remove these screws, and gently lift center console over the shifter.
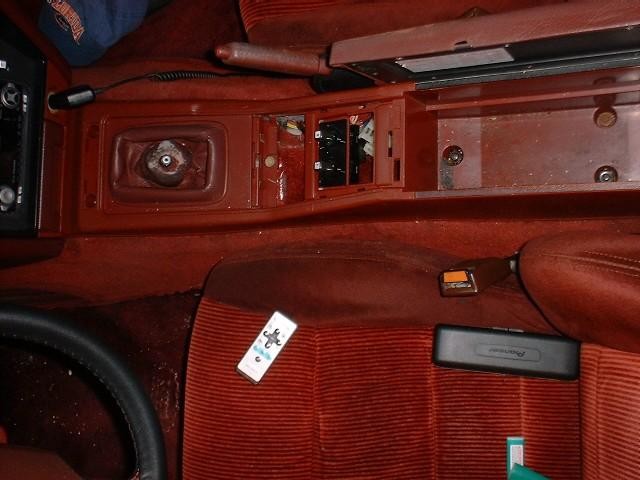
4. Lay the console on its side and disconnect the wiring harness(es). You should now be able to remove the console from the vehicle
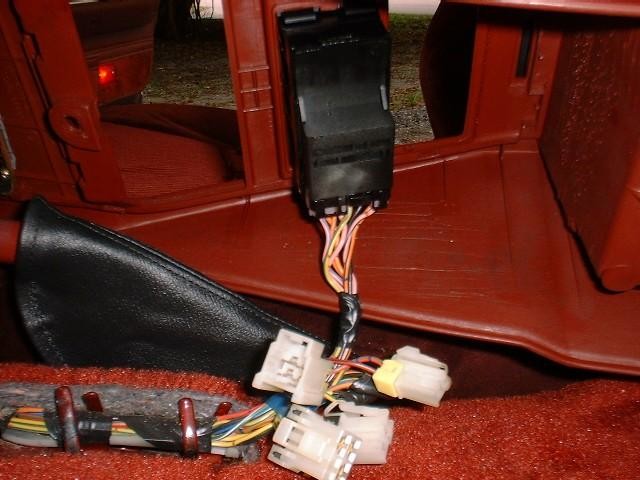
5. Remove the shift boot trim piece from the body of the console by pushing on the plastic clips that hold it in place. Pry off the clips holding shift boot (be careful, they like to fly), and remove the four screws holding the metal clamps in place. Remove the old boot.
6. Emergency brake boot: Unsnap brake boot and remove. Snap is located at the bottom of the boot between passenger seat and console.
Installation of the new boots
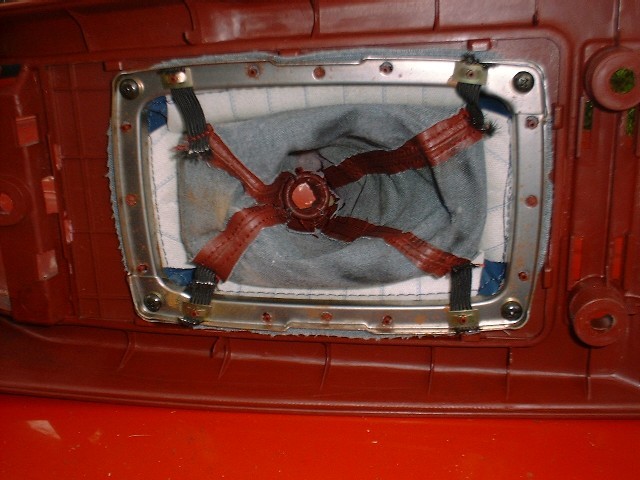
The shifter boot is rectangular, having two long sides, and two short sides. The short sides should be placed facing the front and rear of the shifter plate. Starting from any corner, work your way around the boot, slipping the pegs into the holes. Once you have placed all the pegs in the holes, align the clamps over the holes. The fit will be better if you keep the fabric stiffener out from under the clamps. Place the screws in first, and tighten about halfway. Place the clamps back on the original pegs (see picture), and tighten screws all the way. Tuck flaps at the top of the boot inside.
The metal clips holding the clamps on the bottom of the shift boot trim like to take off and bounce when removed. Before tightening screws after installation of the new shift boot, double check to be sure the fabric stiffener is not caught under the metal clamps. This will provide a better fit, with no wrinkles.
The ebrake boot is extremely easy. Just slip the new boot over the brake handle and attach the snap.
Re-assembly
This one is easy. Use reverse order and you're done.
Useful tip
You have installed a product made out of genuine leather. As you know, to maintain a leather product in good condition, you should take care of it. We suggest occasionally (every 4-6 week for example) applying some leather conditioner/UV protector to keep your leather from drying up in the sun and cracking.
Redline Automotive Accessories Corp. will not be held liable for any labor, incidental or consequential damages of any kind. Proceed at your own risk.