You must be logged in to rate content!
7 minute read

NISSAN 370Z SHIFT BOOT/E-BRAKE INSTALLATION INSTRUCTIONS
1. Reach underneath the center console from the inside and pull upwards to remove the center console.
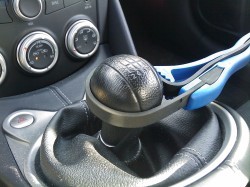
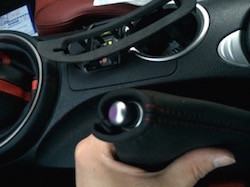
2. Once you lift it up, you can see the shaft. You need to make sure not to twist this shaft when you are trying to remove the shift knob
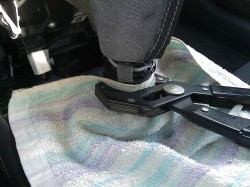
3. Wrap a towel around the shaft and clamp down on it with a vice grip. Have someone hold this while you unscrew the shift knob
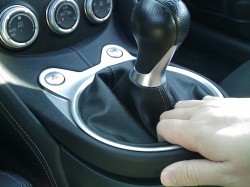
4. Use a strap wrench to unscrew the shift knob counter clockwise to loosen it. It is on there very tight.
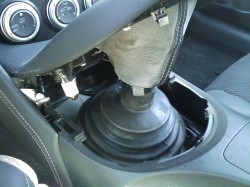
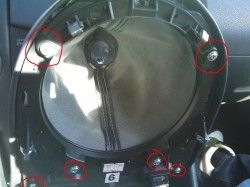
5. Once the knob has been removed you can lift the center console up and see the 6 screws you will need to remove to get to the boot. These screws can be removed now or you can unplug the wire that goes to your hazard button and S-mode button.
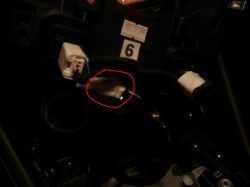
6. This is the wire that goes to your center console for the 2 buttons. If you disconnect this, you can take the whole center console out and make the rest of the install job much easier.
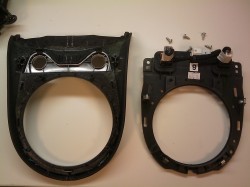
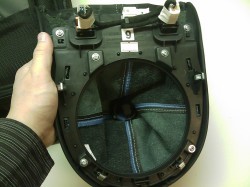
7. Once you’ve removed the 6 screws you can peel the two halves apart and see that the shift boot is held in place by 10 small pegs and 4 larger mounting posts/screw holes. Remove the shift boot from these.
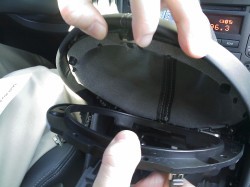
8.Your two halves should look like this once you’ve separated them and removed the shift boot.
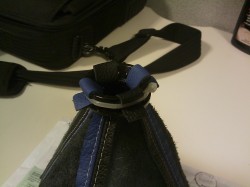
9. Turn your shift boot inside out to see the collar that the boot is attached to. This collar keeps the top of the boot in place. 4 straps from the shift boot are held down by a zip tie that goes all the way around the collar. Remember the orientation of the collar, then cut the zip tie to remove the collar.
10. Turn your new shift boot inside out and attach the 4 straps to the collar in the same way. Make sure the straps go in the wide crevices of the collar. Wrap a new zip tie around the whole thing to secure it.
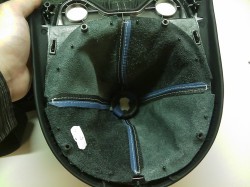
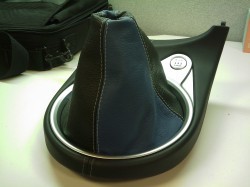
11. Put the new shift boot through the pegs and mounting holes as shown. Don't worry if the holes don't match your pegs exactly - just punch new holes where needed.
12. Put the 6 screws back on.
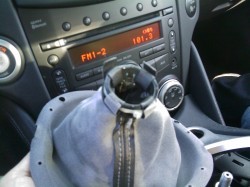
13. Your new shift boot is installed! Just remember to re-connect the wire for the hazard lights button and S-mode button before putting the center console back in your car. You do not have to tighten the shift knob as much if you don’t want to.
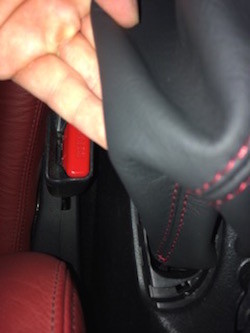
14. Remove the rubber surround at the base of the stock e-brake boot. There are several little rubber tabs that can be pried out with friction from your finger, or use a plastic trim tool to gently separate it from the console.
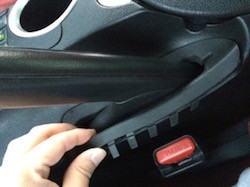
15. Remove the entire rubber base by pulling up. Note that a few of the rubber tabs are of a different type and appear broken Ñ I assume this piece was affixed to pegs or something of the sort, but I canÕt be certain. There is a workaround later in the directions. The piece reseats fine, and it doesnÕt affect the functionality of the brake.
16. Slide the new boot over the e-brake handle, paying careful attention the top area. As you slide it on, the fit will be quite tight around the top. Massage the boot down, alternating sides and twisting the boot gently back and forth.
17. Removal of the handle isnÕt advised since it is securely attached by a ton of Locktite. This method is safer.

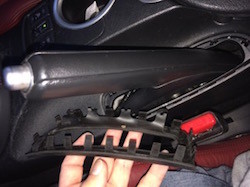
18. This is the probably the hardest part of the installation: slide the rubber piece over the handle and back into place. Pay attention to the tabs and make sure they are put into their holes. The broken rubber tabs on the other side are less important, since the rubber piece still sits almost flush, but if it bothers you, just place a small square of 3M industrial strength velcro on the tab (and put the other side where the tab would ÒslideÓ in). This will provide a snug fit.
19. You are done!
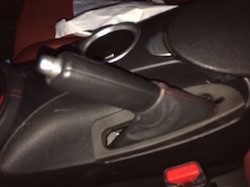
ENJOY YOUR NEW LEATHER BOOTS!
Useful tip
You have installed a product made out of genuine leather. As you know, to maintain a leather product in good condition, you should take care of it. We suggest occasionally (every 4-6 week for example) applying some leather conditioner/UV protector to keep your leather from drying up in the sun and cracking.
Redline Automotive Accessories Corp. will not be held liable for any labor, incidental or consequential damages of any kind. Proceed at your own risk.