You must be logged in to rate content!
11 minute read
Stillen 25-row Oil Cooler
Compliments of MightyBobo @ www.the370z.com
11-10-2009
NOTE: These instructions are OLD! It's very likely the headache I went through to install this, has been solved. Z1 Motorsports makes a very solid kit without requiring relocation of the power steering cooler, but I'd be willing to bet that Stillen has fixed that as well.
OK, I'm going to get straight to the point: Stillens oil cooler install instructions, for the 370Z at least, suck right now. They know this, and Im pretty sure after tonight it all came to light quickly as I had to give them a ring-a-ding and have them mock up their setup to find there indeed is some issues.
DISCLAIMER:
There were, as others have found, parts left over in the kit! I have no idea where they were supposed to go! Use my specific method at your own risk, until Stillen comes out with a better install!
Items you will need that AREN'T MENTIONED on the Stillen Install Sheet!
Medium/Large Crescent Wrench (or wrenches big enough to handle the big Setrab AN fittings up top. Its probably around 3/4th of an inch at least)
32mm Socket - this is used for installing the "sleeve" that holds the new sandwich plate on in between the filter/engine, and giving you a new mount for your oil filter outside the sandwich
A Dremel or other way to cut metal
Drill w/ bit to drill into metal - ~1/4". I didn't measure specifically!
1 Bottle of Castrol Syn. Dextron VI ATF - this is your power steering fluid!
Patience
So, I'll skip over some stuff that has been covered in other DIY's, like pulling the front bumper off.
Once that is done, you must remove the black plastic shroud underneath the car also, which hides the oil filter/pan and whatnot.
Power Steering Cooler
First things first, the instructions for re-running the power steering cooler lines, I found to be horribly vague. When thinking about it though, it became fairly straight forward.
Tools needed:
10MM socket
Plyers/something to pull rubber
Something to cut/trim the new rubber hose with.
1) Take the 2 bolts holding the power steering cooler on (10MM). SAVE THESE.
2) Messy part. You must remove the 2 rubber lines CLOSEST to the power steering cooler, both off of the cooler itself, and off of the metal fittings they are connected to. Easier said than done - expect to tussle with this a bit. I used some pliers and stayed as close to the metal fittings as possible, while twisting/pulling. Have something ready to catch the old ATF!
3) You should now have a power steering cooler with 2 brackets on it. You now need to use the 10MM socket to take the bolts out of the center of the bracket. I then just used my plyers to grab onto the end closest to the center on the short piece, and just pried it off (it was just stuck). It came off, and you're left with 2 bracket pieces, with 2 rubber pieces also, like so:

4) You will then want to take at least 2 of the rubber pieces from the brackets (I just used 2 from the same one...) for the new mount setup. You put the rubber pieces inside the new clamps.
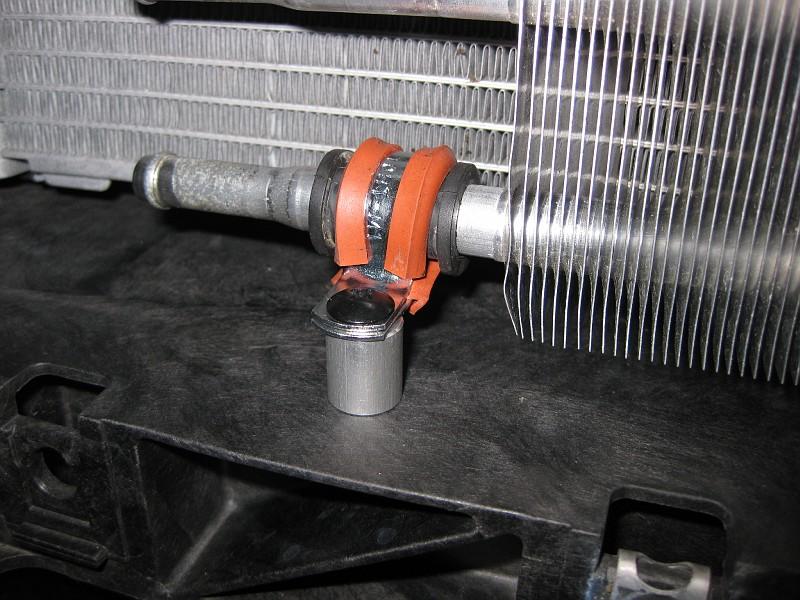
5) Now, I used the picture Stillen provided to line this up to the best of my ability. You first need to realize, you'll be using at least one of those metal spacers, and here is where that little black screw is that threw some people off. Also, I took the one bolt used to hold the bracket together around the power steering cooler, and one of the NEW nuts Stillen provided. First, take the black screw and the metal spacer. I recommend drilling a VERY small pilot hole for this, but heres how it goes:
Then, you need to drill a hole into your vertical post. There is a bracket already there - I just drilled a hole in the lowest "dimple" (you'll know what I mean when you look at it) and it lined up perfectly. You then want to take that smaller bolt from the bracket, and new nut, and mount the OTHER mount up here on the vertical post in the center (I did NOT use the other spacer - that long bolt Stillen provided didnt even work with their own nuts!):
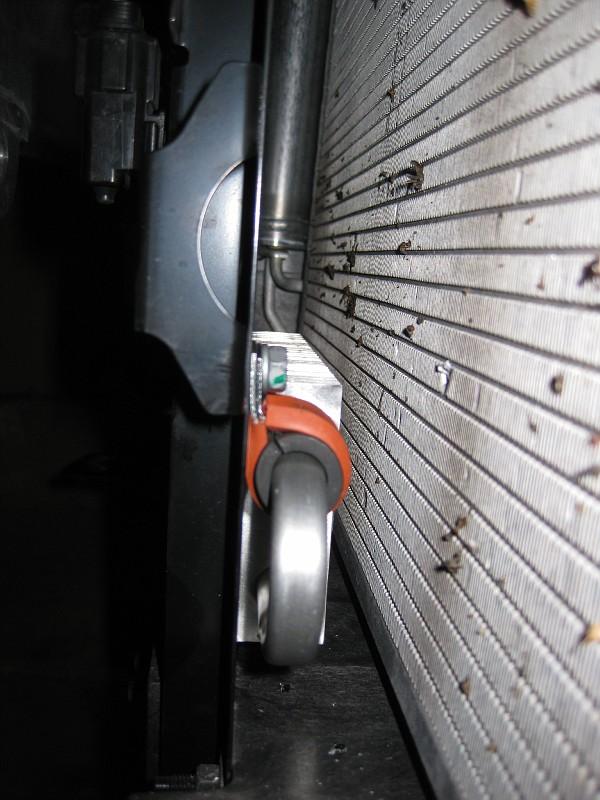
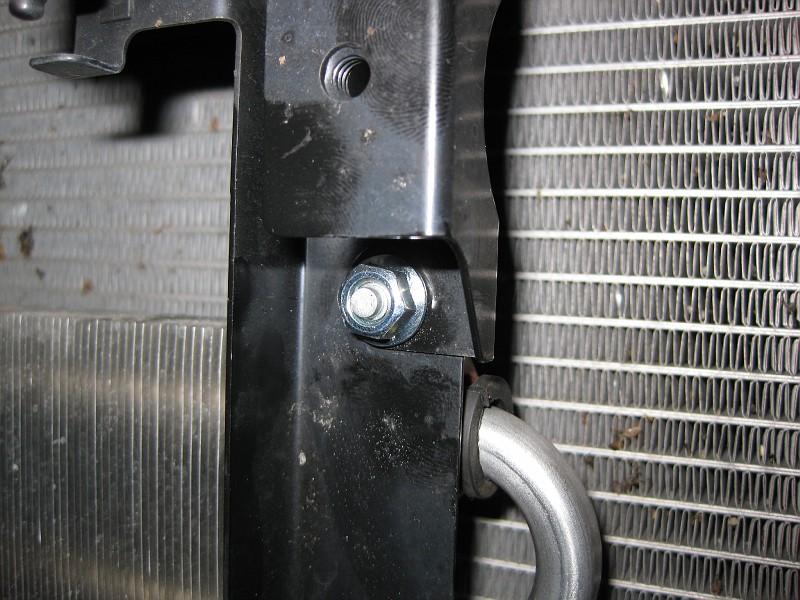
You should now have the power steering cooler secured slightly farther to the right, and further back from its original position.
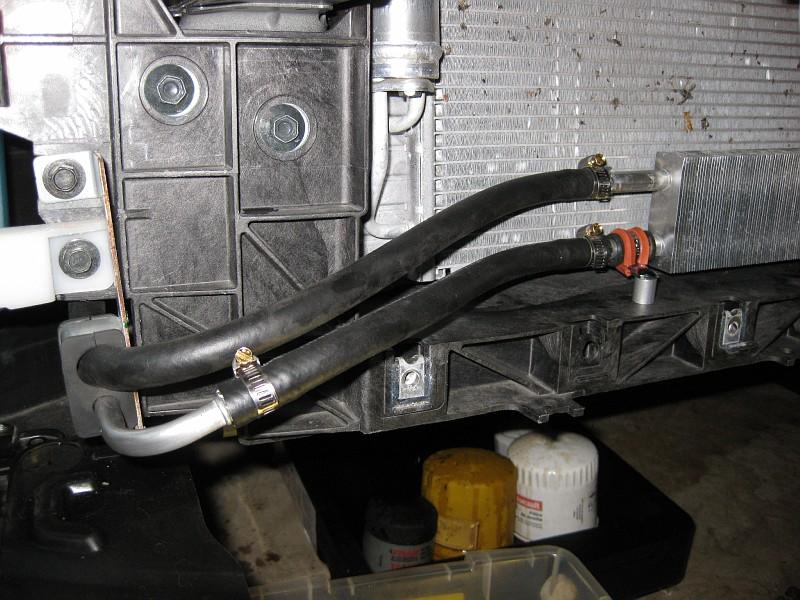
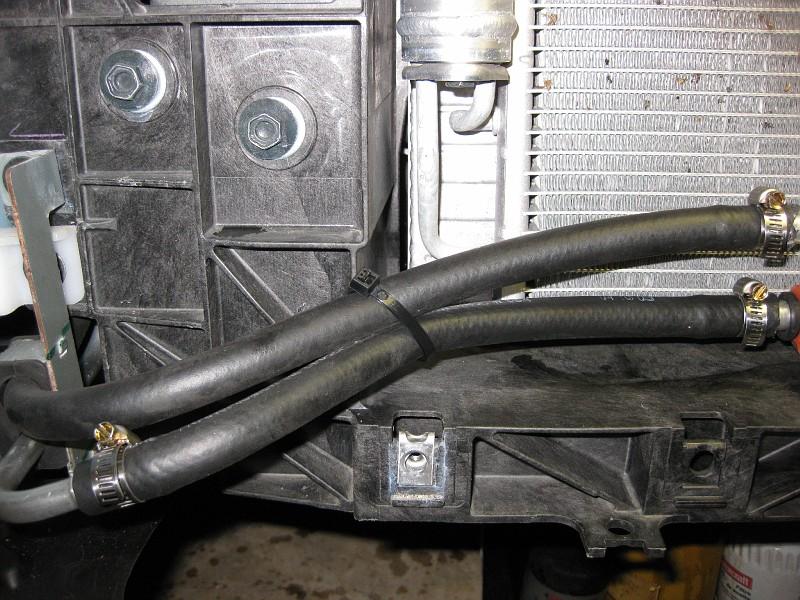
6) You now need to finish the cooler up with some new hoses. The old hose that went through the bracket should slide right out. You then want to thread the new one through there, and put the FAR end on first (you know, that one that cut the **** out of your hand when you were trying to pry it off, way up by the washer fluid...), using the new clamps provided. I STRONGLY recommend "pre-lubing" the tube with a little ATF to let it slide on easier! That one took some effort to push on, and I finally just gave up when it was maybe 3/4ths of the way on. Tighten that bracket down, and then "test run" the hose to the power steering cooler, and cut it off at the right length. Put it on, clamp it off. Then, run repeat the same process for the final run of tubing. When I finished it, it looked as such:
7) I then used one of their zip ties and a small drill bit to put a hole in the plastic there, to pull the lines closer in. Space is at a premium here, as I found later.

8) That's it - you've relocated your power steering cooler.
Oil Cooler
Tools needed:
Dremel to trim your cooler
Crescent wrench (or some good size wrenches)
32MM socket
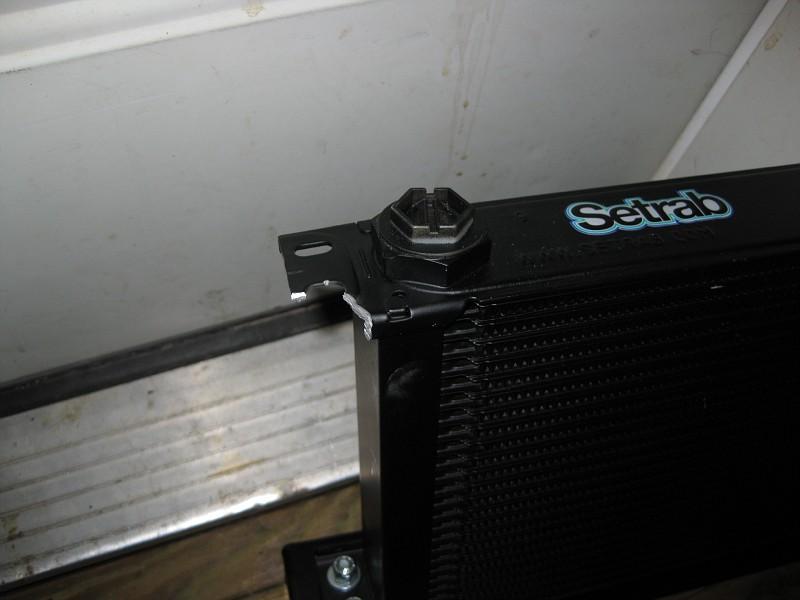
1) So heres the big hang up that confused me, as I figured I was just doing something wrong - the big cooler in the new kit Stillen made, was never mocked up in their facility. Silly mistake on their part, but props to them for immediately mocking it up and confirming what I found to be the case: its just too damn big lol. You need to trim up one corner of it, or it simply wont fit properly. Do it as such:
2) After here, its FAIRLY straight forward, but I'll provide some pictures. Just to make sure its known - you do NOT remove the cooler from the bracket its already attached to!
3) Annoyances as I tried to put the damn thing in:
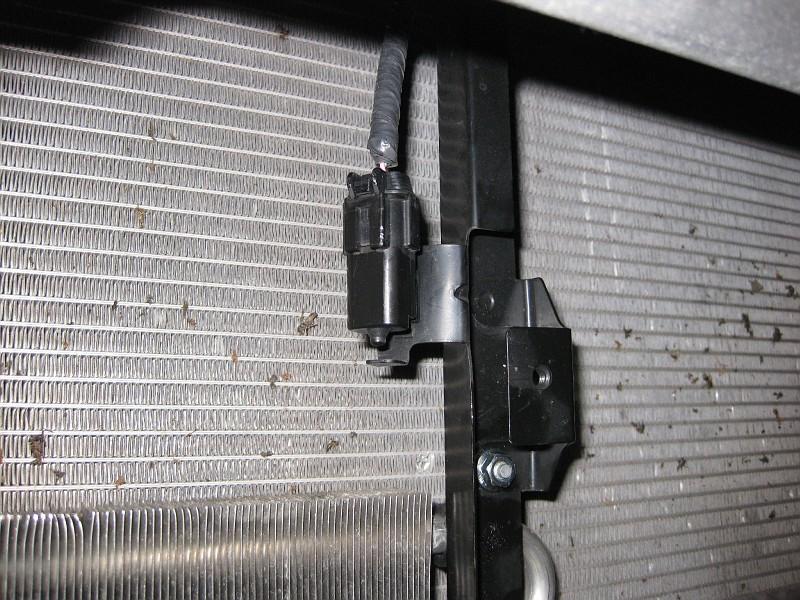
The bracket below, I found had to be pulled tword the front of the car, or the big AN fittings at the top of the cooler simply kept hitting it. Even then, the fit was tight.
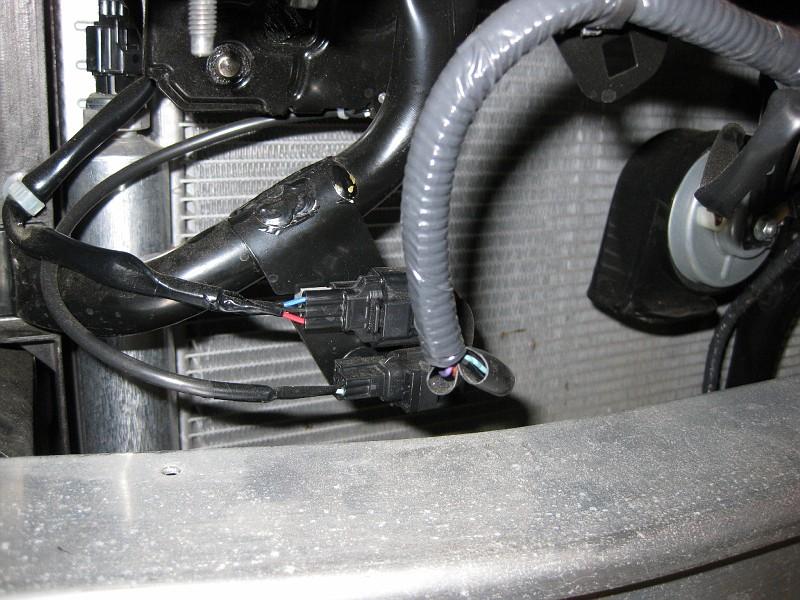
This bracket had to be bent BACK for me. I THINK its the outside temperature sensor, because I noticed on my drive back home, my temp was around 139 degrees lol. It eventually went to "---", so its probably fried haha. If this is the case, take this as forewarning - you may want to relocate this!
4) How I ran my oil lines - I found this to be very tricky, and I probably did it ***-backwards somehow. I actually put the longer tube on the LEFT, and the shorter, on the right. This is how it looked in the end:
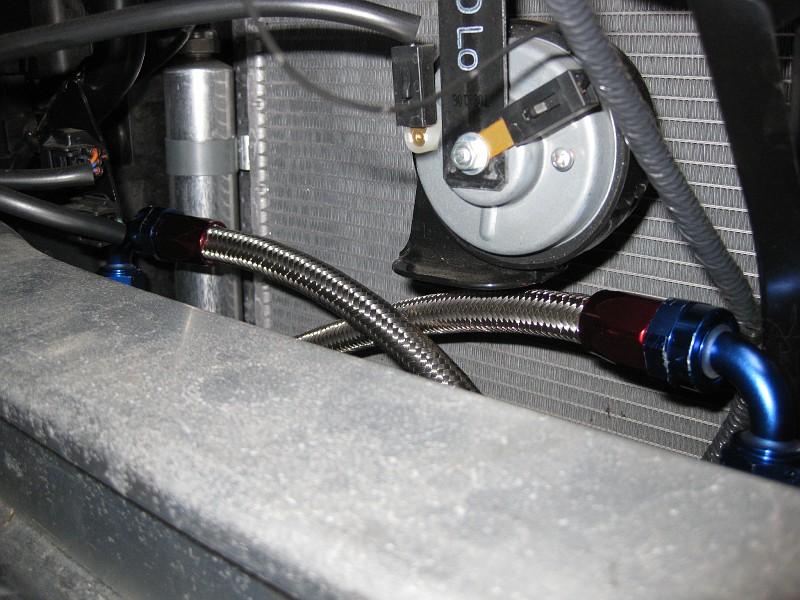
The left tube would actually do a 180 and come back around, and run out the left side, whereas the right one would just come down and meet up with the other one, running parallel.
This fit ended up being EXTREMELY tight, and I hope Stillen tells me an easier way to run these, that I simply was not seeing.
5) I then drilled 2 holes in the 2 shrouds you're supposed to (look in Modshacks DIY), however I found that the shroud that simply slides on (versus using the pushpins - again, you'll know which one when you take it out) probably just needed a whole chunk of it out.
6) I'd recommend test running the lines a few times - make sure to hook up the ends going to the sandwich plate first (IMHO), and run the lines to the front - then work on hooking them up to the cooler and sliding the cooler into place. hopefully, everything fits.
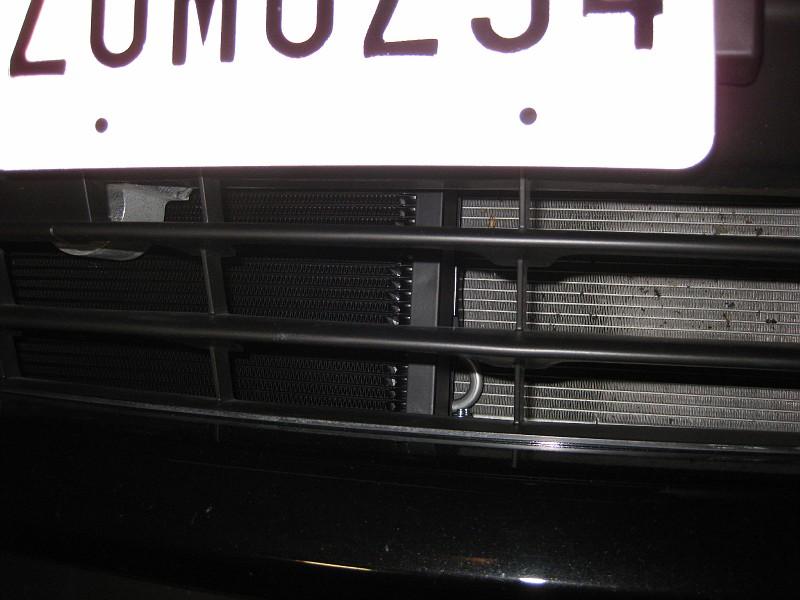
7) Voila:
Finishing Touches
Of course, you aren't QUITE done yet. First, check all your fittings to ensure they are all tight! Don't forget your oil filter/plug, and put in 7.5q of new oil. I will double check and make sure that is enough, but I checked it twice and my level was good before I drove home.
At this point, your car should be MECHANICALLY good to go, and its ready to fire it up! I'd recommend letting it run for a good bit - look for oil leaks and power steering leaks. After a good bit of running and if all is well, shut it off and begin body reassembly.
Try (hard) to remember how you pulled everything out. I know I forgot some **** as far as some of the plastic shrouds on the bottom, but nothing MAJOR. Don't forget to put some of your ATF in to refill your power steering system. Its going to take at least 2 times to refill - just top it off, and after starting the car, check it again. When you take it for a good drive, make liberal left/right movements as much as you can, and let it bleed out.
And thats that - I think I remembered most everything that really bugged me with their install. Josh, if you see this, please feel free to toss your 2 cents in and correct any errors I may have made!
According to Stillen when I called them, no it doesn't. Since its smaller, it doesn't get as high and hit the brackets with the AN fittings, or hit the bumper support with the cooler itself. But the instructions for remounting the power steering cooler is still pretty vague lol. Actually, the instructions sent to me are EXACTLY the same as the ones for the smaller kit.
Nismo cooler is on the driver-side, so I dont believe it requires any modification. Moving the PS cooler is part of the generic Stillen instructions, since they install it on the passenger side for all their kits.
12-21-2009
No, but good point. I'll give a quick summary.
So, I took the kit out for my track day this November. Max ambient temp was in the high 60's, low 70's. I dont believe my oil ever peaked over 235-ish. It did a fantastic job keeping everything nice and cool. HOWEVER (there's always one of those, right?), its worthy to note - I recommend getting a thermostatic plate (I didn't have the cash for one immediately), because it can take a while to get warm, and furthermore, under normal daily driving, it really wont even get very warm at ALL. If I could recommend anything to Stillen, I'd recommend at least making an option for a thermostatic plate.
Other than the iffy instructions, the kit is great and does its intended job very well.