You must be logged in to rate content!
5 minute read

Z1 Intake Plenum and Spark Plug Swap [Picture Heavy]
Compliments of Mozen @ www.the370z.com
2-22-2014
Ok all i know most of this is rather basic but i thought id create a DIY anyways.
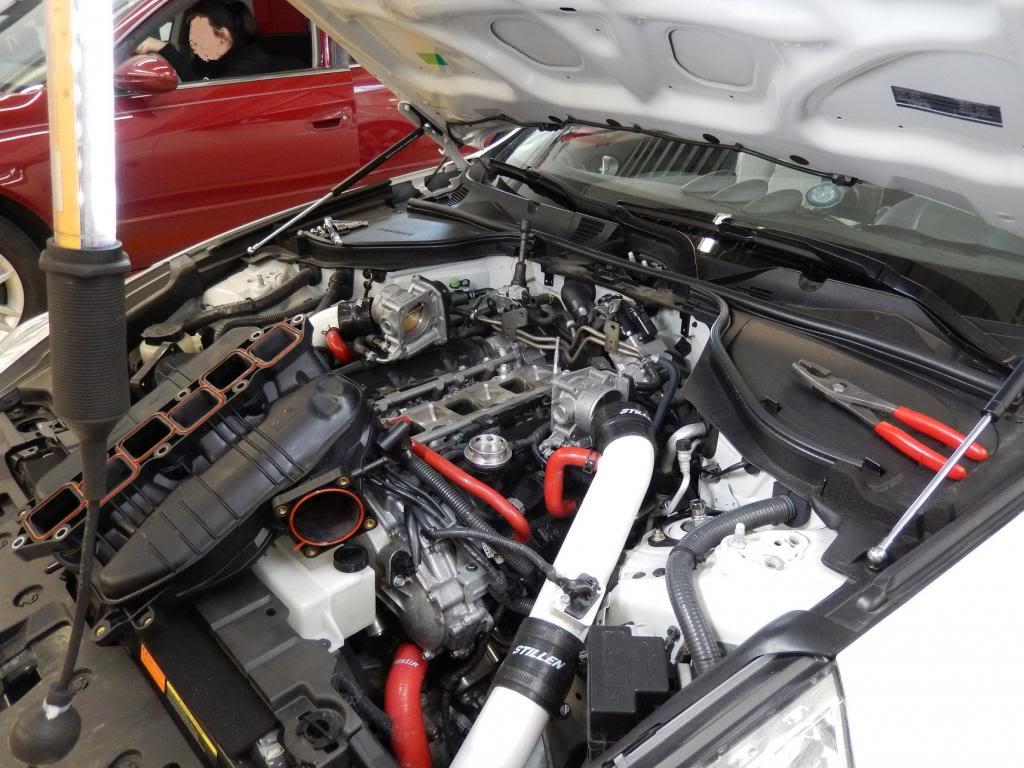
First off you will need to remove the brace bar (Yellow boxes) and then the Cover (blue circles)
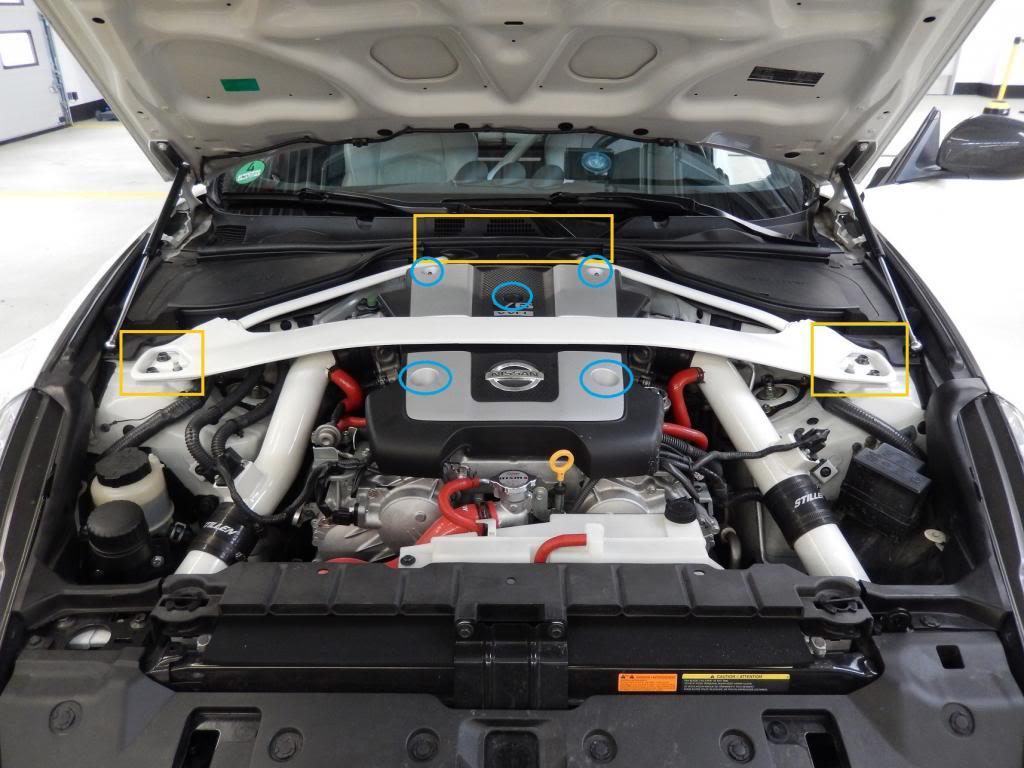
Next you will need to remove the connectors off the back side of the plenum, there should be 4 small bolts back there. Then remove the sensor on the upper right corner. After that is done pull and remove all the hoses on the back and the two in the front. (Light blue circles)
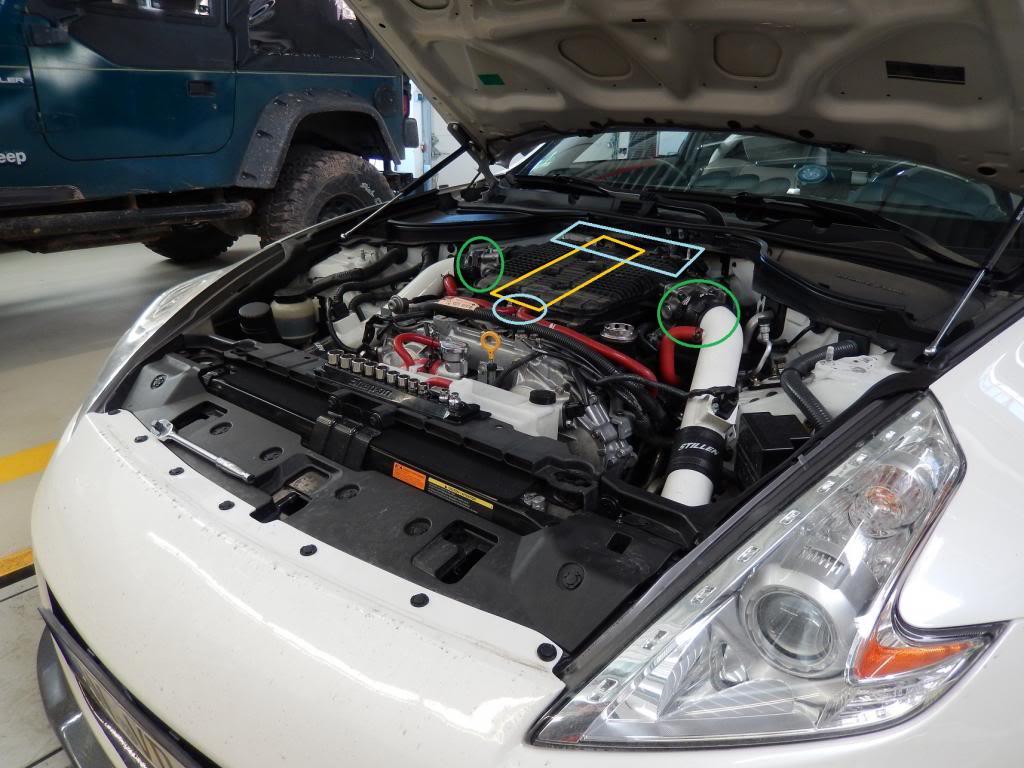
After that you will need to remove the main bolts that hold the plenum down. (yellow box)
Then you will need to disconnect your upper intake from the throttle bodies. (green circle)
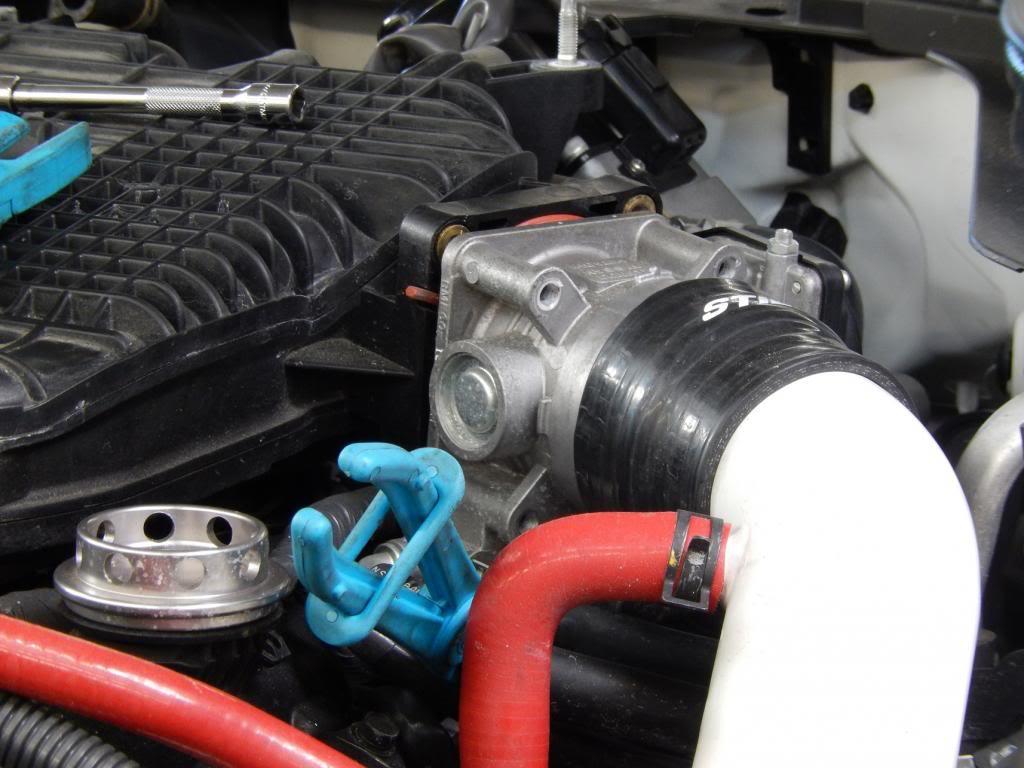
Once all that is done you need to clamp the two coolant lines on each throttle body and then remove the 4 bolts and 4 washers that hold the throttle bodies on to the plenum.
Once both throttle bodies are disconnected, remove the clamped lines and take the throttle bodies out to clean them. You will have some buildup and since they are off now you might as well clean them up.
Now that everything is disconnected remove your plenum and set it next to the new one. You will need to transfer over both throttle body gaskets and the primary gasket on the bottom. You will also need an E6 socket to move over both upper studs. Once this is all complete you can move onto the spark plugs.
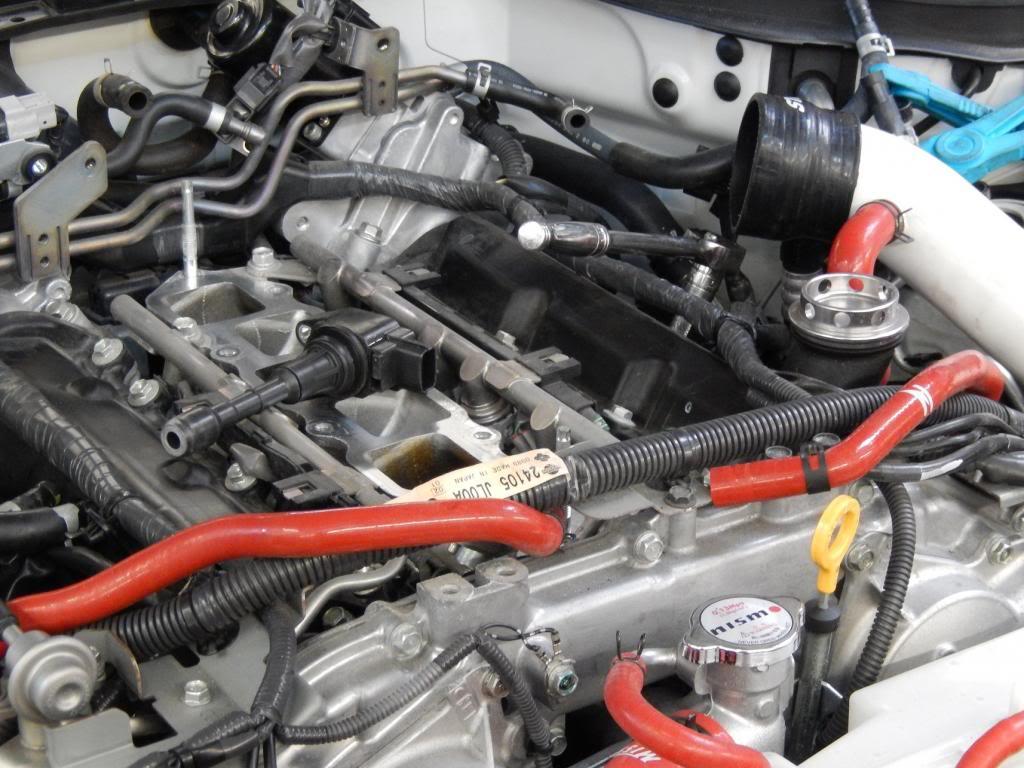
With the throttle bodies and plenum out of the way, changing your spark plugs is a breeze. You can see one of the coil packs on the engine and my wrench pulling another out. Each coil pack is held down by a small bolt. Remove the bolt, disconnect the electrical connector and pull the coil pack out of the way. Then take a spark plug socket on an extension and remove the spark plugs. Reverse the order to put the new ones in and Tq your new spark plugs to 25nm to call it a day. . NOTE. ONLY DO ONE AT A TIME TO AVOID MIXING THINGS UP!!
Once spark plugs are all done, reconnect the coolant lines to your now clean throttle bodies and set them on the sides out of the way.
Put the new Plenum on the engine and re-install the 4 bolts on each throttle body to secure them back to it. Then install the 6 primary bolts and 2 nuts to hold the plenum down to the engine.
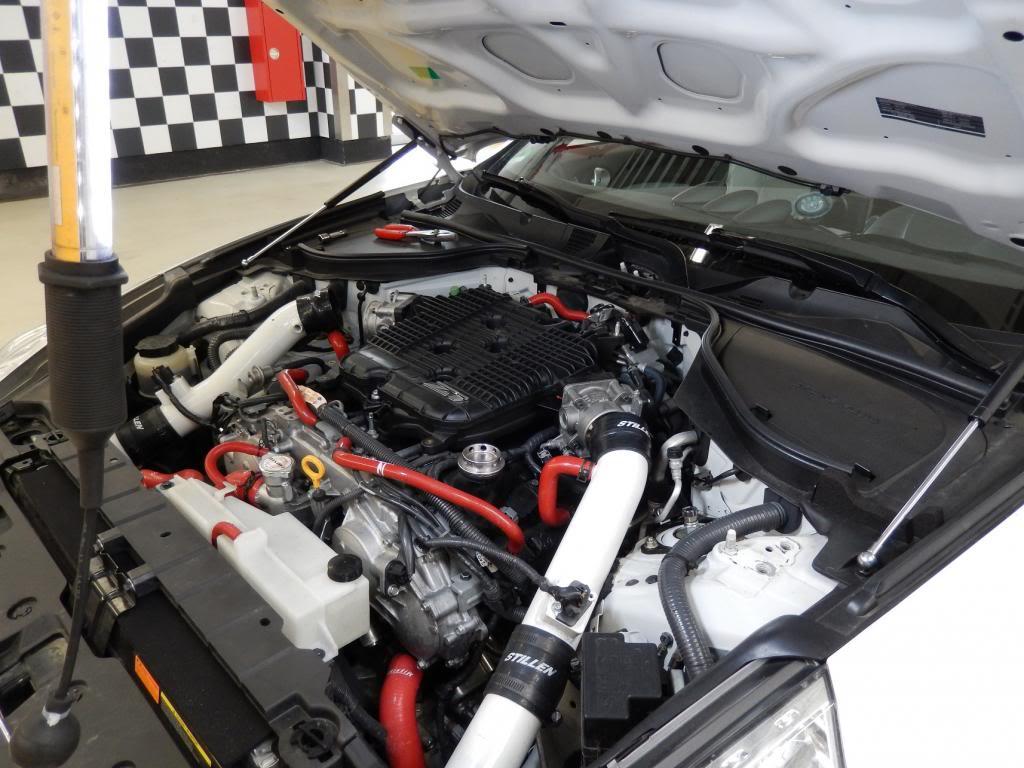
Once the throttle bodies and plenum are secure you need to reattach the lines on the back and front and re-secure the intakes to the throttle bodies.
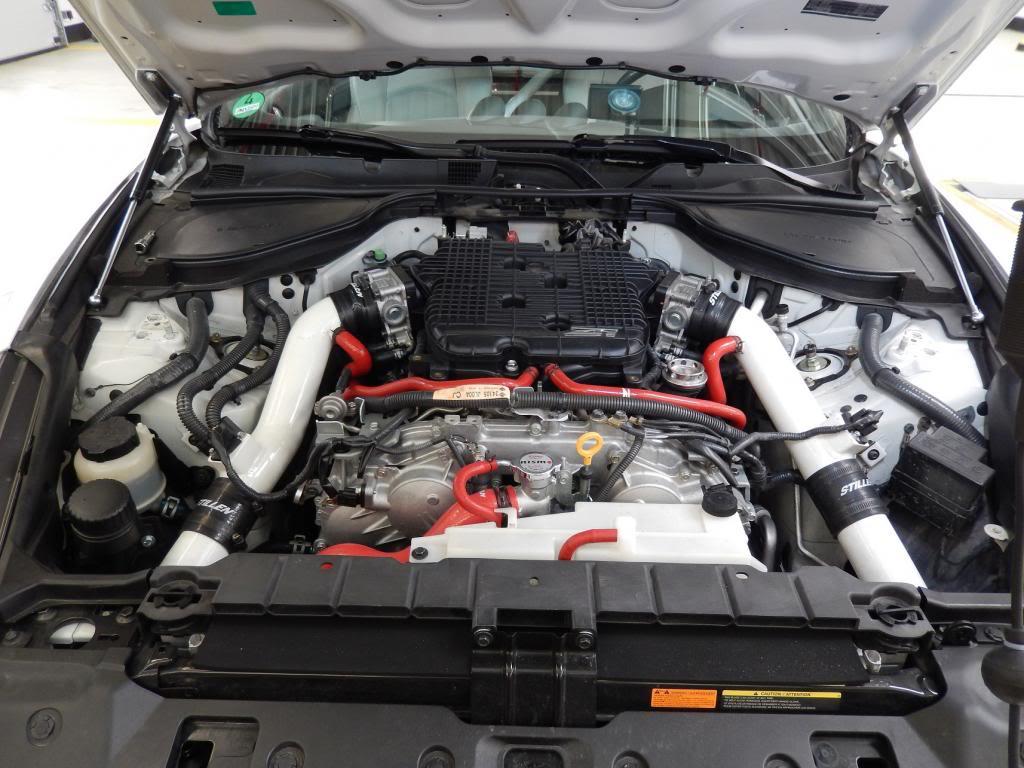
Once that is done put the strut bar and engine cover back on and you are done!
If you liked this DIY toss me some rep or a comment on my profile page! If you have questions hit me up in a PM and ill do my best to answer promptly!
3-1-2014
Sorry all, i should have chimed in sooner on this. All in all i wasnt sure i wanted to review it yet. When i got it i was rather dissapointed in the quality. 2/3ds of the sanding or porting done was rather rough and i ended up grabing some light sandpaper and smoothing it all down in the end. Whoever did the work also made a mistake and in the core i got there was a dollop of resin where they had sanded through a wall and needed to repair...which wouldent have bothered me if whoever did it had bothered to sand it all back down smooth. As it was it took about an hour to smooth all the rough spots out and clean it up a bit.
That all said its been on the car for some time now and ive logged just over 500 miles with a tune and love it. It is a gain although how much im not sure since my tunes are Etunes through Dynotronics.
Its hard to see in the picture below but on the left side where the throttle body meets the manifold there is a part that has a rough look. Its where the resin is. I can take a closer picture if needed to show it.

Pictures are good!
Posted by Diggymart on 3/19/20 @ 3:59:21 PM