- Glue (Industrial Spray Glue
- Super Glue
- Hot Glue Gun
- #2 Phillips Screwdriver
- Small flat screwdriver
You must be logged in to rate content!
7 minute read

03-08 TOYOTA MATRIX/PONTIAC VIBE INSTALLATION INSTRUCTIONS
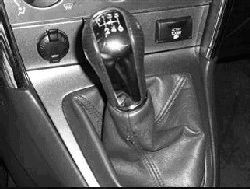
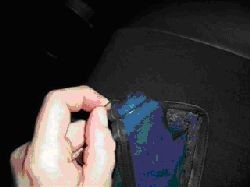
Start by removing your shift knob. It simply unscrews.
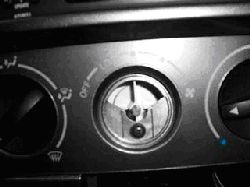
2. Remove the center climate control knob (Fan Speed) by grasping and pulling out.
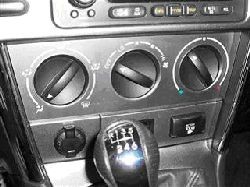
3. Remove the exposed screw beneath the Fan Speed knob with a #2 Phillips screwdriver.
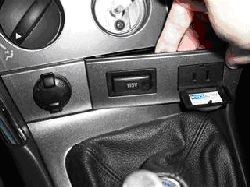
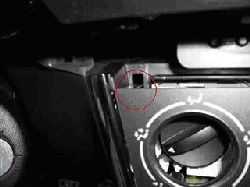
4. Next, remove the power outlet panel (if so equipped). Open the 115V cover on the outlet and give it a little tug – the panel should come loose on the right-hand side. Be careful not to break the door off!
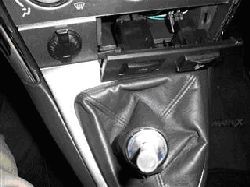
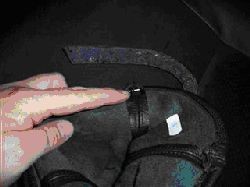
5. On the left-hand side there is a bigger tab and can be removed by getting your fingers behind the power outlet side and pushing from behind. Here is a close-up.
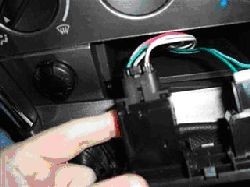
6. Remove the cables leading to the power outlet and the switch by pressing the tabs on the top of the connectors and pulling strait out. Set the power outlet panel aside.
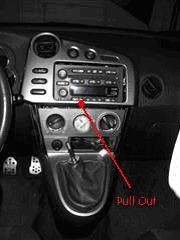
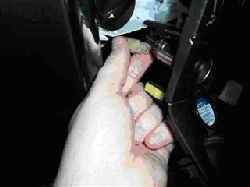
7. Dislodge the upper console by pulling out on the bottom of it. There is no need to completely remove this piece, just dislodge it enough so that the bottom is completely unclipped as in the picture. Remove the chrome trim pieces from either side of the console by pulling directly out, they should come out very easily.
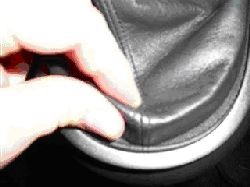
8. Grasp the edge shift boot with your fingers and pull up firmly. This will dislodge the shifter base surround so that you can remove it. After pulling up use your fingers from underneath to help unclip the rest of the shifter base surround.
9. The shifter surround is part of the climate controls. Carefully remove the shifter base surround and the climate control trim. There are two large clips at the top that need to be unclipped; you may find it easiest to insert a small flat screwdriver to “lift” the clips.

10. Now pull the climate control trim/shifter base out and remove the wires connected to the cigar lighter socket.
11. The trim piece should now be free and can be removed for swapping the shift boot.
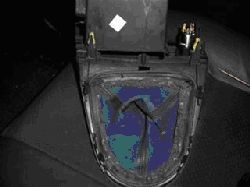
12. The OEM shift boot is retained by a series of clips around the underside of the shifter base. Just pull the shift boot free of the clips to remove.

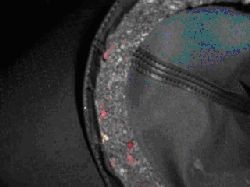
13. Now that the shift boot is removed you need to do some surgery on it to remove the molding from the inside and transplant into the new boot. The material should pull out without cutting, but if needed use an X-Acto knife to separate it from the OEM boot material without cutting the original boot.
14. Next remove the Chrome Trim from the boot top by turning the boot inside-out and removing the wire that secures it.
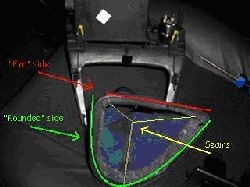
15. Remove the base wire from the OEM shift boot and insert it into the RedlineGoods shift boot. Orientation is key here because one of the three panels is a little smaller than the others. The smaller panel goes along the “flat” side. The wire is moved out of the original boot by cutting a small hole near one of the seams and working the wire out that hole. You move the wire inside the boot base by “scrunching” it up and moving it within the boot until it’s all the way out. Installing the wire into the new boot is just as easy. Since the Redline shift boot is made of premium leather it stretches easily – just take your time and make sure you don’t poke the wire through the leather when nearing the seams. In the end you should have a seam at the edge of each corner of the “flat” side and one in the middle of the “rounded” side.
16. Important: Test fit the boot into the shifter base to make sure the orientation is correct before going on, once you glue the shifter molding (next step) in it will be too late to fix!
17. Once the wire is in the shift boot and oriented correctly dry-fit the boot molding into the new boot. Trim the molding in order to get the best fit. Use a quality glue to adhere the molding to the base of the boot. Apply glue to the mating surfaces only. Allow the glue to dry enough to be handled before re-installing see the glue bottle’s directions for specific drying times.
18. To affix the chrome trim to the top of the shift boot force the top (shift knob part) of the RedlineGoods boot inside itself (folding the top inside the boot) and stick the chrome plug into it. Roll the boot into itself until the opening is big enough to accept the chrome plug firmly. Then from the inside of the boot attach the retaining wire to keep the chrome trim in place.
Reinstall in the reversed order of installation.
ENJOY YOUR NEW LEATHER BOOTS!
Useful tip
You have installed a product made out of genuine leather. As you know, to maintain a leather product in good condition, you should take care of it. We suggest occasionally (every 4-6 week for example) applying some leather conditioner/UV protector to keep your leather from drying up in the sun and cracking.
Redline Automotive Accessories Corp. will not be held liable for any labor, incidental or consequential damages of any kind. Proceed at your own risk.
Cool
Posted by Diggymart on 7/30/20 @ 11:51:12 AM