You must be logged in to rate content!
13 minute read
981 Steering Wheel Replacement DIY
Compliments of mcomet @ www.planet-9.com
2-13-2015
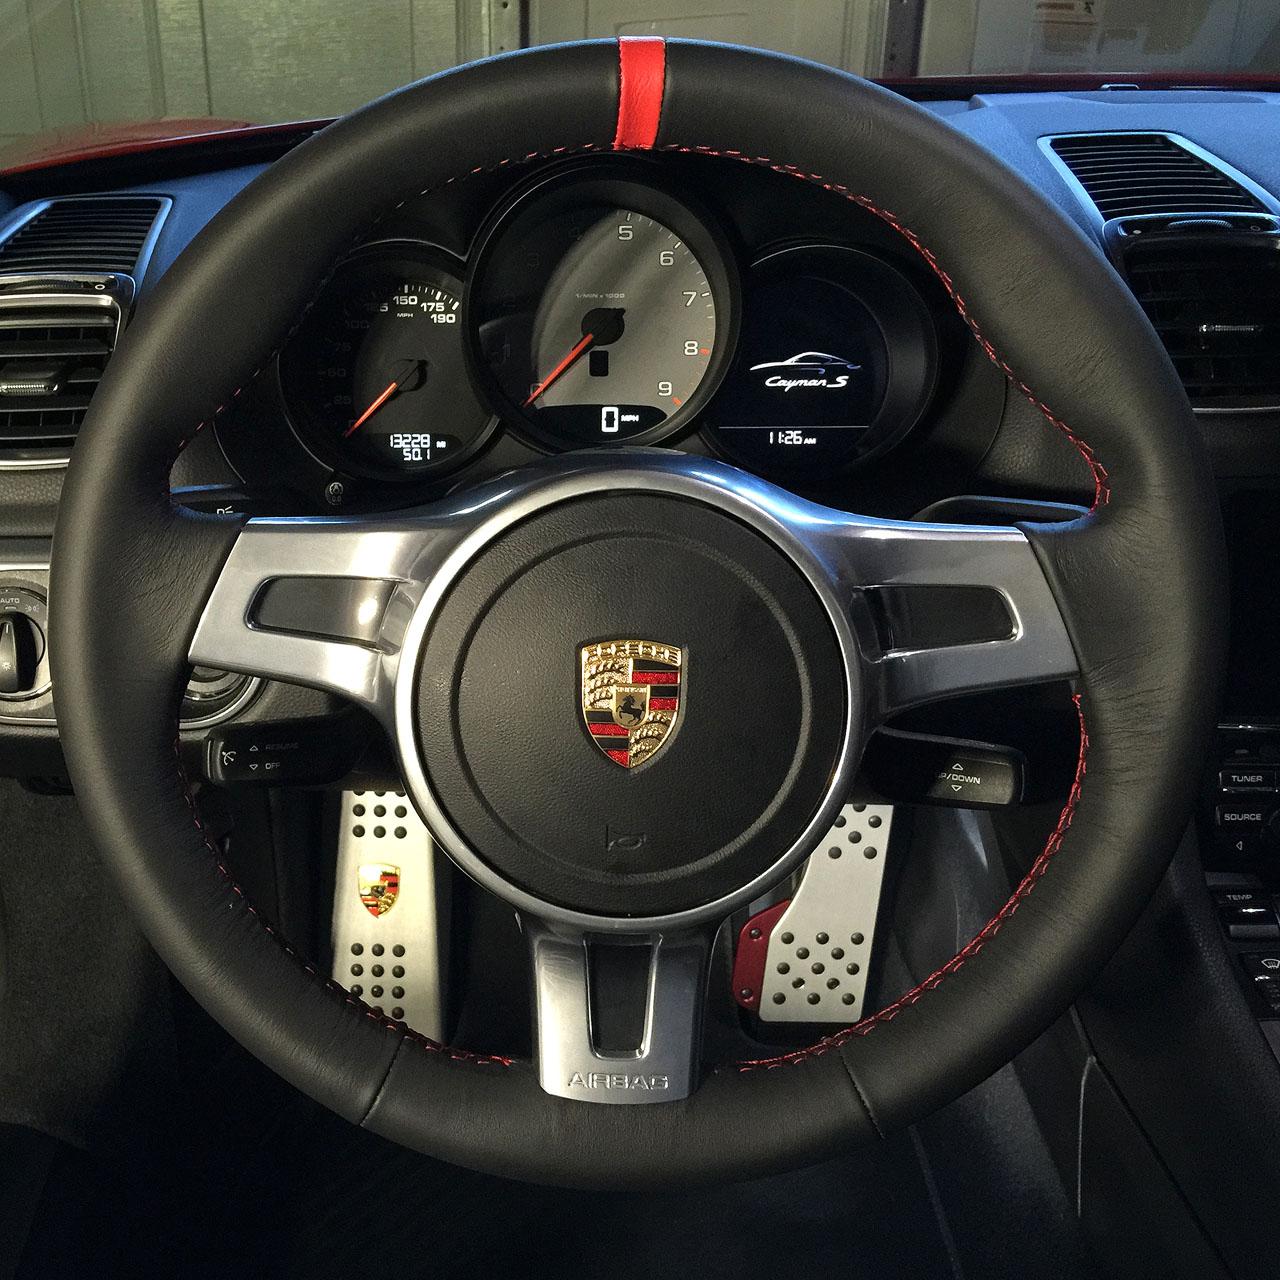
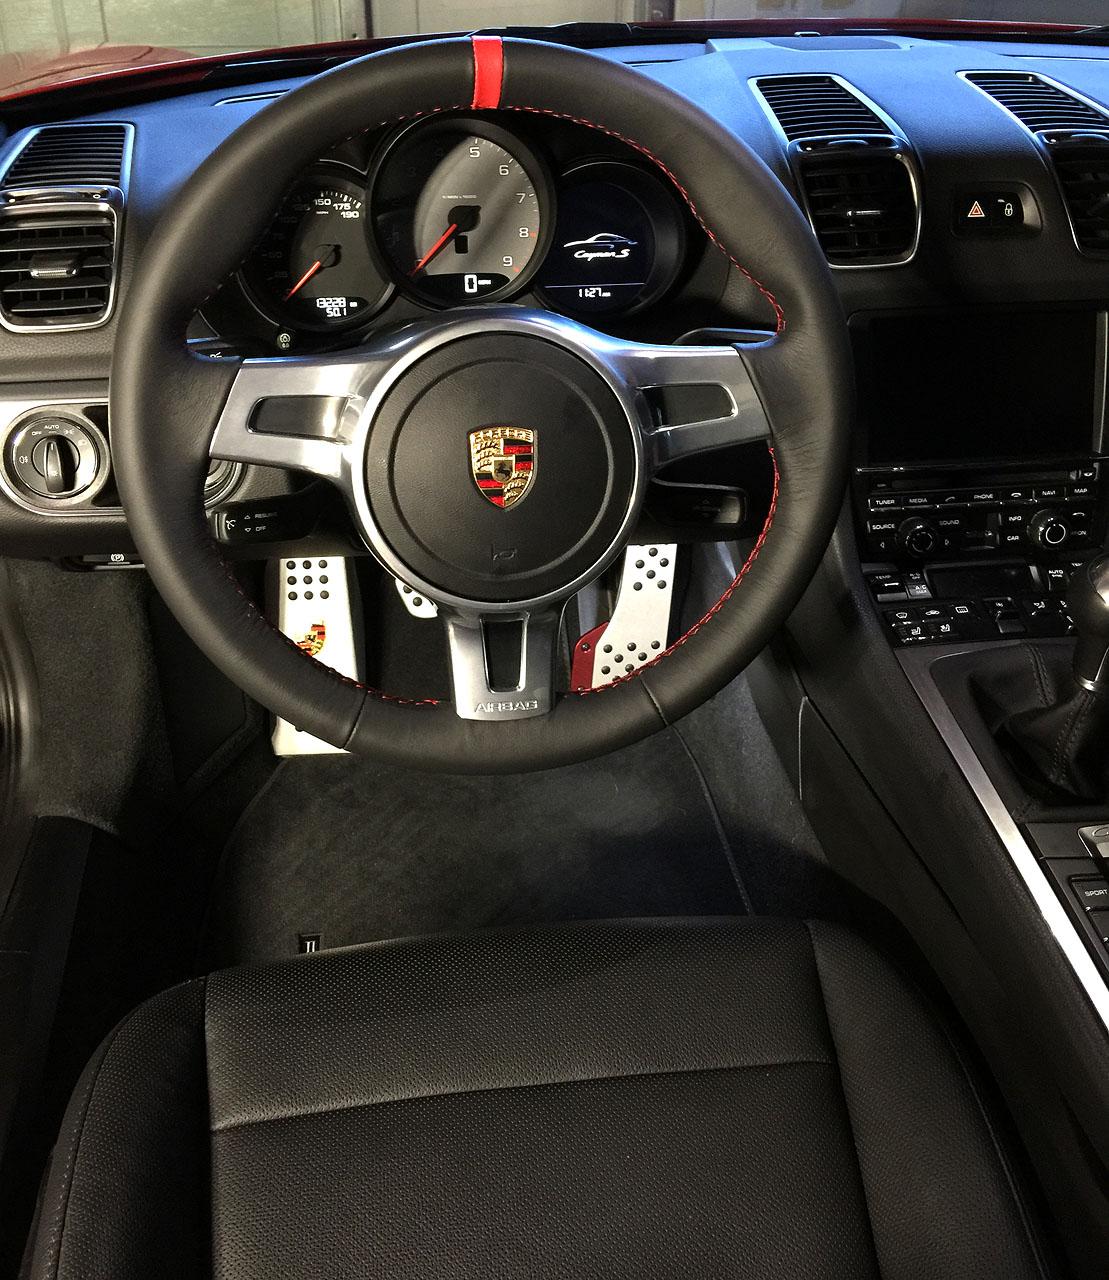
I have been mulling over getting the stitching on my steering wheel replaced with red stitching to accent my interior and go with my red seat belts. I had leads on a place semi local but after talking online with another forum member decided to use Dallas Custom Steering Wheel. The other member had their wheel redone with Alcantara. In my case I wanted to keep it leather but replace it with the red notch on top and the colored stitching. This place had a similar cost and turnaround time seemed about half. I waited about a week and a day including my shipping to and waiting on shipping from DCSW. The actual work took about 2.5 days. Donald was able to ship it to me 2nd day return (at my expense) at the end of that third day. Note that doing this replaces the leather and effectively re-wraps the entire wheel.
Here is some info on how to remove and then replace the wheel. I consider this one of the more easy DIY items I have done, with the exception that you do need to be careful with the fact that you are working with the air-bag. Some common sense and safety and it is pretty straightforward. That said if you do this, be aware you are doing so at your own risk. I can't guarantee anything or that you won't get codes or such popping up. (I didn't have any problems tho).
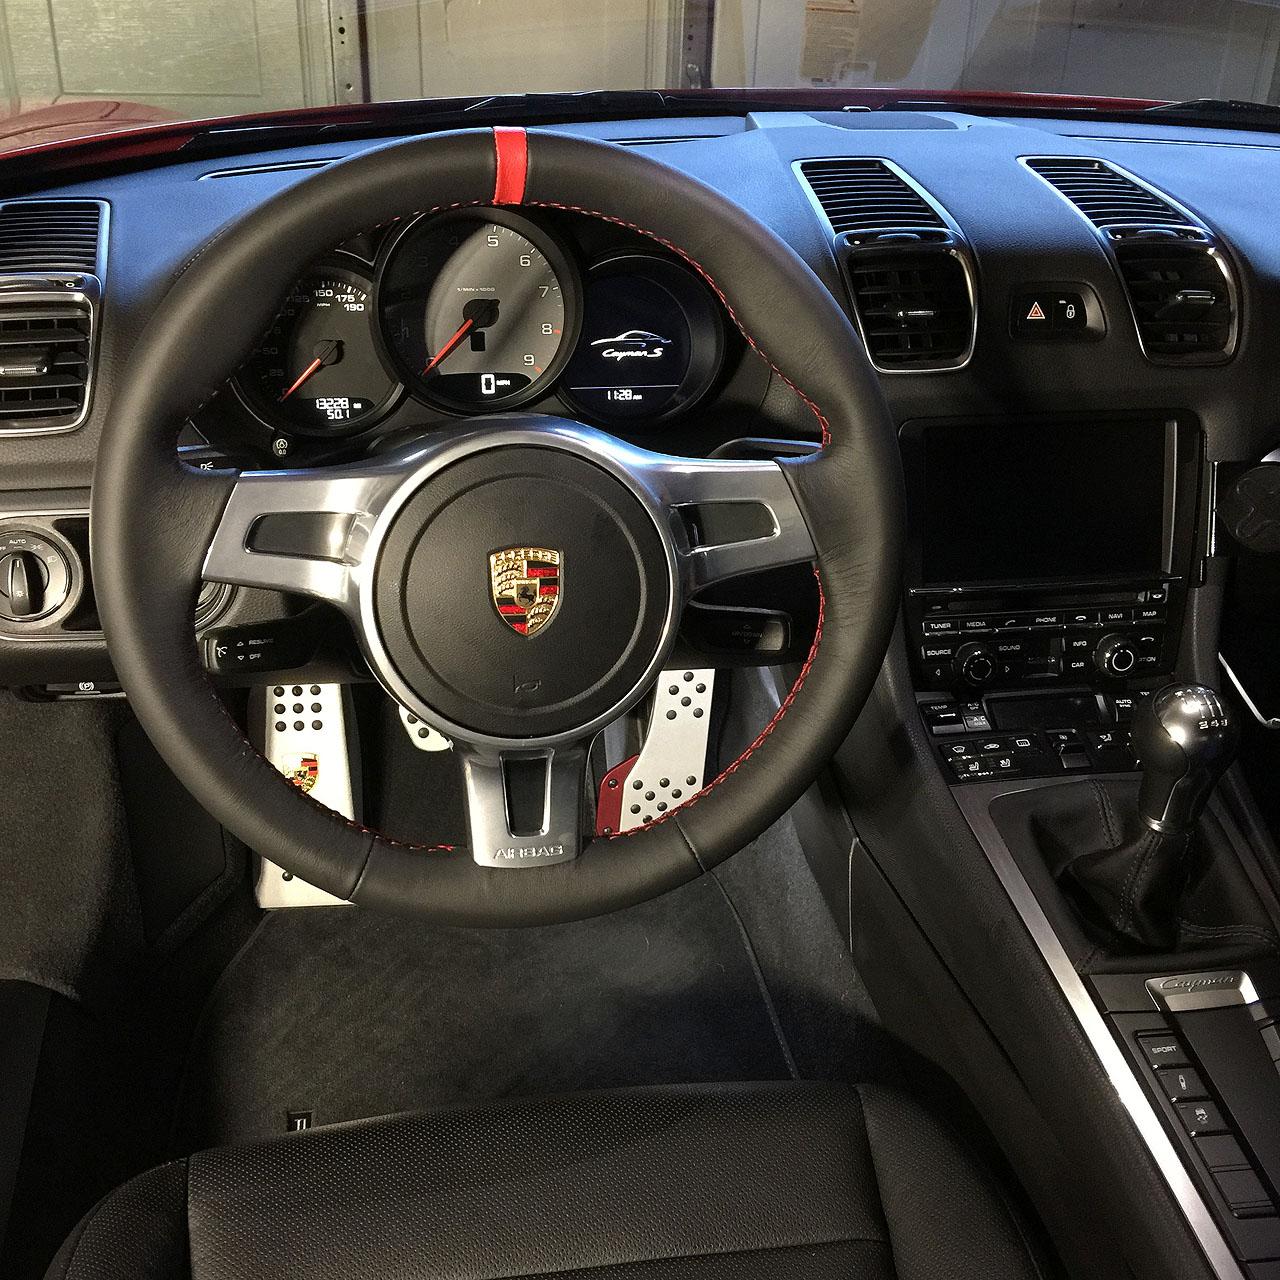
Please note my wheel is a Sport Design wheel for a 6MT car. I am not sure if paddles on the wheel would change anything here or not..someone else can weigh in perhaps...
I'll break this into a few posts so I can attach all the images...
1. Park your car somewhere it can sit for a week. Make sure your wheel is straight or as straight as you can when you pull in. You'll want to put the wheel back on in the same straight position.
2. First you need to disconnect the battery. Remove the plastic cover in the front trunk and get a 10mm socket and take off the Negative terminal. I recommend pulling the terminal aside and covering it somewhat just so it won't contact anything.
NOTE: Remember NOT to close the front trunk! There won't be any power to the electronic release to open it again and you'll have to find the manual release if you do close... I just left my up for a week.
3. Let the car sit for a while. This is important, you don't want any static or electricity to accidentally trigger the airbag. I believe that Porsche recommend about 1-2 minutes. Every other wheel item I have read online says to wait 30 minutes. I did the latter. I also made sure to ground myself by touching the metal pipes in my garage sink before getting in the car to work etc, just to be sure I didn't have any static on me.
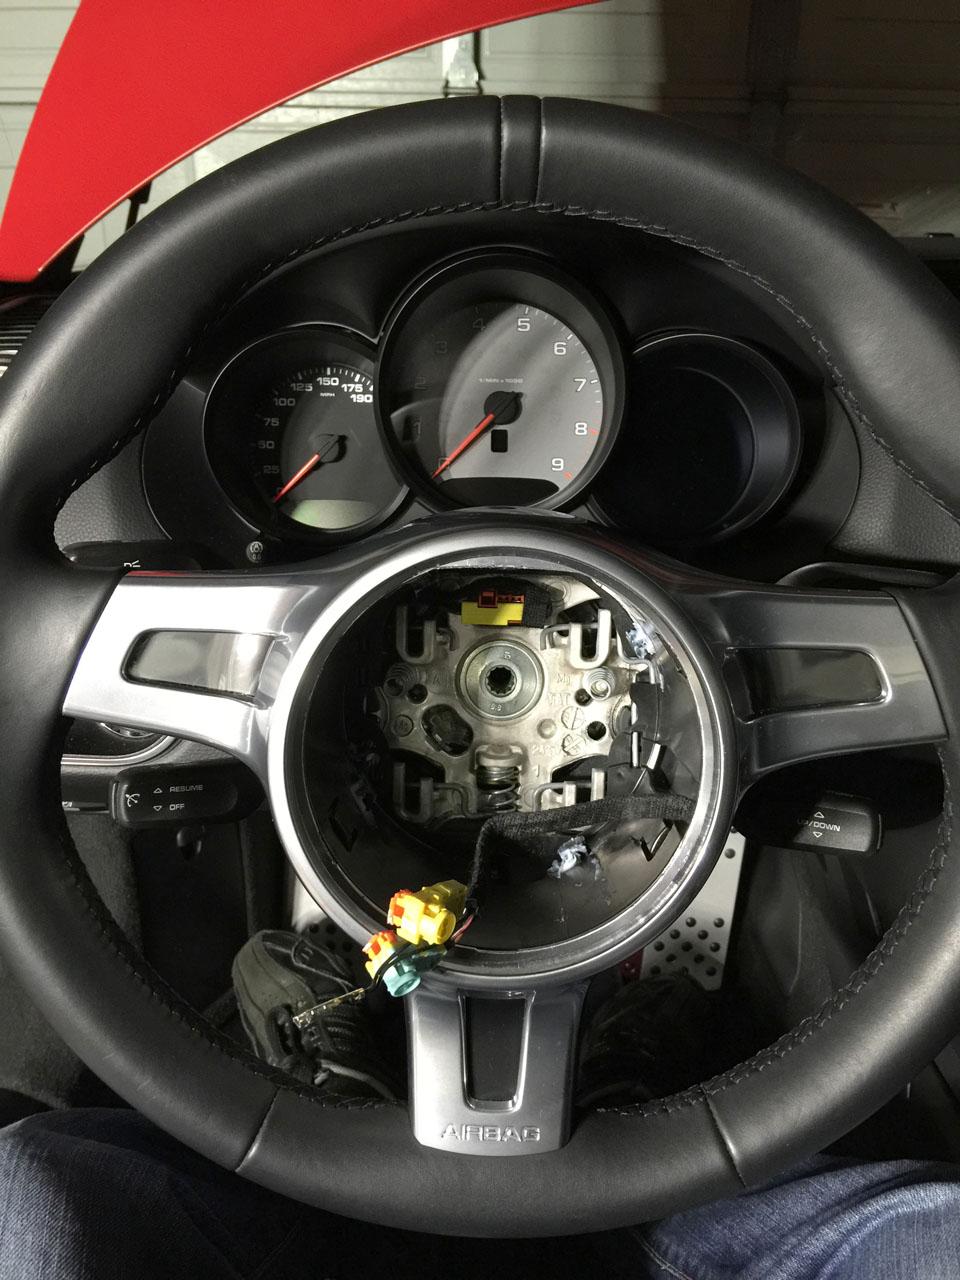
4. At this point you need to start by removing the airbag. Use a Torx T30 size screwdriver or a medium phillips screw driver. On the bottom of the wheel there will be either a notch or a hole. A notch if the wheel/car is new and airbag never been removed, a small hole if it has been removed before. What you need to do is careful push and break into the bottom of the wheel, then angle straight up and push against a release lever inside. You need to carefully guide this in. If you get it wrong you might partially disengage the airbag release and need to force the airbag bag in by pushing to relock, and then try again to release. That said just go slow and angle forward very slightly. You should feel the inside lever... push up onto it and with a nice pop the airbag should easily release and pop forward a fair bit.
5. At this point you can carefully slide the airbag forward and hold it. It will be attached by several wires to the wheel itself. There is also some white lubricant on the notches in the back of the wheel and airbag to help it slide in and out. Be aware as you don't want to touch the back too much as you might get grease on you.
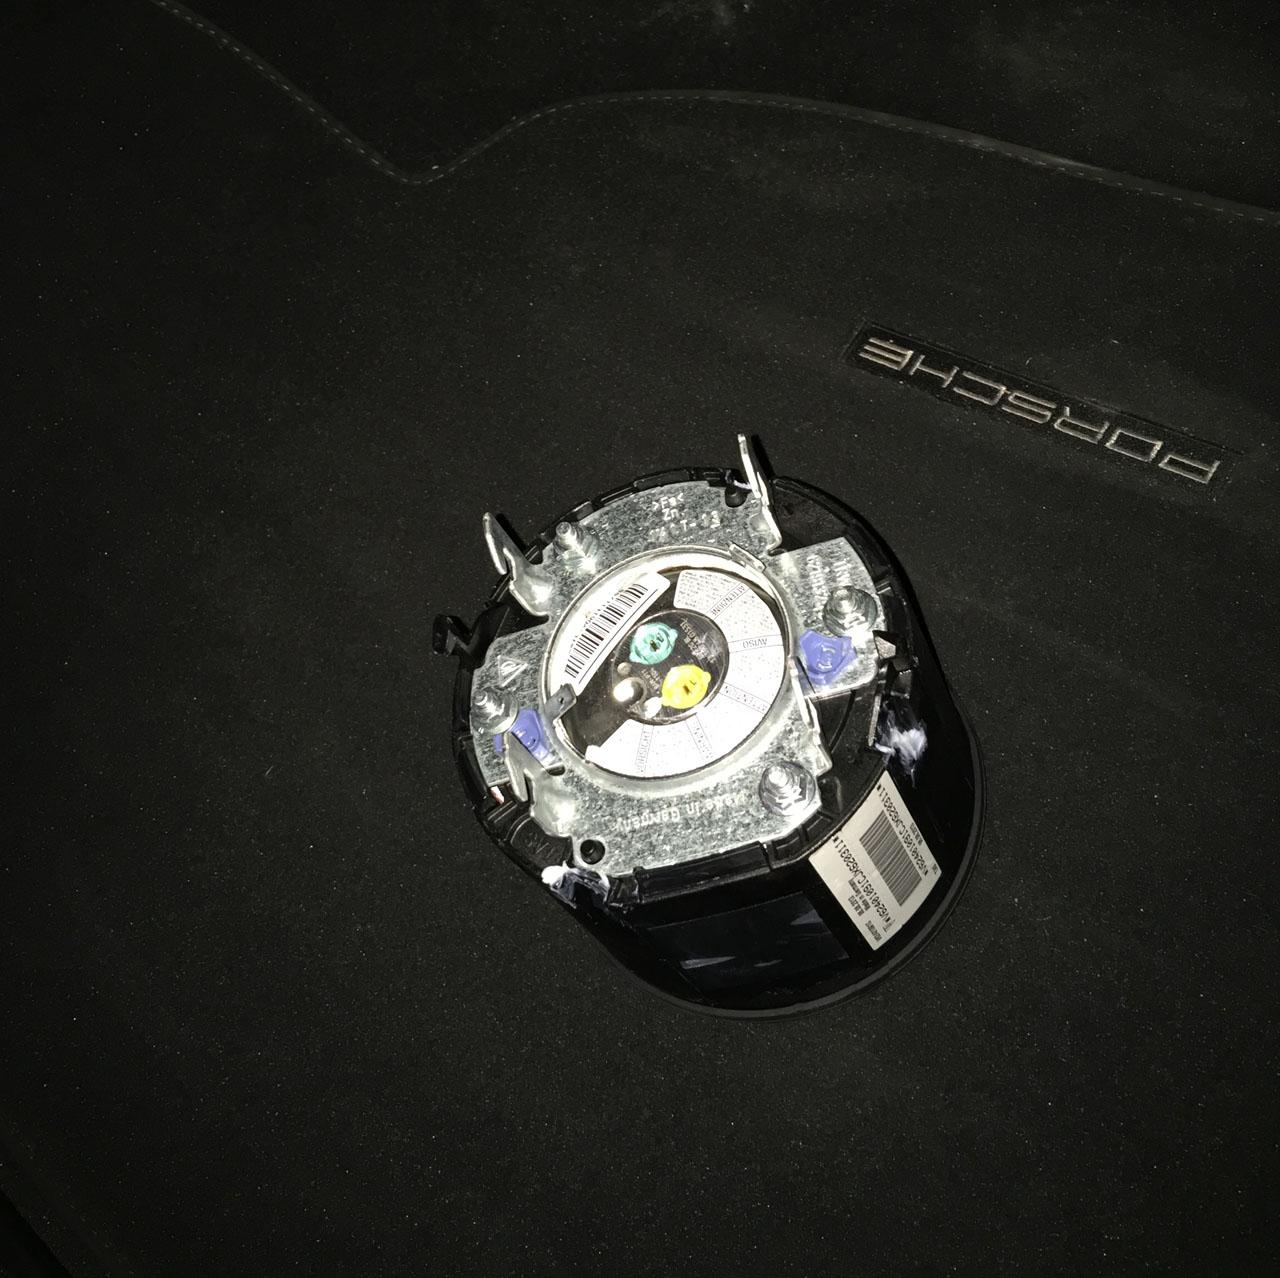
The main connectors pop out sliding toward the back of the airbag itself. Simply use you fingernail and release the orange tabs on the back of the connector by popping them towards the rear of the airbag. Then the connector itself comes out the same way. Finally slide off the silver ground tab and the airbag will be free. I stored mine logo down in the passenger seat. Porsche recommends not to let it get over 90 degrees during storage... fortunately weather here was temperate and I left my window open a bit before I disconnected my battery anyhow. If you need to store it somewhere, just be sure it is safe from any static electricity.

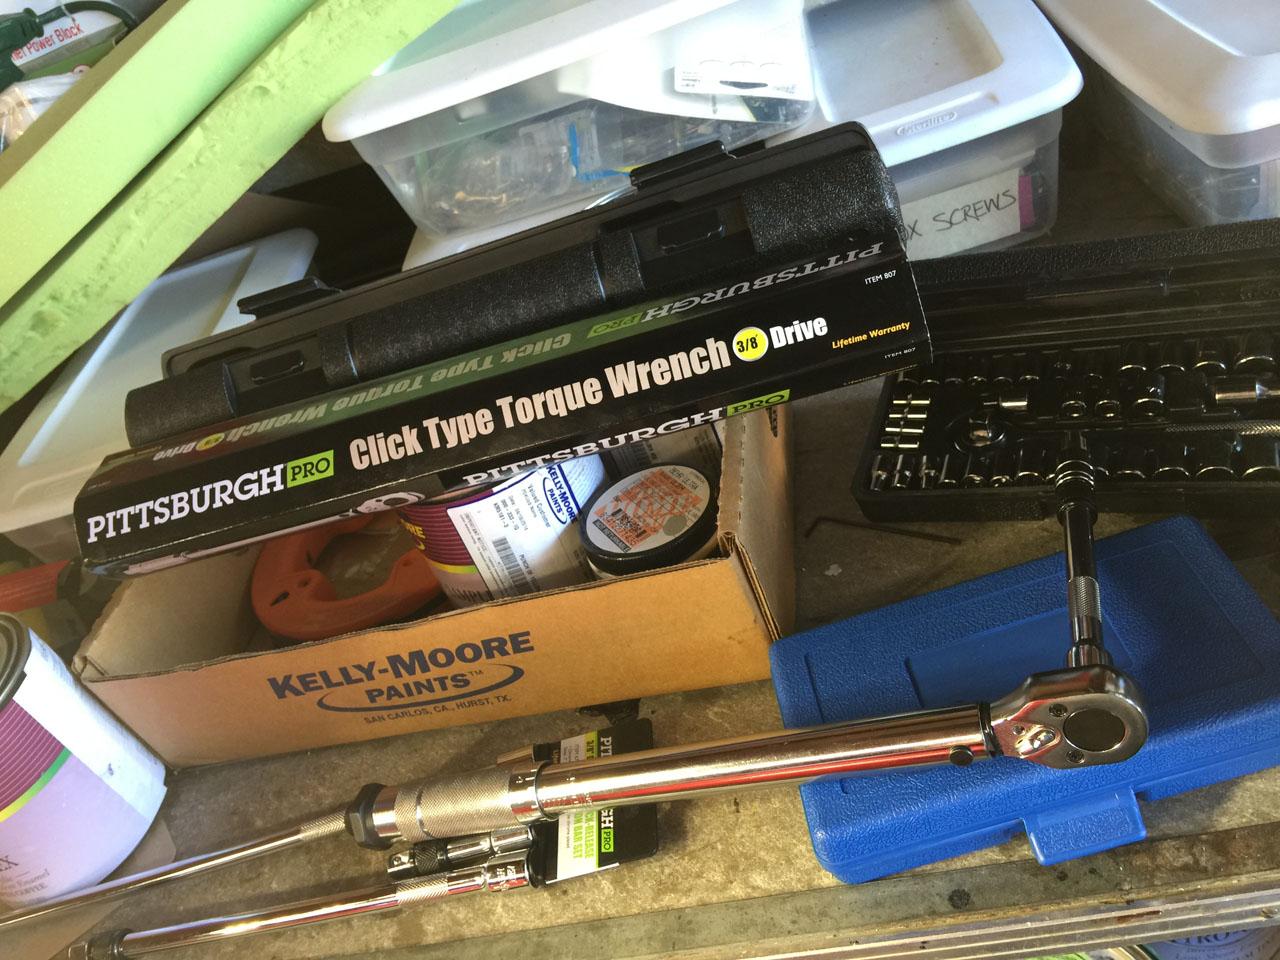
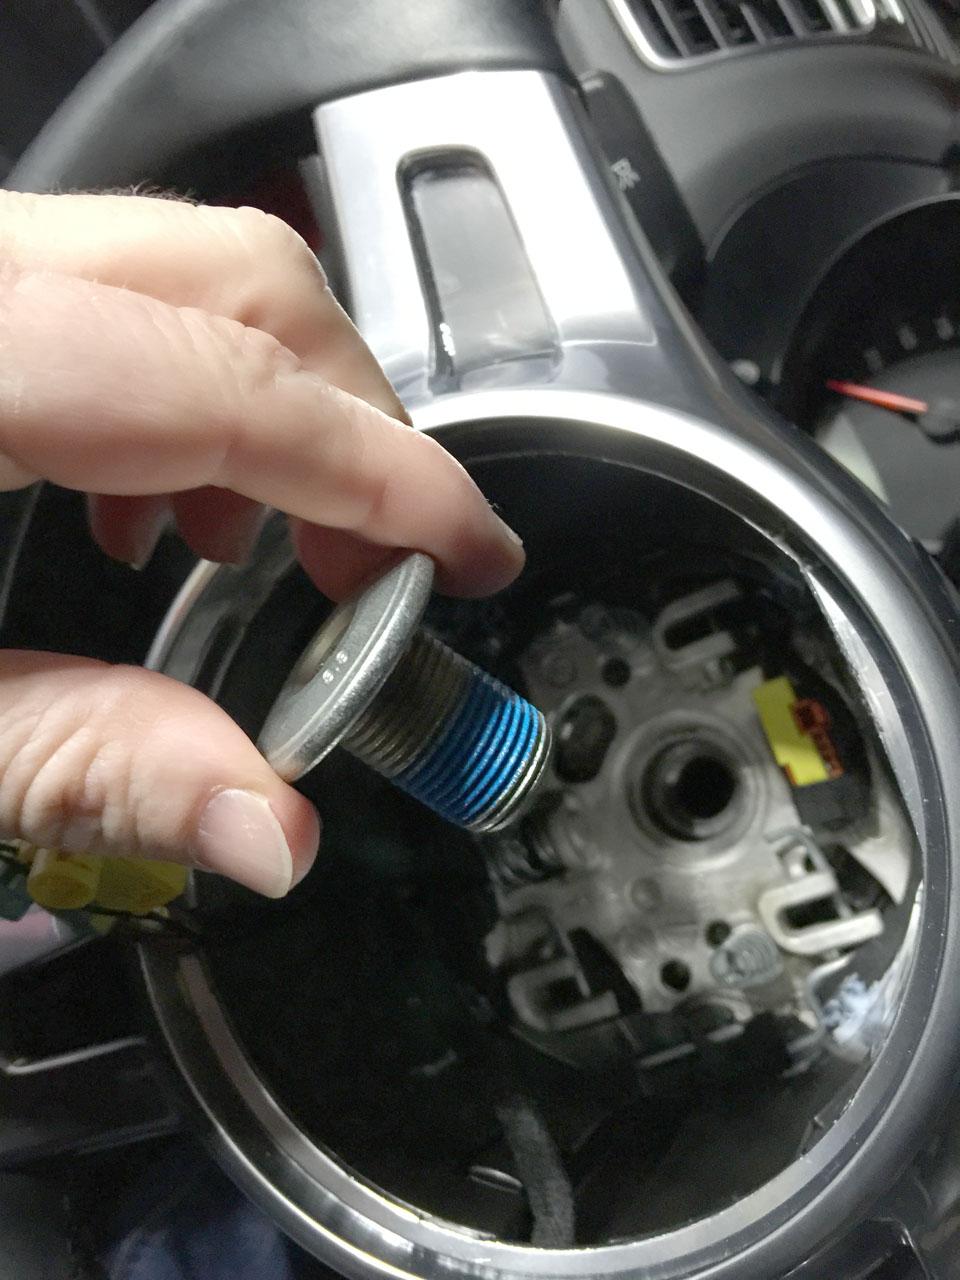
6. Now we get to the wheel itself. It's screwed in with a Nr32 start bolt, basically a 12-point 12mm bolt I believe. I ended up using a 6 point "T55" socket to install and replace. The T55 worked just fine. You will need a small extender for your socket to be able to reach into the bottom of the wheel and unscrew. See info on the bottom for some of the tools I used.
Take your socket wrench and extension and the 12 start of T55 and unbolt the wheel. You will need to hold the wheel and keep it from turning and unbolt with the other hand. This will take some force, I was somewhat surprised at how much but given that it's a steering wheel I guess I should have known. The bolt comes from the factory with both blue locktite applied and torqued to 37 ft.lb. (50Nm). Once you get the bolt started keep going. Then you can remove the socket and unscrew the rest of the way by hand. Note in the photo how most of the bottom half had locktite applied.
Porsche recommends using a NEW BOLT when you replace the wheel. I didn't do this, but do so at your own risk. I stored mine on the passenger flor next to the airbag for later.
7. Now disconnect any connections on the inside of the wheel. There will be an orange clip on top, push down on the small lever and pull out. If you have a heated steering wheel there will be another connector or two to remove.
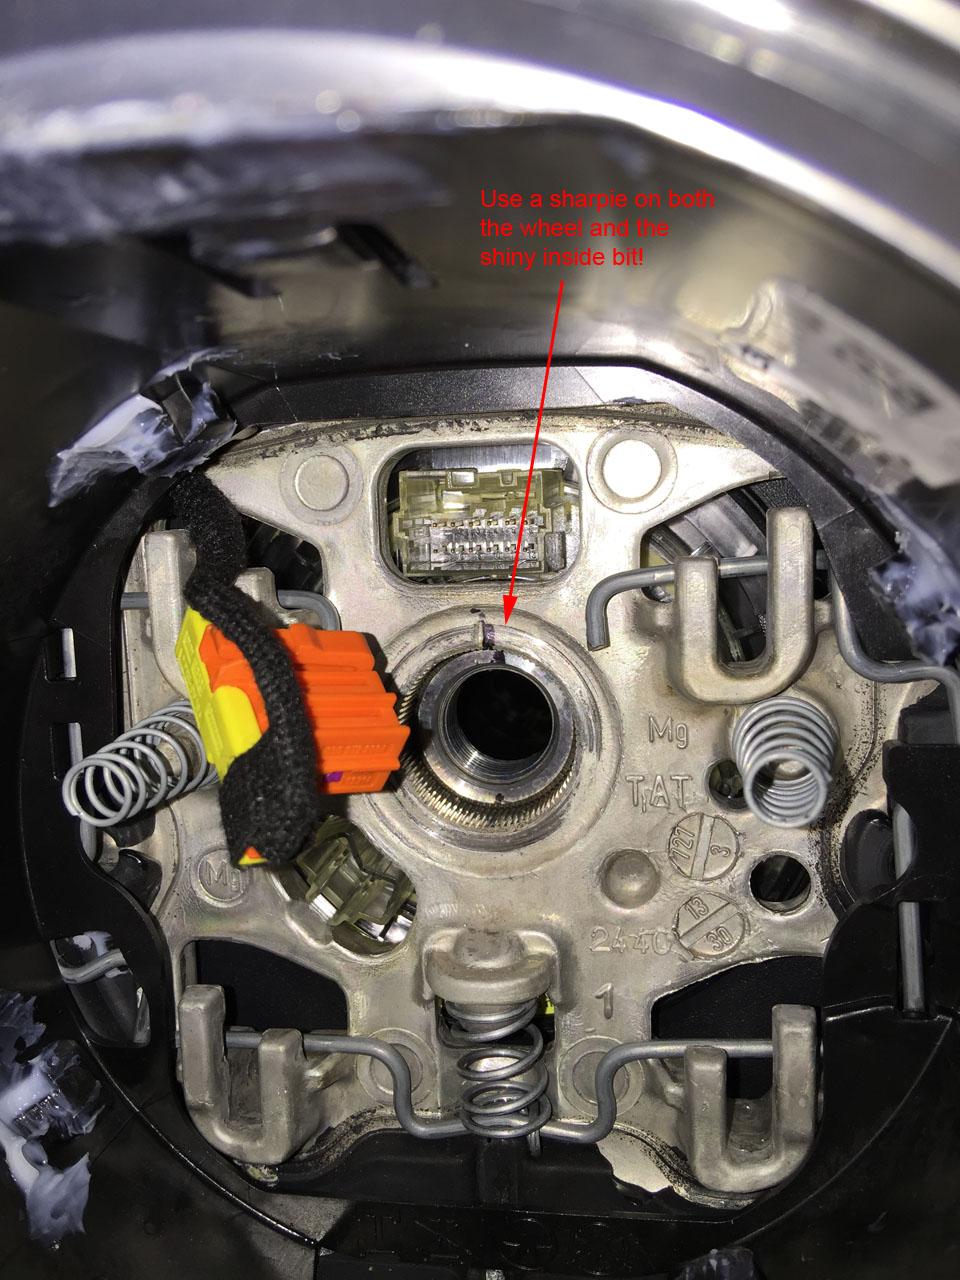
8. MARK the Steering wheel with a sharpie! You'll need to put the wheel back on exactly how it came off. DO NOT pull off the wheel until you mark it. You need to mark both the duller wheel area itself and the shiny backing of where it sits on the car (see image). Try to take a mental note of how the wheel is aligned and your marks are made for later.
9. With everything disconnected and marked, gently pull the wheel out toward you, should be easy. Congratulation you now have removed you wheel!
Do NOT touch anything on the back where all the guides are. I believe this sets the wheel to be aligned and such. It looks cool tho...
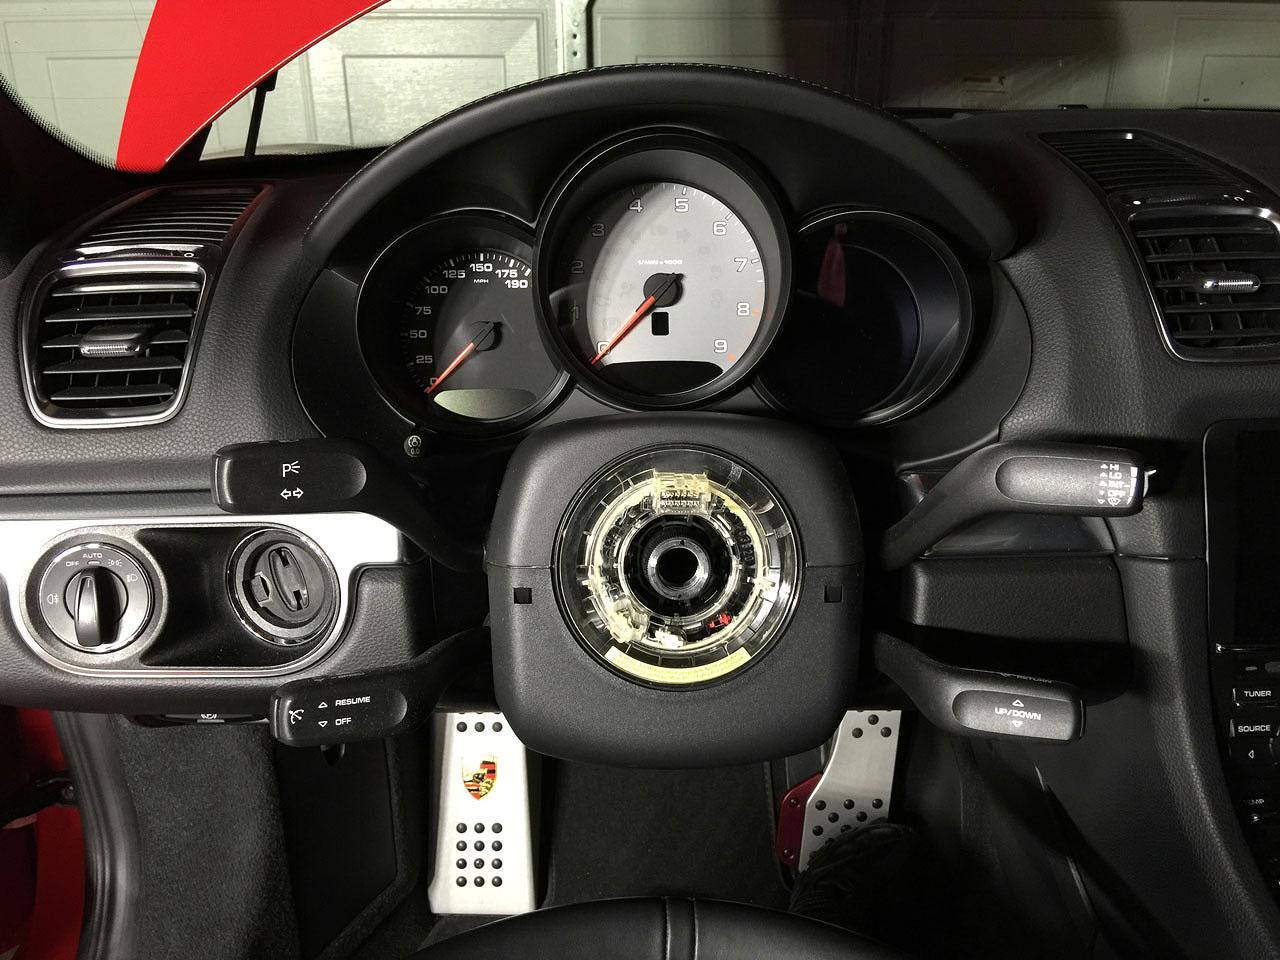
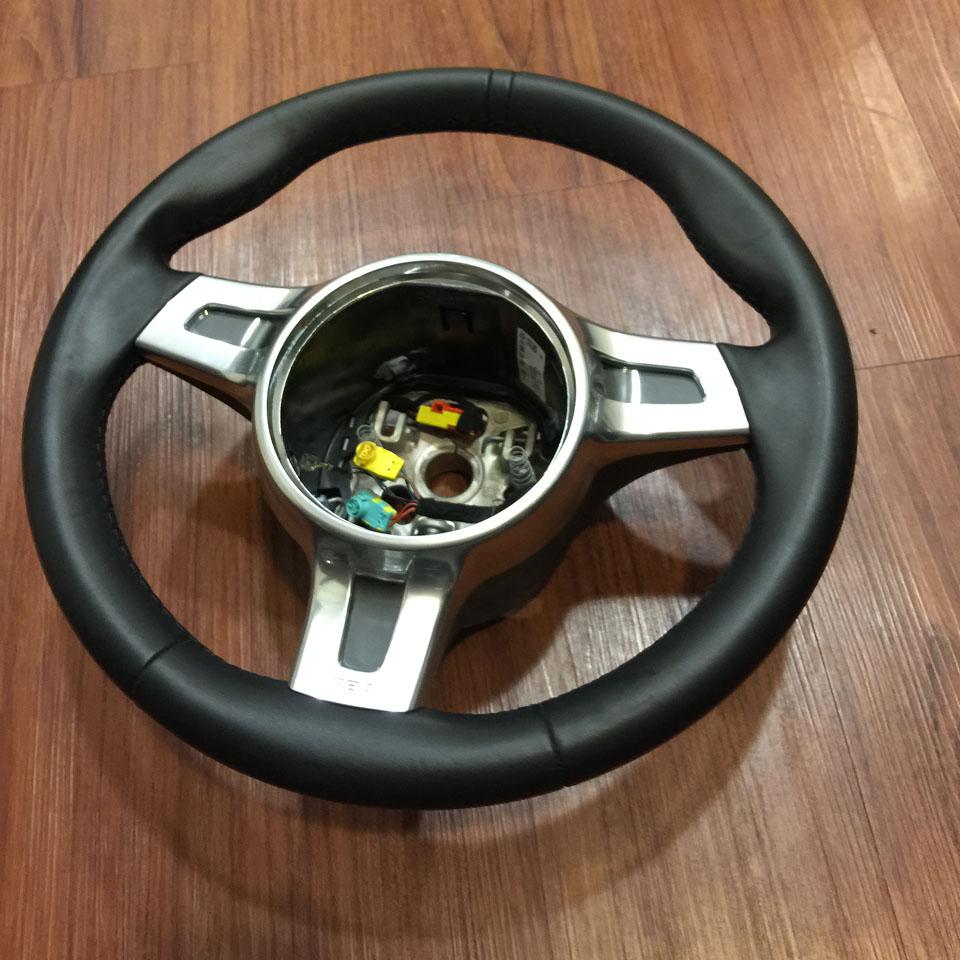
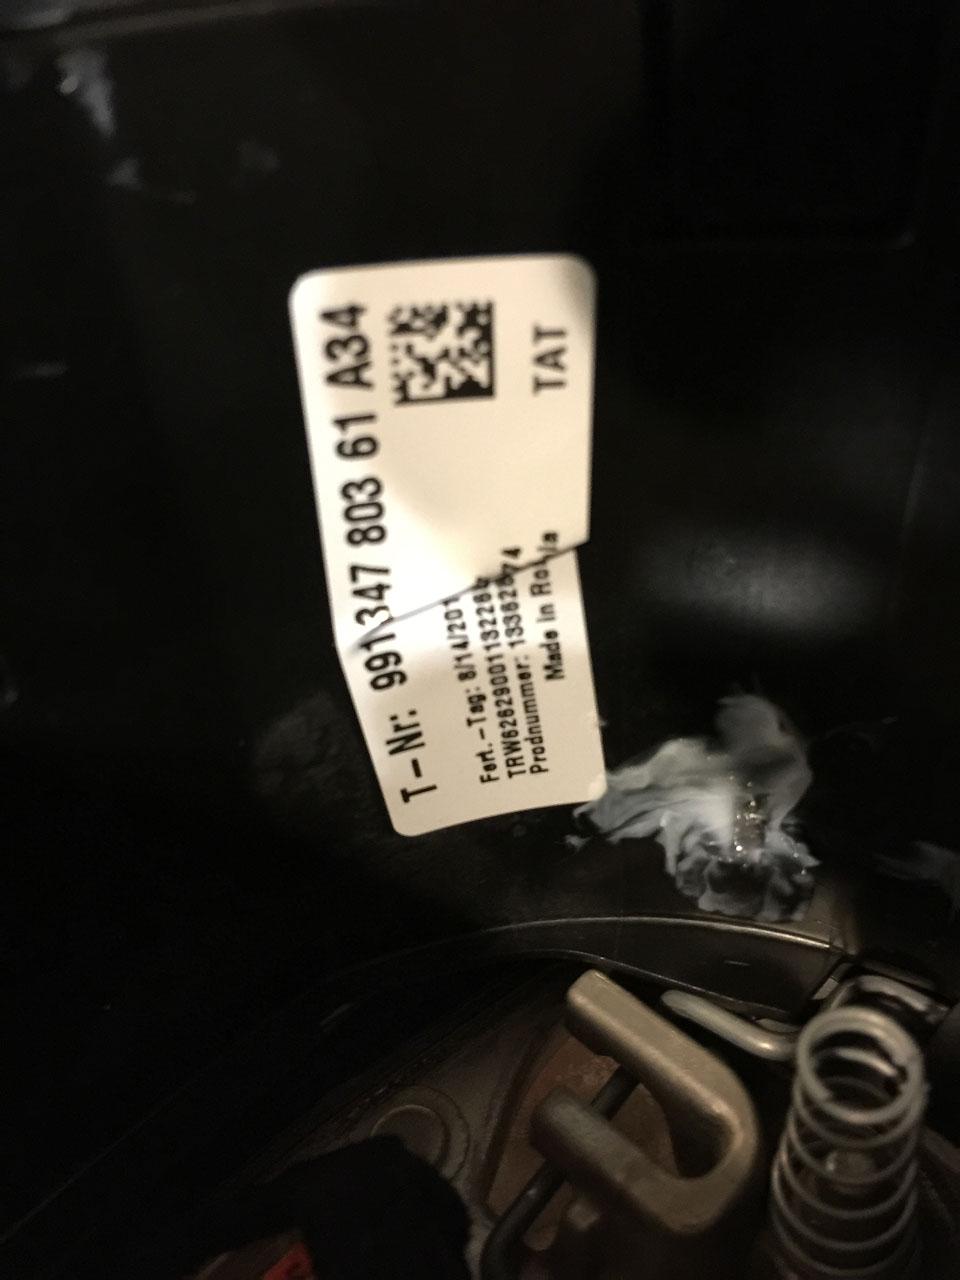
10. At this point you'll have your wheel off. I took it inside, showed the wife, and took a photo for reference for later. Here is a shot and also the part number listed on the inside of my Sport Design steering wheel.
11. Ship it. I boxed up and shipped my wheel next day because I was impatient. Should have done 2 day, would have been a -lot- cheaper.  Unlike the first place I looked at he does the work up front and then sends you a picture of the final product and you PayPal the money. There were two leather options, Premium and Napa (I chose Napa) as well as the option for the notch, padding (I didn't add...I prefer thinner), and color stitching. Once he received the wheel I got a few photos showing my wheel and the leather options he had on top of it so I could choose what I wanted. We verified what I wanted done and he started the next day. After about 3 days I got my photo, sent the money and some money to ship back 2nd day and awaited my new wheel.
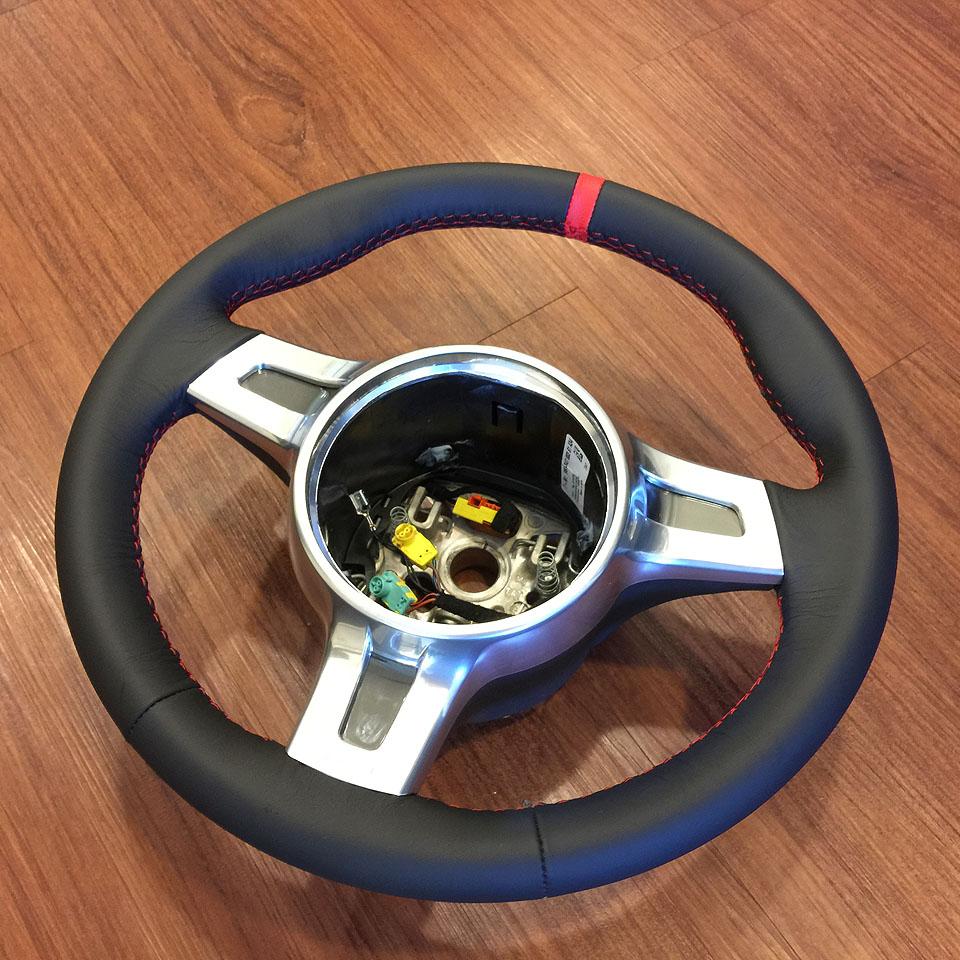
I of course took a photo on the floor when it arrived for comparison.
12. At this point reassembly is basically the same as before but in opposite order. Again be careful that you have no static charge. Line up your wheel. You might want to try aligning it off and on a few different angle to be sure, but if you marked your wheel with the sharpie it should be pretty obvious.
13. Screw in the bolt using the 12star 12mm or the T55. First use blue locktite as was done at the factory. Torque with a torque wrench to 37 Ft. Lb. (50 Nm.)
14. Plug in any connectors from the wheel to the back of the car.
15. Take the airbag, reconnect the yellow and cyan connectors in the appropriate holes and lock the orange locking tabs back in. Slide on the ground wire.
16. Guide the airbag back in and push to lock it. It MUST make a loud click sound as it seats. It should. If it doesn't it isn't in properly. You might want to make sure the locking release and things look straight and good before you try to put the airbag back in. Mine had no issues at all. You can gently tap on the wheel and around the horn to make sure.
17. Reconnect the battery, tighten down with a socket. That's it. Reassembly only took me a few minutes.
18. Take some photos and enjoy.  You probably want to let the locktite cure for an hour or so before driving as well imho. Also note there are POST battery reconnect procedures that you might want or need to do. I had no error lights on my dash but still did some of them...more below....
Post battery procedures....
A. Resetting the ECU mix stuff.... basically turn the car ignition key but do NOT start the car. Let it sit for 30 seconds...everything resets apparently. Do NOT push the accelerator pedal during this time!
B. Resetting power windows top and bottom positions. Pull up on the windows till they go up. Pull up once more. The up position is stored. Push down to lower the windows. Push down again once more. The bottom position is stored.
C. Resetting the steering wheel alignment. I haven't done this yet... i might not if I don't need to. You basically turn the ignition on but do NOT start the car. Turn it off, then turn it on again without starting. (So twice). Then, Start the car. Turn the wheel about 20 degrees to the right. Then drive straight at over 4mph or so for 100 feet. This will reset the wheel center position.
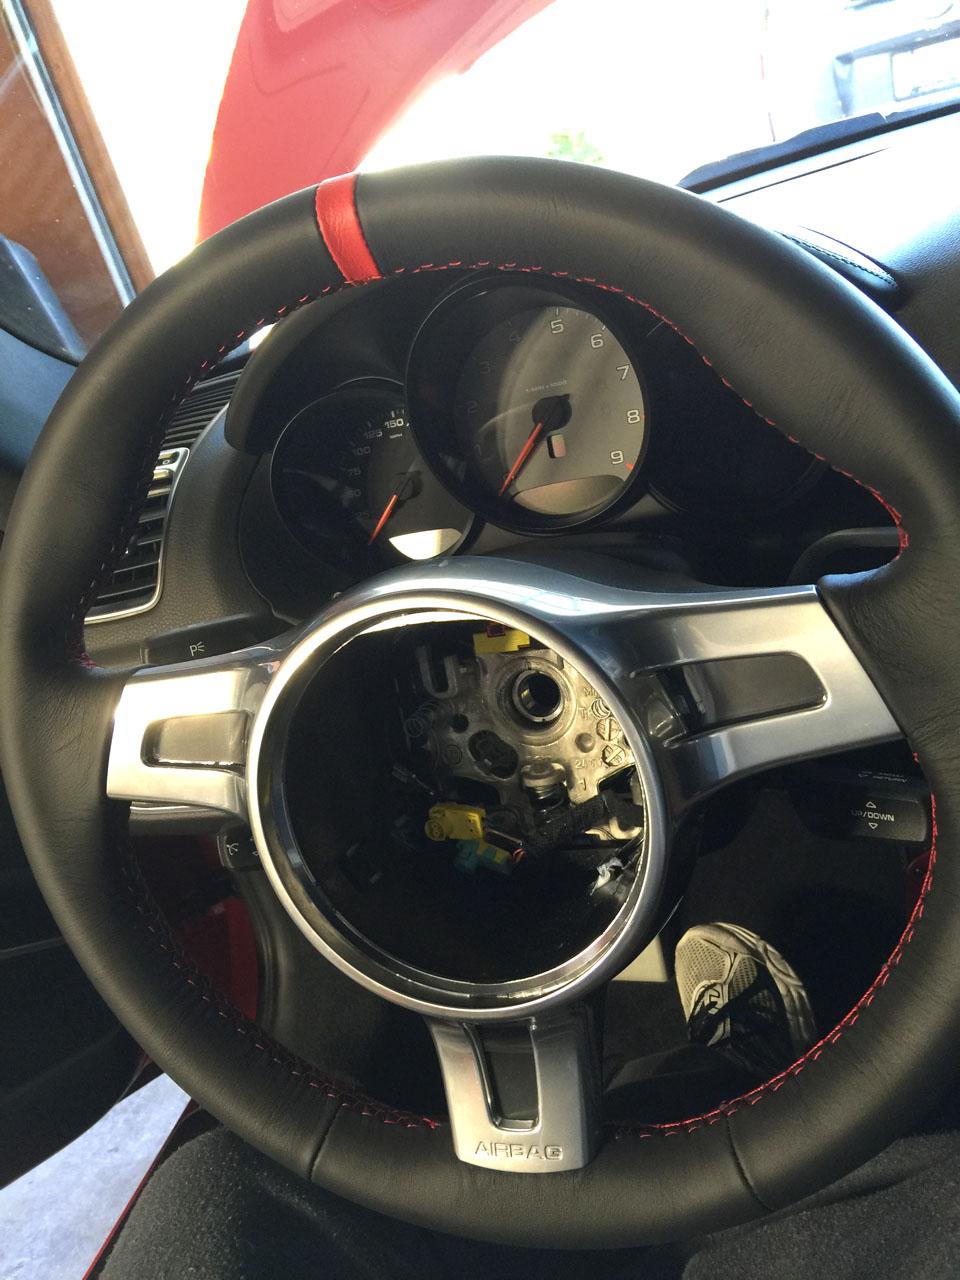
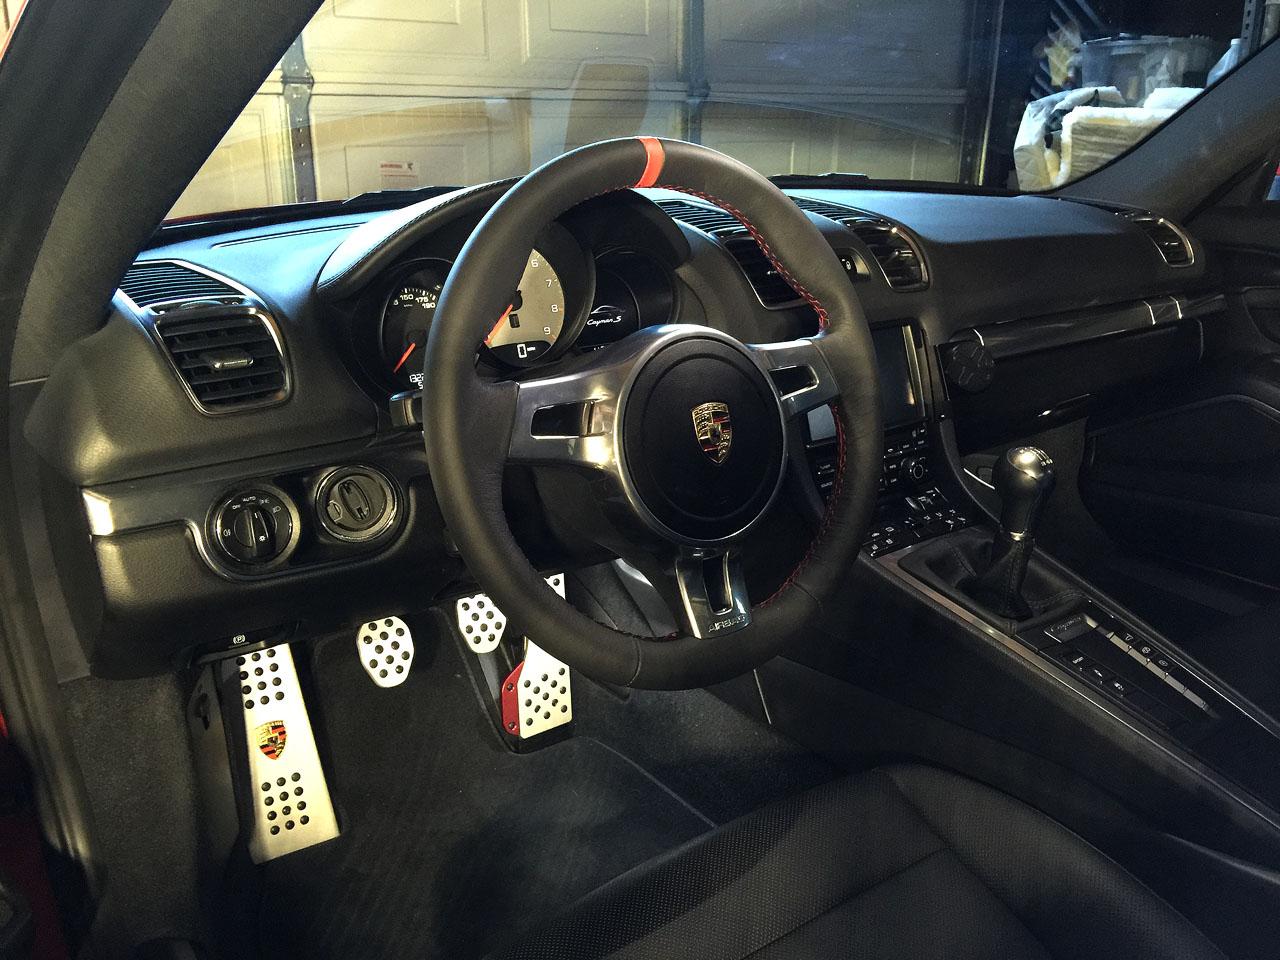
Here are a few more photos... The red notch looks really good even from outside. The leather I find a little less grippy than stock...we'll have to see how that goes. But the quality and such looks good. There is some slight stretching in areas when you look close up but I account for that being the different leather...
Here are some of the tools I used, my small socket set, extender, a new 3/8" torque wrench (I have a 1/2" drive for my wheels) and the T55 set... Also don't forget the T30 Torx to release the airbag, a sharpie, and Blue locktite (remember at a hobby store blue locktite usually comes in a red box, and red locktite in a blue box! Be sure to use the liquid that is blue in color!!!!)