You must be logged in to rate content!
7 minute read
Changing Taillights Tail lamps lights
Compliments of RADONCulous @ www.planet-9.com
12-5-2014
Through some great advice by a few members on this forum I was very easily able to change my tails easily. I'm proving a very detailed procedure for non-handy people as myself:
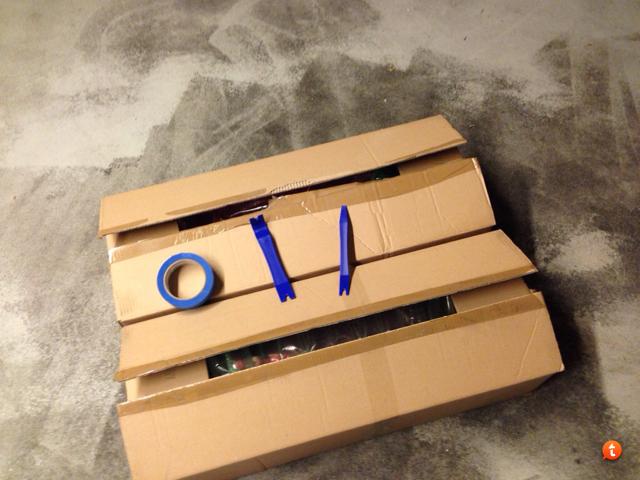
First thing you need is painters tape, plastic car audio pry tools, screw driver or #4 hex key, and the new lights...
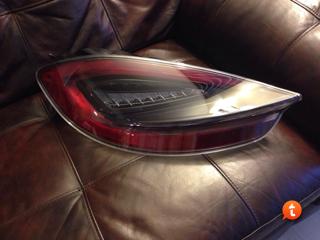
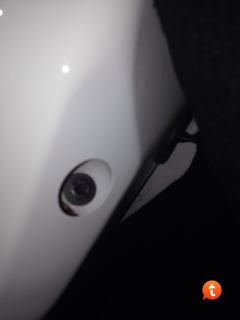
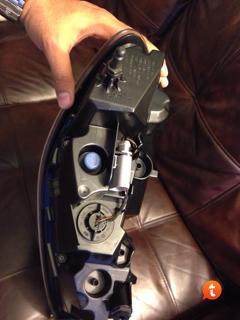
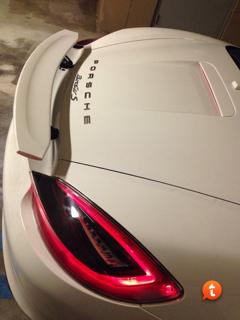
Last look at old lights:
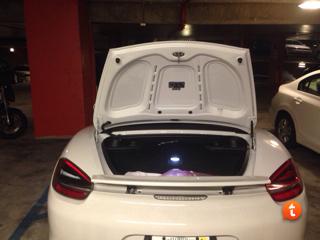
Make sure spoiler is down and you turn the auto lights off.
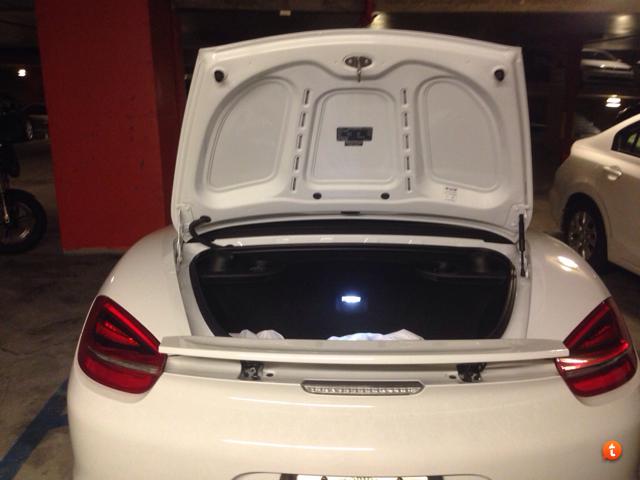
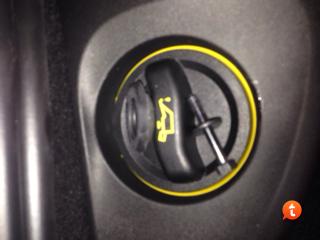
Pop trunk and on bilateral sides there are rubber stoppers (grovets)
Underneath is the top of the screw
You can use a hex key #4, screw w piece, or a wrench to get the screw:
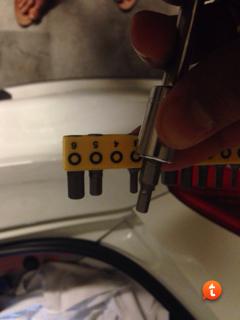
Leave the screws and rubber stopper on the water or oil cap for easy finding:
Once undone, raise the spoiler so you can grip the most backside of the light (near middle and most posterior where the spoiler would be). In the meantime use the pry tool on the front most side of the tail lights near the sides of the car. Pull straight back and the lights will slide out. Be careful not to pull too hard bc the tail lights are still attached by the by the light cables. (seen below)
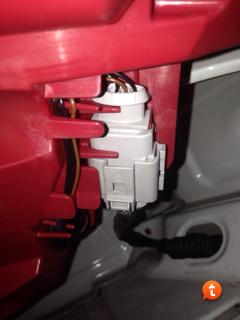
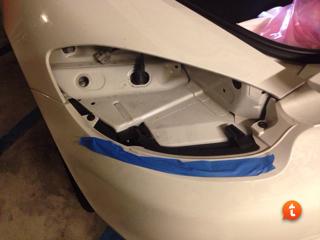
This part is the hardest in my opinion bc it's hard to wiggle the cable off whole holding the light and trying not to scratch anything. Feels like there is a clasp under the cable to hold it in place
Once removed you're good
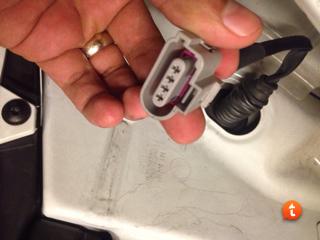
Now place painters tape as shown bc when you plug the new tail lights into the cable very carefully so you don't scratch the new lights / car.

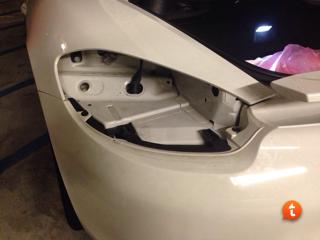
Slide the tail light while carefully watching the bottom of the light bc there are two round "studs" (As seen in the pick below on the right side=bottom of the tail light unit) that slide on the two black tracks (as seen on the pic above):
Carefully and evenly push the tail lights into place. You can also tap the unlock button on the remote to check the lights.
Now lower the spoiler and from the trunk put the screw in place and replace the rubber stopper.
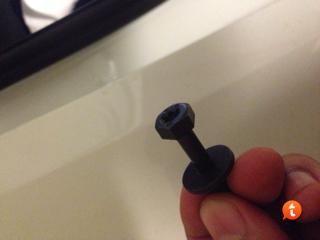
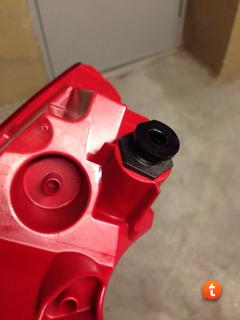
One thing that slowed me down on one of my tails was this silly screw / nut seen below (someone know what it's called?). If its not all the way down (in this picture its up which it should not be) then you won't be able to screw the tails in. This piece actually screws into the unit in a counterclockwise fashion.
Now enjoy!
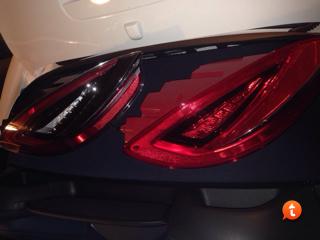
Here is one of each: Driver's side is the new, passenger side is the old
New tails:
Total time: about 10 mins a light
Hope this helps!
Special thanks to:
K-man S, aemjr, and finally @ 57 for their help!
A few more helpful tips:
When I put my tinted tails on my Cayman S, I had to apply significant pressure to get one side tail light off and the other side tail light popped off easily. The one that popped off easily was because the plastic seat/bushing in the car that the end pin of the taillight seats in was split and came out with the light (Had to be installed broken by the factory). Be careful to check the location to make sure that the plastic seat/bushing is in the car before you put the tail lights back in or else the tails will be loose and at best rattle. If it comes out and is split, It should be OK to just push back together and into the car frame. The pin will force the sleeve/bushing and hold everything into place. Just be looking for each half of it - mine was halfl attached to the light and the other halve of the bushing fell to the ground.
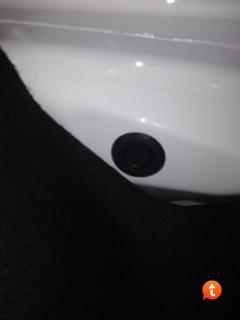
You can see the bushing location in the upper left side of the cavity in the original posters photo:
The retaining screws in my Cayman were Torx, not Hex. Once you get the retaining screw removed raise the wing. Next, cover the bumper below the tail with towels/tape to protect the paint (very important). The far side of the tail is held in place with a ball point which snaps in/out. I used a wide flat head screw driver wrapped in a towel to pull the taillight away from the body. DO NOT PRY against the paint, just pull away from the body. With your other hand at the wing side apply even pressure pulling out. Stand in front of the tail as it could fly out under the pressure exerted. You must pull at those two points evenly to get the tail to release.