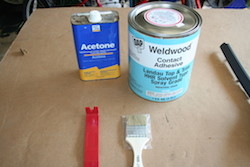
- Trim Removal Tools
- Disposable Brushes
- Acetone & Sandpaper
- Weldwood Contact Adhesive for Landau Top & Trim HHR
- Razor knife
You must be logged in to rate content!
5 minute read

Porsche Boxster EBRAKE HANDLE COVER AND BOOT
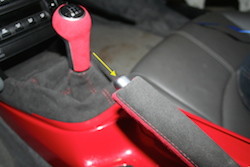
1. Remove the handle (blue arrow) from the brake by pulling the handle straight forward. The button will fall out, so be sure to keep an eye on it.

2. Remove the leather cover by peeling it backwards, cutting it off, or removing the stitches. Apply adhesive to both the material and the handle. Be sure to follow the manufacturer's instructions... avoid the temptation to attach the parts early, When dry, put the material on the handle, and roll the edges of the material around the ends.
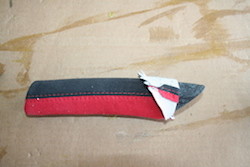
3. Slide the handle back on the brake (yellow arrow) until it goes in all the way. It may take a little force to seat completely
4. Slide the button into the end.
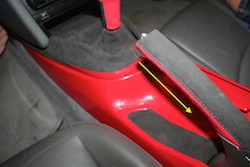
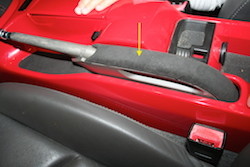
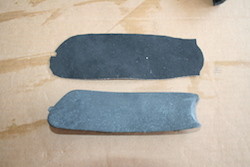
5. Remove the pad (blue arrow) from the brake by siding the trim tool underneath and prying it up. The pad is held into place by means of a channel that the brake body fits into. Alternatively, you can also slide the pad toward the back to remove, although installing that way won't work.

6. Remove the cover by peeling it starting from underneath. Be careful not to tear the foam under that cover, since it may adhere to the cover. Align the material to the pad, paying special attention to the circular cut at the front end. Mark it in pencil if necessary.
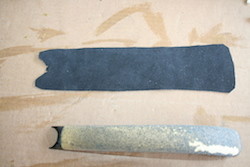
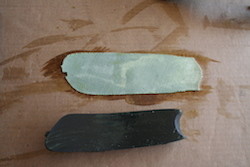
7. Apply adhesive to both the material and the pad. Be sure to follow the manufacturer's instructions... avoid the temptation to attach the parts early. Lay the pad onto the fabric and roll the fabric around the edges, and using a razor knife, cut the excess material away.

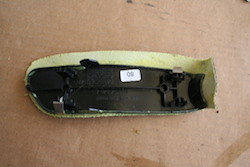
8. When dry, attach (yellow arrow) by sliding the front underneath the handle and pressing down firmly along the entire length until it snaps into place.
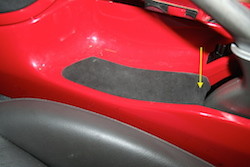
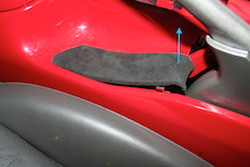
9. Remove the banana (blue arrow) from the console by siding the trim tool underneath the back (the side closest to the brake) and prying it up. Remove the cover by peeling it starting from underneath.
10. Use acetone and sandpaper to clean off any material that may cause bumps when you removed the cover.
11. Align the material to the banana, paying special attention to the little tab in front. If the material bunches around the corners, use scissors to cut a small piece of the corner off so that it fits the way you want it to. For inside corners, the material should already be cut so that it can flex. You may need to deepen the cut if it does not lay the way you want it to. Feel free to trim excess material, but don't cut too much. Apply adhesive to both the material and the pad. Be sure to follow the manufacturer's instructions... avoid the temptation to attach the parts early. Lay the banana onto the fabric starting with the tab.
12. You can use the blunt part of the trim tool to rub the top of the fabric evenly. Then, roll the fabric around the sides. With a razor knife, cut the excess material away.
13. When dry, attach by (yellow arrow) sliding the tab into the slot in the console ...

14. ... then rotating it down and snapping the back down into place.