You must be logged in to rate content!
5 minute read

1. Removing the shift knobs on SC's can be quite difficult. Take a 15 mm or adjustable wrench and place it under the shift knob. Some like to place a cloth or other soft material to prevent damage to the shift knob or lever.
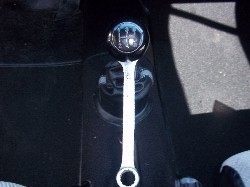
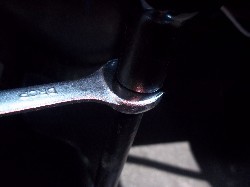
2. Take a hammer and hit the wrench from the bottom, trying to pop the knob off the top. (Yes, this is how you are supposed to remove the knob.) There are three outcomes. It will come off fine and fairly easy, it will come off fine but the crush sleeve inside that holds the knob in will break, or it will be nearly impossible to remove because of age or a previous owner that decided to glue the knob on instead of installing it properly.
3. If the knob and crush sleeve came off fine, you may skip this step. If the crush sleeve broke in the process, you can buy a new one for very little and move on to the next step. If the knob is not coming off at all then stop trying, at this point it will likely shatter before coming off. I had this problem, I simply cut the old shift boot off, and cut the new shift boot less than an inch at the top. I then attached velcro so that it can slip over the knob and still have a complete look.
With the shift knob off, simply pull the old boot from the top of the lever.
Slide the new boot onto the top of the lever and tuck it into the carpet.
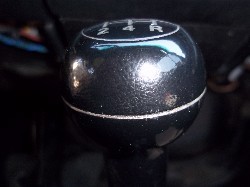
Replace the shift knob.
4. Remove the original shift boot from the carpet, you can simply untuck it and slide it off.
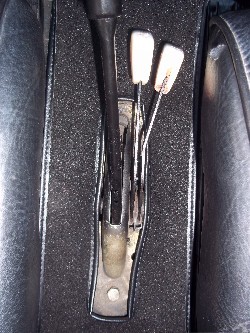
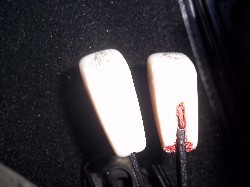
5. You may remove the heater knobs, it can help get the brake boot off easier and a new set will greatly improve the look of the car. Simply pull them off, some have suffered from heat and sunlight. sticking it on tight, in this case just cut it. You can see the right one is cut, the left was just pulled off.
You may remove the heater knobs, it can help get the brake boot off easier and a new set will greatly improve the look of the car. Simply pull them off, some have suffered from heat and sunlight. sticking it on tight, in this case just cut it. You can see the right one is cut, the left was just pulled off.
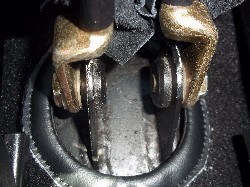
6. Untuck the seat-belt receptacle boot from the carpet so you can see the bolts. Remove the seat-belts receptacles by unscrewing the bolts with a properly sized or adjustable wrench. Make sure to take a picture of the area before removing so that you can re-install it properly.
Remove the boot by pulling on it through the bottom of the receptacles.
7. Install the new boot by pushing the bottom of a receptacle through the top of the new boot. Repeat this for the second receptacle. Be sure to work slowly so that no damage is done to the new boot.
Re-install the receptacles to how they were before. They should stay up with enough tightening, If they fall and struggle to stay up then you may have forgotten to include the bushings upon installation.
Tuck the new boot into the carpet.
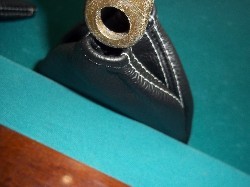
CONGRATULATIONS - YOU HAVE SUCCESSFULLY INSTALLED YOUR NEW LEATHER BOOTS!
Useful tip
You have installed a product made out of genuine leather. As you know, to maintain a leather product in good condition, you should take care of it. We suggest occasionally (every 4-6 week for example) applying some leather conditioner/UV protector to keep your leather from drying up in the sun and cracking.
Redline Automotive Accessories Corp. will not be held liable for any labor, incidental or consequential damages of any kind. Proceed at your own risk.