You must be logged in to rate content!
10 minute read
DIY Internal Engine Coatings
Compliments of Crystal_Imprezav @ nasioc.com
8-31-2011
So I have been paying for coatings on my motors for awhile now, and it adds up fast. At $34 a piston, it adds up quick but from my testing the stuff works wonders and I will not go without it in my motors. It eliminates hotspots which is a big problem most don't know about or ever actually see but anyone who has pulled a motor apart and cleaned a used set of pistons has seen this. It also allows you to run a bit tighter PTW clearances because with the top coating, you control your expansion better and the skirt coatings keep them lubed.
Now, most people think skirt coatings are a waste. Most think they wear off as soon as you start the motor and the stuff ends up in the oil and other places you don't want it to... WELL this all depends on what coating you have on the skirts. Coatings that come from the factory i.e. Wiseco or Manley are cheap quick coatings that are screen printed in mass production and are not prepped at all. These coatings will barely make it through the piston installation from my experience. A true piston coating is prepped, blasted, applied, and baked. These coatings from my experience, will last a long time and sometime even outlast the motor but this all depends on your PTW clearances. Get it right, and it will not wear off. Too tight and yes, the stuff will be gone fast but so will your skirts and cylinder walls because the only way it wears off is if you are scoring which will destroy a lot more than coatings.
That being said, I was tired of paying for the service so I decided to do it my self. Running trials on old set of pistons, here is my experience and how-to.
Equipment:
-Air compressor
-Detail "mini-eraser" or sand blaster from Harbor Freight
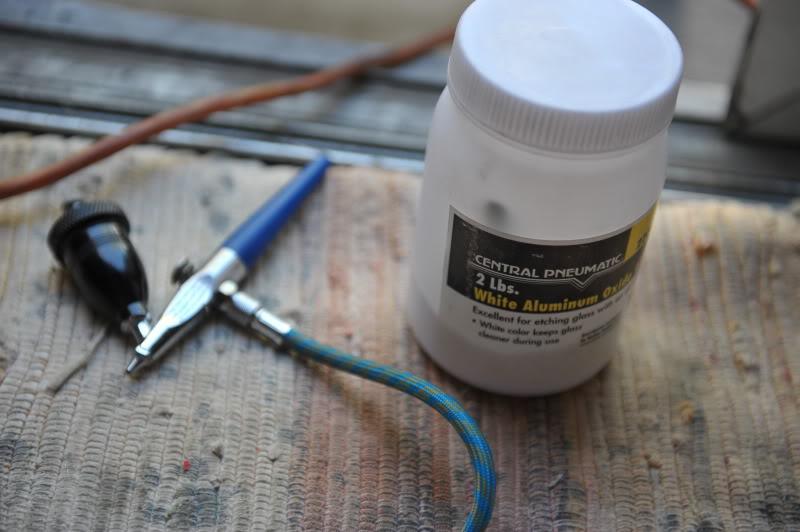
-Aluminum Oxide - 100-120 Grit
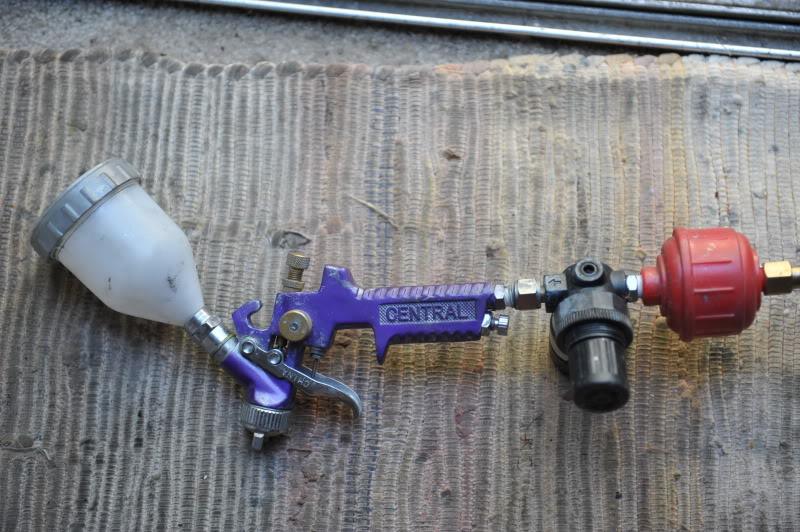
-Detail HVLP paint gun or air brush (I suggest the gun.. More on this later)
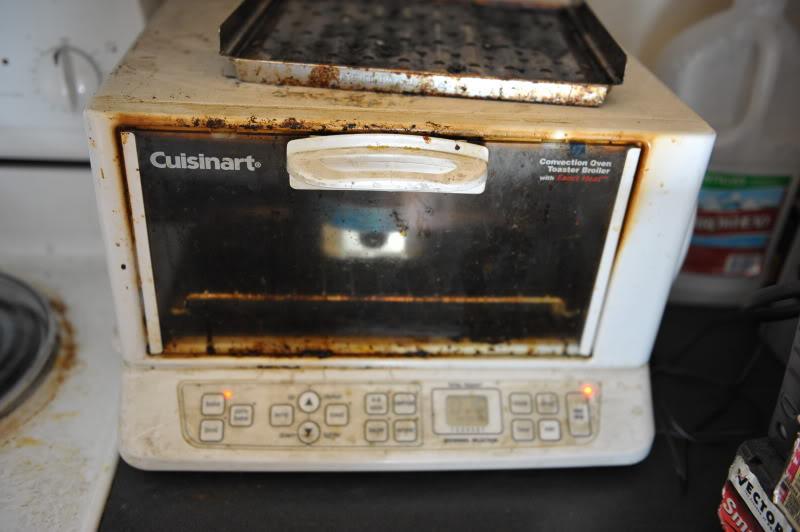
-Oven or toaster oven
Supplies:
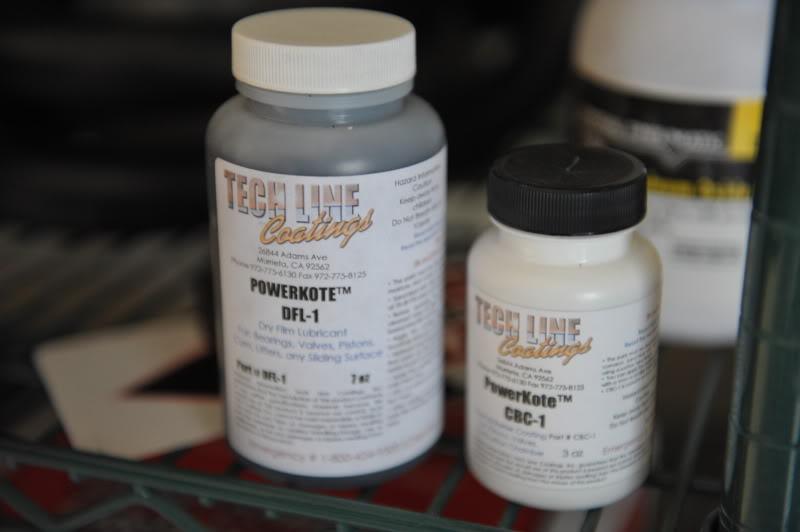
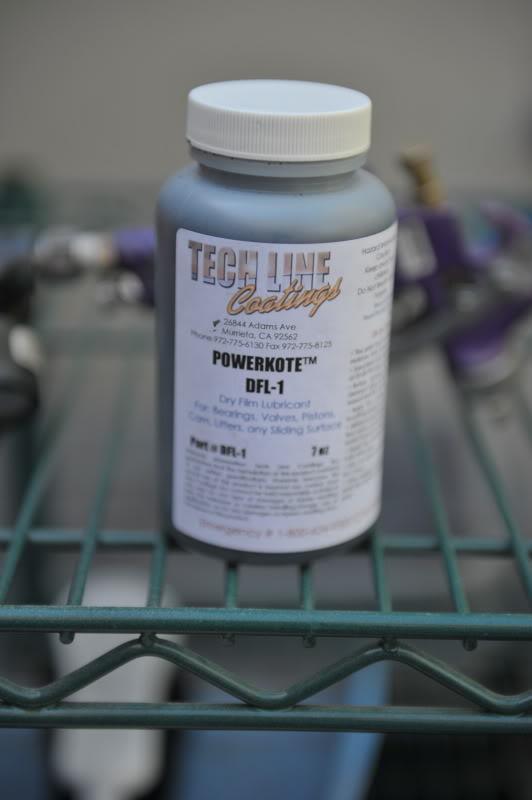
-Coating from Techline or elsewhere. The gold coating and good Techline coating require a vendor account.
-Acetone
-Gloves and mask
-High heat tape or Blue painters tape if you cheap and spend the extra time to demask before baking
-Common sense
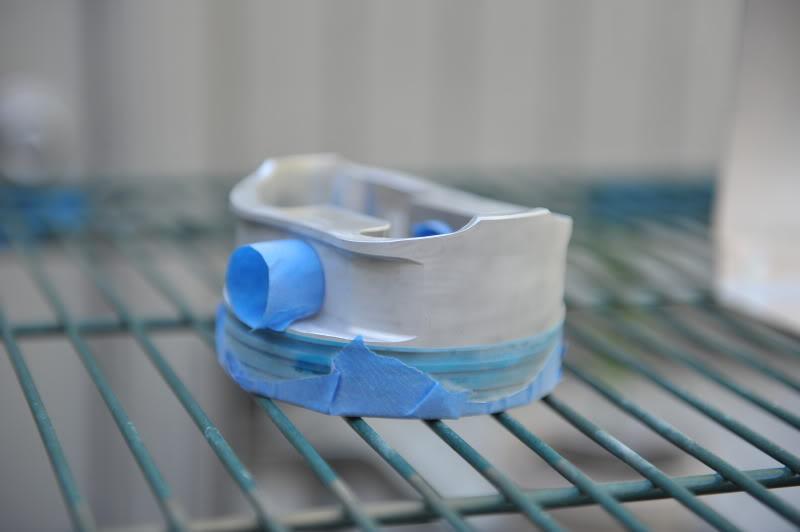
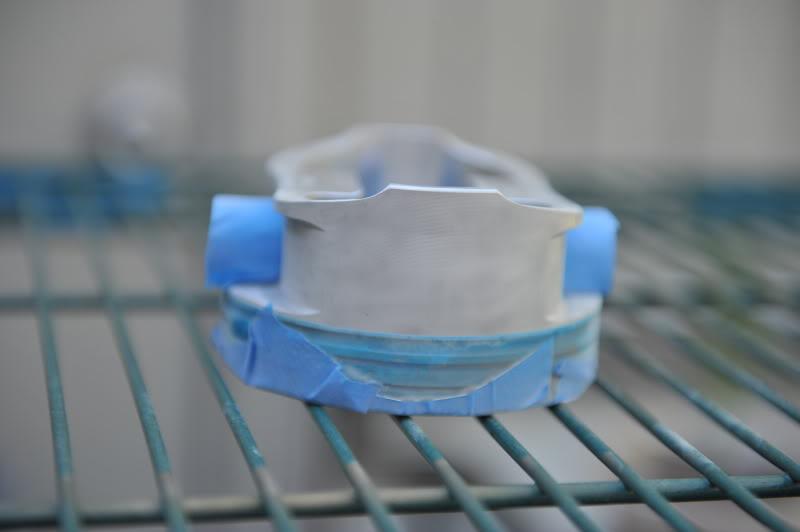
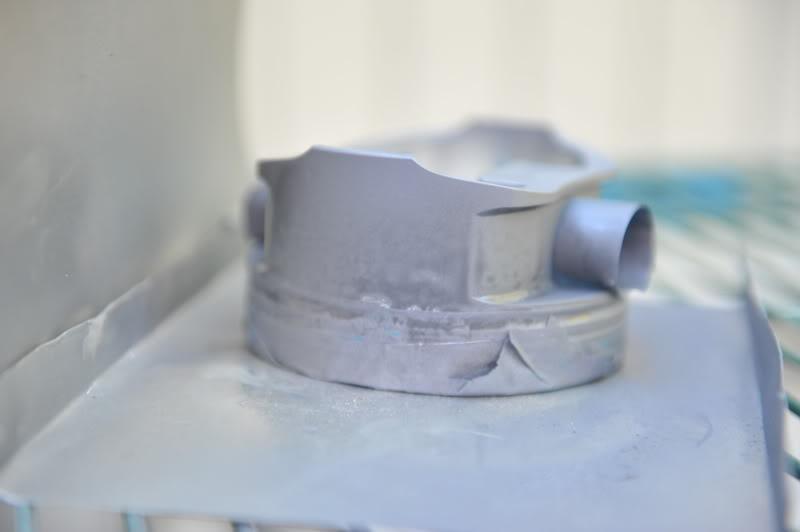
#1: If your using an used part, clean it well. If new, continue to mask it off on the ringlands and skirts. If you use high heat tape, you can leave it on in the oven. Otherwise, you will need to removed before you bake the parts.
#2: Take part outside (or to blast cabinet). Put the aluminum oxide into the blaster and sandblast the parts until the part is really clean and dull in color. Note if you use finer than 120 grit it may not stick, if you use glass bead it will fail (not porous and rough enough), and as for sand, I have not personally tried it. Rougher may be too rough. All coating companies suggest 120 grit aluminum oxide. Some say 100-120 grit.
(Sorry forgot the pic of the blasted part)
#3: Clean the part with Acetone or brake cleaner. Make sure you wear gloves so you do not touch the part and get any oil on it. If your part is used, you may want to bake it at 175* for 15min to get any residual oil out of the pores and surface and clean again.
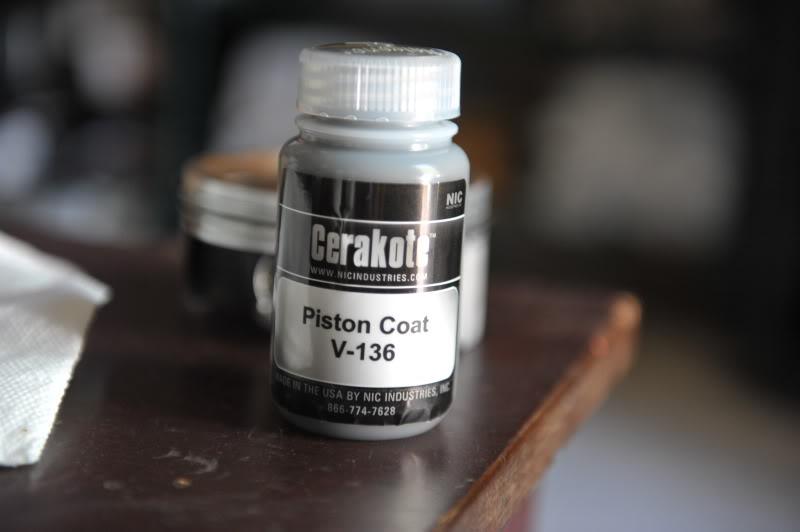
#4: Get your coatings and shake it up. The Techline coating is water based and does not smell. My gold coat was stinky and I would highly suggest wearing a respirator
#5: Put coating in the gun or air brush. If you use a air brush, be prepared for it to clog or only be used once. This ceramic plugs it up FAST and it is not easy to clean. Use a HVLP detail gun and it will make your life much easier later and for clean up. Make sure you mix the coating well and filter it before it goes in the gun. Spray the part. I will not go into the details here because gun setup is a whole other DIY. Look it up on youtube if you are unsure. A good air pressure to spray at is 30-40psi.
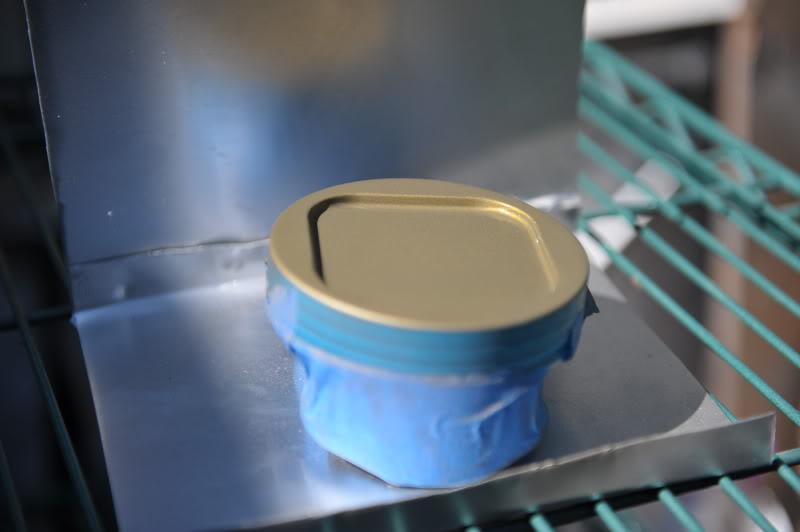
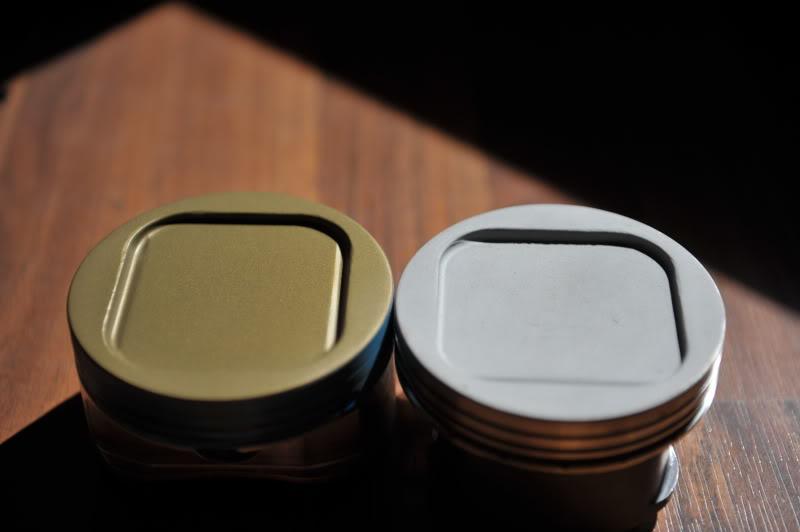
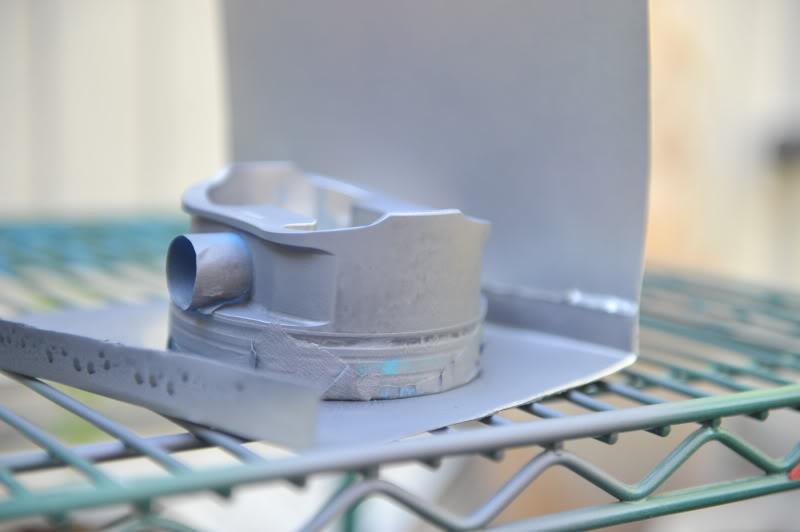
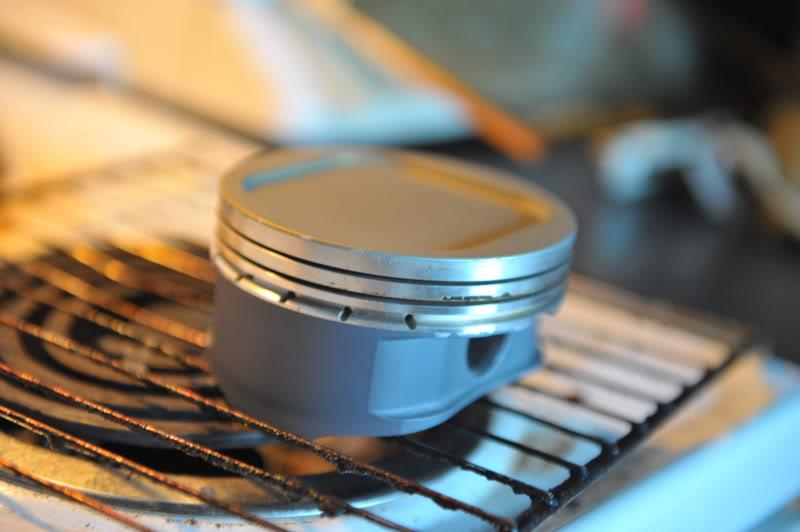
#6: Let the part air dry for 20 minutes. Remove any non high heat tape and take it to the oven. Note you must do this process twice and separately if you are going to do the skirts. More on that in the next post. Place the part in the oven (a toaster oven is a good cheap choice if you don't want to risk exposure to food later). Bake at 175* for 20min to get any remainder solvent dry. Then bake the part at 300* for 1 hour and let cool. Enjoy your new coating  . The Techline stuff is the white coating and the gold stuff is Cerakote. The white Techline stuff if much harder to apply because it is water based and runs very easily. Also, it your part is not blaster 100% or not 100% clean, the ceramic will bubble in those areas so be careful.
Skirt Coatings:
Ok, so before we continue here, be aware the skirt coating is much harder to apply. If you have never used a HVLP gun, don't try it. Even if you have used a HVLP paint gun, if you have never shot water based paint, get some practice. Water based paint is much harder to spray than solvent based stuff and it loves to run and go on heavy. Please do some practice before you decide to spray your pistons or bearings!
1) Mask off the top of your pistons that you coated in the above steps. If you used high heat tape, you ringlands are already masked. If not, remask them and make sure they are covered well. You going to want to mask off the piston pin holes as well.

2)Ok, now your going to sandblast the parts just like above. With 100-120 grit aluminum oxide. Use a little less air pressure on the skirts (or bearings if you are doing those. Same steps as skirts) Blast the skirts and other area's if you desire. The skirts should be a dull finish at this point. Hit the piston with the blow gun and then shoot them with acetone or brake cleaner. Make sure NO BARE skin touches them at this point. Put a new set of gloves on as well.
3)Put the dry film lube into the spray gun and use VERY low pressure with the water based stuff. 20-30psi MAX. I need to get some of the Cerakote dry film lubricant since it is not water based and should be much easier to apply. This was the same case with the top coatings. Hit the skirts with a dust coat first. Then get heavier and heavier. I would place the piston up side down when you are spraying because if not, it is much more likely to run and have drip marks at the skirt bottoms. After you finish spraying, clean your gun immediately. This stuff thickens quick and is a PITA to clean. Let the piston air dry for 10-15 min and then throw it in the oven for 30 min at 175* to get the remaining solvent and water out.
4) At this point it probably looks blotchy and crappy. It's ok. Bake it at 300* for 1 hour and then remove the remaining masking. It should look pretty uniform after baking. If not, take a green Scotch Bright pad and skuff it up to even the coating out. If you are doing bearings, no matter how the coating looks you will want to scuff/polish them with the green Scotch Bright pad. I have some pics somewhere of a set of bearings I did. They are easier to do than the skirts. If you use the Scotch Bright pad, the finish should be shiny. Otherwise, it should be more of a flat sheen.
Enjoy!
9-5-2011
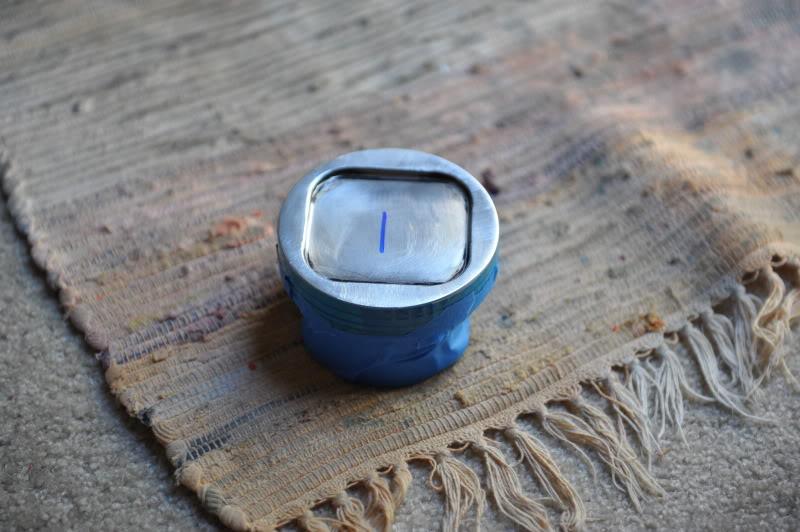
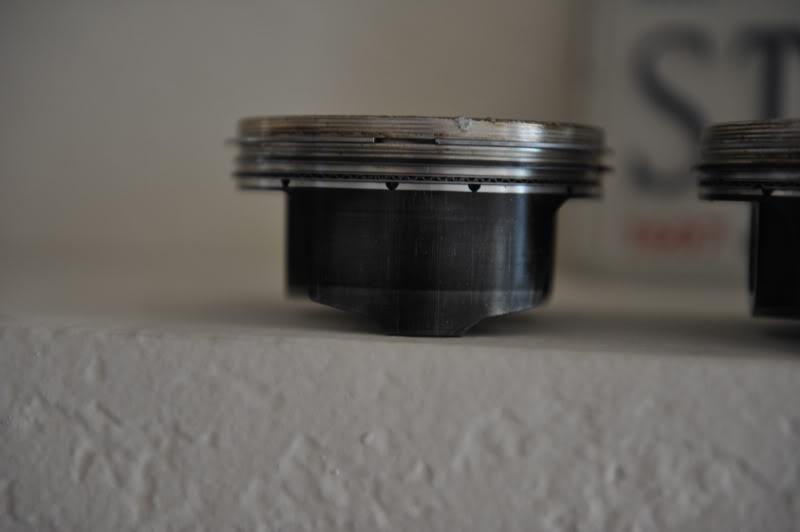
This isn't a Techline coating (Embee) but it shows that when done correctly and PTW set correctly, the stuff doesn't just come off after you start the car. This piston has over 4k miles and dozen's of 10 second passes. I have another piston with over 20k miles and 3 years on it, and the coating is still on it too.
I usually just use scotch bright to rough up the bearings then spray them, bake them, and burnish them with scotch bright again.