You must be logged in to rate content!
5 minute read
Power Steering Fluid Cooler
Compliments of JDwhiteWRX @ nasioc.com
10-19-2012
Hi Guys,
Here is my latest DIY guide, a power steering fluid cooler. The reason for installing this is doing autox, rallyx you are doing a lot of turning lock to lock, fluid gets hot, this helps keep it cool and stops it breaking down. Also running 9" wheels on the track with lots of positive caster puts extra stress on the system.
* note - In Aus (not sure about USA) the STi comes with a factory steering cooler so I wouldn't bother if you own a STi although I think this cooler would be slightly more efficient.
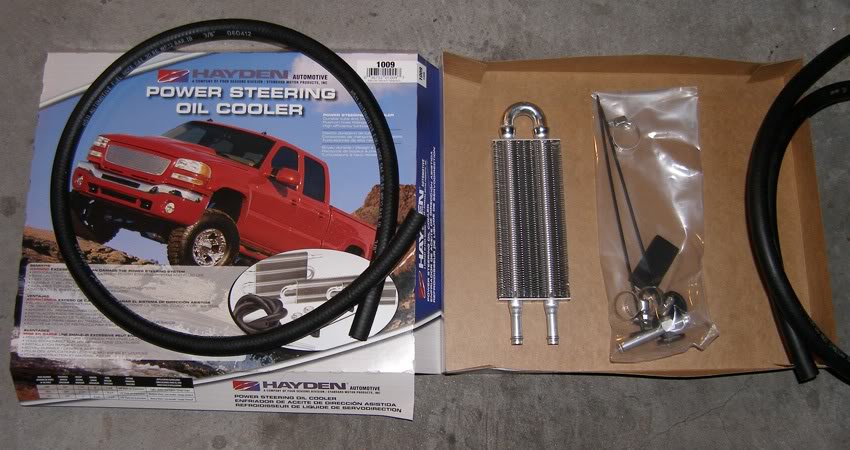
The cooler itself is very common, you could use almost anything off ebay or whatever. The cooler I used is "HAY-1009 3/4? x 2-1/2? x 9? Power Steering Oil Cooler 3/8' push on".
I also purchased an extra 1m of 3/8" power steering hose and one extra hose clamp. Total install time was 1.5 hours but I was drinking beer which always adds time to any DIY
Here is the kit
First step is to remove the air intake, 2 x 10mm bolts
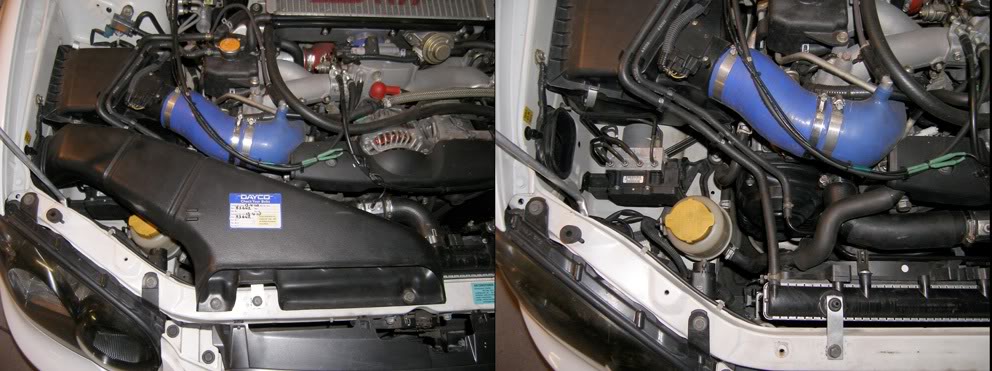
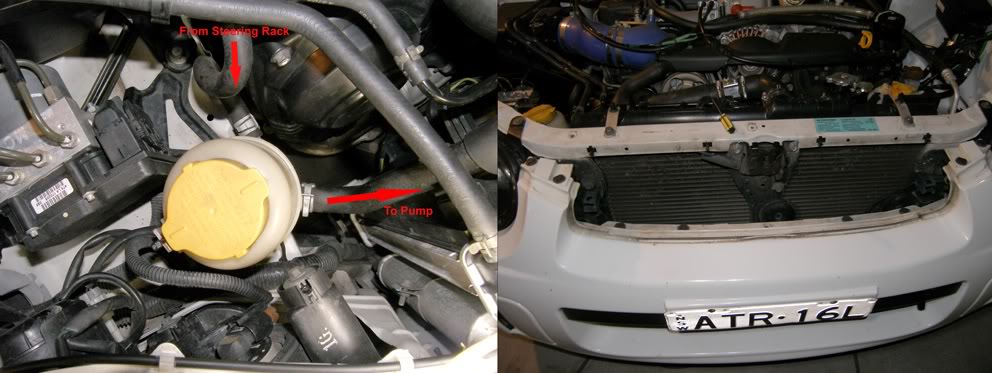
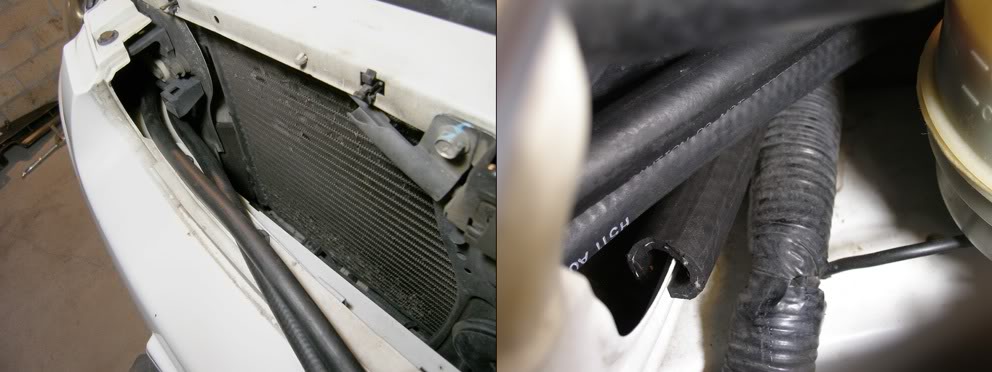
Now lets look at how the power steering system works, the fluid resevior has two hoses coming out of it. One goes to the pump and the other is the return line from the rack, the return line is what we will tap into for the cooler. You need to remove the grill with a flat blade screwdriver, they are little clips which unclip when you push the screwdriver into them.
Now make sure you always keep yourself hydrated when working on the car
Grab your hose and push it through the opening for the headlight, you will need both pieces which we will cut shorter later. I also used an offcut of hose to place over the sharp edge of the headlight opening, just cut it lengthwise and place over the edge.
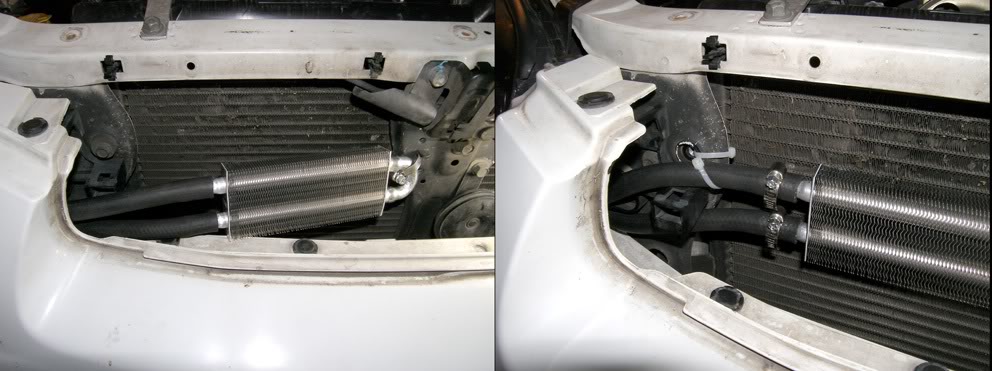
Next we want to mount the cooler, I used that extra hose clamp I bought, just open it up and feed it through the middle rad support and cooler then re-join it. Its fiddly to re-join but makes a simple and strong clamp when done up. Once mounted cut your hose to the correct length, see photos below this photo to see where hoses are routed to and how much hose you will need.
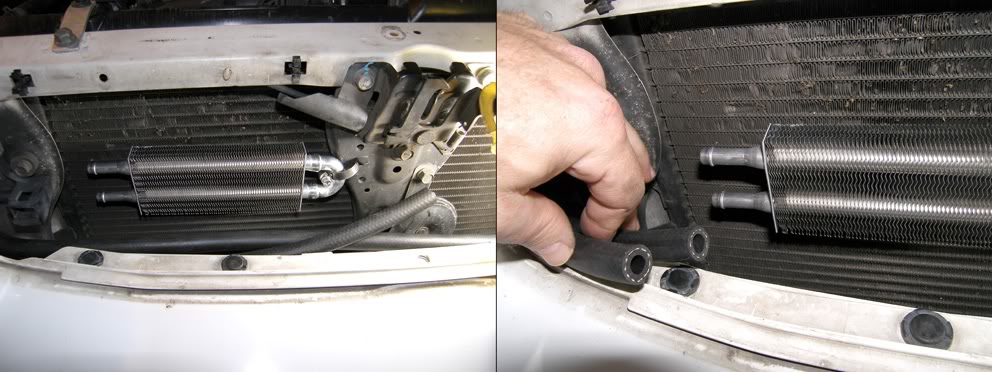
To make more room and keep the cooler level I removed a bolt for the AC compressor and replaced it with a cable tie. I also used a cable tie to hold this hose in place. Don't forget to slide your hose clamps onto the hose before joining them to the cooler.
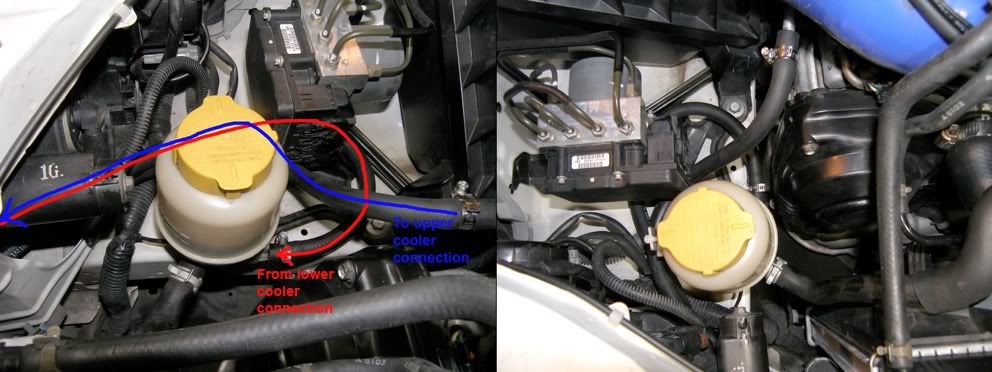
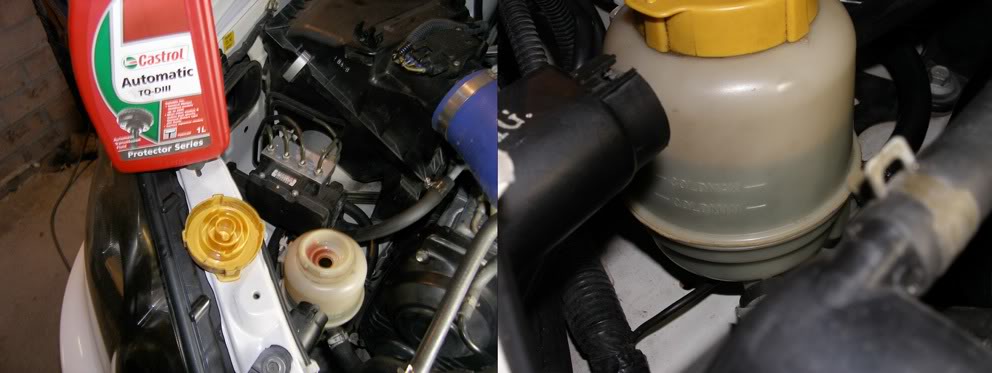
This photo shows where we are running the hoses from the cooler to and lets you work out how long the hose needs to be. I put a rag under the resevior when removing the old hose and connecting the new hose from the cooler and I only spilt maybe 50ml of fluid at most. Its better to unbolt the resevior from its mount so you can lift it up and remove the hose without fluid pouring out the bottom.
Once connections are made you will need to top up the fluid to replace what you spill plus we need extra to fill the cooler and extra hose. This photo shows how much extra I added before starting the car to get the pump running. Remember Subaru use automatic trans fluid for the power steering.
Once all your hose clamps are done up and the resevior is re-attached to its mount you can start the car. After I started the car the fluid dropped to the minimum mark on the resevior so I stopped it and topped it back up the maximum. I then started it again and turned the steering wheel lock to lock a few times to pump fluid through the system.
If there are no leaks you can reinstall the grill and air scoop and you are finished. Keep an eye on fluid levels for the next few times you drive to make sure there is no leaks but there shouldn't be.
cheers
Thanks!
Posted by Diggymart on 10/2/19 @ 1:22:31 PM