You must be logged in to rate content!
4 minute read

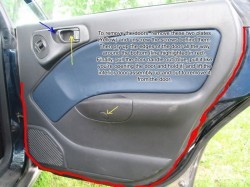
34. Remove inside door panel by unscrewing the door lever screw and the door handle screw. There are plastic covers over the two screws.
35. Pop out the plastic pins around the bottom-outside edges of the door panel and pull the entire panel upward slowly to slide the top of the panel window sill
36. Unplug any wires that may get in your way
(Note you don't have to unplug the window switches but it may help)
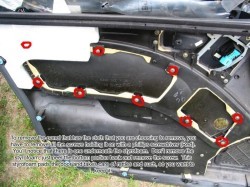
37. Remove the screws surrounding the inside plastic door insert panel. There is one screw under the Styrofoam so you can either remove the foam or simply puncture the screw driver where the screw is underneath it (Note to put the foam back when you are finished because the foam reduces rattles).
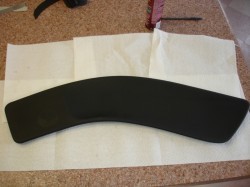
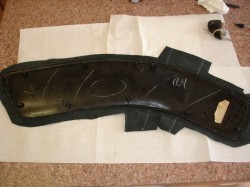
38. Take the door trim panel and separate the old door trim from it.
39. Clean the surface of the plastic door insert panel with some GooGone and a wash sponge to remove the old glue. Somewhat dry rubbing works best.
40. Make sure the surface is completely clean and dry before placing the leather inserts on it. Place some newspaper underneath the plastic and leather pieces if you have a spray on adhesive.
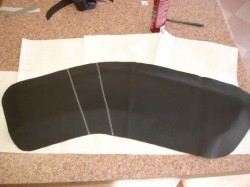
41. Line up the the leather door insert in the general location and cut perpendicular slits along the bottom inside curve so the leather can wrap around evenly.
42. If you have the 2 stitched stripe pattern like the one shown, line up the front stitch line on top of the front edge of the concave indent section on the plastic insert panel).
43. Spray on a decent amount of adhesive in between the leather and plastic but don't completely wrap the leather around the panel because it may need adjusting.
The adhesive doesn't dry immediately so you have a good 10 min of time to adjust after you place the trim back in the door panel to check the alignment.
44. After verifying that the insert is in the right place on the plastic panel, trim up the outer edge of the leather insert and apply additional adhesive where necessary.
Don't cut off the edge of the stitches because they could unravel)
45. To install the door insert into the door panel, just install the screws for the insert. Remember the screw that is underneath the foam.
46. Plug in any wires, hang the door panel in the window sill, pop the plastic pins back into place, and replace the door handle and lever screws.
Congratulations, you're DONE!
Useful tip
You have installed a product made out of genuine leather. As you know, to maintain a leather product in good condition, you should take care of it. We suggest occasionally (every 4-6 week for example) applying some leather conditioner/UV protector to keep your leather from drying up in the sun and cracking.
Redline Automotive Accessories Corp. will not be held liable for any labor, incidental or consequential damages of any kind. Proceed at your own risk.