You must be logged in to rate content!
20 minute(s) of a 158 minute read
12-1-2013
EugeneUtopia's 2010 FXT Project
Compliments of EugeneUtopia @ www.clubwrx.net
12-1-2013
Current mod list:
Current Power : 479.1 WHP, 482 WTQ (E85 @ 25psi).
11.844 @ 116.01 1/4 mile time
------------------------------------------------------------------------------------------------------------------------------------
Motor
Inlet: Perrin turbo inlet
Heads: Ported and polished
Transmission: 2011 STI 6 speed
Headers: Agency Power Equal Length
TGV Deletes: Composite TGV Deletes
Radiator: Koyo performance aluminum
Motor Mounts: Perrin motor mount kit
Downpipe: 3" Invidia (ceramic coated)
Spark plugs: Denso iridium 1 step colder
Air/oil Separator: Crawford Performance
Intake: Motorsports air-intake sensor kit
Flywheel: Comes with the Exedy clutch kit
Boost Control: AEM Electronic Boost Controller
Timing Belt: Gates Kevlar high performance belt
Access Port: COBB Access Port, V3 – SUB – 003
Uppipe: GrimmSpeed
DCCD: DCCDPro active center differential control
Map Sensor: AEM 3.5 Bar Map Sensor with COBB adapter
BPV: Forge Motorsport FMDVSUB03 alloy recirculating valve
Crankshaft pulley: GrimmSpeed lightweight crankshaft pulley
Valves: GSC Power-Division exhaust, intake & beehive springs
Turbo: Blouch Dominator 2.5XT-R (heat shield ceramic coated)
CAI Intake: SpeedFactory Racing Custom fabricated CAI intake
Oil Management: Killer B oil pickup, tray and pan w/STI oil pump
Injectors: Injector Dynamics ID1300s, balanced and flow tested
E85/92 octane Management: Custom fabricated fuel purge system
Radiator Hose: Mishimoto hose
Exhaust: Invidia Q300 catless exhaust (with custom Flowmaster mufflers)
Clutch: Exedy FM022HD Stage 4 Heavy Duty Twin Metallic Disc Clutch Kit
Fuel Regulator: Cobb Subaru 08-14 STI FPR Kit + Tomei Fuel Pressure Regulator
Fuel Pump: 2 x Walbro 460 LPH inside a Radium fuel surge tank, fed by a DW255 in-tank
Air Pump Deletes: KS composite Tech air pump deletes with Phenolic Thermal Intake Spacers
Intercooler: SpeedFactory Racing custom fabricated front mount w/4" Extreme Turbo Systems (ETS) core
Short Block
Rods: Manley H-Tuff
Head Bolts: ARP 625++
Crank: OEM STI heat treated
Cams: GSC Power-Division S2 grind
Pistons: Custom forged CP 99.75mm
Bearings: King race intake and exhaust
Block: OEM EJ257, fully closed decked, dynamically balanced
Suspension
Springs: Fortune 500 coil overs 7K/8K
Strut Tower Bar: Cusco Type OS
Rear Sway: 22mm adjustable Whiteline
Front Sway: 24mm adjustable Whiteline
Tires: Michelin Pilot Super Sport 255/35R18
Wheels: 18 x 8 O.Z. UltraLeggera wheels @ 16lbs each
Brakes
Pads: Hawk HPS
ABS Pump: 2010 WRX ABS Pump
Lines: GoodRidge G-Stop stainless steel
Brace: Grimmspeed Master Cylinder Brace
Rotors: DBA 4000 Series T-Slot Slotted Rotors
OEM add-ons
iPod interface
OBP sport grill
Rear cargo cover
DVD w/navigation
2 x rear cargo nets
Red foot well lighting
All weather floor mats
OBP body side molding
iPod tray in center console
OBP Front sport bumper cover
2010 Forester XT Limited model
Subwoofer under the drivers seat
Miscellaneous
Gorilla mud guards (2 sets, one OEM for stock ride height, the other cut down 4")
STI themed Oil cap
Smoke tinted tail lights
GrillCraft hood scoop grill
Tint - 15% Front, 35% Rear
Cobb black battery tie down
Sound deadening in rear area
2010 WRX instrument cluster
Cobb black on black shift knob
Optima D35 Yellow Top battery
6000K HID low beam conversion
Subtle Solutions Alternator Cover
Grimmspeed magnetic oil drain plug
COBB short throw shifter & bushing kit
OBP (Body color) painted door handles
3000K HID fog light conversion (yellow output)
Blacked out fog light trim rings with amber tint
2010 WRX Hatch ECU and partial wiring harness
Projector headlights, blacked out with LED brow
Interior map, dome, hatch and door lights converted to LED
All major components in the engine bay power-coated black
2010 FXT 5spd yaw rate/G sensor (to make the hill assist work)
JDM Forester emblem overlays on front, rear and steering wheel badges
2010 FXT Build Thread
How I came to get an FXT
Bought the FXT in early August, 2010. My intention was to get a 2011. I heard that the engine, radio and MPG were all going to be better. I couldn’t get a confirmation on when the 2011 was going to be released, and my DD at the time (an AWD Audi A4) was starting to become unreliable, so I decided I’d search for a Forester. Many of my friends had Foresters and loved them, and it matched my needs well.
I test drove a 2.5 Premium and liked it well enough, but coming from a turbo equipped “sporty” car, I felt the power was lacking. My good friend is an Audi fanatic, and when I mentioned that I drove the Forester, he asked me what my thoughts were of the Subaru turbo power delivery vs. the Audi A4’s turbo? I thought at first that none the Foresters were turbo equipped. I didn’t realize that the FXT existed. My buddy schooled me on the Impreza platform and how it carries over to the WRX, STI and Forester. He also let me in on the upgradability of the stout 2.5 motor (though he firmly believes the Audi S4 he owns is the best platform from which to jump into the turbo culture).
I went back to the dealership and asked to look at an FXT. The first time I drove it…. honestly… I was underwhelmed. I could barely tell the difference between the 2.5i and the FXT. Maybe it was because the WRX/STI skewed my expectations. I thought the XT was going to be comparable, no, better than my A4. Still, I liked Subaru. My first brand new car was a Subaru Justy. That car was awesome, for what it was. I had hoped that Subaru had a CVT available for the FXT, but all that was available was the 4EAT. Little did I know how much that small lack of research would come to cost me in the end.
I decided to take the plunge and started searching for an FXT. I knew that I wanted leather, Bluetooth and a turbo; in black please. Easy, right? Nuh uh. While the 2010’s were well discounted, there weren’t many left to be had. There was a black one in Spokane. That was it for the entire state. The next closest black FXT with leather was in Las Vegas. Instead of going with a 2010, I plopped some Benjamin’s down at Walker Subaru in Renton, WA and ordered a 2011 FXT Premium with no extra equipment.
About a month later my worries about the reliability of the A4 proved justified, and I needed something NOW. Called Walker Subaru to see when the car I had ordered was going to arrive. Turns out they never ordered it. I canceled the order, but they refused and tried to hold my deposit. After a long argument and the threat of Small Claims Court, I got my deposit back and started calling around for a dealership that could get it right. I learned that the changes that I anticipated the 2011 model would have were not coming in that year. I negotiated over the phone and email and finalized on the black FXT Limited with 85 total miles clocked at Appleway Subaru in Spokane. It came with more stuff than I ordered on the 2011, but it was available, well discounted and they agreed to deliver it to downtown Seattle.
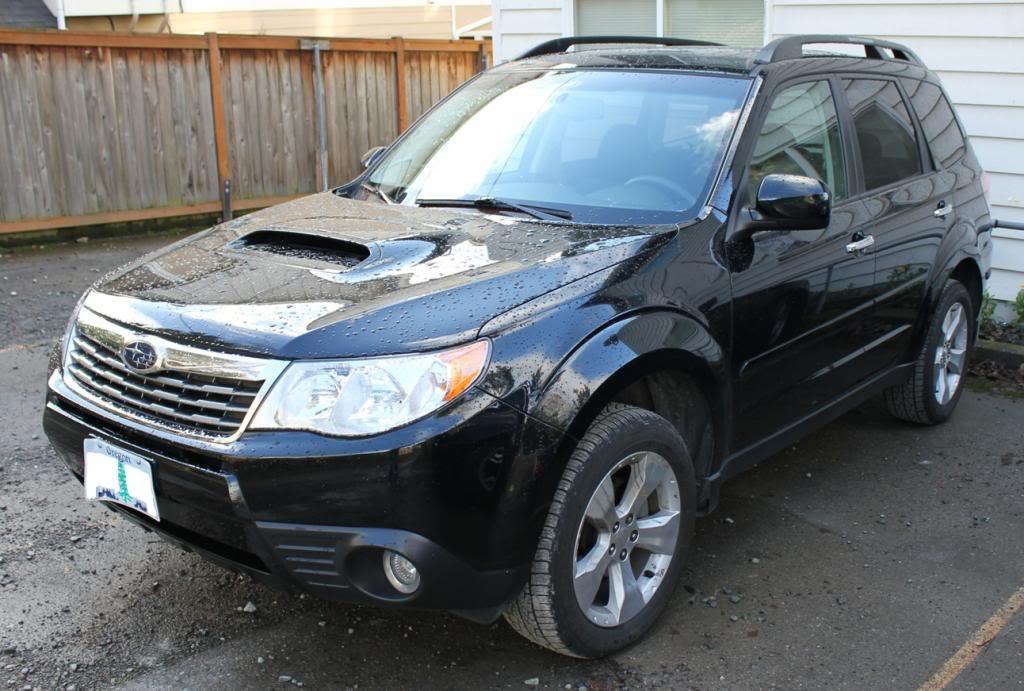
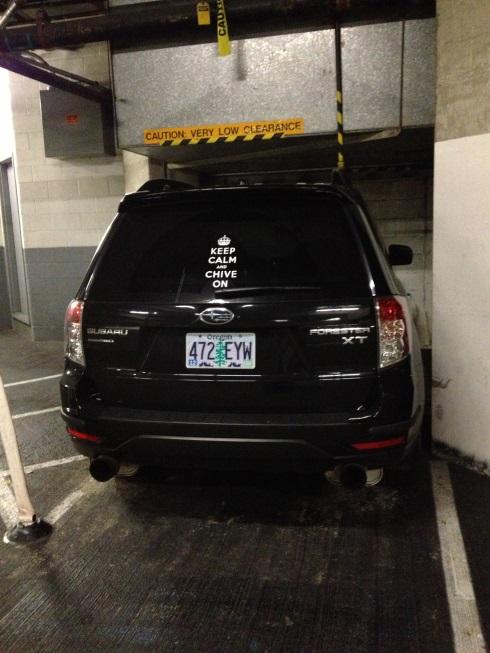
Brand new FXT
Choosing a direction
A few months after I bought the FXT I joined subaruforester.org and started researching what performance options were available. In hindsight, I should have joined/researched first. The FXT is my second car with an automatic transmission (not counting the ’72 Cadillac I bought as a project car in my early 20’s and drove for no more than 150 miles). I’m a stick shift kind of guy first and foremost. I’d always had manual shift cars, and between 1991 and 2007 my primary method of transportation had only 2 wheels (all 40+ of them in those 16 years). I had no idea how much power the automatic transmission robs from the performance of the FXT (as I mentioned earlier, the ’09 – ’13 FXT’s were only available with the 4EAT automatic transmission). It wasn’t until I was in the post-Stage 2 modification stage that I learned that in order to make, and use, exceptional AWHP, you need have a manual transmission. I learned how inadvisable it would be to swap to a WRX/Forester 2.5i 5-speed transmission (not very stout or possessing of ideal ratios) or how difficult it would be to swap to an STI 6-speed transmission. More on that later.
Initial mods – Stage 1
I initially bought a few cosmetic/functional items. Things I could install myself and enjoy immediately.
• Security System Shock Sensor
Floor Mats
The iPod interface is functional, but the interface isn’t intuitive. If I could to do it over again I would just get an aftermarket head unit. The pros include a fairly easy installation and very clean look. You do have to remove the stereo and the center console and center storage. It should take the average person 90-120 minutes to do the first time and half that time if you have to get in there again. Installation instructions here
The under-seat subwoofer sounds decent and you can adjust its output from the DVD/NAV OEM stereo. Installation is much like the iPod interface. If you can do both the subwoofer and the iPod interface simultaneously, you’ll save a lot of time. The subwoofer has been in the FXT for 3 years now. I listen to it fairly loudly, and it still sounds great. Of course, at this price point you can go aftermarket for the same of a little more money and get much better sound. My goal was to go OEM for plug and play installation and reliability/compatibility. If you’re an audiophile, you’ll want to go the aftermarket route. Installation instructions here
Cargo Cover
The security system shock sensor is a no brainer. The sensitivity is adjustable from don’t-bother-installing-it to light parking lot bump (it is on the DVD/Navigation unit; I’m unsure if it is with the base head unit). Installation is very easy and takes 10-15 minutes to install and under 5 minutes to adjust. Don’t let the dealership fool you! My local dealer told me that they needed to set the sensitivity using a computer and specialized cable. That may be the case with OEM head units, but is isn’t at all with the DVD/Navigation setup. They charged me 1.5 hours to adjust the sensitivity alone. It was quite the con. Installation instructions here
I think the color matched body molding is a great deal, and looks awesome. It comes with thin-ish cardboard templates that insure proper placement on the doors. If anyone could screw this kind of install up, it’s me, but it really was easy and fool proof. Installation instructions here
The bumper corner molding look cheap and were hard (for me) to estimate proper placement and install by eye. The backing doesn’t set firmly and starts to peel off if not revisited a few times over the 2-3 hours following the initial install. I’m amazed I haven’t taken them off yet. I guess I have a sense that if I do, the bumper will get scuffed immediately after. Installation instructions here
Color Matched Body Molding
& Bumper Corner Moldings

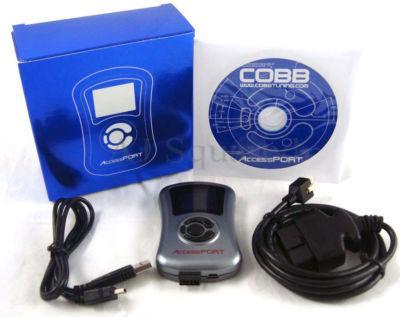
The AccessPORT was eye opening. In my opinion the best option for a budget minded owner wanting more UMPH. It gave me the modification bug! While expensive @ $600, it provides a stand alone performance boost and arguably mandatory for any modification past Stage 1.
Access Port
2nd round mods – Stage 2
I saved up for the next year and a half, lurking at subaruforester.org. May of 2012 I learned about Maxwell Power Services in Marysville, WA. I consulted with Dom, stating in uber-noob fashion that my goal was 380-400 AWHP. At ~15,000 miles on the odometer we went with:
• Invidia Q300 cat-back, dual tip exhaust
• AEM electronic boost control
• Whiteline 22mm rear sway bar
• Whiteline 24mm front sway bar
Dom advised me that these mods wouldn’t get me 380-400 AWHP, but it should be around there. The net result of this combined modification was 307.9 AWHP @ 5650 rpm & 375.9 AWTQ @ 3500 rpm.
308hp / 376tq
I was VERY happy with the actual power it made after the initial tune and mods, even tough the horsepower gain it produced was much lower than I was expecting.
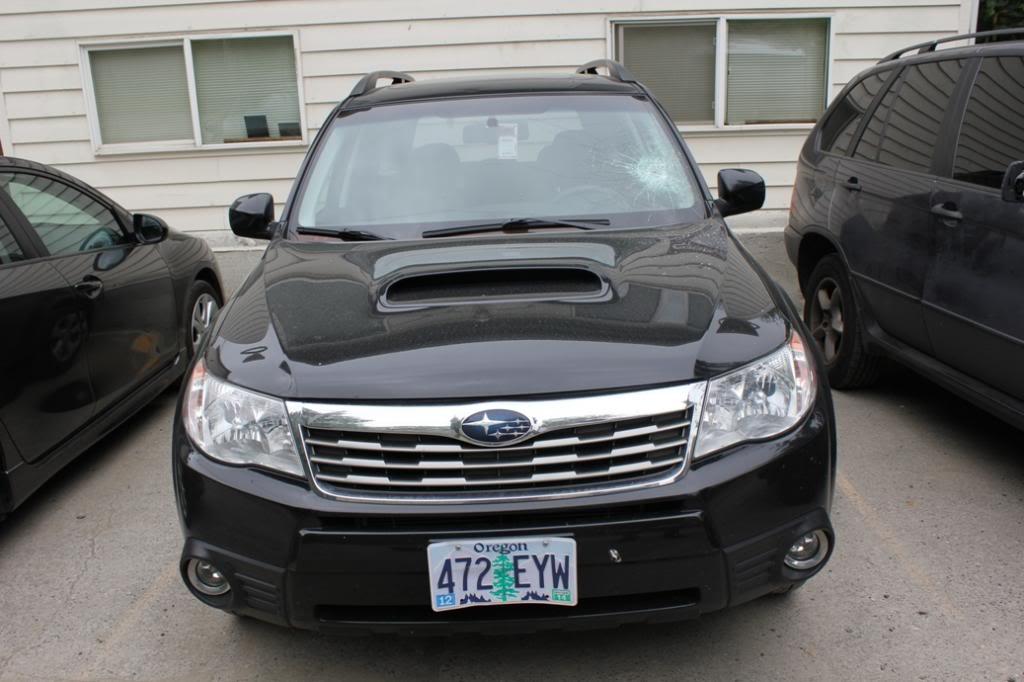
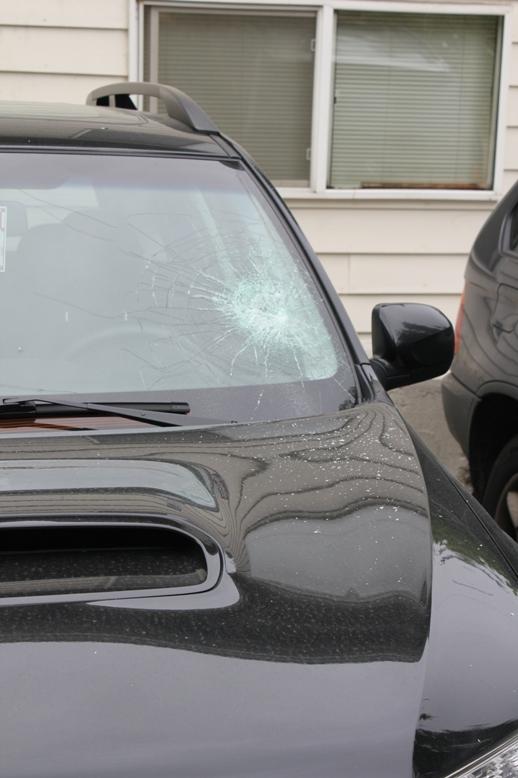
Someone smashed my windshield with a large rock less than a month after getting the exhaust. I’d lived in the same place since the car was new, and I don’t have a bad relationship with anyone in my neighborhood, so the only thing that I can think might have drove someone to vandalize the FXT was the noise of the exhaust. At the time the Q300 was really pretty quiet. But it didn’t say quiet for long.
Vandalism
Increasing power and eliminating boost creep
Over the course of the next 8 months the FXT developed a REALLY bad case of boost creep. The boost creep was there right after the mods were installed in May of 2012, but it wasn’t very noticeable. As time past, it became more noticeable until it got to the point that it would violently shut down power. I felt it was dangerous. I went back to Dom at MPS and we discussed a possible fix for the boost creep as well as the path to higher HP.
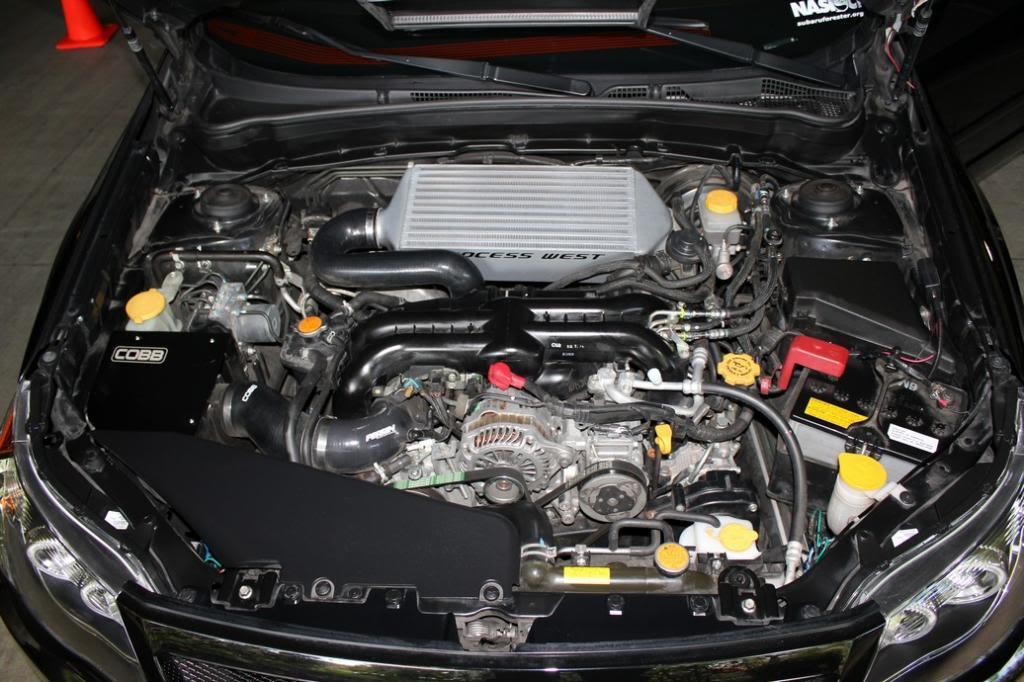
In February 2013 and with ~30,000 miles a Process West TMIC w/ Process West Traditional Turbo Upgrade Hose (necessary for the non-standard turbo placement), Cobb SF intake and Airbox was installed. The Blouch 380XT was removed and the housing (wastegate) ported. Dom performed a re-tune to compensate for the added modifications, including dropping the map to a maximum of 15psi. During the re-tune considerable knock was noticed and the boost creep was reduced significantly, but it still existed. A few days later Dom switched to 1 step colder spark plugs, which did help a little more, but didn’t resolve the issue 100%.
• Process West Traditional Turbo Upgrade Hose
• Denso Iridium Power Plugs One Step Colder IKH22
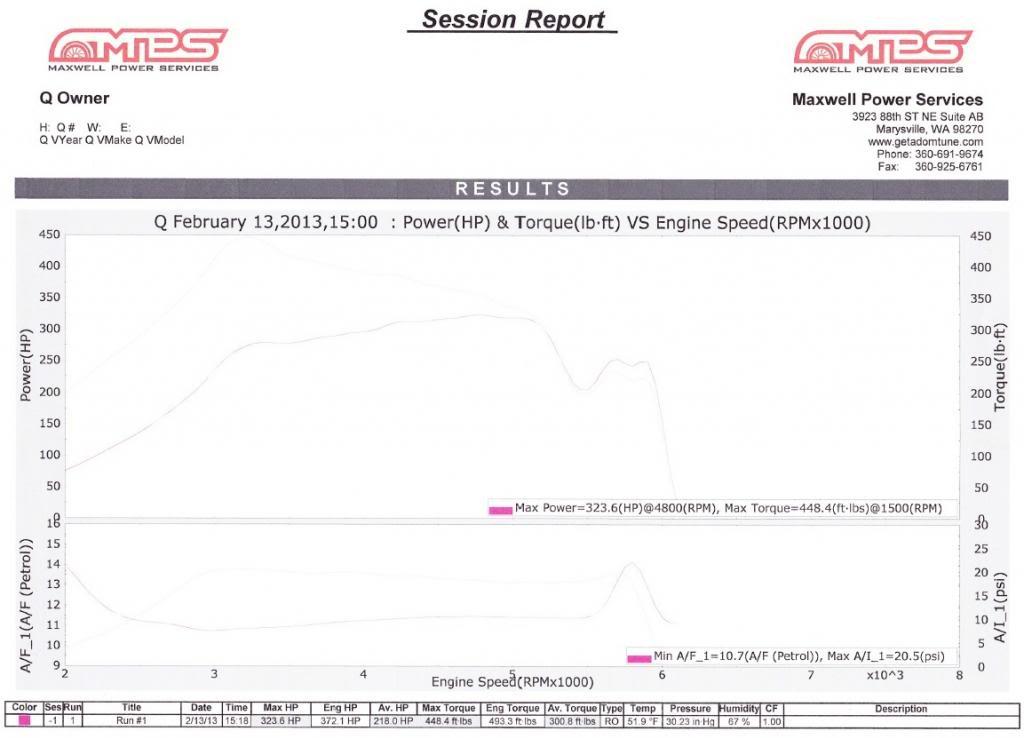
The net result of this modification was 323.6 AWHP @ 4800 rpm & unk AWTQ (dyno read 448.4 AWTQ, @ 1,500 rpm, but I seriously doubt that).
The knock was still very bad, and the timing had to be retarded by 11 degrees.
Process West TMIC
324hp / 448 tq
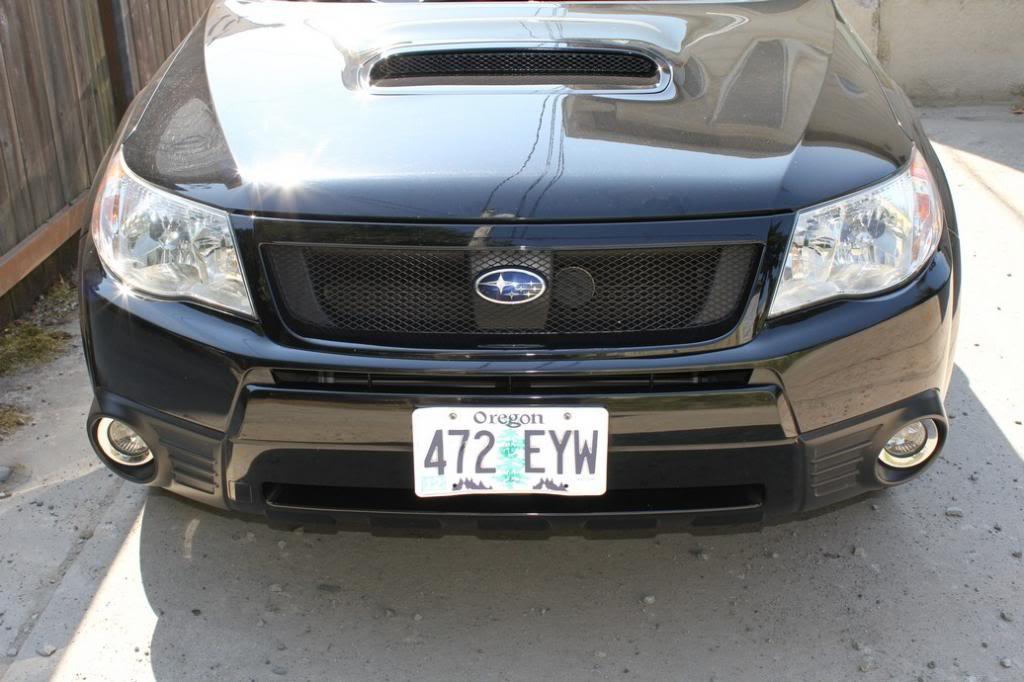
While looking on the forums I came across the GrillCraft hood scoop grill. Knowing it would match the sport grill once I get that, I decided to buy and install the GrillCraft hood scoop grill. It didn’t fit the scoop opening very well, but its close enough to not be noticed by the causal observer. Looks pretty decent, and I have yet to see another in person. I bought and installed it in Mid March, 2013. Instructions for the install can be found Install instructions here
GrillCraft Hood Scoop Grille
At the same time I returned to the Genuine Subaru accessories for some aesthetic and convenience items.
• Interior Illumination Kit (blue)
I don’t like the look of the OEM grille. It makes the FXT look like it has braces. After searching for an alternative (the STI sport grille, an aftermarket Carbon Fiber grille and a few others) I eventually went with the OEM Sport Grille option. Installation took about an hour, but probably should have taken closer to 30-45 minutes. Installation Instructions here
Subaru Sport Mesh Grille
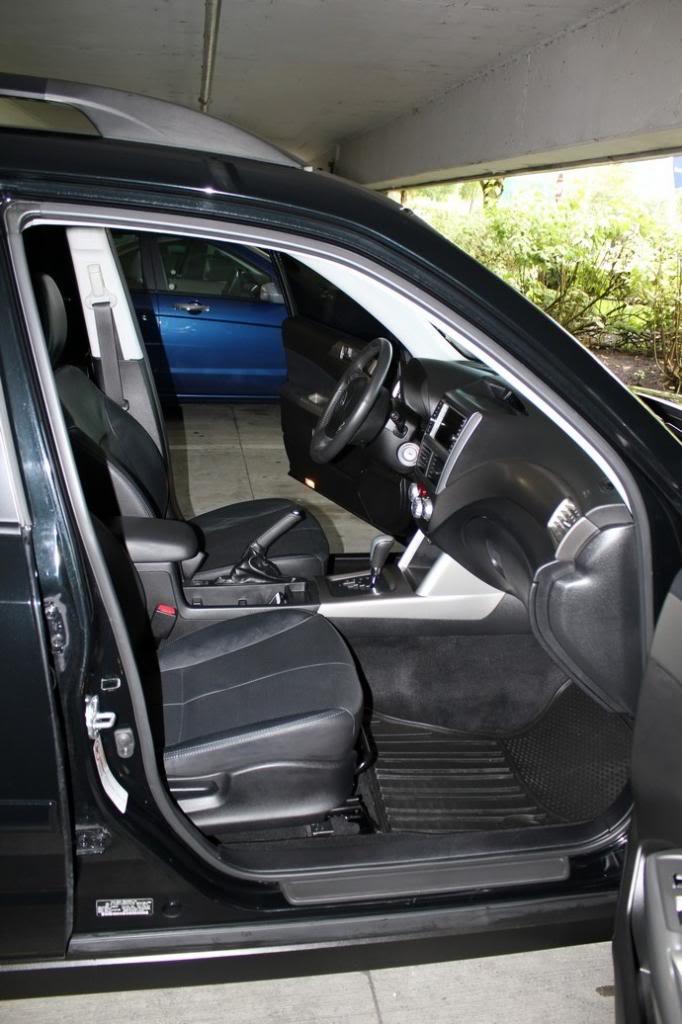
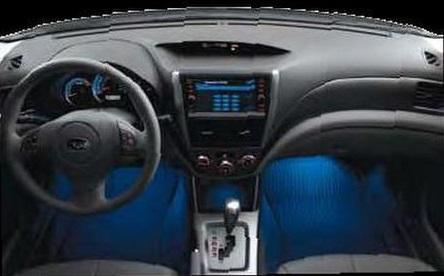
I also installed blue footwell lights. Knowing then what I know now, I should have gotten the red footwell lights. My instrument cluster was blue when I installed the blue footwell lights, but I currently have a WRX instrument cluster (more on that later) which is red. Putting in the red footwell lights will come later, I’m sure. Installation instructions here
Footwell Illumination Kit. Stock photo. I can’t take low light photos well
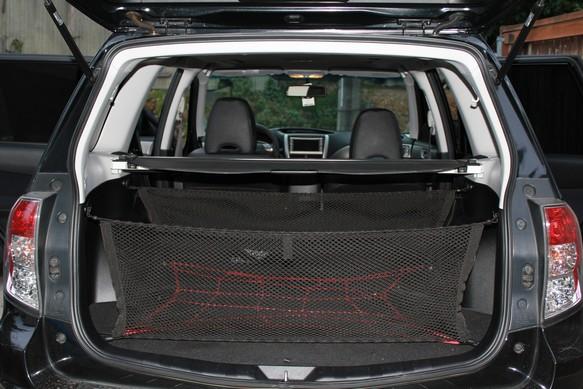
Lastly, the cargo nets (one that goes against the back of the rear passenger seats and the other that goes directly in front of the rear hatch) often come in handy. While the front net and rear net have two different part numbers (F551SSC001 & F551SSC101) they are, in fact, identical. Mounting is very easy, with the exception of finding the areas that have “no texture”. These areas need to be drilled into. I have pretty good vision and it took me forever to find them. Installation instructions here
Cargo Nets

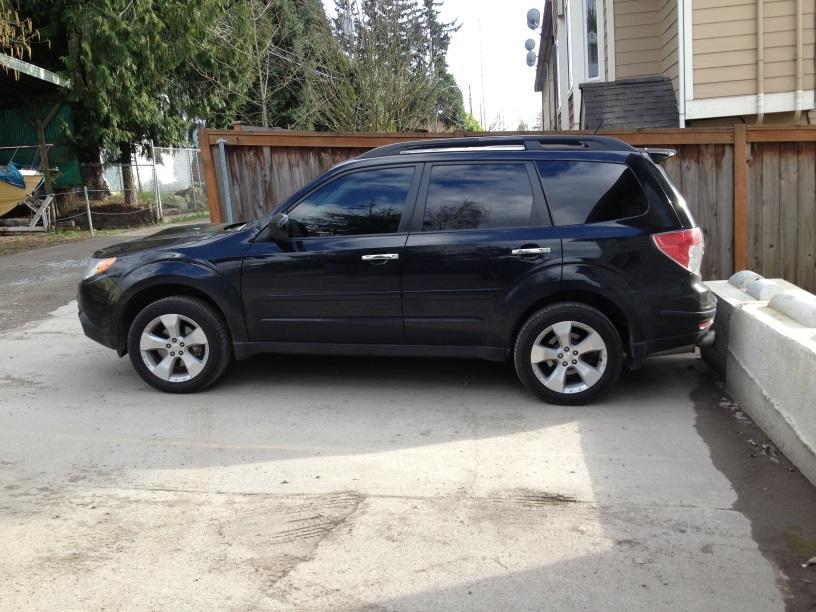
A couple of the OEM wheels were pretty dinged up because of some careless parking. Wanting to get some nicer, undamaged wheels and keep with the blacked out theme, my next step was to get replace the OEM alloys, in black. Unfortunately I couldn’t afford that yet, so opted to Plasti-Dip the originals. The DipYourCar website has some great tutorials, but ordering the Plasti-Dip product from DipYourCar is neither the fastest nor the most affordable option. Instead, I bought the Plasti-Dip from Home Depot of all places. DipYourCar sells the black product that I thought would look best on my car for $6.85 per can, plus shipping. Home Depot sells the exact same product for $5.98 with no shipping fee or delayed gratification. I bought 4 cans, but actually needed 7, because I chose to do 6 coats on each wheel including out outside as well as the inside of the wheel. The end result came out pretty good! This is a GREAT product which comes in many colors. If you want to test a wheel color (or body paint color), this is a very easy, inexpensive way to visually validate the right direction for you for very little money. A little effort and the Plasti-Dip comes off, leaving the original surface as it was before it was applied.
Pre Plasti Dip
Post Plasti Dip
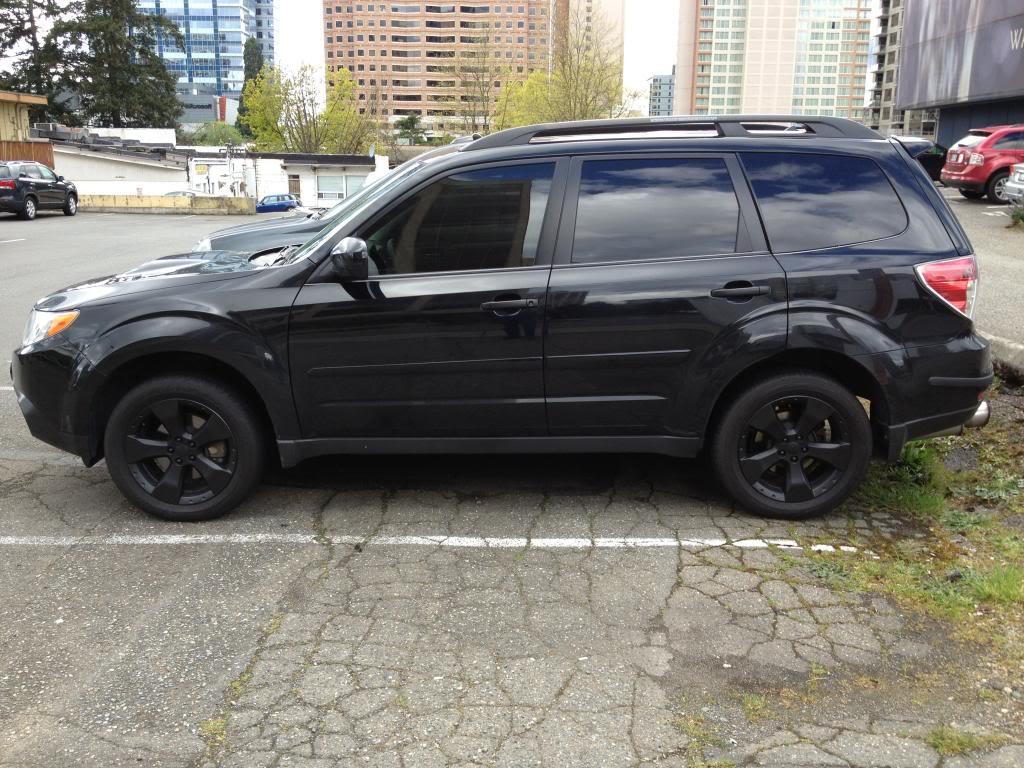
I brought the FXT to AccuTint in Bellevue, WA to get it tinted a few days later. I found a good deal on GroupOn or Yelp or some place like that. I had 15% tint installed on the front windows and 35% tint on the rear. This makes the car look a lot better IMHO. I have no problems seeing out in daylight or at night. I think if it were any darker it may be dangerous to drive at night. The 35% added to the factory tint makes it nearly limo tint dark.
Tinting

Nice story about AccuTint. First off, the owner offered to drop me off at my work while the work was done (1/2 day). They also picked my up when it was done, which in itself was unexpected and appreciated. What really set them apart from other businesses was what one of my favorite websites, thechive.com, would call a RAK (random act of kindness). The Chive embraces random acts of kindness between its members and anyone else for that matter. I had a sticker on the inside of my back windows which I had applied to the inside of my rear window only a few weeks prior to deciding to get the tint done. The front desk employee at AccuTint told me that the sticker would have to be removed. I told her about the new sticker, and that I was bummed that I’d lose it. When I came back to pick up the car, I discovered that AccuTint also creates custom stickers, and had duplicated and applied the sticker they had to remove. They did it as a surprise, and didn’t ask for any compensation. Wonderful people there at Bellevue AccuTint!
KCCO - Chive On!
Catastrophe and Stage 2+
At about 44,000 miles the FXT started to lose performance. It smelled like oil, smoked when it was started in the morning and at one point wouldn’t hold a stable idle. A cracked piston was to blame, so a set of JE forged pistons were installed. While I did like the power the FXT had made, it wasn’t at the 400ish AWHP that was shooting for. Since the piston install was a major job, I opted to ask DOM what else he would do if it were his. Some calls were made and the results was:
• Blouch Dominator 1.5XTR Turbo
• Agency Power equal length headers
• KS tech air pump delete plates
• Center timing belt guide
• JE EJ257 99.5mm forged pistons
• Cam bolt – NON AVCS
• Oil Pump Timing Belt Guide
• Denso Iridium Power Plugs One Step Colder IKH22
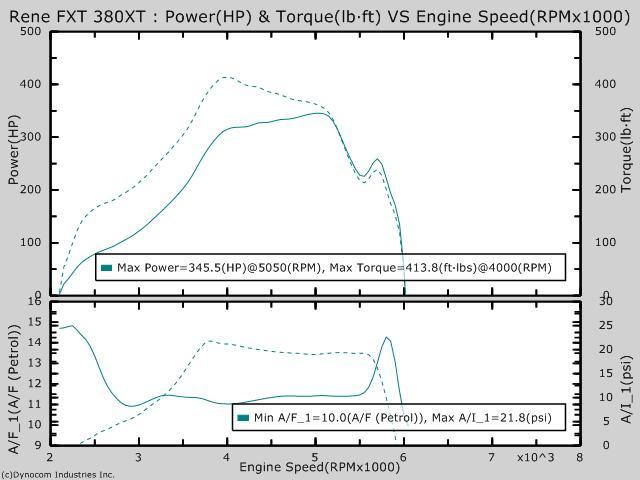
The net result of this modification was 345.5 AWHP @ 4800 rpm & 413.8 AWTQ @ 4000 rpm and no more cracked piston or poor drivability.
It was with this modification that I learned how the 4EAT automatic transmission was the limiting factor for any more significant increase in power and torque. The only option at this point to get more from the build was to install a 5 or 6-speed transmission. If only I had known that $11,000 ago.
346hp / 414tq
Looks like a fun little sleeper!
Posted by MPower on 10/12/20 @ 2:03:01 PM