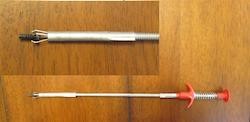
- #2 Phillips screwdriver
- flat-tip screwdriver with thin blade.
You must be logged in to rate content!
4 minute read

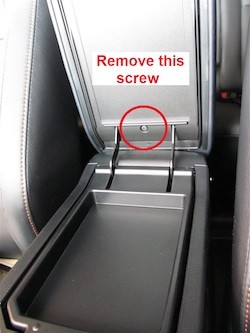
1. Raise the armrest (console lid) and remove the screw at the bottom.
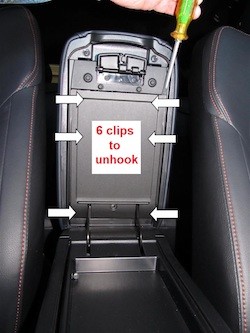
2. Using a thin-bladed flat-tip screwdriver (or similar tool), carefully pry off the plate on the bottom of the armrest. Start at one of the upper corners and work across and down - there are six clips to unhook.
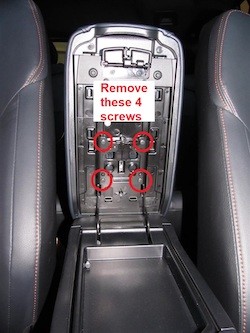
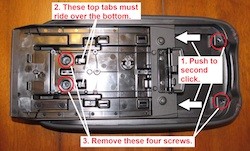
3. Remove the four screws and you can remove the armrest assembly from the mount.
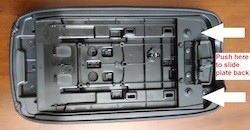
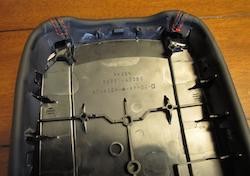
4. To access the screws that hold the armrest itself (where you will mount the new cover), you have to move the armrest plate back two notches (away from the top). This plate moves on rollers and has a ball with two detents (not visible unless you take the plate all the way off - DO NOT take it off). Push on the latch mount area (arrows) away from the top - the plate will move about 1.5 inches and snap into place. Push again until it snaps into place a second time. Two plastic tabs in the plate have to ride over two tabs in the assembly beneath - you may have to lift up the bottom of the plate slightly to allow these tabs to ride over. (Don't push farther than the second notch.)
5. When the plate is clicked into place in the second notch, two holes will line up with the two screws beneath. Remove these two screws and also the two screws at the top of the armrest.
6. (A small parts holder may be useful for this - if you drop a screw, let it roll to the center of the cover, then it will fall out the back/bottom end.) Leave the plate in this second notch position - don't move it back to its original position.
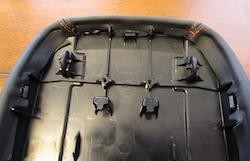
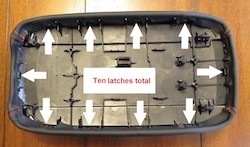
7. Pull the entire assembly away from the upper armrest. There are four plastic latches on each side of the upper armrest and one on each end, that will have to be released. (The latches release easily; they are a little harder to get back in place.)
8. Install your new cover (and padding, if any) over top of the existing cover. You will need to use a good glue such as leather/upholstery glue or contact cement.
9. Be careful not to get any glue on the outside surface, and make sure no part of the new cover covers any of the plastic latches (you may have to do some small trimming with a good set of trimming scissors or a sharp knife). Stretch the new cover as tight as possible down inside the upper armrest (this is to make sure there is no excess material that will make it hard to reinstall the assembly plate).
10. When the glue has dried, push the assembly back into the upper armrest, making sure the ten plastic latches are hooked. You may have to insert the four screws first and tighten these gradually (in an X pattern) to draw the assembly down into the armrest latches. (Again, a small parts holder will be useful to insert the screws into their holes.)
11. Slide the armrest plate back two notches to its original position (toward the top). Reverse Steps 3-2-1 to reinstall the armrest in the car.