- 3/8" Ratchet
- 14" of 3/8" extensions
- Spark Plug Socket
- Flathead screwdriver
- 10mm wrench
- Spark plug gapper
- Torque wrench (13 ft-lbs and 69 in-lbs)
You must be logged in to rate content!
7 minute read
How To: Replacing Spark Plugs and Wires on 5VZ-FE 3.4 V6
Compliments of TacomaJPP @ www.tacomcaworld.com
1-31-2013
Safety Blurb: Don’t do anything stupid. If you do something stupid and kill yourself or your truck, don’t blame me. You’re responsible for your own actions and if you are desperate enough to read a “how to” on the internet, then you assume all responsibility for the outcome. Let’s get started.
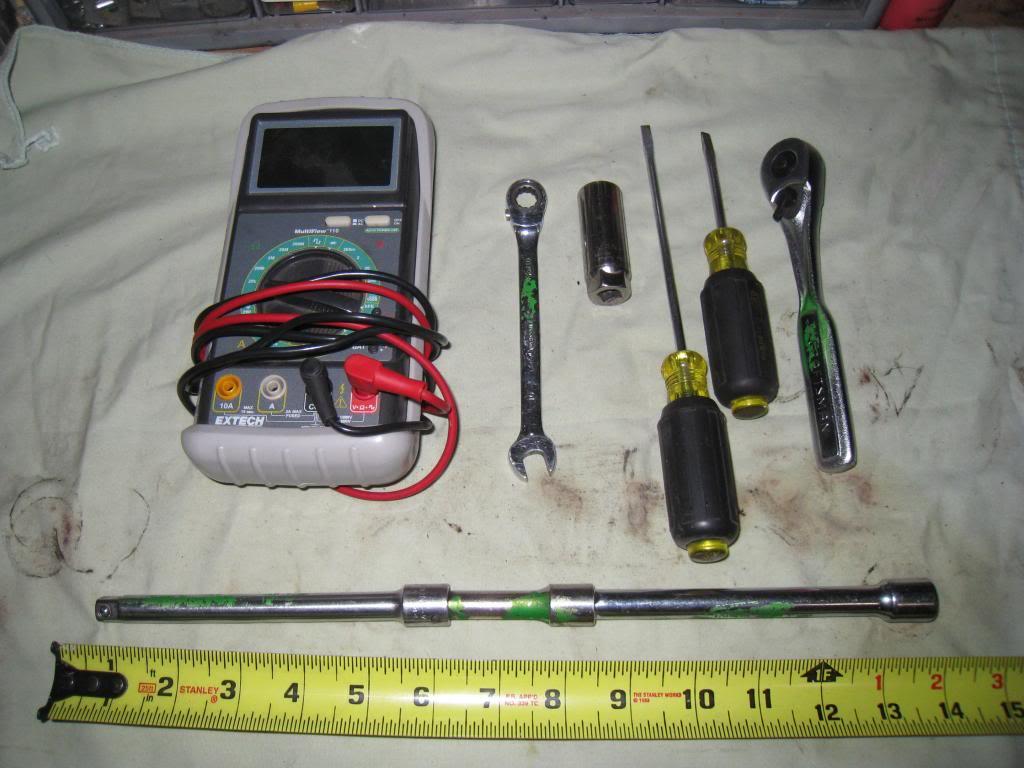
Tools Required:
3/8" Ratchet
14" of 3/8" extensions
Spark Plug Socket
Flathead screwdriver
10mm wrench
Spark plug gapper
Torque wrench (13 ft-lbs and 69 in-lbs)
Optional Tools:
Digital Multimeter (DMM)
Code Reader
Parts Required:
Toyota Spark Plugs
Qty: 6
Part Number: 9091901192
Price: $2.44 each x 6 = $14.64

Toyota Spark Plug Wire Set
Qty: 1
Part Number: 1903762010
Price: $55.05
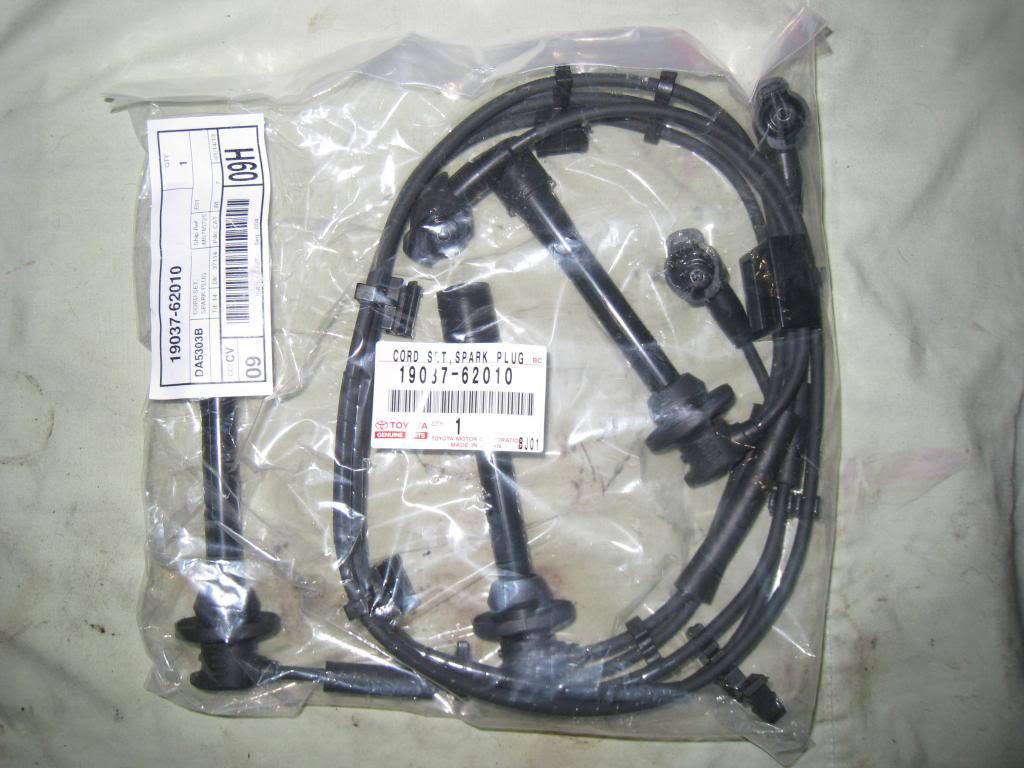
Source: www.partznet.com
Factory Service Documents:
Attached and will be found at the bottom of this post.
Symptoms: As part of a routine maintenance plan, spark plugs and wires should be changed more frequently than most folks do them. 100,000 miles is probably acceptable. My truck had 104,000 miles since the last change. I experienced a severe driveline shudder. In fact, it prompted me to replace my carrier bearing.
After the carrier bearing replacement, it was obvious that the problem still existed. My CEL flashed randomly for about 15 seconds on a couple of different occassions when I tried to accelerate hard. I felt a severe driveline vibration.
Eventually, my cousin, a certified mechanic suggested I change the plugs and wires. I ended up using a code reader and retrieved a P0306 code. The P0306 means a misfire on cylinder #6. P030X code indicates a misfire. The"x" digit will indicate the cylinder.
However, the P030X code could be a wide range of things including: bad spark plug, faulty spark plug wire, faulty coil, faulty cam sensor, faulty crank sensor, or a dead cylinder based on insufficient compression. It really runs the board.
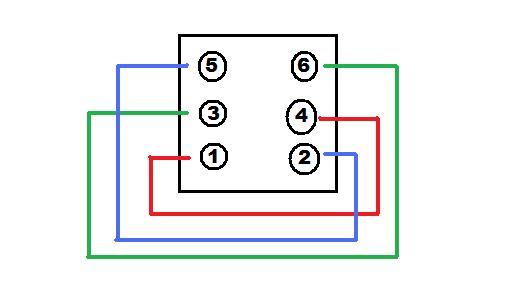
Cylinder Diagram.
Step 1. Unplug your battery and let your engine cool.
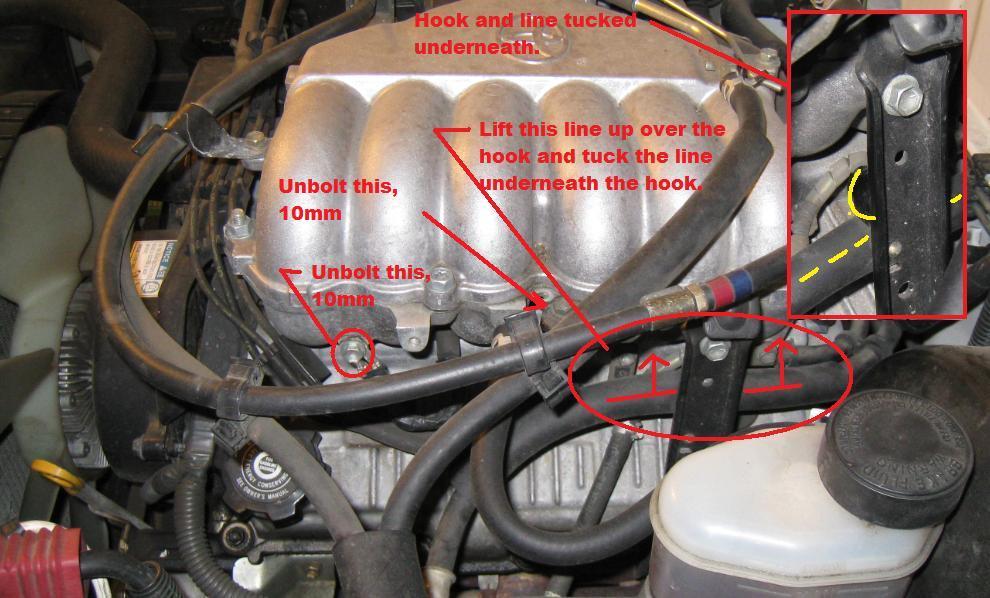
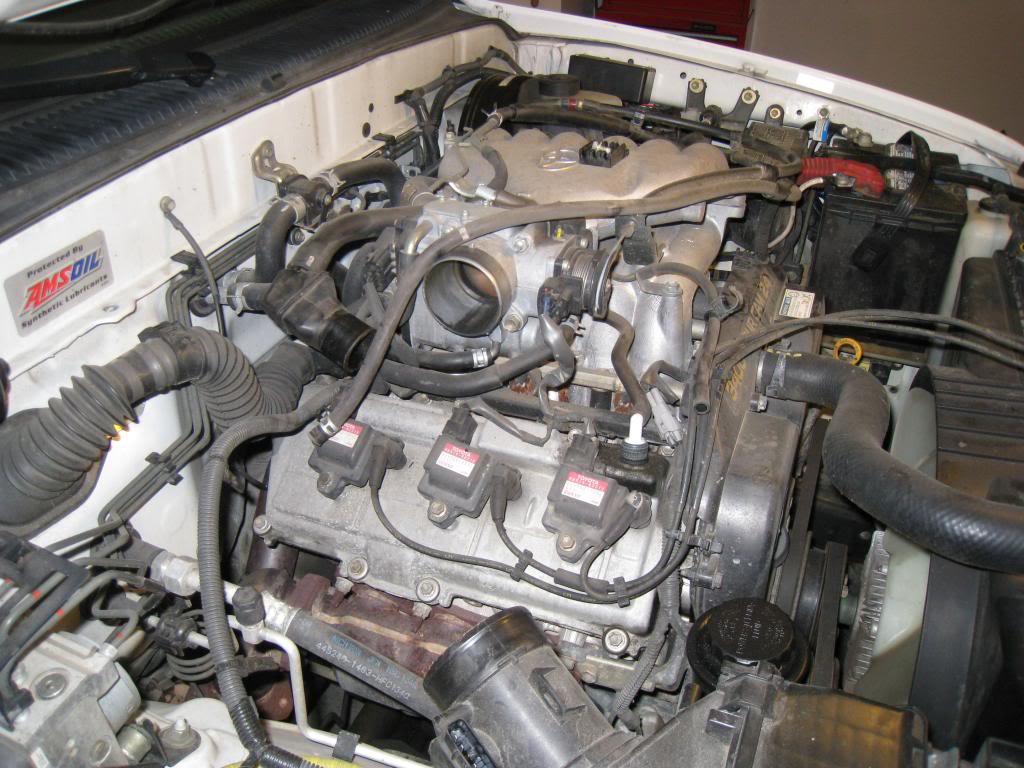
Step 2. Prepare to remove the plug wires on the driver side of the engine. Remove the bolts as pictured below. Also lift the vacuum line out of the hook and tuck it underneath the hook. This will allow for flexibility of the lines to make unplugging the boots and removing/installing the plugs much easier.
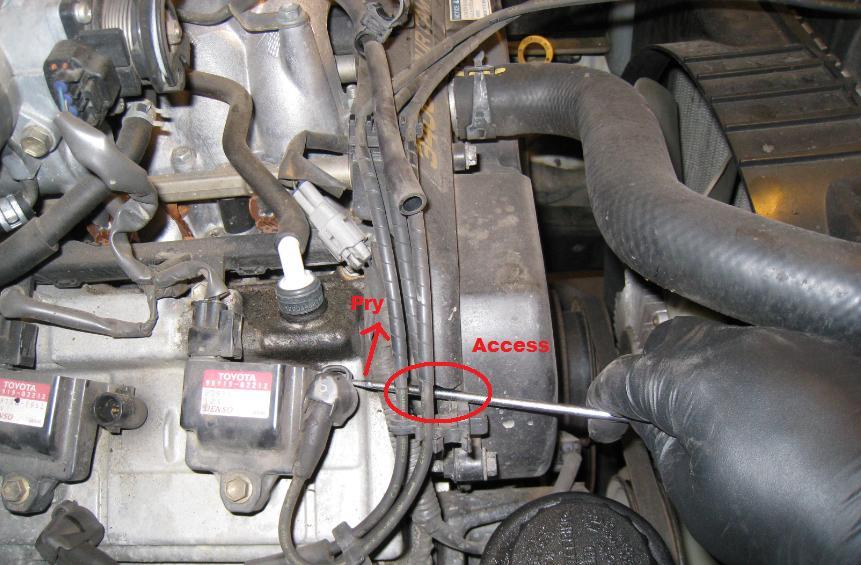
Step 3. Prepare the passenger side of the engine. This is most easily done by removing the air intake tube. Pictured below are the components that need to be unclipped, unscrewed, etc to get the air tube out.

Step 4. Return to the driver side and begin with cylinder #6 (closest to the driver's seat) and begin removing each boot on the driverside, progressively working closer to the front of the engine.
Continue by unclipping the spark plugs wires from the retainer clips across the front of the engine.
Step 5. Unclip the spark plug wires from the each of the coil packs. Do so by using a flathead screwdriver.
Step 6. Return to the driver's side and remove the spark plug from cylinder #6 using a 3/8" ratchet with 14" of extensions and the spark plug socket.
Step 7. Gap your spark plugs. Although the spark plugs are supposed to come pre-gapped, they aren't. All 6 of the plugs I received were gapped at 0.022". The specification calls for a gap on the 5VZ-FE motor of 0.043". Since it is a dual electrode plug, you will need to gap each electrode.
Step 8. Dab a small amount of spark plug dielectric onto the end of the spark plug where the boot connects. You can purchase spark plug dielectric in the small "condom" packs typically found at the counter of your local auto parts store.
NOTE: There is much internet debate about whether or not to lubricate the threads of your spark plug. Since NGK is one supplier of Toyota spark plugs, I found this article of particular interest. Summary: The Denso and NGK spark plugs have nickel plated threads. The nickel plating has a lubricating quality not requiring any anti-seize or other lubricants. Moreover, anti-seize will tend to create so much lubricity that mechanics will tend to over-torque the spark plugs and will cause problems for removal later.
See technical publication: http://www.ngksparkplugs.com/pdf/tb-0630111antisieze.pdf
Step 9. Install the spark plugs into each cylinder on the driver's side of the engine. Spark plugs are to be torqued to 13 ft-lbs. Be careful not to strip the threads. This is best done by getting the spark plugs started by using the spark plug socket and extension and starting it with your fingers.
Step 10. Move to the passenger side of the engine andr emove the cylinder #1 coil. To do this, unbolt the 10mm bolt and unclip the electrical supply clip by using a flathead screwdriver to apply leverage to the retainer clip and gently pull up.
Step 11. Remove the spark plug and replace it.
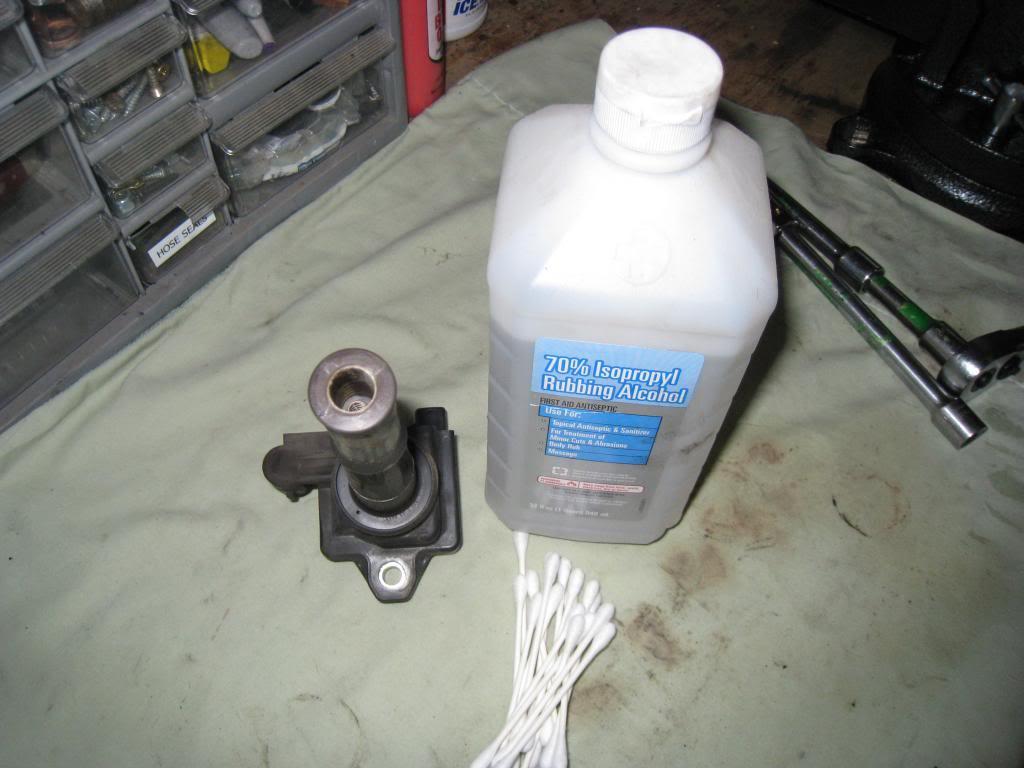
Step 12. Use some alcohol and Q-tips to clean the tip of the coil boot and just inside of the boot. Be sure to not damage the spring up inside the boot.
Step 13. Reinstall the coil, pressing firmly down and re-installing the 10mm bolt that holds the coil down. Torque this bolt to 69inch-lbs. Next, install the electrical supply clip into the coil.
Step 14. Repeat this for cylinders #3 and #5.
Step 15. Take the new plug wire set and begin installing the wires by clipping the plugs on the passenger side of the engine starting at cylinder #5 and progressively working towards the front of the engine. Work your way across the front of the engine by clipping the wire set into the plastic cover for the timing belt. Leave the last one (on the top, on the driver's side) unclipped for now.
Begin by fishing the #6 boot across the valve cover and plugging it into cylinder #6. Next, install the boot for cylinder #4 and finish by plugging the #2 boot in. You can now clip the final clip into the plastic timing belt cover.
Step 16. Re-install the bolts on the driver's side of the engine removed during preparation and rehook the vacuum line back on the hook.
Step 17. Move to the passenger side of the engine and reinstall air tube making sure to plug the MAF sensor back in and tighten all of the spring clamps and hooking up all of the vacuum lines that were removed in Step 3.
Step 18. Hook battery back up.