You must be logged in to rate content!
4 minute(s) of a 106 minute read
6-5-2015
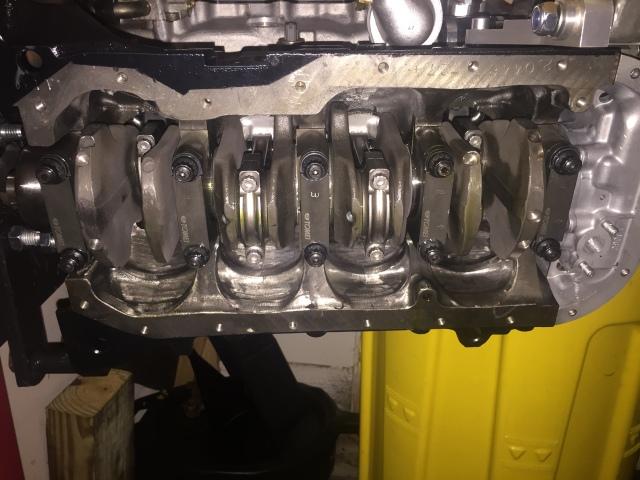
Ok fellas, engine work is done at the shop....had to get a new block, the other was already 83mm and re-honing it would of put it out of the sidewall specs needed so got a new block, bored for 83mm, installed everything and had my head bolted on...over the past week or two I've been slowly bolting everything on, had my cams and valve buckets DLC coated, shimmed the cams which for anyone who has a 20v knows how big of a pain in the ass that is and this is what the results are....
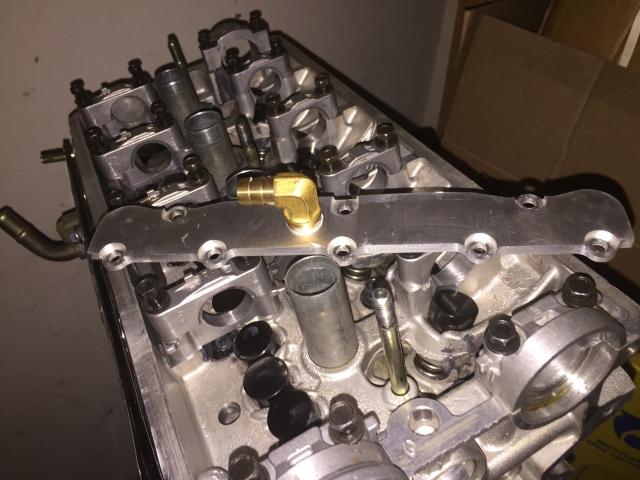
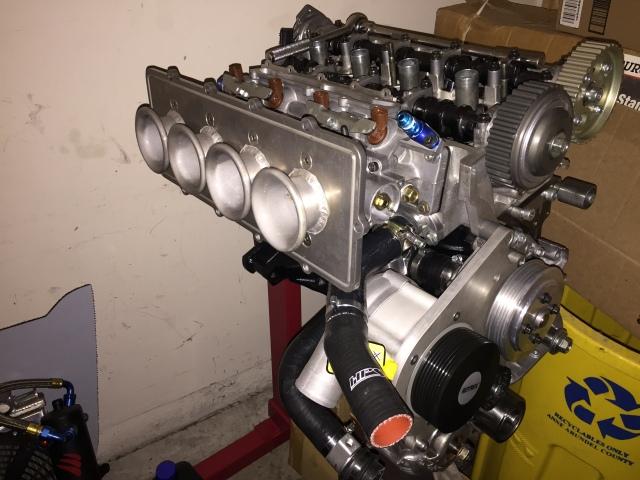
Heres the head with the DLC coated valve buckets and a SQ Engineering block off plate that eliminates that bulk air canister that sits on top of the ITB manifold. I tapped it with a barb so I can still connect the idle control valve to it.
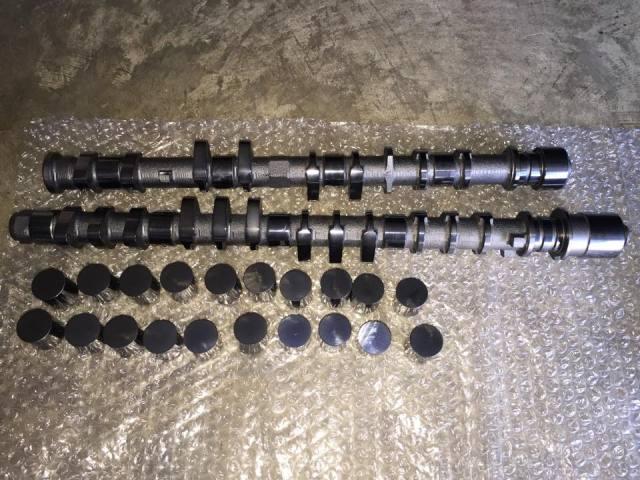
DLC coated cams and valve buckets. Last engine setup I had I just did the buckets and there was no wear on the sides or tops at all when I sold the head...this time I did both in hopes the friction reduction would be reduced substantially between the cam lobes and buckets and between the cam caps where the cams spin at.
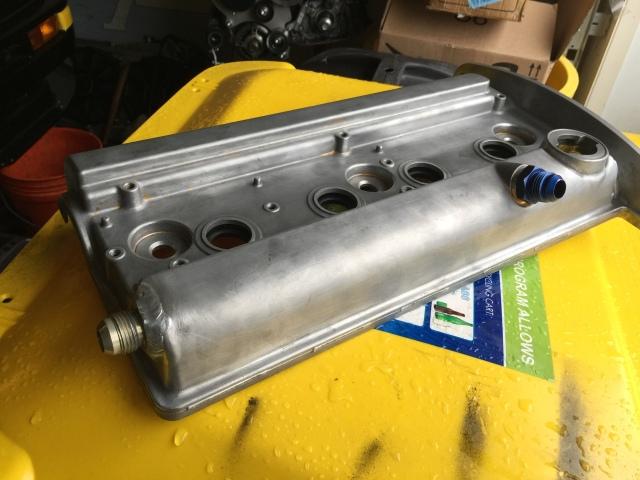
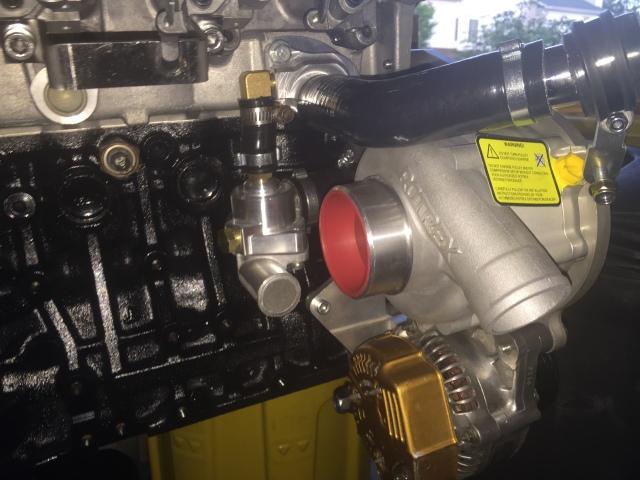
Heres my original valve cover, I had an additional 10an fitting welded to the rear of the cover. I will be running two catch cans this time...one from the original pcv location to a catch can and then to a one way check valve to another port I'm having placed on that SQ block off plate above...this will recirculate the crank case pressure back into the engine after the catch can scrubs it...when the intake pressurizes and there is no more vacuum in the manifold the check valve will close to prevent the crank case pressure from being pushed back thru the catch can into the valve cover. The second port on the back of the head will go to a second catch can to scrub the air and then into my air intake pipe after my air filter...once the supercharger starts to spin it will cause vacuum and suck the air out of the valve cover creating negative pressure in the engine..well thats how I'm figuring it will all work out anyways.
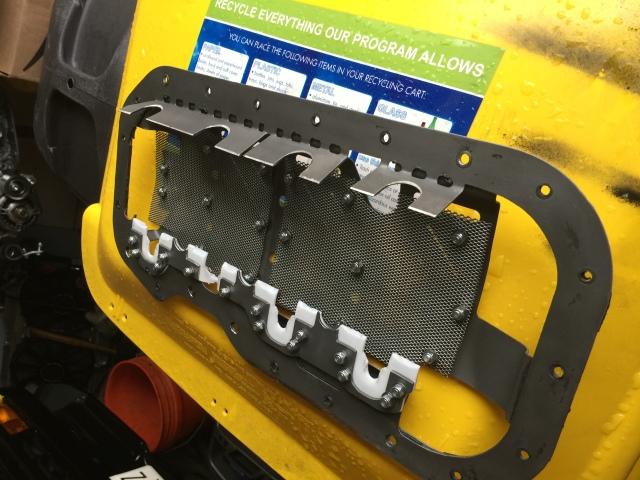
This is old from the last engine but i installed a new teflon piece to scrape the crank and made a few adjustments to the metal scrapers as well.
Heres some pictures of the engine being assembled, New SQ engineering RWD water circulation kit is top notch and fits perfectly with the S/C, Custom made plenum with velocity stacks by Barry at MRP, Block was prepped like the last one water jackets cemented half way up, crank case polished to remove any casting marks and rough edges.
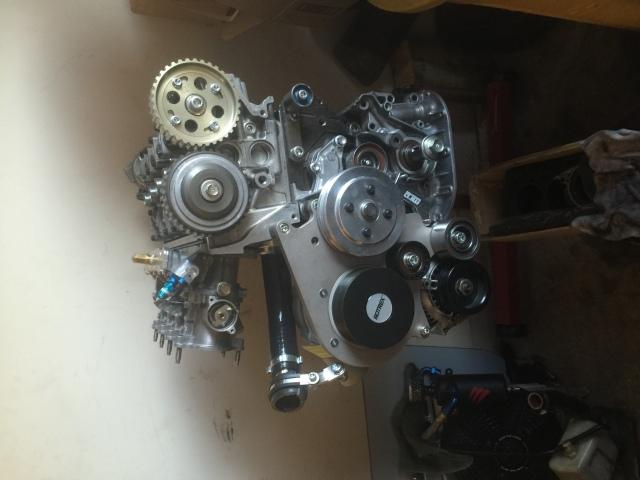
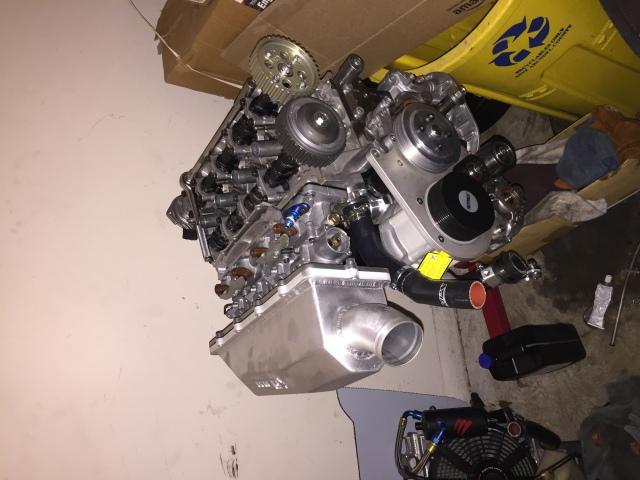
Another oil pan from Moroso...this time its a full custom pan with the same trap door system as my last pan but has smaller wings so its less volume but he old pan would not clear the lower alternator with the supercharger kit. This thing is built tough and kind of heavy.

Thats it for now will update as my progress continues....sorry if some of the pictures come out sideways i can't figure out why they upload that way.
I have a set of Toyo RA1s on my car now but have another set of watanabes with some ventus z214s on them
A lot of detail!
Posted by Diggymart on 3/24/20 @ 4:53:18 PM