You must be logged in to rate content!
19 minute(s) of a 106 minute read
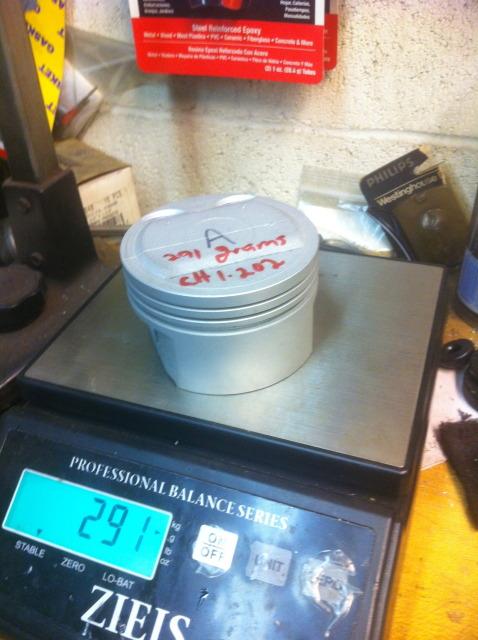
1-17-2013
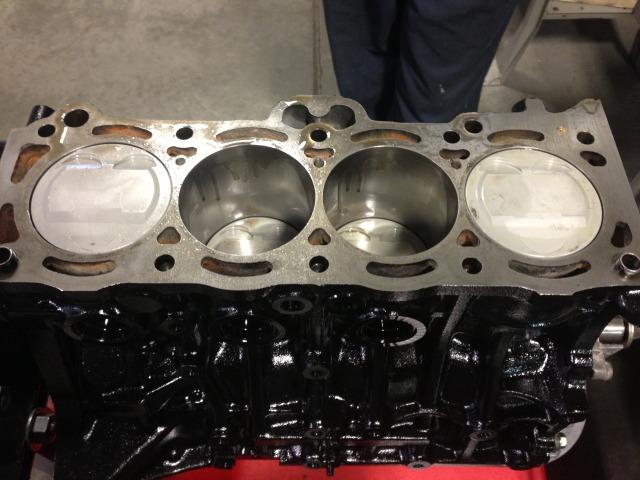
5.5 is a completely square engine 83mm stroke and 83mm bore final displacement 1796cc
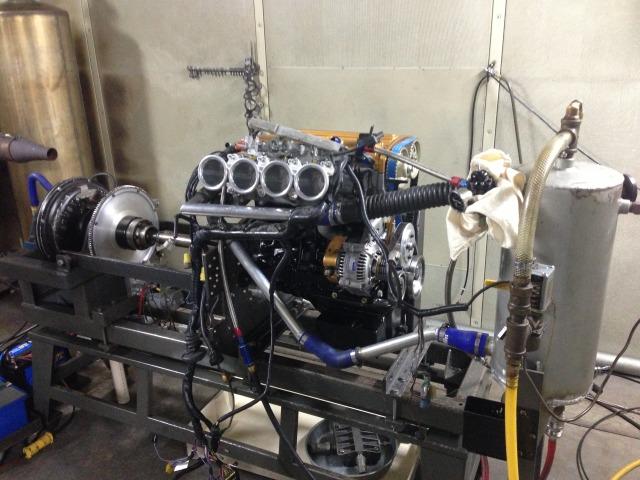
well yeah the more expensive way....best of both worlds though...more torque like the 7ag while reserving the rev-ability of the 4ag........should hit the dyno soon had an injector and O2 problem after breakin which is all sorted out now ...
1-18-2013
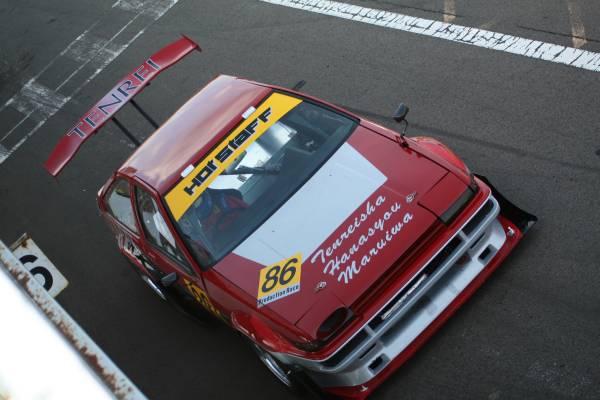
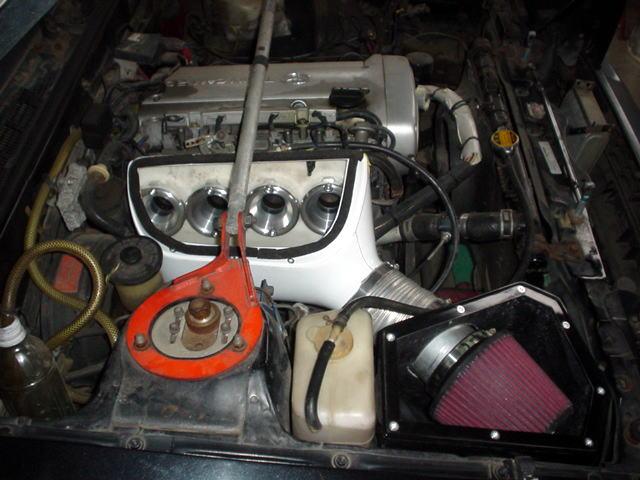
Acquired a piece of AE86 history today...thanks to staff at Hot Staff a piece of history will live on thru my car...a little cosmetic touch up and paint and we are in business
hey ronny you avocado hatch you parted was what inspired me to build a 20v....now after looking at what i spent your price for that engine was a steal....lol....notice your silk road headers on the engine ????
Heres little write ups i did on another forum
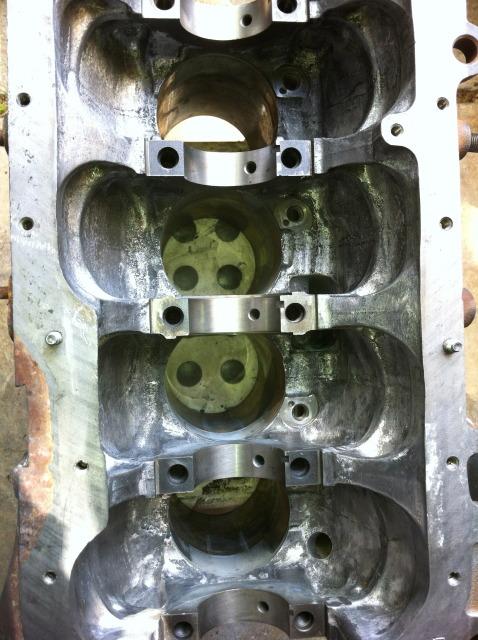
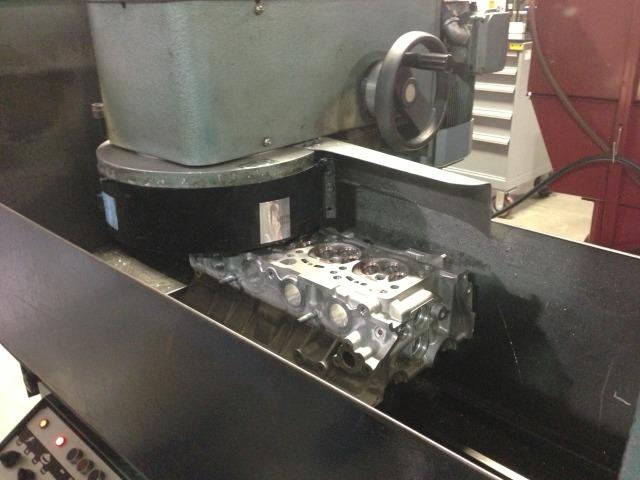
block being hot bored, line bored and honed with torque plate
cams are a special Toda setup not available to the public 300 duration 10.7mm lift they only sell 9mm lift in a few durations to the public. lift was so high the lobes hit the spark tubes and had to modify them to have clearance
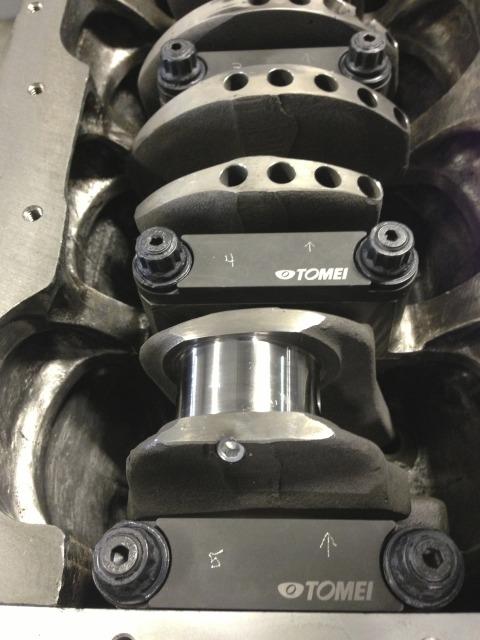
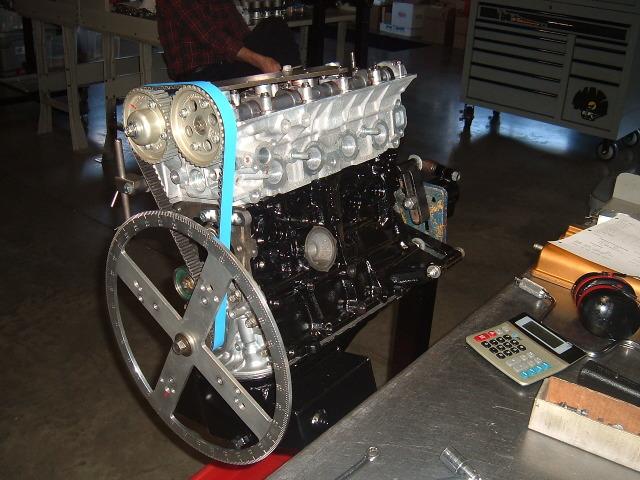
Block is fully balanced, blueprinted and cemented due to it being 83mm bore...the cement added extra strength to the cylinder walls...if you do bore over in 4ag blocks always cement and wait 30 days or so before boring ....Tomei ladder caps are used with ARP bolts to prevent flexing of the main caps at high RPM......must have unless u have custom main caps special harmonic balancer was made to absorb and additional vibration, its about 2.8lbs compared to the stock one. Custom windage tray with teflon crank scraper. Pistons are CP with ceramic coating on top and friction coating on skirts.


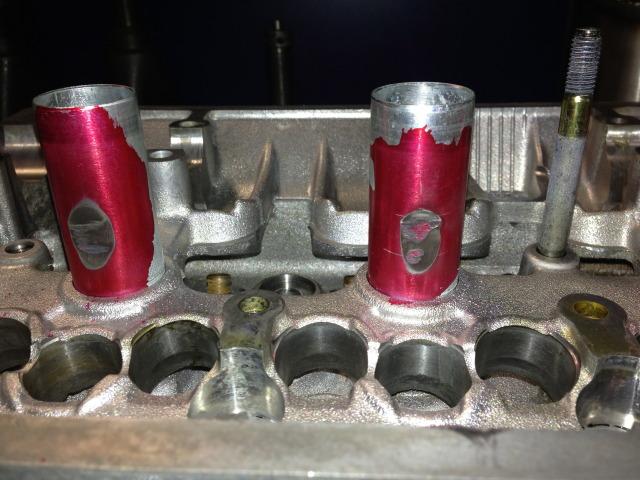
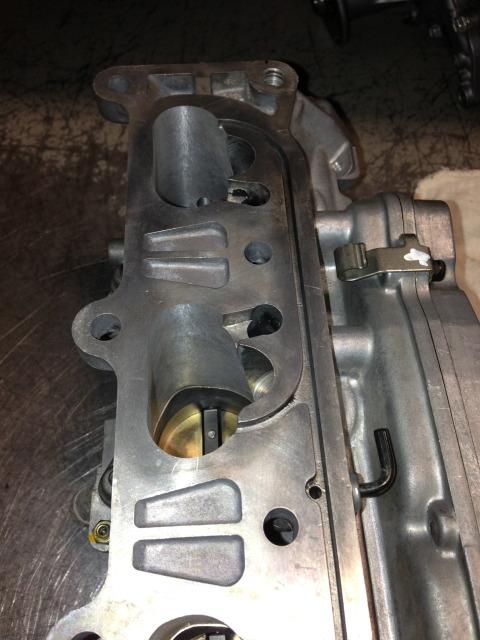
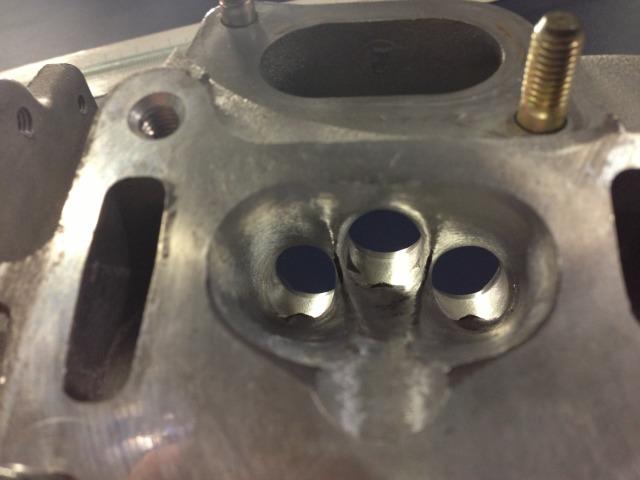
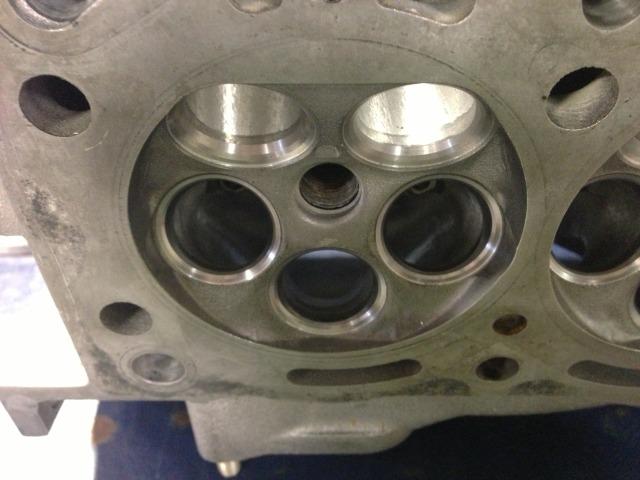
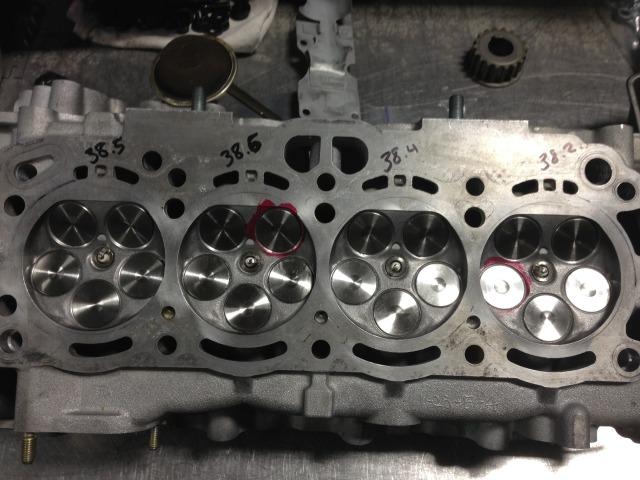
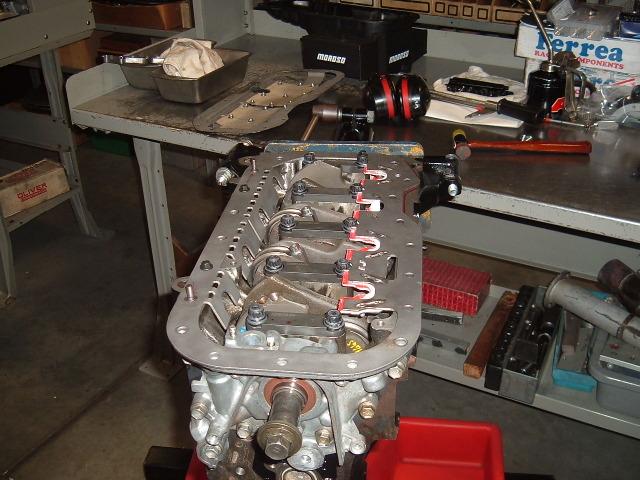
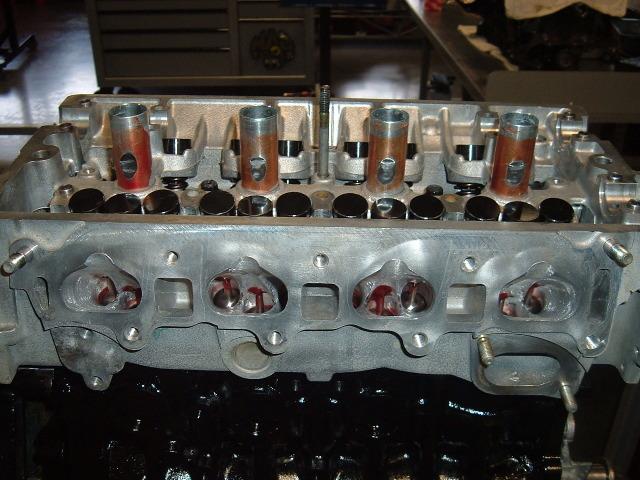
Some port and bowl work on my head...also port matched intake manifold...custom valves with flatter face then stock...flow bench was 283cfm at 28 inch water and 10.7mm lift stock the head flowed 170cfm
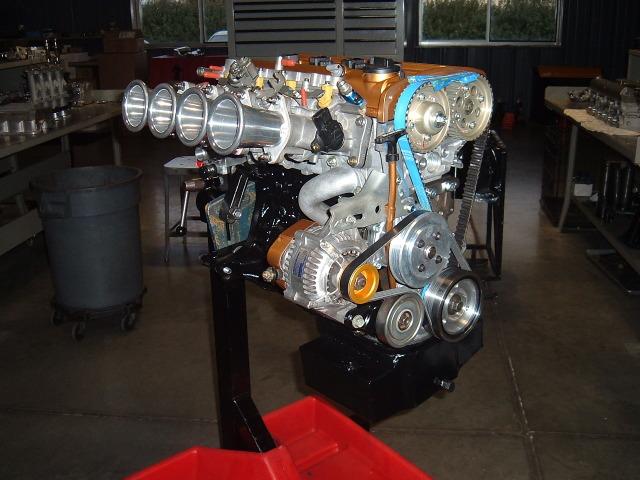
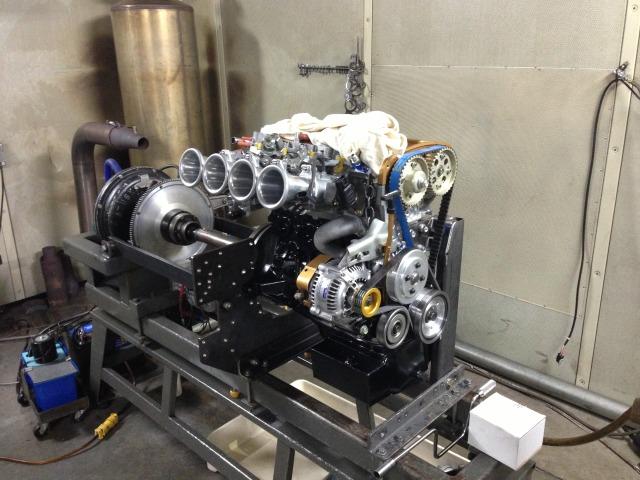
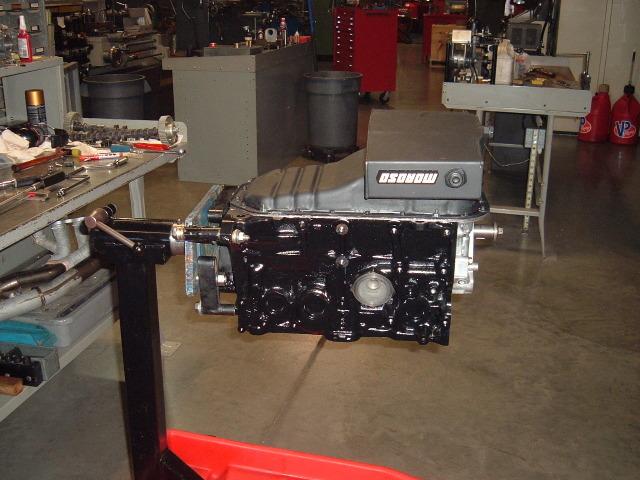
Final product.....u can see the custom harmonic balancer there..
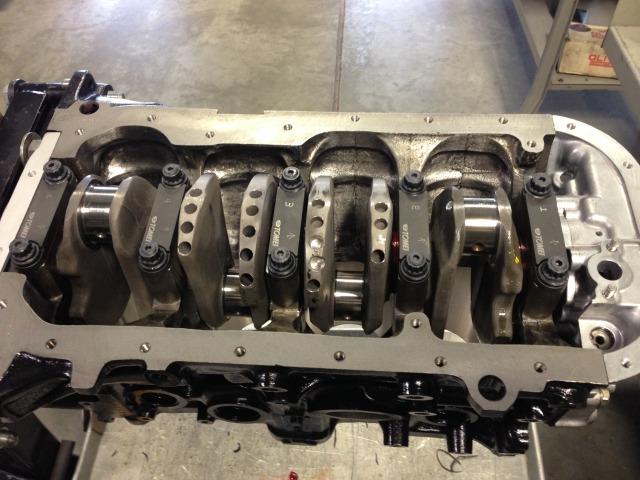
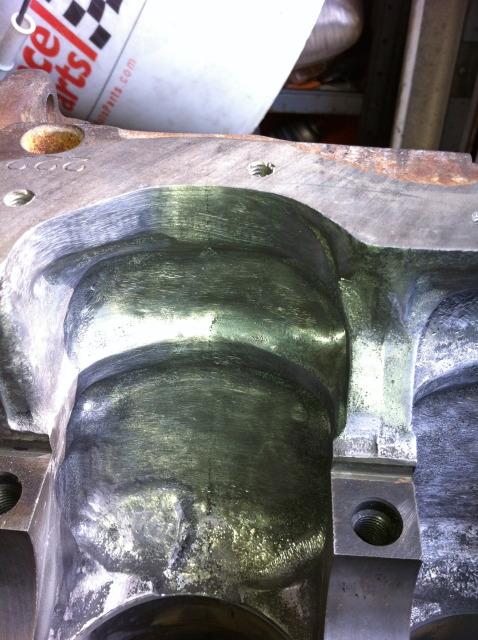
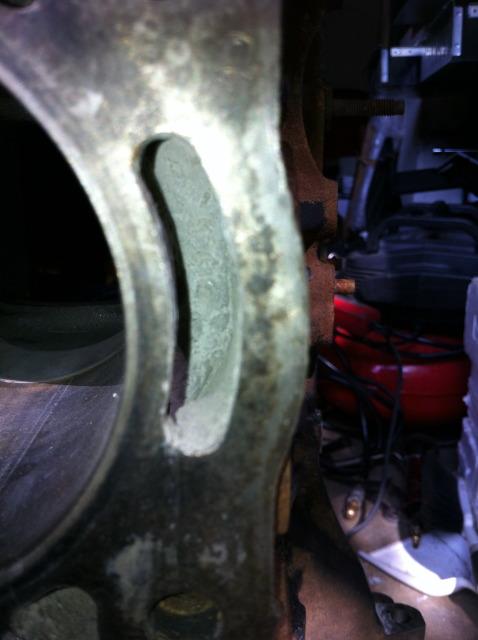
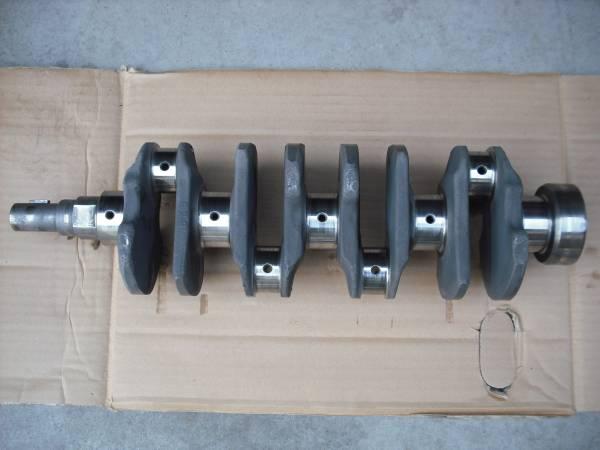
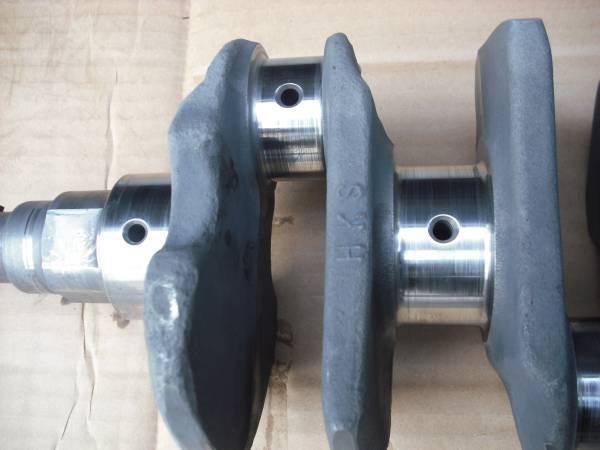
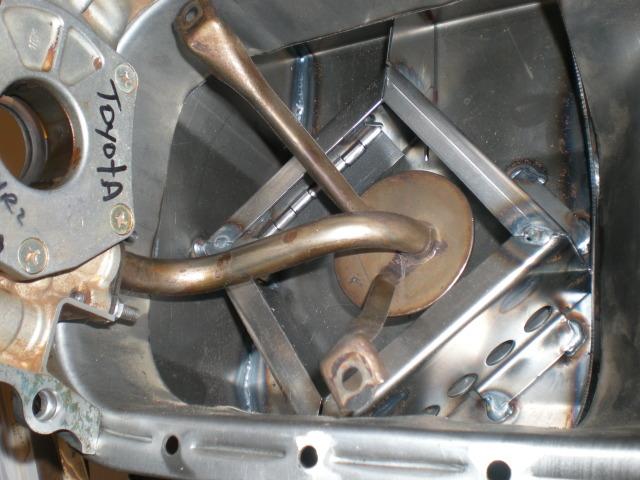
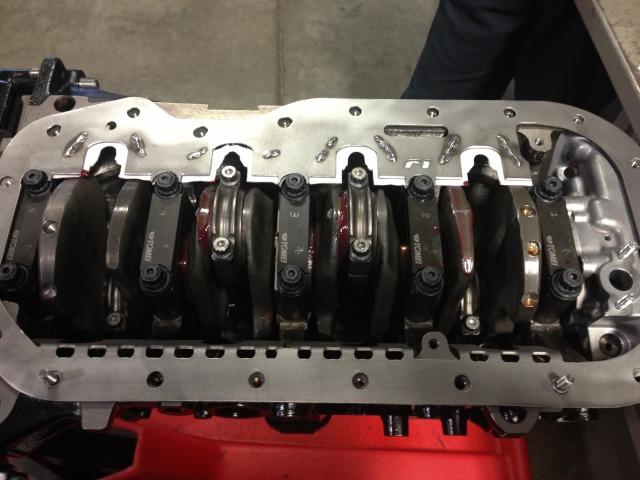
Ok fellas now that we have a new tread I can walk you all thru my build .....I will make separate posts on different parts of my build, provide pictures and justification of why I did it this way. First Block preparation....the 20v has two types of blocks one without oil squirters and one with....Silvertops usually are the ones without them but I have seen some of the later model silvertops that were made the same year the blacktops came out have them. I prefer the squirters mainly for their piston cooling function also the fact that it provides a direct source of oil for the piston pins. First thing for block prep and a good practice for all sand cast blocks is removing any excess sand and casting flashes in the crank case area....this ensures no sand un-lodges and gets circulated thru your oiling system...metal flakes and sand finding its way under bearings will destroy your engine and crank journals...semi polishing the inside of the block also helps with oil shedding keeping the oil in the pan where you need it. Lastly I used a engine cement called Hard Blok to fill my water jackets half way up to re-enforce my cylinder walls since my setup requires 83mm bores for the pistons. If you cement your block it needs to cure for about 30 days prior to any boring or honing also after pouring it make sure you place it on some type of agitator for about 30 mins so that the movement can make any air bubbles rise to the top...I strapped two electric sanders to the side of the block and let them run for about 30 mins. Another way to do it for engines like hondas that have open sleeves towards the top of the block is put a layer of salt about half way up the water jackets.....pour the hard blok on top of the salt and let it dry....then flush the water jackets with water until all the salt dissolves and is gone what you will have left is a suspended cementing where water can flow under it. To compensate for the reduction in cooling area I upgraded the radiator as well as increased the amount of oil circulating thru my engine from 4 quarts to 6.5. Crank being used is HKS stroker crank with the 42mm journals..83mm stroke vs the OEM 77mm....no modifications to the block is needed for clearance when using Carrillo rods like you would have to do with OEM rods..
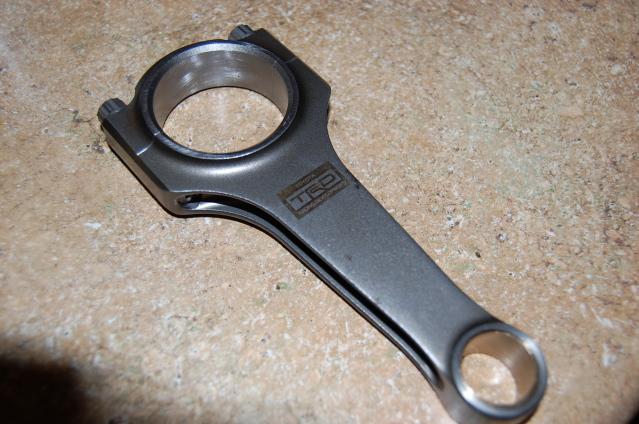
Pistons and Rods:
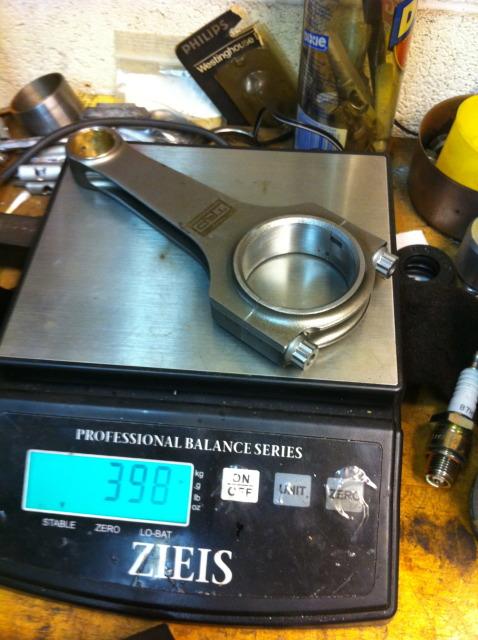
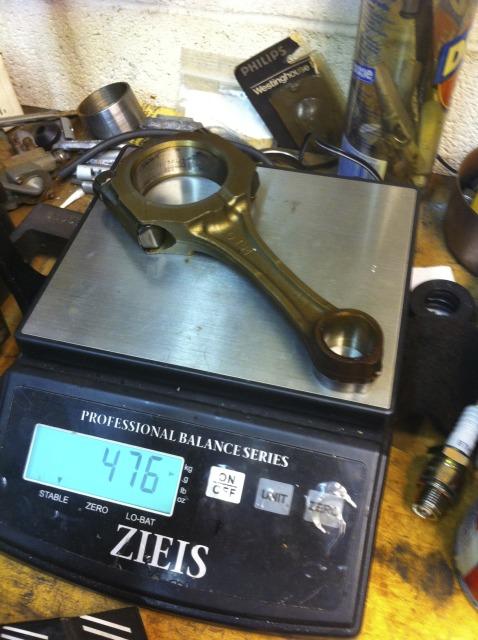
I am using TRD Formula Atlantic (FA) rods re-bushed to fit 20mm pins...FA rods are 19mm standard. The rods are made by Carrillo in their customary H beam style. Blacktop factory rods are the lightest rods made for any production 4age engine and come in at 476 grams...they are the typical I beam style and are very skinny in the center.....ok for stock or lightly modified setups but are prone to snapping in the center for highly modified setups...TRD rods weigh in at 398 grams each.
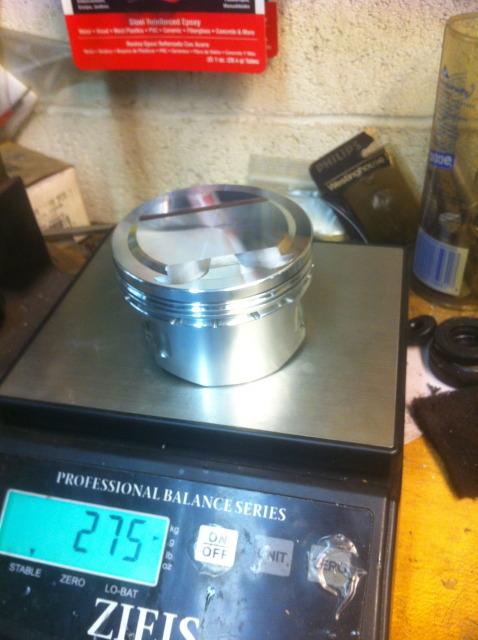
Pistons are custom made from CP because I am using a HKS stroker. The stroker was only sold for 16v setups back in the 90s so I sent a stock blacktop piston and a cast 16v stroker piston and came back with a 83mm blacktop piston with the pin location moved to accommodate the 6mm extra stroke from the crank. The piston pins and rings were sent to be DLC coated to reduce friction on the cylinder walls as well as the friction between the rods and piston. The pistons were sent to Swain and ceramic coated on top to help with any detonation issues and the skirts were treated with anti friction coating also.
Oiling system:
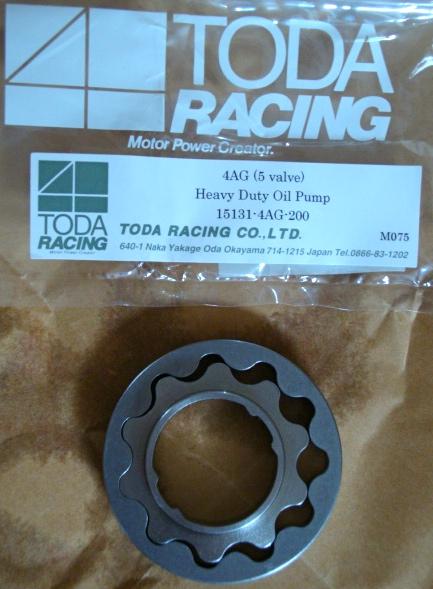
I didn't opt for the dry sump setup for a few reason...its overkill for street cars that see track time, added weight for the oiling system and expensive. With that said I chose to keep the wet sump setup but upgrade it to meet my needs. Toda recently released a upgraded oil pump gear using a different type of high spec metal and CNC'd to closer tolerance then OEM. This ensures high speed reliability in the factory oil pump as well as safeguards against breaking at high rpm or sudden rpm spikes.
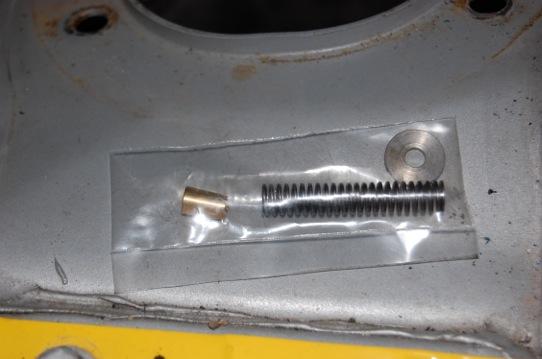
To go along with the gear the pump was ported to smooth out any sharp angles and an HKS oil pressure up kit was installed....this kit consist of a brass plug, a spring and spring seat. The brass plug is fitted into on of the oil passages in the block ....in the center it has a small hole to allow oil to pass at a restricted speed thus upping oil pressure...the spring is inserted into the center of the stock spring in the oil pump to add a stiffer motion and the spring seat ensures both springs are seated properly. The 4age is prone to low oil pressures at high RPM when the factory oil pump cant keep up...this setup will ensure I dont have that problem.
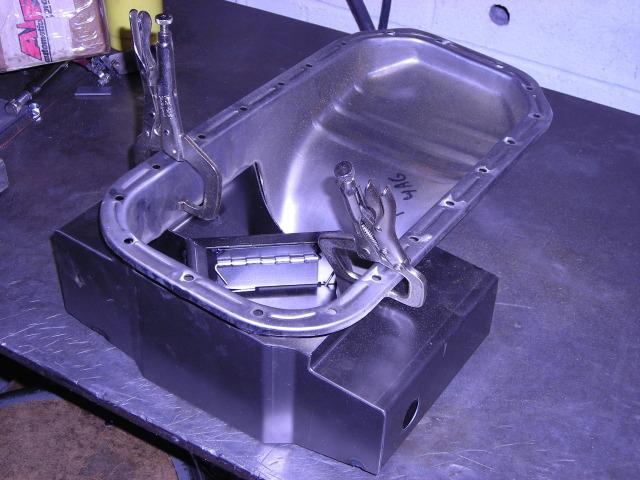
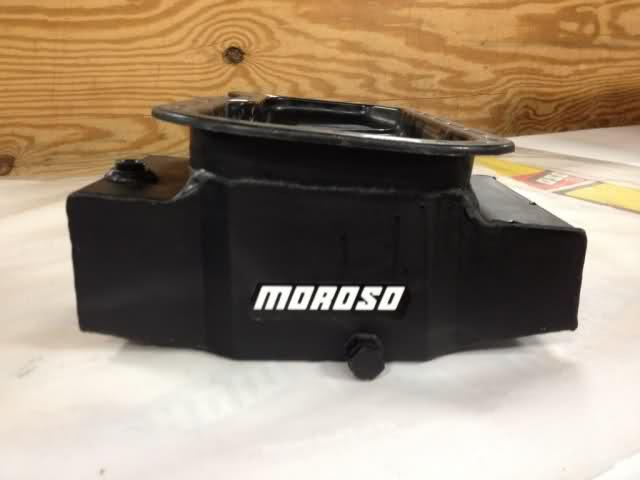
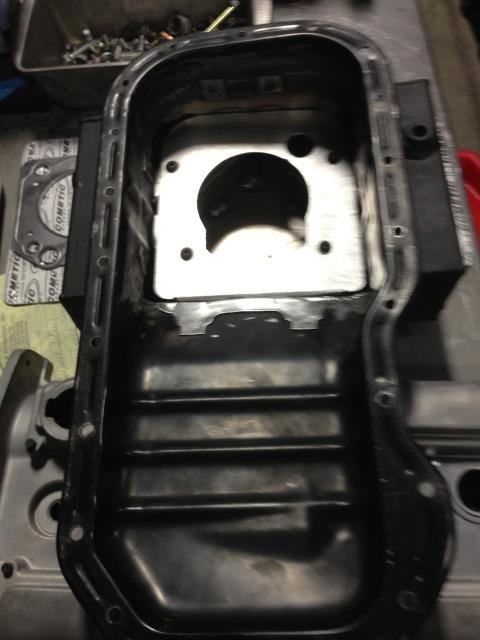
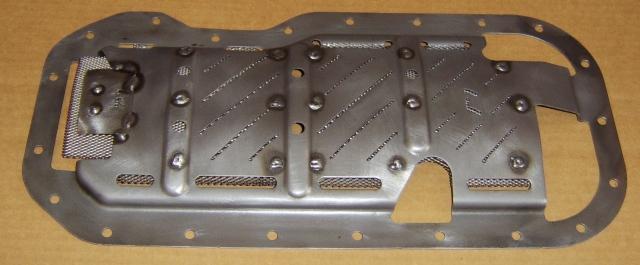
Moroso custom made the oil pan according to my design to withstand G force from acceleration, braking and cornering. I initially wanted a full aluminum pan but chose steel due to durability and longevity, also aluminum is prone to cracking over time. The design incorporates a stock pan with a custom tray welded on to it. Inside the tray is a trap door system that prevents oil from all building up on any side of the pan, keeping it in the center at the pickup where its needed. 3 drain plugs were added...on for oil, one for turbo train use if needed and one for crank case venting. Oil capacity was increased from 4 to 6.5 quarts for a few reasons. The 4age is an oil hungry engine, and the stock system just plain sucks. More oil capacity allows cooler oil to circulate through the engine by reducing how frequently the same oil is cycled and allowing more time to cool. this also helps reduce engine temps especially when u cement the block
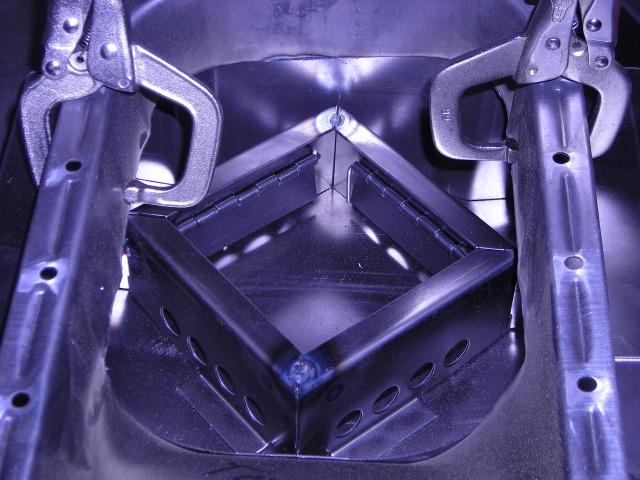
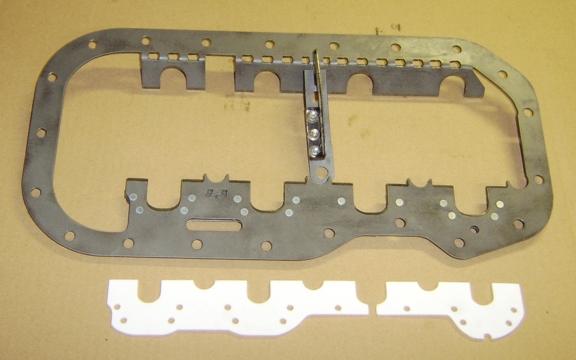
Windage tray:
All 4ages have windage trays but i took mines to the next level for performance and modified the tray and incorporated a teflon crank scraper to reduce drag...as the crank turns a windage cloud starts to form suspending oil within the energy made from the spinning crank. The modified tray allows oild to drain into the pan quicker, prevents the oil in the pan from sloshing back up into the spinning crank and shields the oil from the aerodynamic energy of the spinning crank which draws oil up into the windage cloud. The scraper on the other hand actively strips oil from the air(windage cloud) by interfering with the pressure build up at high rpm and physically scrapes oil off the rotating crank reducing parasitic drag which robs HP. A few other benefits of this type of windage tray and scrapper combo is reduction in oil foaming which can damage your engine, reduction in oil starvation by keeping the oil in the pan, and prevents the cylinder walls from being overloaded with oil. This is a stock tray modified, scraper is custom made
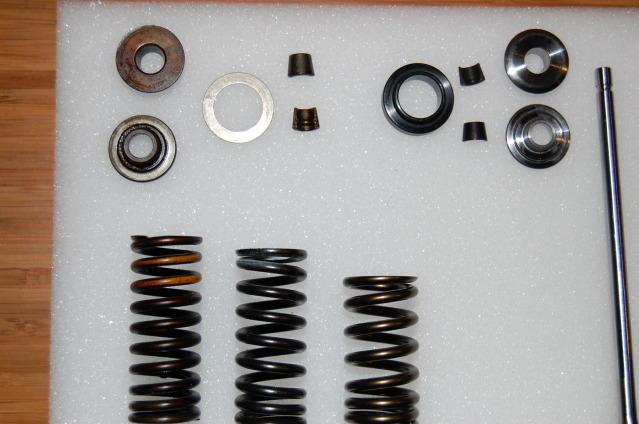
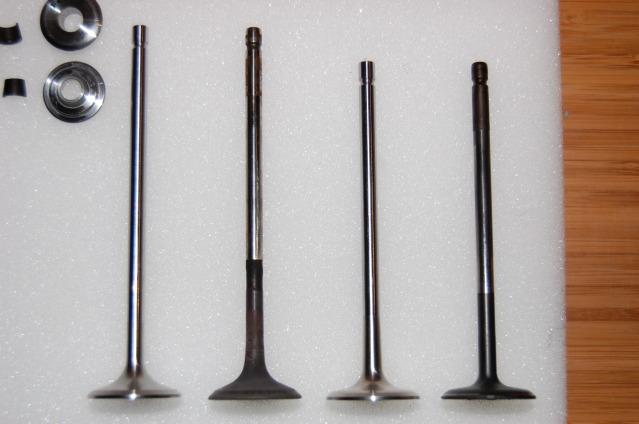
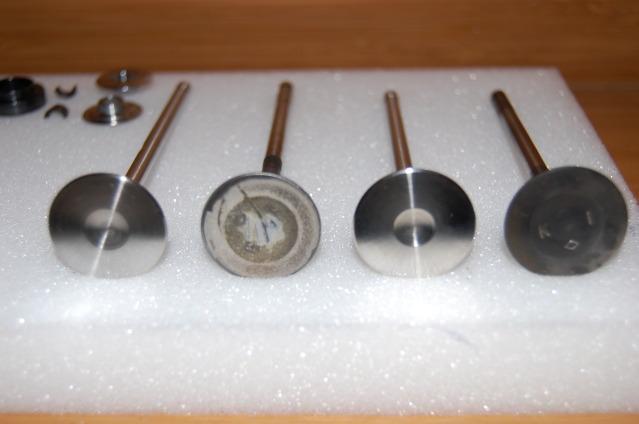
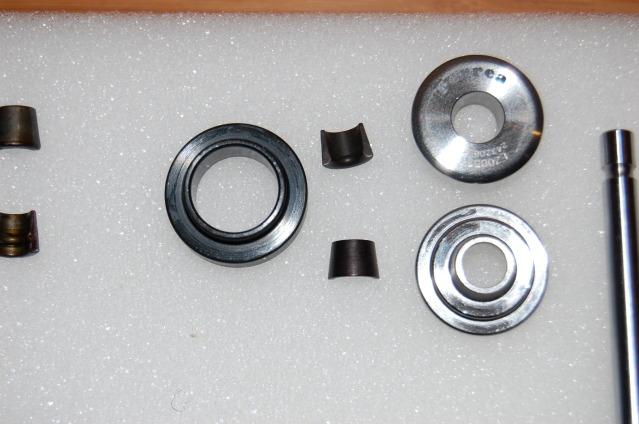
DLC (Diamond like coating) treated piston pins and valve buckets compared to factory.....tests show using this type of coating on high wear parts can reduce friction by up to 50%. Also pictured are drive train comparison....stock spring, TODA spring and the spring I have engineered, along with the stock spring seat, retainer and retainer locks on the left also compared to what I had engineered. Spring weight reduction between stock and mines 3grams each, and retainers 1.5 grams each. If you notice the spring seat factory is like a washer and the ones i had made are an actual seat which prevents the springs from moving around and rubbing against the head and buckets causing hp robbing friction. Last pictures are the custom valves next to stock...Competition plus valve with re-engineered tulip design for better flow into the combustion chamber, back cuts on the valve head, swirl polished, and flatter faced to bump C/R by 0.2:1.
Drivetrain:
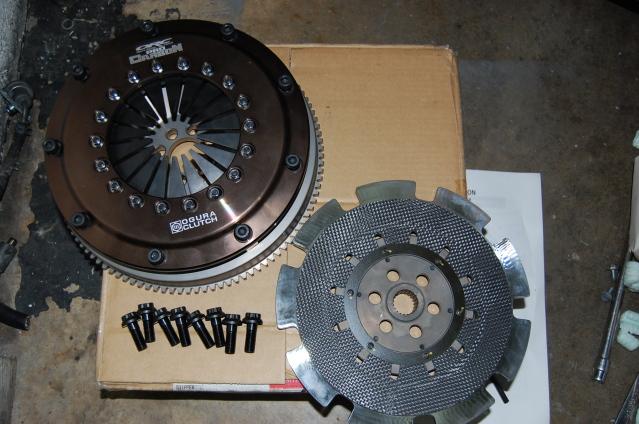
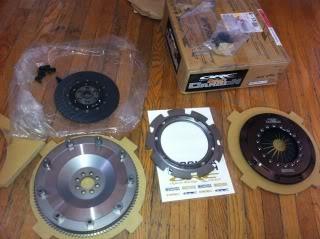
To minimize crank to wheel power loss I had to go to the drawing table again and try to minimize loss best i could. What i came up with is some custom and top of the line drive train parts that I think will help me minimize power lose as much as possible....to begin I purchased a super light Ogura pro carbon racing clutch and flywheel package...I chose this for a few reasons....everything is fully rebuildable except for the flywheel. If my diaphragms go bad i can unbolt and purchase new ones, if the carbon disc wears out I can purchase a new disk and keep my center basket, if the tension plate goes bad I can purchase a new one without having to buy a whole pressure plate...the disc is 100% carbon fiber and are very light, very good friction co-effiecent, so you can use a fairly soft spring = light pedal, have a lot of internal damping so they engage as smoothly as an OEM organic clutch, contain solid lubricants as part of their makeup, making it pretty light on the flywheel facing, they can take so much heat then any metal clutch and cool a lot faster, the friction bond is more chemical than mechanical based, and lastly the wear rates are superior to metal and even OEM clutches and thats a plus especially at $700 a disc.
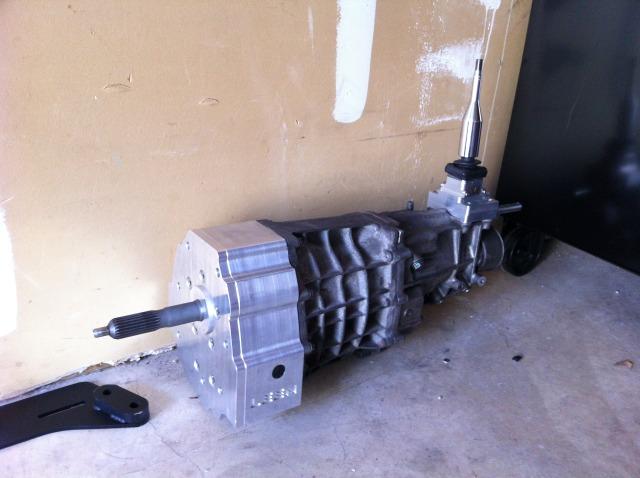
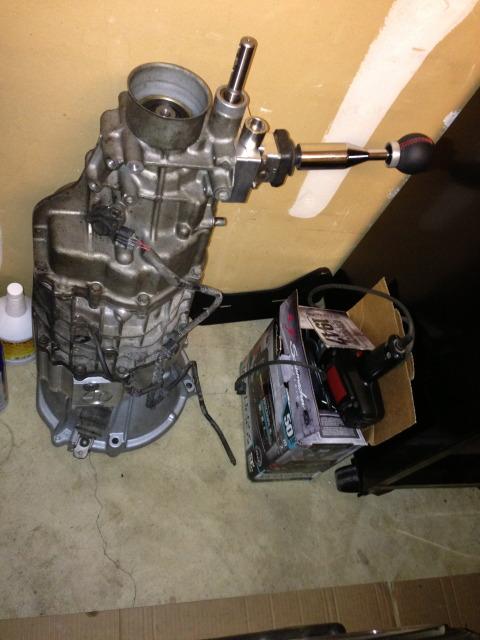
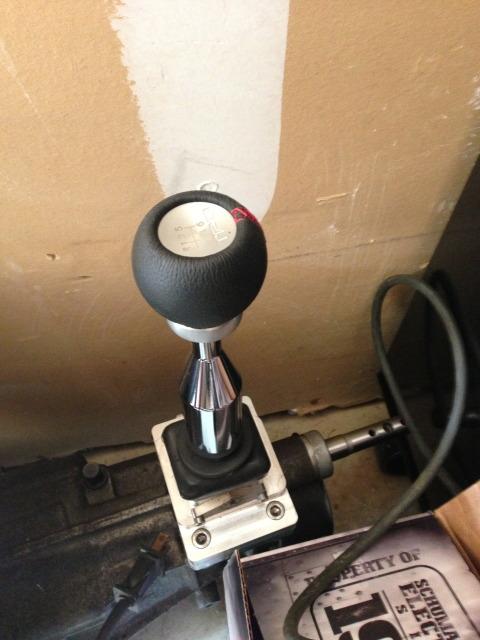
Tranny is a a custom made J160 6 speed from an Altezza made by Joe at LEEN. Mated with a 4.77 ring and pinion my car will be super quick on the road and track....top speed with my rim and tire setup is 162mph. I needed something a little more modern, stronger and reliable then the 28 year old T50 that came in my car so this was the best choice due to the ease of modifying to fit.
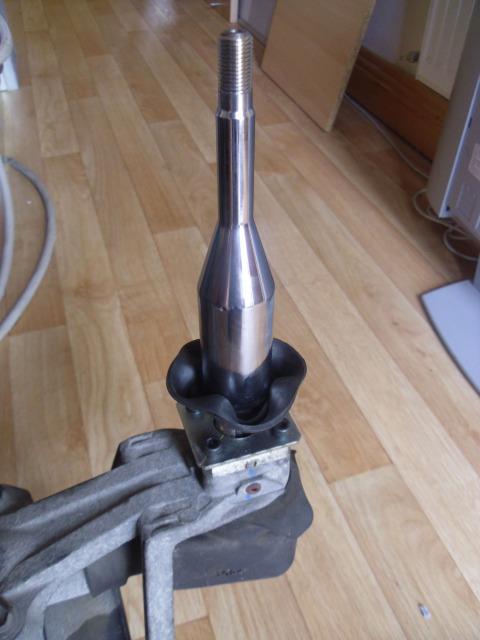
Drive shaft is a custom 2.75 inch carbon fiber one piece setup with steel yoke and rebuildable u joint....reasons I picked carbon fiber is its light, actually 15lbs lighter then the stock two piece shaft, able to absorb and eliminate high speed shock and vibration, vibration occurs at a higher RPM then steel or aluminum, my shaft actually has zero vibration up to 180mph and 11800 rpm where the same size shaft in steel or aluminum has vibration at 8000 rpm. Three times the torsional strength of steel, torsional spring allows for better traction grab, smoother shifting, better control out of corners and less shock load on the diff and tranny
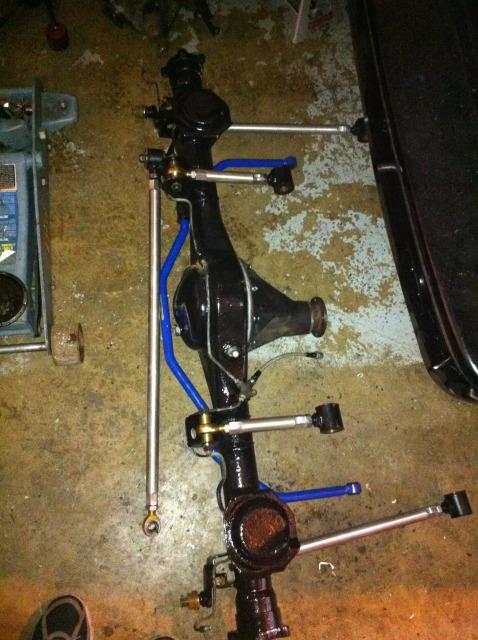
Rear end is a fully built 6.7 toyota rear with TRD 1.5 way LSD mated with a 4.77 ring and pinion, slightly larger then OEM sway bar, fully adjustable 4 link and panhard rod and traction brackets....
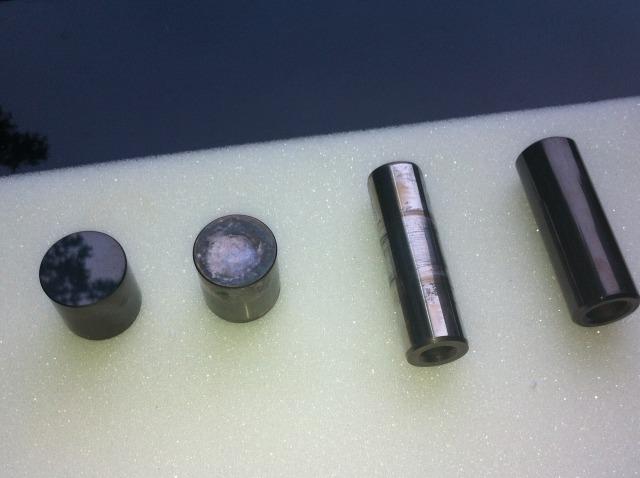
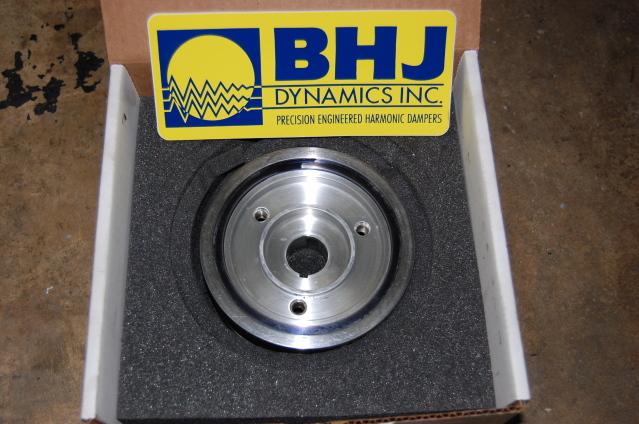
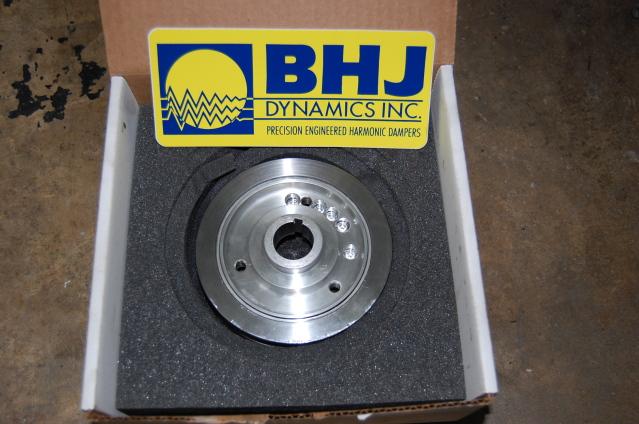
Custom harmonic dampener courtousy of BHJ Dynamics...outstanding piece of machinery...should extend the life of my bearings greatly as well as reduce the rotating mass...for those using double row assesories they will be available in the future...dont kill your engine with those aluminum underdrive setups..the makers dont advertise the negative outcome of using them.

Intake System/Blow by Breather
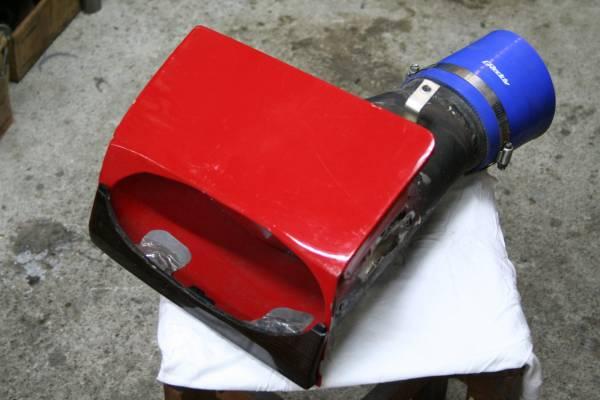
Im going to have two setups for the intake....one will consist of 100mm velocity stacks from SQ Engineering mated to their pipercross backplate and a pipercross filter...this will be the track setup....the other is my street setup using SQ 20mm velocity stacks(might move up to 40mm) a Mekaru Japan RWD 20v plenum and a Mekaru power chamber which will be feed air from the Hot Staff headlight intake I just got.
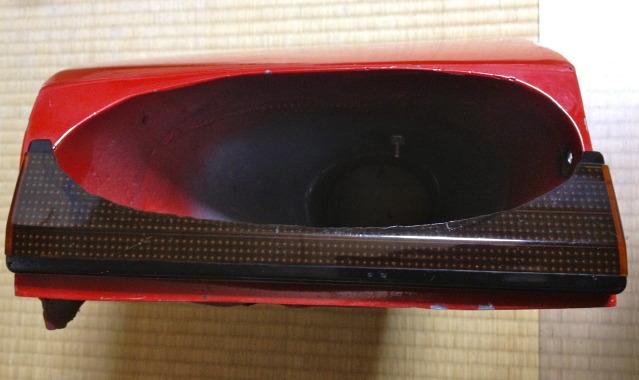
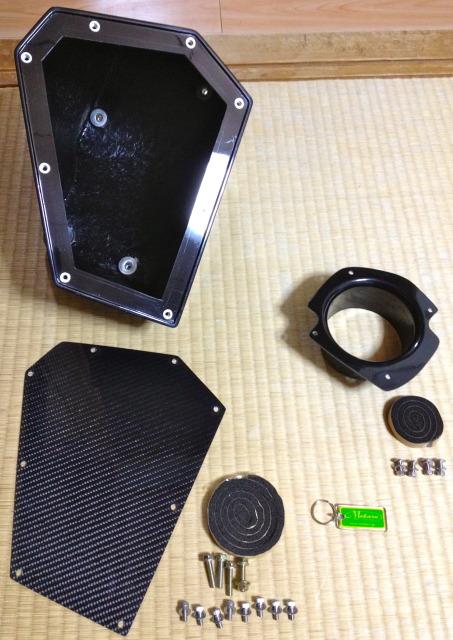
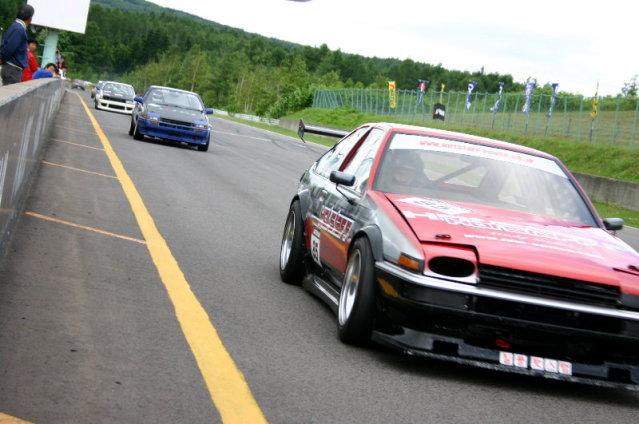
Not mines but exact same setup
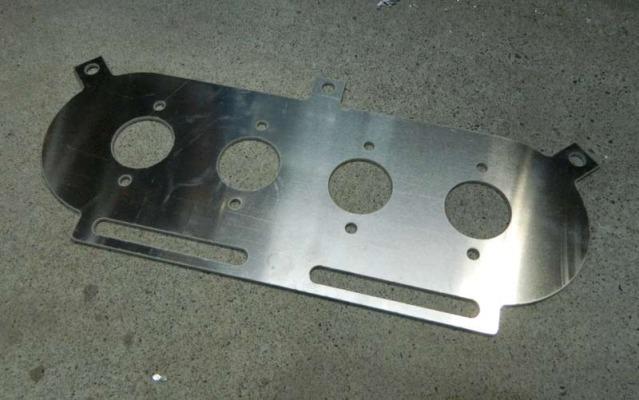
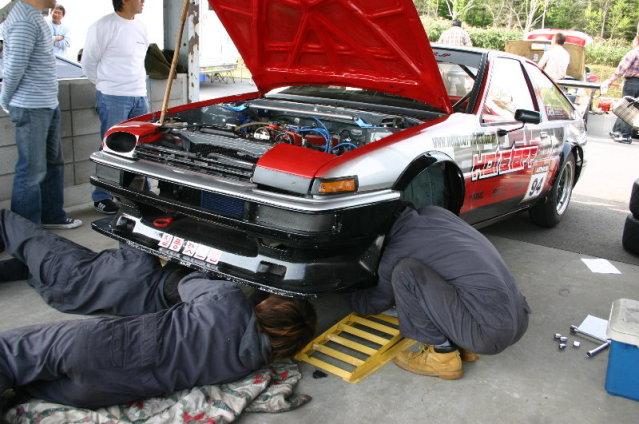
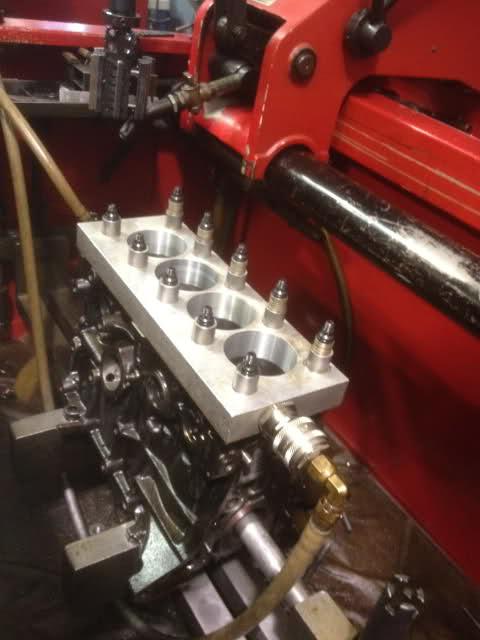
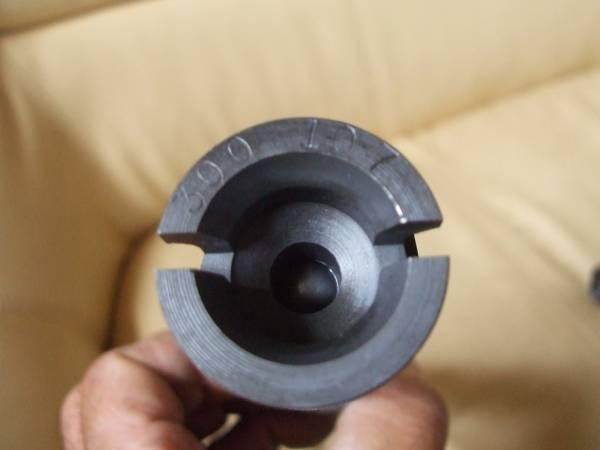
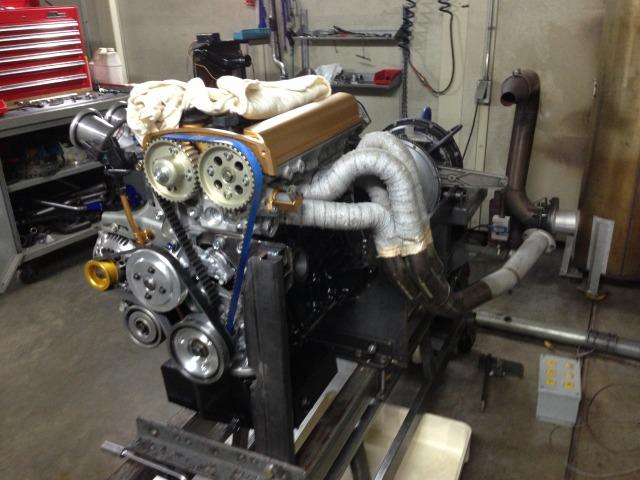
random pics from the shop during the build

A lot of detail!
Posted by Diggymart on 3/24/20 @ 4:53:18 PM