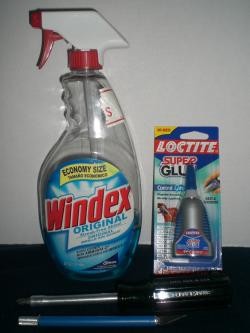
- • Phillips screwdriver
- • Razor blade
- • Glue
- • Cleaner (Windex)
- • Metal washers (optional)
You must be logged in to rate content!
4 minute read
<a target="_blank" href="https://shareasale.com/r.cfm?b=1162467&u=2412332&m=78472&urllink=&afftrack="><img src="https://static.shareasale.com/image/78472/redlinegoods_banner_468x60px_v2_shift_00.jpg" border="0" alt="Shift boot store" /></a>
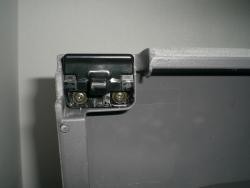
1. Open the armrest and remove the two screws that attach the armrest to the hinge.
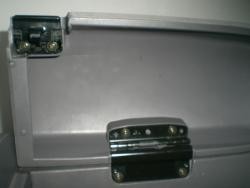
2. Remove the two screws that attach the latch to the armrest.
3. Spray the cleaner on the armrest and make sure to get all the dirt and grease off, especially where the adhesive will be at (bottom lip) to ensure a strong hold.
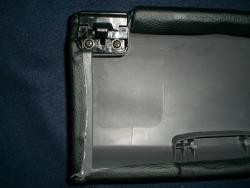
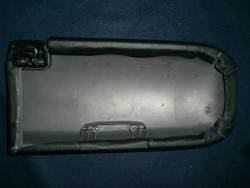
4. Place the cover on the armrest lid. Position the cover so that it is centered from left to right, and it has enough excess material to wrap around to the underneath lip. Especially make sure the front flat section of the lid is up against the cover as close as possible, because it will be difficult to close if it’s not. Where the latch is, make sure there is enough material to wrap underneath to the lip also; may need some adjusting to do so.
5. Once you have the cover positioned where you like it, put some glue on the underneath lip (red box above) and fold the material over on the glue (follow glue instructions). Make sure the cover on flat face, on the front of the lid is firmly against it with, with no wrinkles.
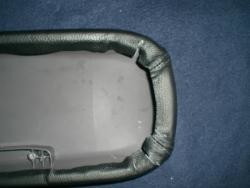
6. On the back, rounded part of the lid, stretch the leather as much as it will go and glue it down on the underneath lip.
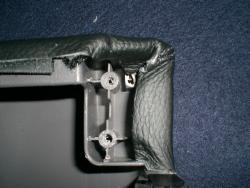
7. Stretch the cover over the left side of the lid, and glue it down only where it is straight. Leave the curved parts for last where the material wrinkles up. If you can glue down the curved parts now, go ahead. The reason for doing this part first, is because this is the side where the latch is, and you need to make sure there is plenty to cover around that sharp corner.
8. Do the right side next. Just stretch and glue it down. Make sure to get it in that little notch well, because that’s where the hinge goes.
9. Now go back and get the wrinkles out. I used a razor blade to cut it, then stretched it down and glued it.
10. The extra material in the corner where the latch is, stretch it down tight against the cover. When you install the latch, it will hold down that material.
11. When you install the latch and the armrest won’t close enough to latch, I used a couple small washers between the lid and the latch to bring the latch down more.
ENJOY YOUR NEW LEATHER BOOTS!
Useful tip
You have installed a product made out of genuine leather. As you know, to maintain a leather product in good condition, you should take care of it. We suggest occasionally (every 4-6 week for example) applying some leather conditioner/UV protector to keep your leather from drying up in the sun and cracking.
Redline Automotive Accessories Corp. will not be held liable for any labor, incidental or consequential damages of any kind. Proceed at your own risk.