You must be logged in to rate content!
8 minute read
16vvincent's cruise control install
Compliments of 16vvincent @ vwvortex.com
1-6-2009
I also managed to get the cruise fully up and running. I used the factory cruise from a Mk2 Jetta, switches, controller, vacuum pump, and wiring. The vacuum diaphram came off of a Audi 80 with a 3A engine and was a bolt on affair.
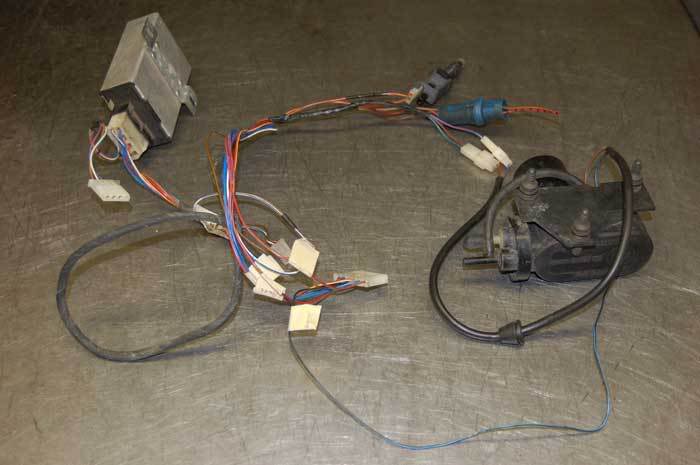
The only thing not shown is the diaphram. Everything that you need is in the picture
First to figure out where to mount the vacuum pump. I wanted it out of the engine compartment, close to the firewall, but not in the way of anything else.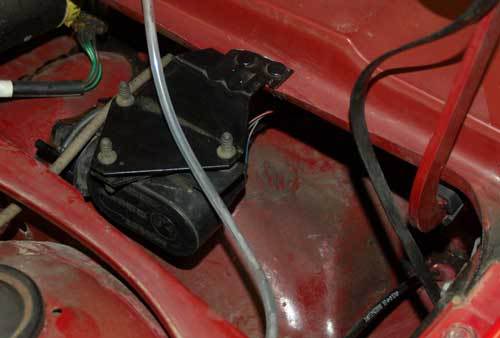
Pump installed.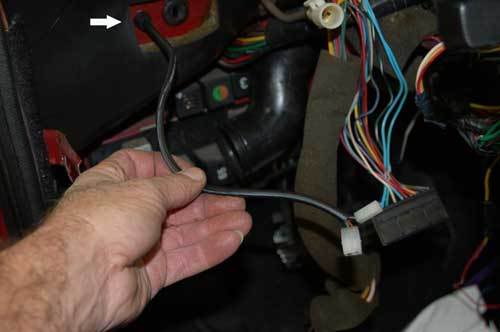
Pump harness routed.
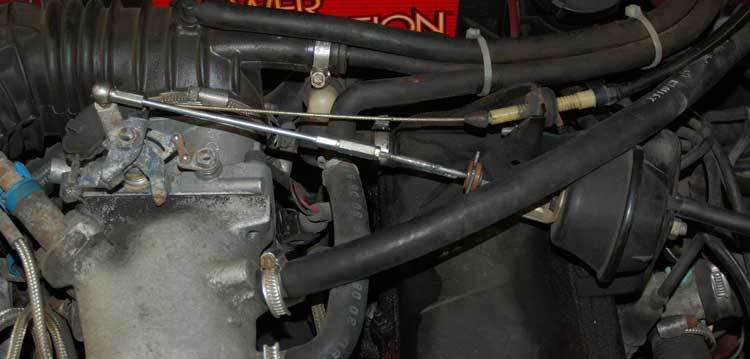
Diaphram mounted and hooked up.
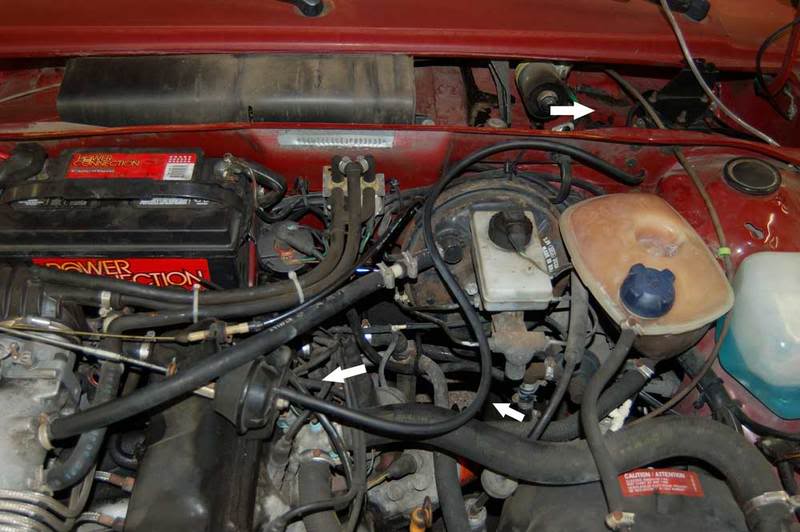
Vacuum hose routed (arrows).
The only thing left to do was connect the speed sensor into the back of the cluster (another reason I used the Mk2 cluster) hook up power, ground and brake light signal.
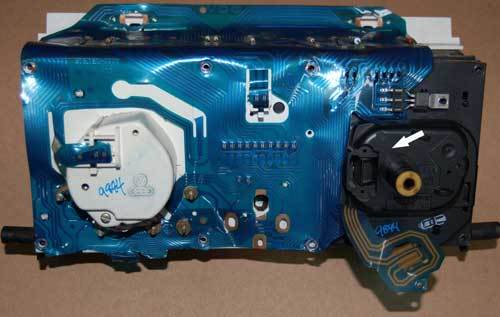
The arrow indicates where the speed sensor goes. On the Mk2 cluster (and the later Cabrio and Scirocco clusters) this is pretty simple, break out the tab and install a speed sensor out of a car with cruise. On the Fox, I do not know.
I bypassed the brake and clutch switches and did not install a vacuum brake switch. It just made the installation a little easier and the brake light circuit disconnects the cruise without an issue.
This is the wiring diagram for the factory wiring out of a Mk2;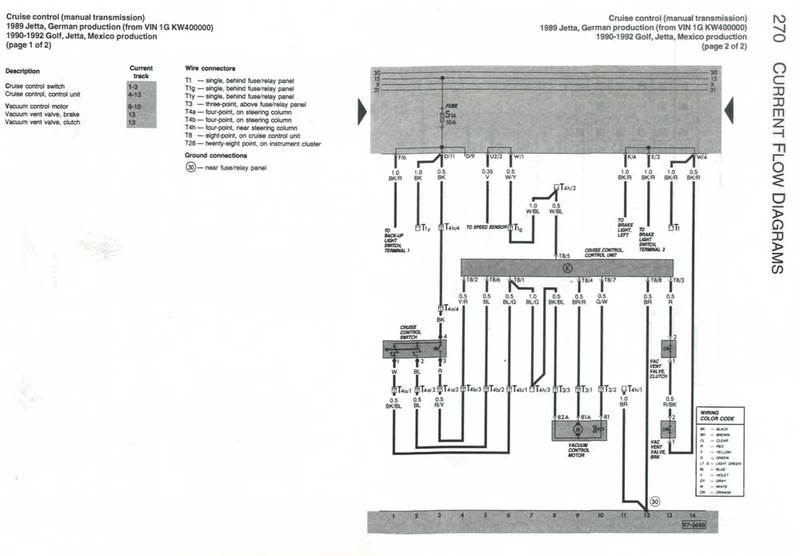
And this is the Mods that I made to the wiring: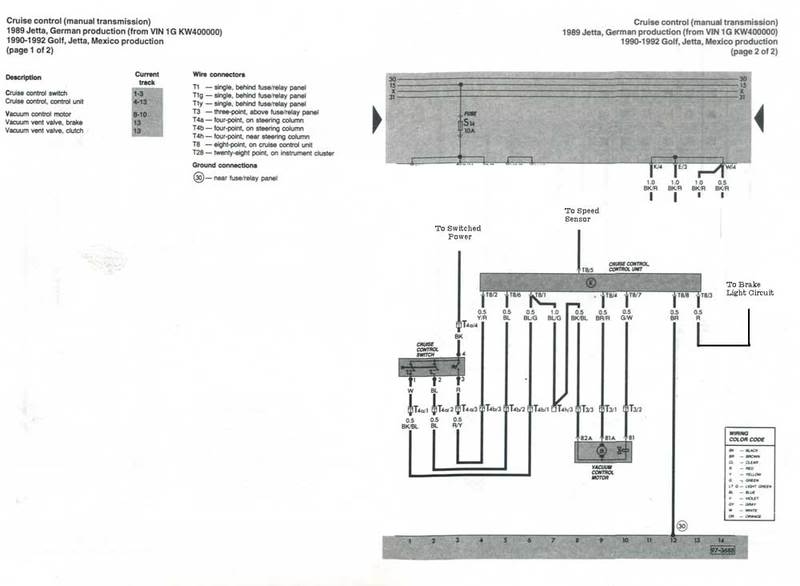
The complete instructions are:
Cruise Control Install;
Parts Required:
Cruise Vacuum pump
Cruise Vacuum Pump mounting Bracket
Cruise Module
Cruise switches
Speed sensor
Cruise wiring
Vacuum Diaphragm
Most of this is available from a single Mk2. Normally found in the Jetta.
The vacuum diaphragm mounting bracket and the vacuum diaphragm mounting bracket are the only things that you really can’t use from the Jetta.
On the Fox, due to the engine / intake / throttle body placement, the correct bracket is off of an Audi 4000 with a 4 cylinder, or the 80 / 90 with the same engine. In my case, I found one off of an Audi 80 with a 3A engine.
With the Vacuum pump mounting bracket this can also be off of an 4000, 80, 90 or in my case a VW Cabriolet.
The speed sensor has to match the instrument cluster used. I do not know what the sensor is that would work in a Fox cluster (if any) and in my case that is why I went to a Mk2 cluster. This is not a wiring project (the cluster swap) for the faint of heart. And you will loose the Brake Warning lamp and the Seat Belt warning lamp.
Once you get the wiring, you will want to modify it slightly.
The Brake and Clutch switches are not really needed, so you will want to run that circuit (coming off of pin 3 at the module) to the brake light circuit. This is the power feed to the brake light switch. On the Fox, this is normally the Red/White wire (check the Bentley for your year). When I splice a wire in, I never cut the old wire. I strip off about 1.5” of insulation and twist the added wire onto the old wire. I then solder and wrap it tightly with electrical tape.
The power circuit is going to come off the back of the fuse box. Use a female spade connector, a good pair of crimp pliers and attach that wire to one of the pins at ‘M’ on the back of the fuse box. Just use a test light to check which one(s) power up with the key on.
The ground is the easy one. A ring crimp connector and attach it at the bolt in grounds on the drivers side of the a pillar. Right next to the fuse box.
The vacuum pump mounting location is a personal choice. As you can tell, I mounted mine at a location that allowed the shortest wiring run, there are several grommets already there to run the wiring and it is kept away from the engine heat. Run the vacuum line through the rain tray, using an existing hole. I did have to modify the drip rail (where the bracket is mounted) slightly, but that was 5 minutes of work.
Mounting the vacuum diaphragm is also straight forward. It only goes in one place. I did reroute the vacuum hose to the brake booster after final assembly. You just want to make sure that the linkage between the diaphragm and the throttle body is unobstructed. If there is any hang up, the engine speed will stick.
The vacuum hose goes from the diaphragm to the vacuum pump. Connect it to the side of the pump that has a hose coming off of it. It is normally the black hose fitting. The white side is the vent.
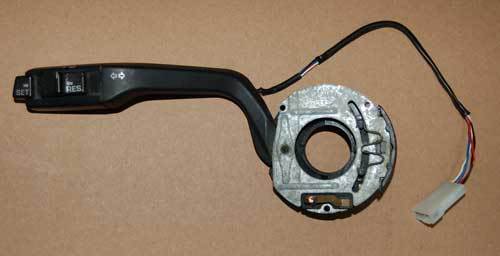
On the inside of the vehicle, you will have to remove the steering wheel and remove and replace the turn signal switch with a cruise switch. This can come from any Mk1 or early Mk2. The best thing is to match the switches with what you have or replace both with matching switches.
I used the switches off of a 1989 Mk2 Jetta on the signal side and off of a Mk2 Golf on the wiper side (rear wiper on my wagon). This switch choice will depend on you and your vehicle.
Install the cruise control module where ever you wish. I attached mine to the underside of the dash. As long as it is within range of the wiring harness, it really doesn’t matter where you put it.
Plug everything together, make sure that the brake lights work, and take it for a test drive. The speed has to be above 30 mph (on average) before the cruise will enable. But once there, turn the system on, push the set button and take your foot off the gas pedal. It should hold the speed without a problem.
Most of the issues that I have had over the years with the factory cruise, is the switches. You can take them apart (carefully) and clean the contact surfaces, but reassembly can be a bit of a pain. The only other area has been the vacuum diaphragm. When picking one up, check to make sure that it holds vacuum. Simply depress the diaphragm and cover the hose connection with a finger, release the diaphragm and it should stay sucked in. If not, look for another one.
That should do it.
Now this thing cruises down the freeway at 75 + mph without touching the gas pedal and turning just 3200 rpm.
I am really starting to like this car!
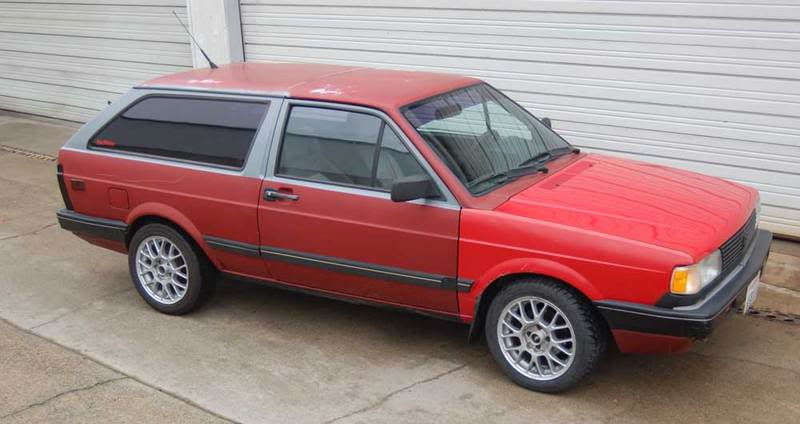
I also managed to get the Hock R's installed. Photos later. I want to get the car washed and shoot a couple of shots outdoors.
It did nothing but rain yesterday, but I did get one photo shot with the Hock's on.
Next: Brakes. I have a set of 16v Scirocco front brakes with drilled rotors ready to go. Just want to source some steel brake lines.