You must be logged in to rate content!
7 minute(s) of a 99 minute read
1-25-2010
I got some more work done this weekend.
I took a little break from the motor and body and did a project I could actually finish. The previous owner of my car upgraded the electrical system to 12v from 6v but never got the wipers working. I want this car to be usable so having working wipers is a must. There are a few ways to address this problem. The best way seemed to be modifying the wiper motor to work with the higher voltage. A couple companies offer a replacement armature to make the conversion work. However, they are only available for SWF motors and I had a Bosch. So, I picked up a used SWF wiper assembly, the conversion and some new pivots for good measure.
Here are the two parts side by side. I have no idea what the difference is. They look the same to me
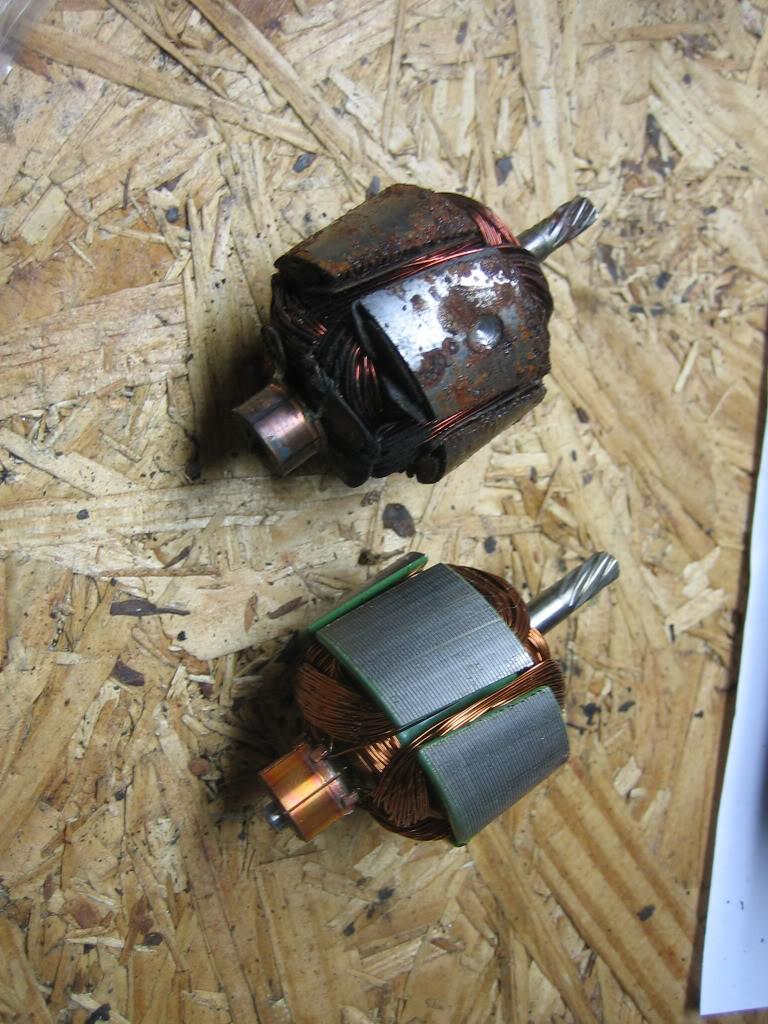
The new armature in the motor
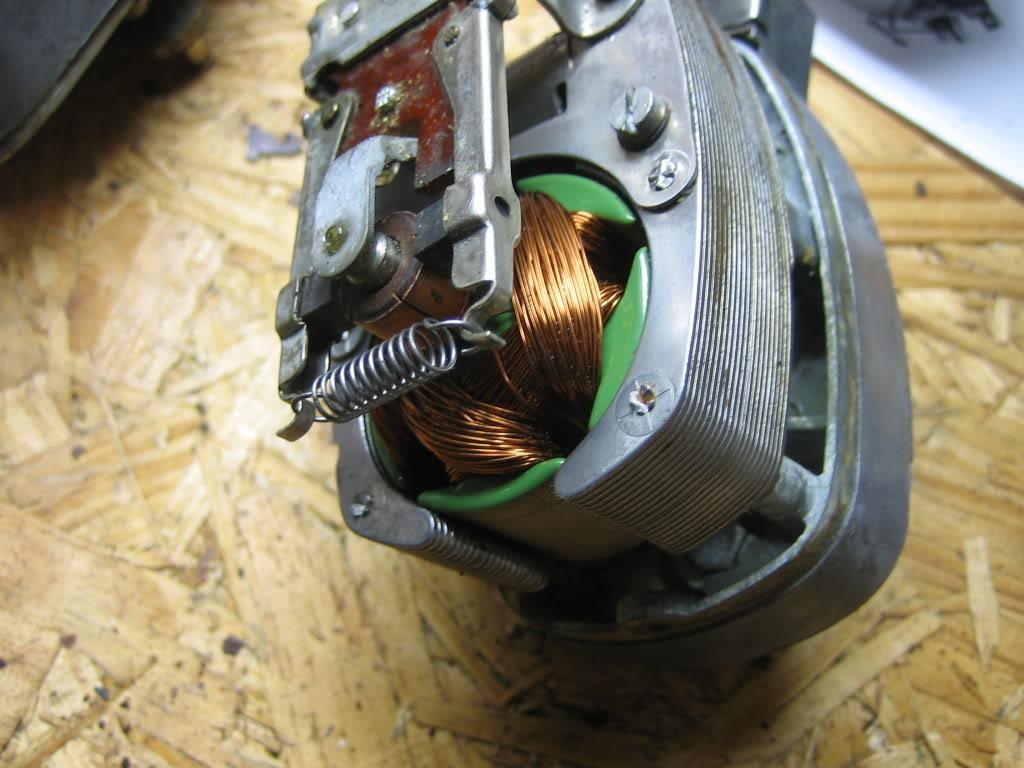
I cleaned and painted the wiper assembly while I had it out. Here is the completed assembly next to the old Bosch one.

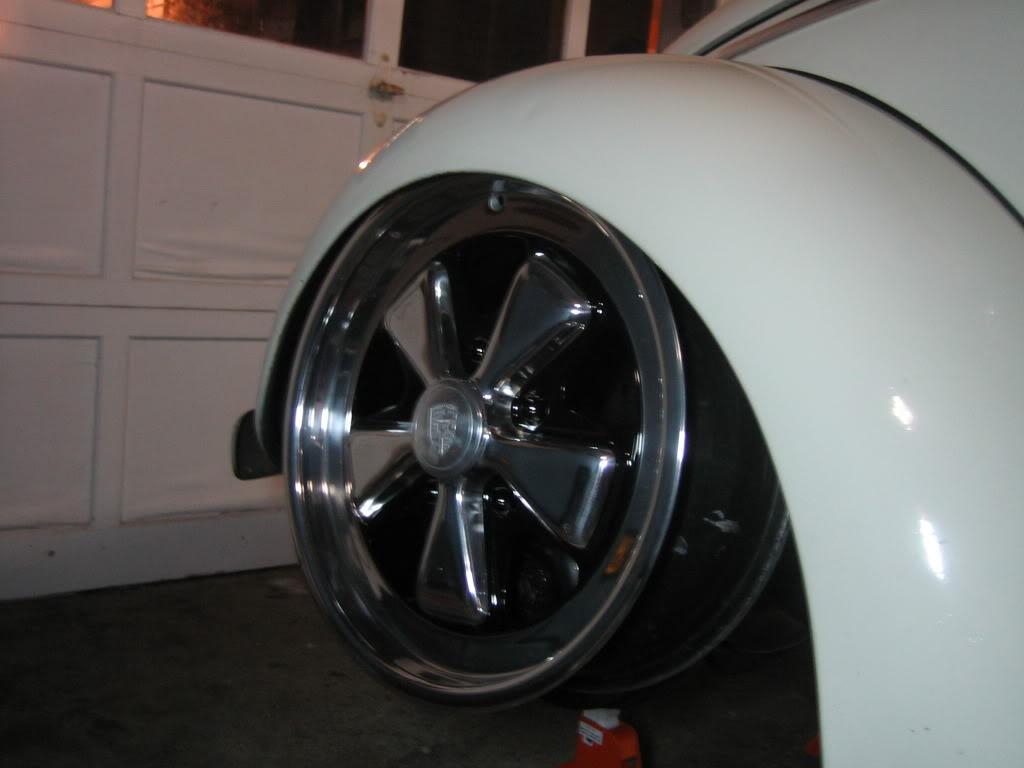
I also got my wheel in this week. I don't have the brakes on yet so a proper test fit is not possible. This gives you an idea of what they should look like though.
got my new "OE" tins and started test fitting them. These are gonna require some serious love to fit correctly.
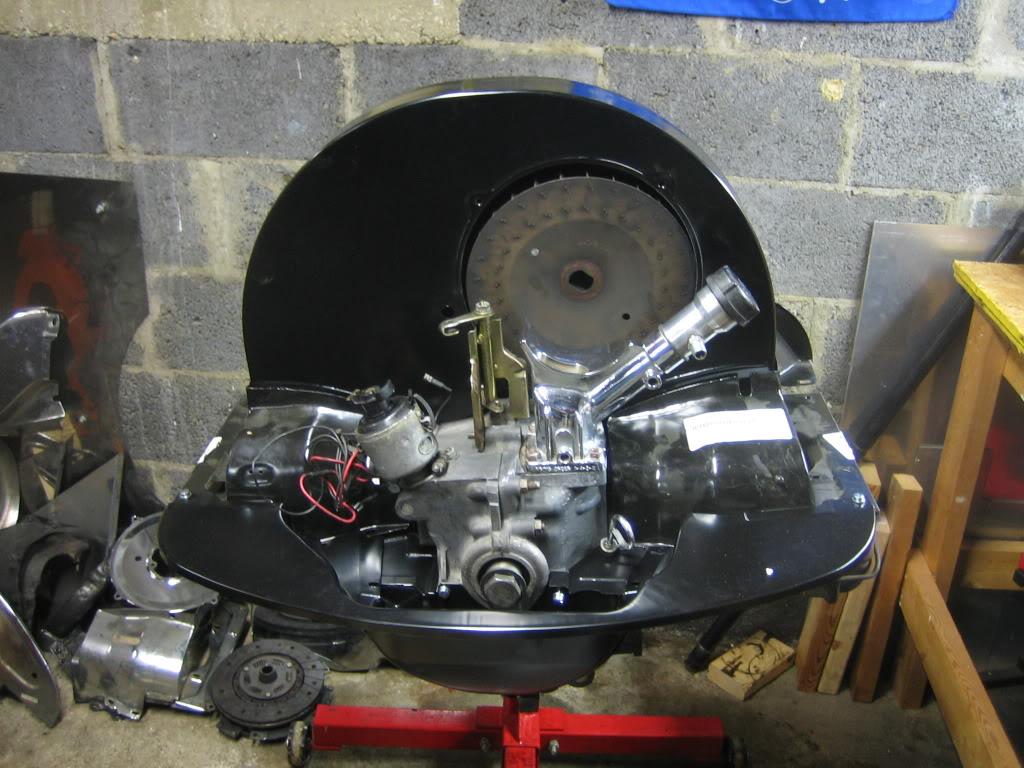
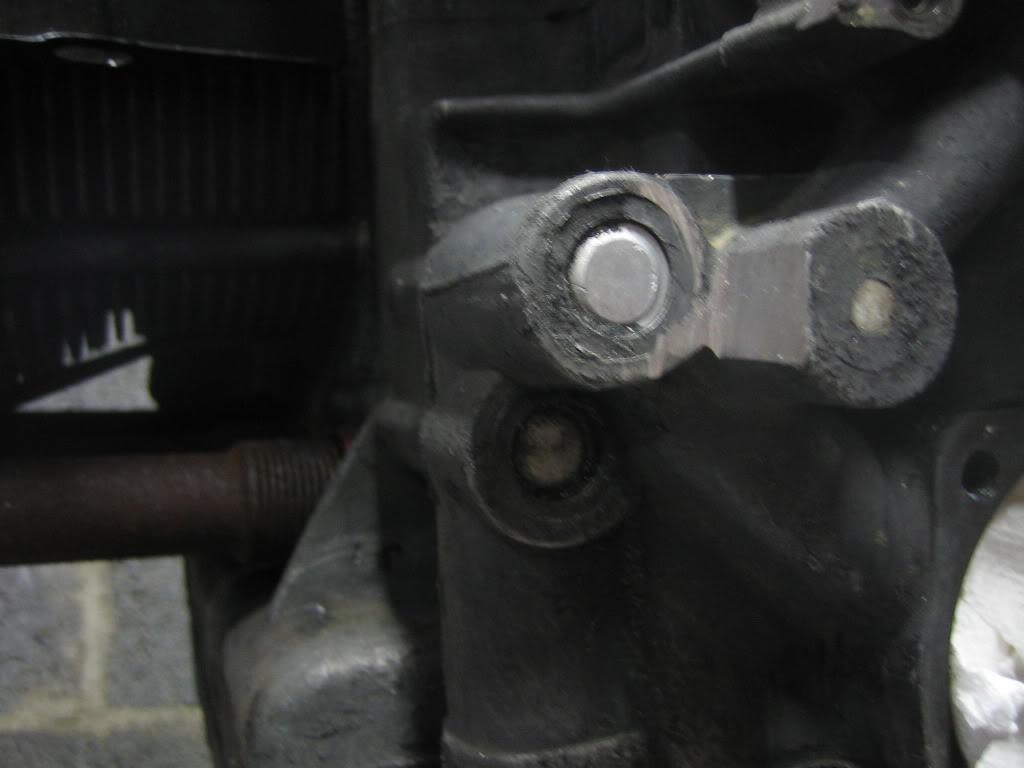
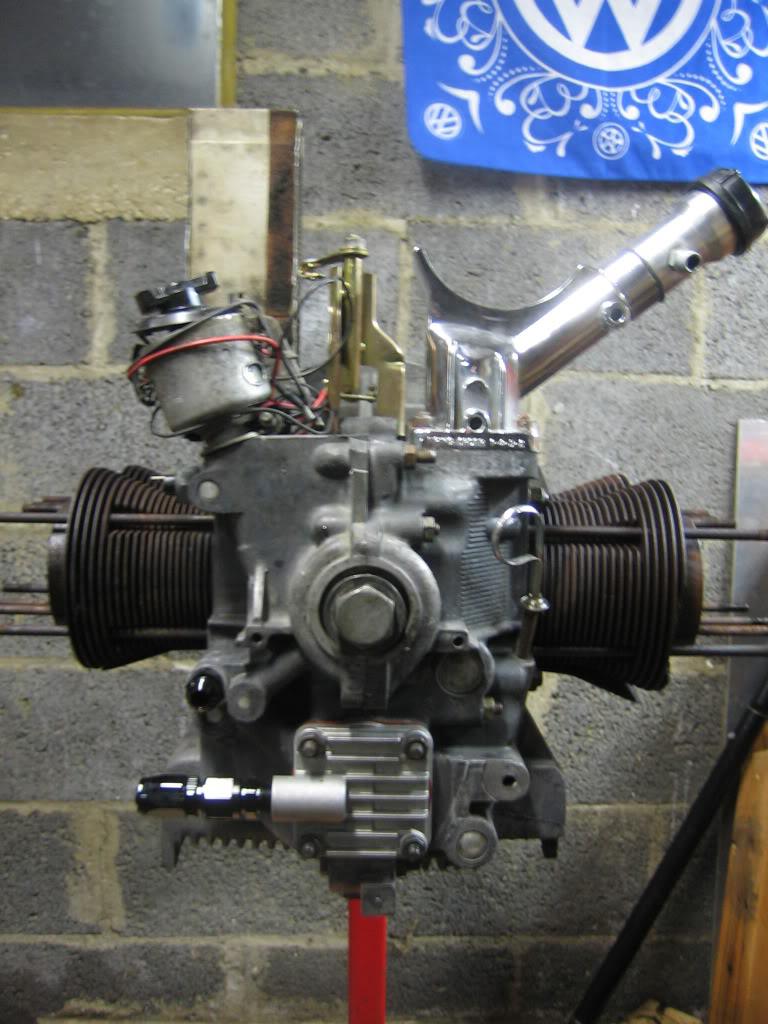
Finally, I got the engine prepped for the full flow oil system. For those not familiar with this, the idea is to re-route the flow of oil from a strictly internal affair to an external path. This allows plumbing of external oil coolers or filters. The oil pump outlet gets plugged and a new cover allows the oil to flow out. Then you have to tap the case to allow a new return port. Some people say this should only be done with the case split. Others have claimed it can be done with an assembled engine if the proper precautions are taken. I decided to go for it.
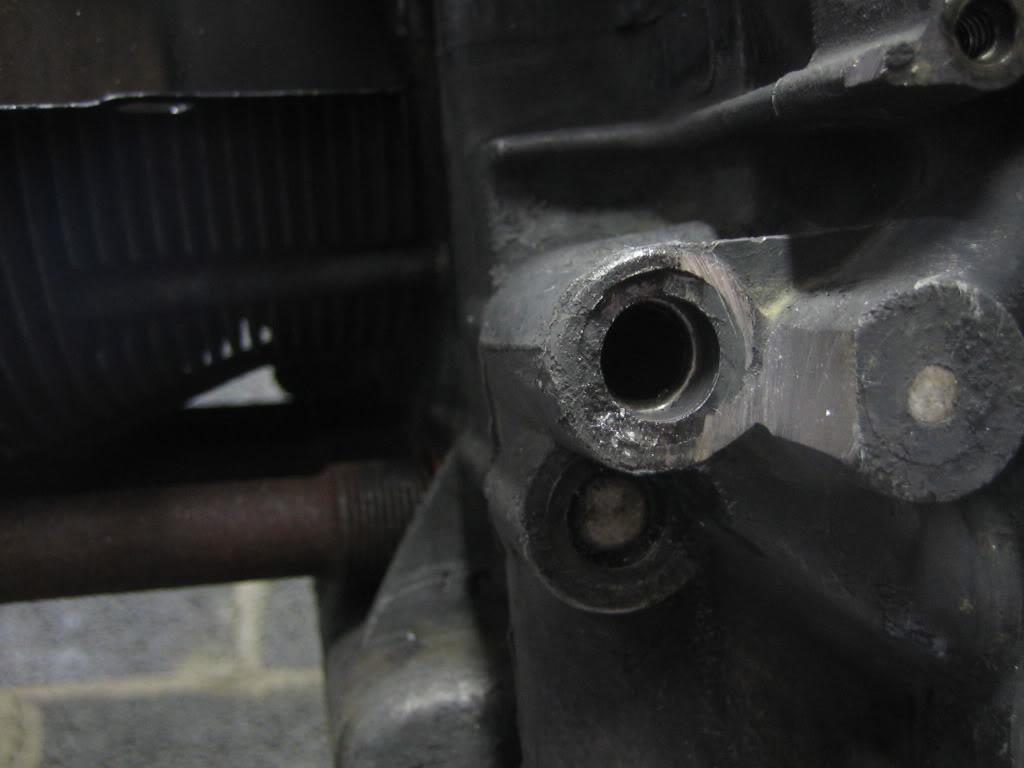
I started by tapping the return port. It has a small freeze plug from the factory that is pulled out with a slide hammer.
My technique for keeping metal shavings out of the engine has three parts. First, I removed the oil pressure sensor and plumbed pressurized air into the oil passages to force any loose particles outward.
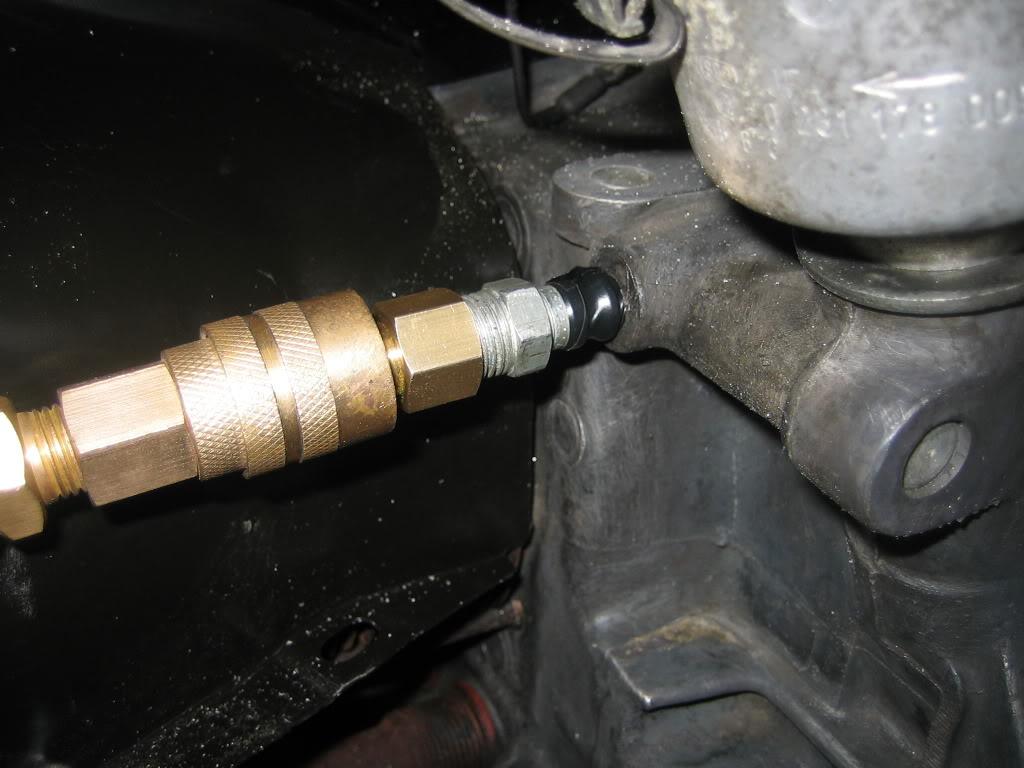
Then I used a shop vac to suck any metal out that falls down the oil pump passage
Finally, a healthy amount of grease on the tap helps to keep all the metal captive.
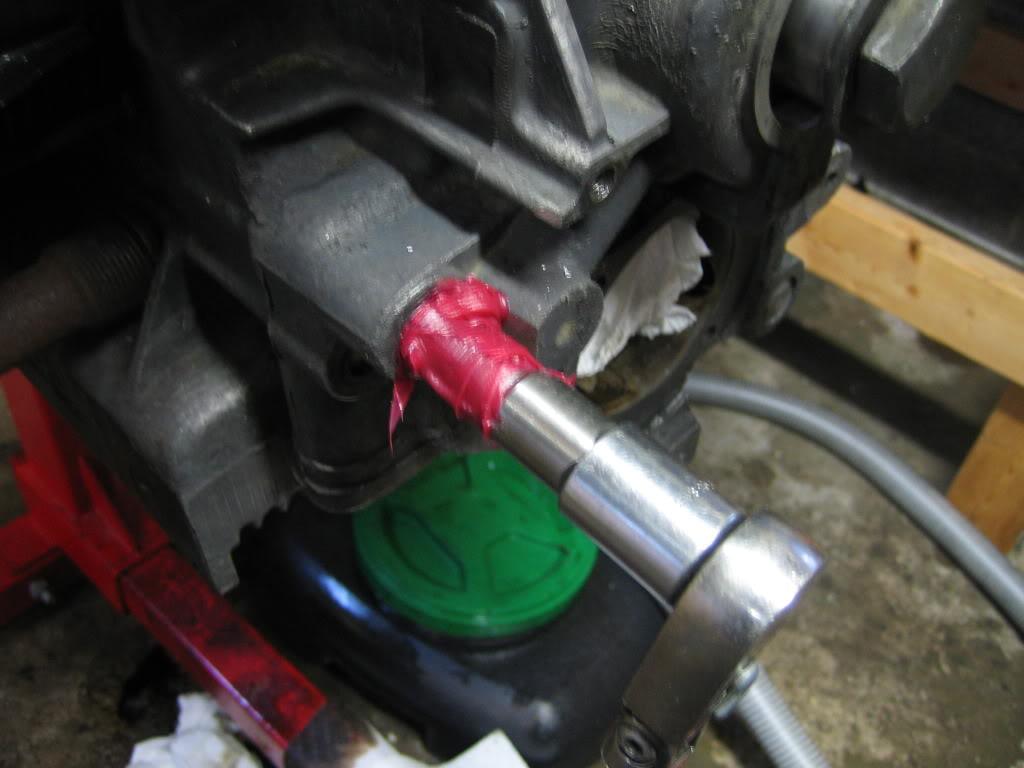
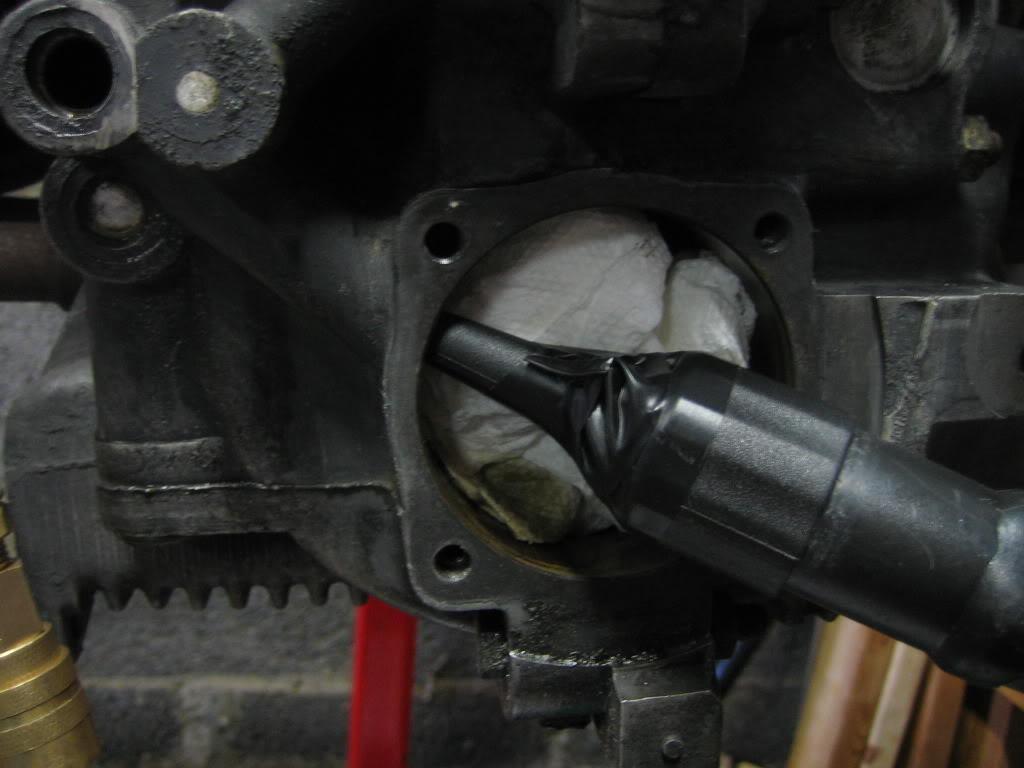
I took my time in drilling and tapping. I would cut one rotation and then back off the tap, clean it and re-apply the grease.
This is the metal shaving laden stuff that was forced out of the passage.
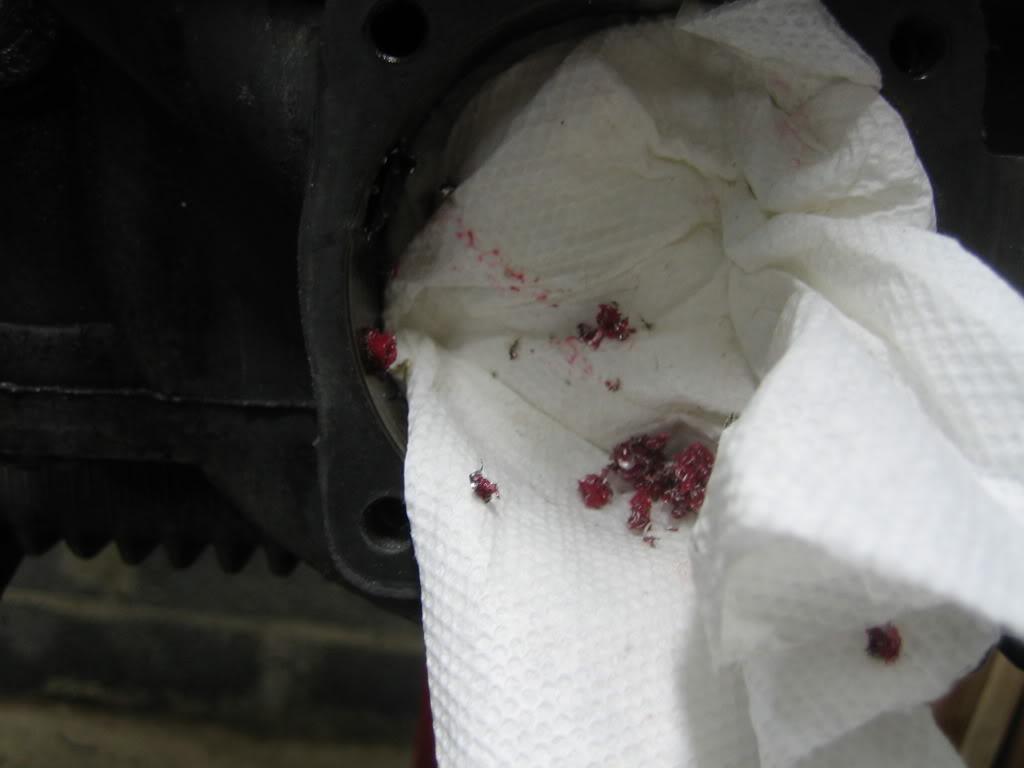
After the port was cut I used a couple cans of break clean to get all the grease and shavings out. With the oil lines pressurized all the bad stuff was forced out. It was messy but effective.
Here is the result.

I purchased a new oil pump that already had its factory outlet plugged and installed it with longer studs
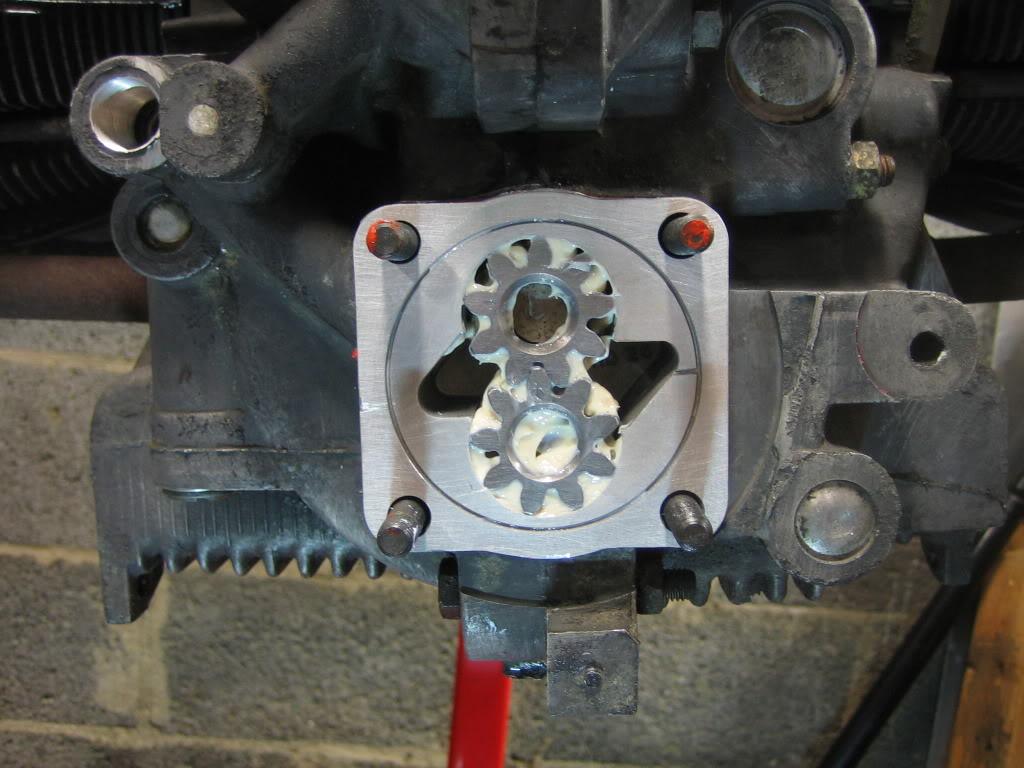
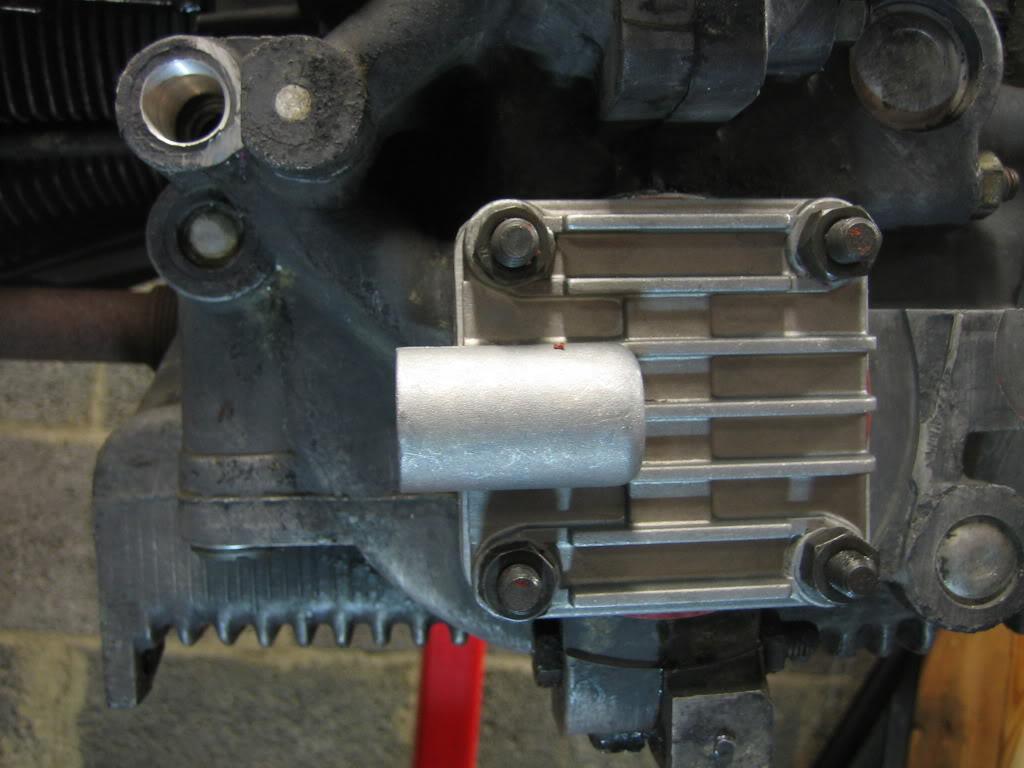
Then I installed the pump cover with new sealing nuts. All it needs now is the correct fittings and the filter stand.
Hopefully I got all the metal out???!!??
1/27/2010
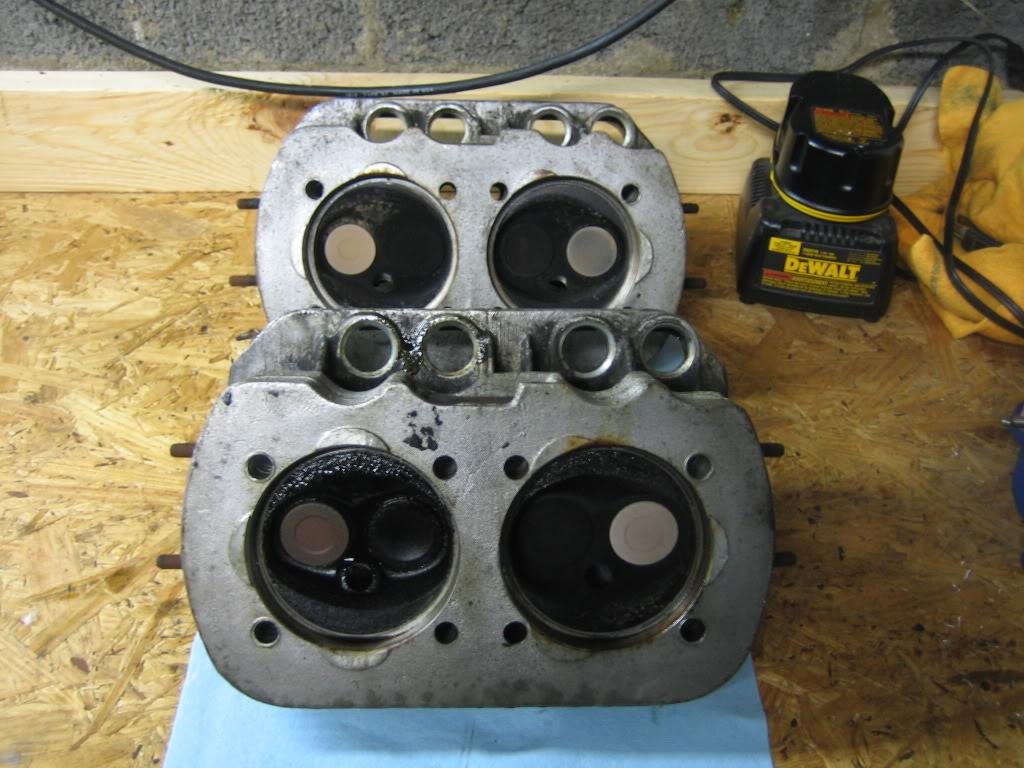
Dug my whole a little deeper tonight and pulled the heads. I really planned on just pulling them to replace the push rod tubes.....but now I might want to do a little freshening up too.
It gets smaller all the time.
Here are the heads. See the discoloration on the intake valve of cylinder three? It's oil and I'm a bit concerned. There was a decent puddle in there when I pulled the head. The cylinders show a bit of scoring but nothing too extreme (I don't think). I'm really wishing I had done a compression and leak down test before I pulled the motor. Of course at that time I was just gonna replace the tins :D:.
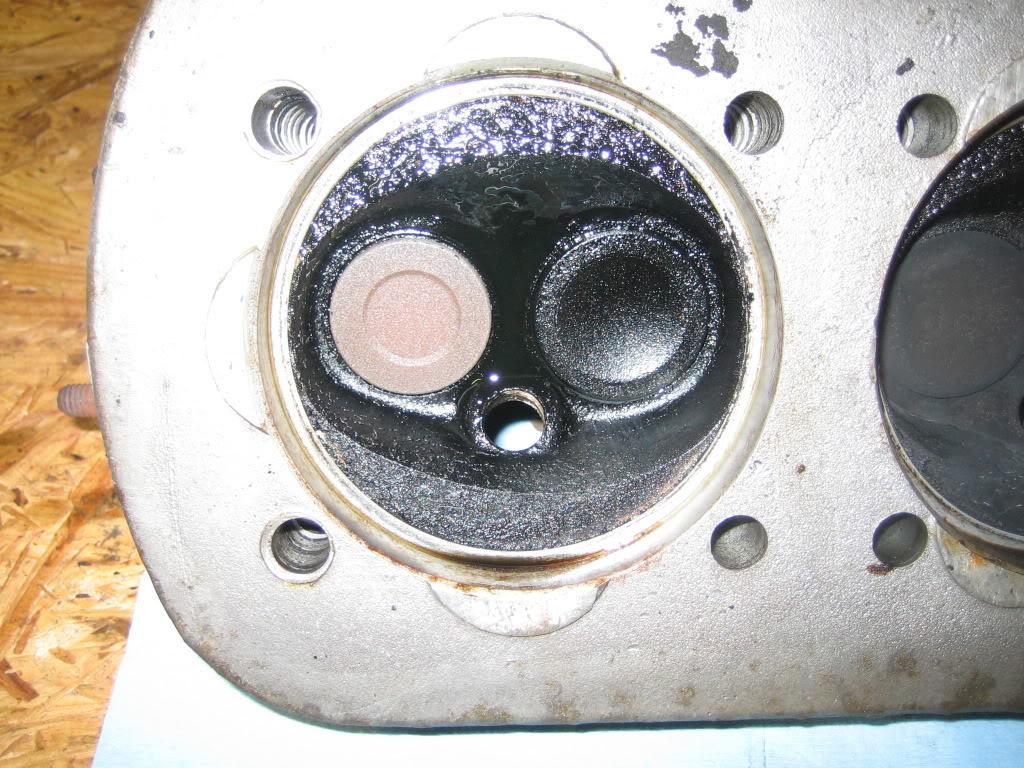
Any ideas on this oil build up?
1/28/2010
Hmmm, I started looking into endplay. If this is correct I could be in serious trouble.
You guys warned me about opening this can of worms.
"
"Speedy Jim" wrote with a "poor man's" endplay test -
- Remove the flywheel and push in on the bearing. (Prying with a large screwdriver works well.)
- Push the crank back in from the pulley end.
- Repeat. What you're trying to do is make the crankshaft move longitudinally through the case.
- Look for movement at both/either end of the crankshaft.
- If you can see any movement of the crankshaft, the bearing has spun.
In other words, see if the crankshaft can be push-pulled long-wise through the case. If you can see/feel more than the tiniest motion (0.006"-- same feel as a normal tappet movement), the end-play is excessive, usually due to the bearing. If the bearing has been spun, you can NOT compensate by shimming more."
1/30/2010
I had another shitty discovery this morning. I was measuring the pistons and cylinders in order to get some new rings and found they are only 85.5mm. That's a stock 1600 piston and not the advertised 87mm. Now I'm not sure if this thing was ever even rebuilt or just slapped in there. :ugh!:
Great! Nice job! She looks ????
Posted by Diggymart on 10/29/18 @ 11:40:08 AM