You must be logged in to rate content!
10 minute(s) of a 99 minute read
1-31-2010
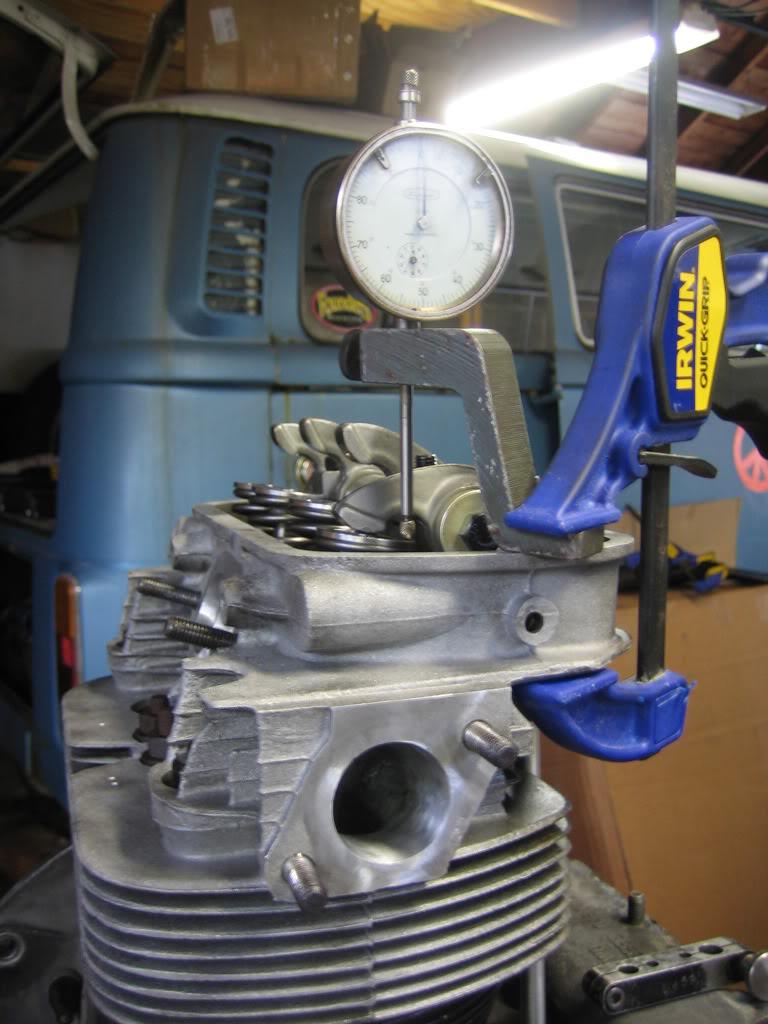
Ok, I did a proper end play test with a dial indicator
I've got .0075" of end play. That's not nearly as bad as I expected. I feel better now.
2/3/2010
Ok, so I'm cool with the end play concern. Things should be good with the proper shims.
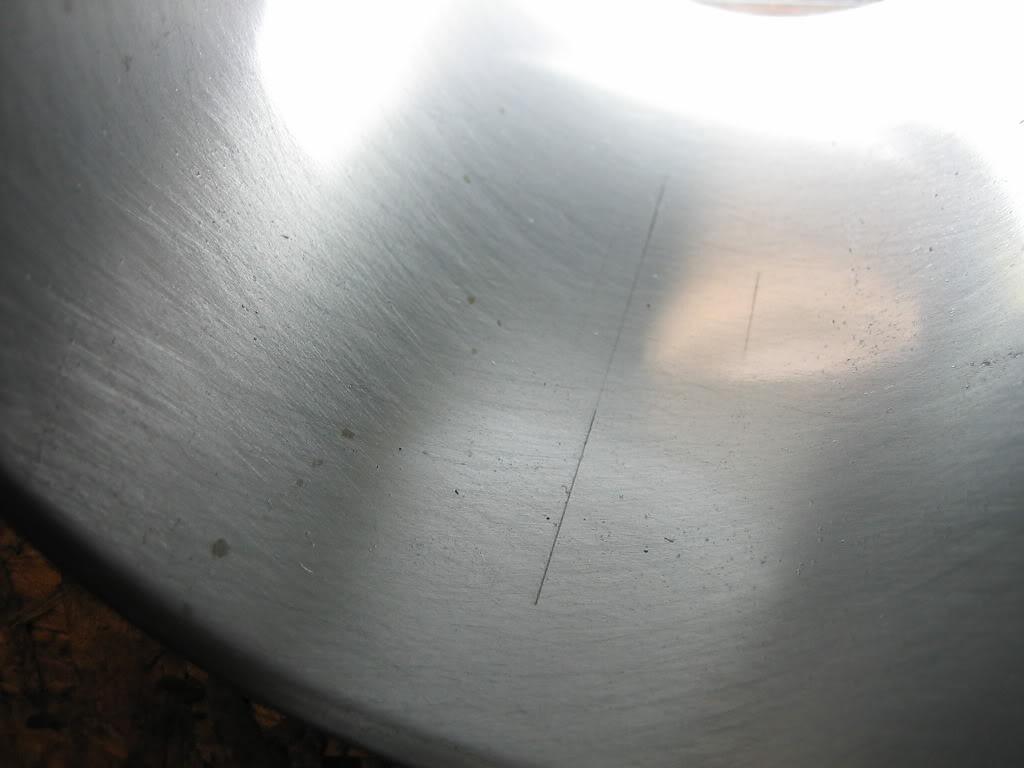
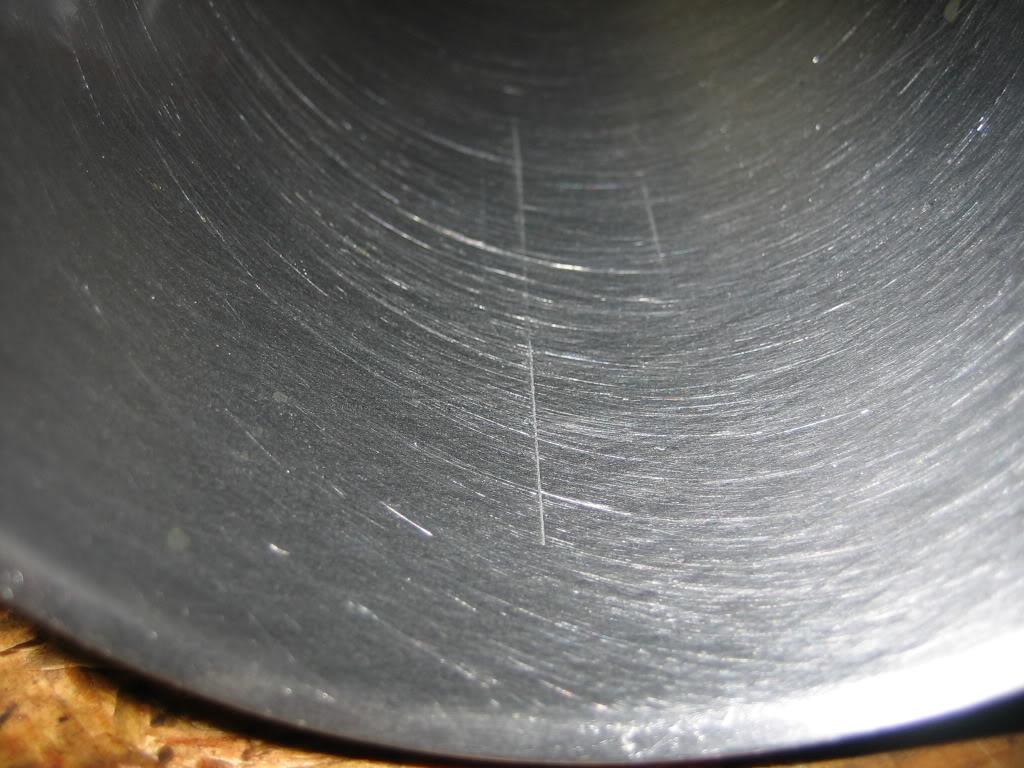
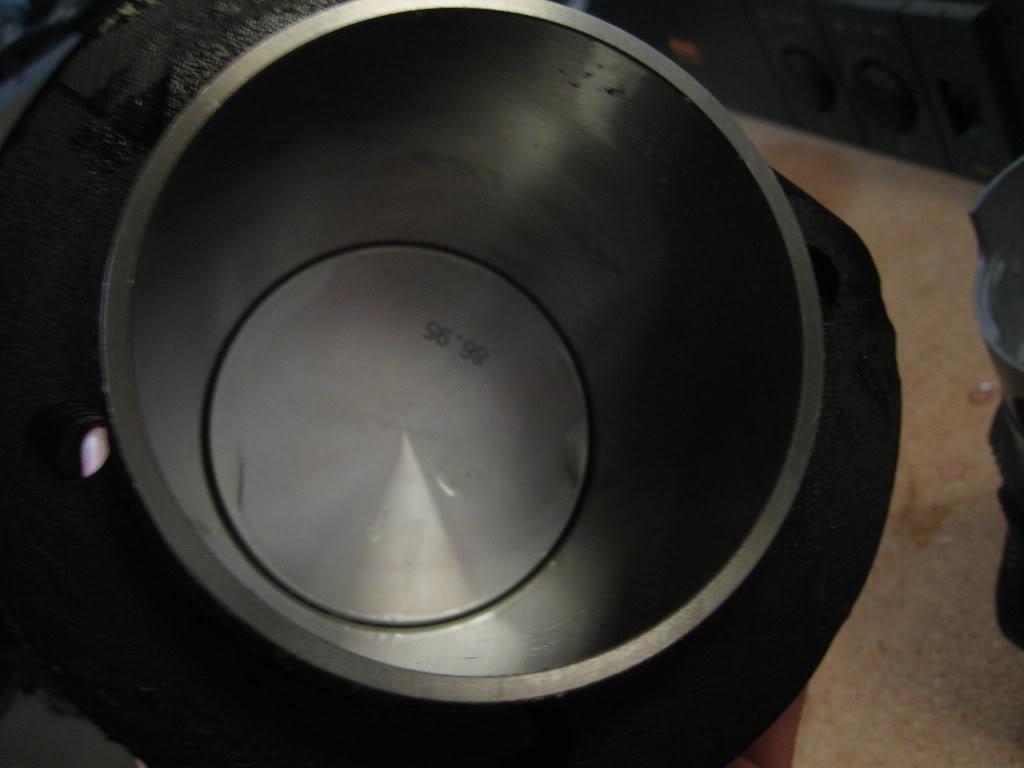
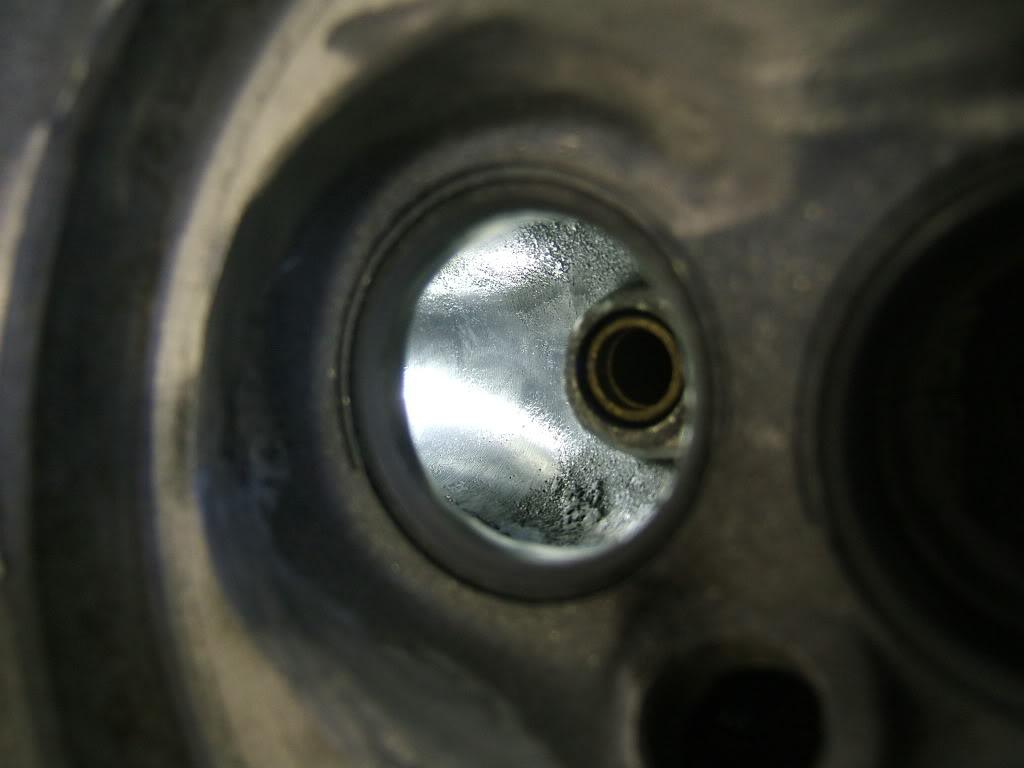
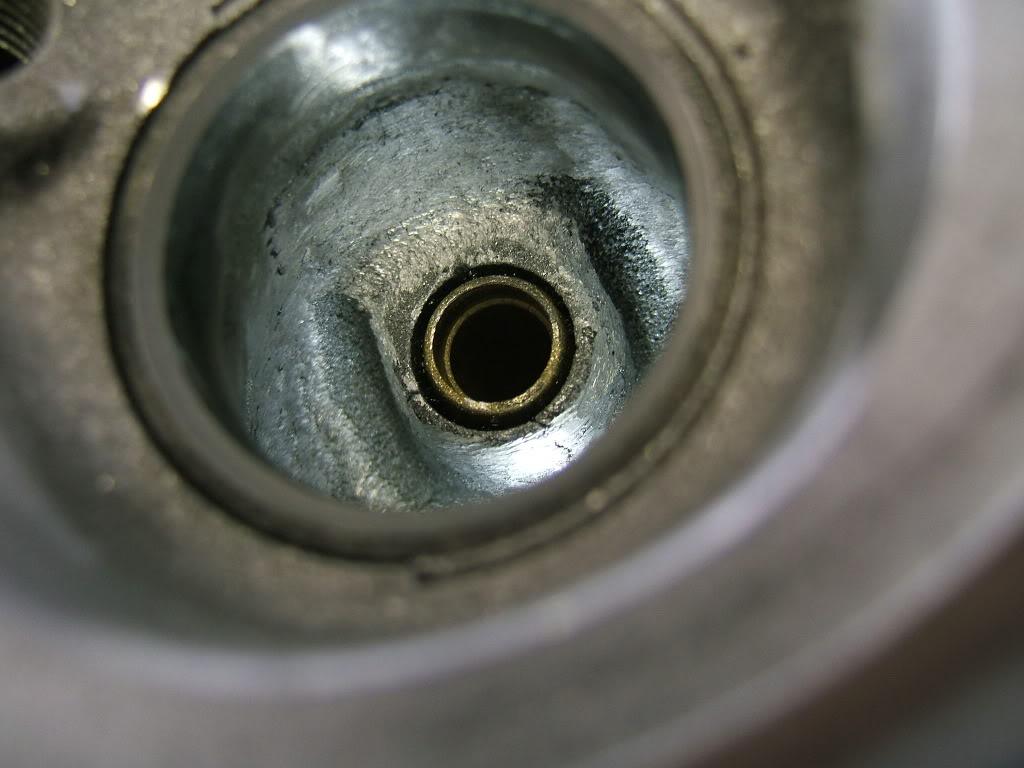
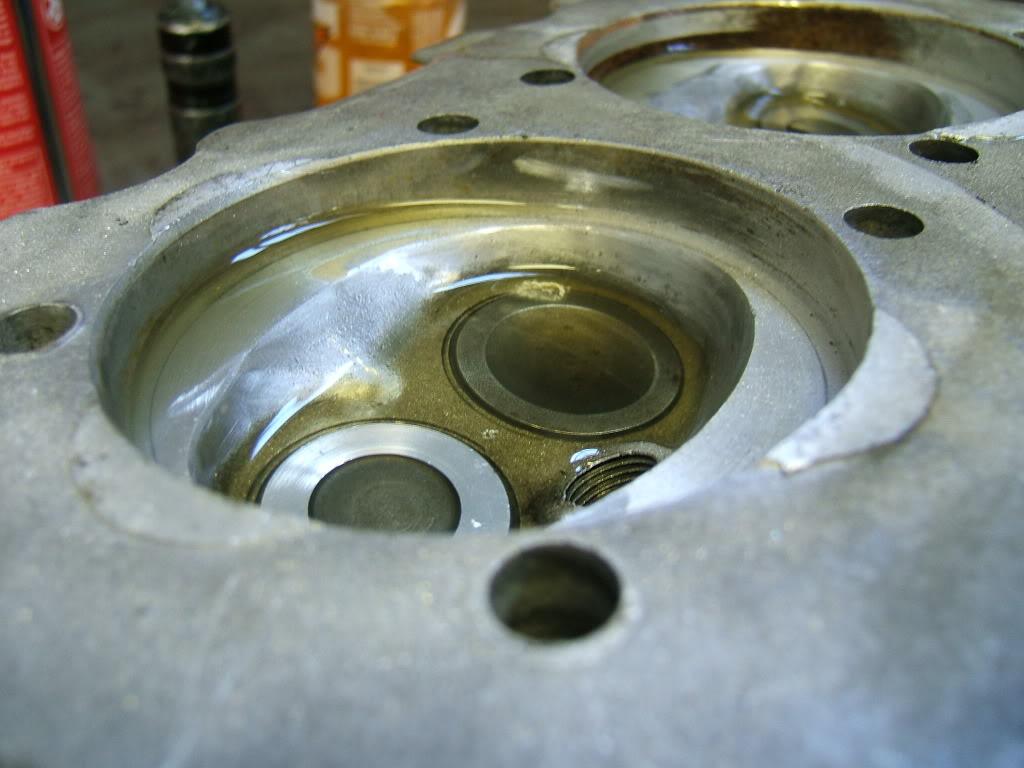
I did some honing on the cylinders today and it didn't turn out so well. After nearly 20 minutes of going at it there was still some gnarly scrapes in the cylinder wall. I guess I'll be getting some new jugs and pistons after all. While I'm saving for those I'll start inspecting the heads. Hopefully they look a bit better.
But here is my best shot at photos. These scratches were so deep I'd have to take a ton of material off to loose them. At that point the cylinder would most likely not be strait anymore.
2/3/2010
Damn, what is with you guys and your desire to have me slap this thing back together all half-ass? Sure, I'd like to build a super cool motor soon but who knows if I'm going to have the time or money to do that down the road. Then I'm left with a poorly built engine and no money to fix it. I'd rather put this engine together knowing that it is in good shape and can last me a while if I need it to.
Yes, it's relatively easy to pull the motor on these cars, but not that easy. I certainly don't want to have to do it again right away. I'd feel a lot better about spending an extra $100-$200 to know that it was done right and won't burn a bunch of oil.
Ed, Yes, my fingernail catches on the score big time so I'm sure it would allow oil and compression to pass.
Steve, if I had C-Tech machine hone these things they would probably charge me close to half of what new cylinders cost and then I'd be left with thinner cylinder walls which are prone to over-heating.
Plus, it will take a lot more time to get the existing pistons all cleaned up a ready to use again. If I get new ones they are ready to go out of the box and I just have to gap the rings. That will allow me to focus on finishing other parts of the project sooner.
Sorry to rant, I really do appreciate the advice and I realize you guys are trying to be the voice of reason. I just don't get the logic in this case.
2/5/2010
I haven't decided exactly which route to take. I'm leaning toward these big valve heads. While you're in there ya know?
Here is the break down of options:
0. Do nothing and bolt the heads back on with worn guides - $0 (not really an option for me)
1. Rebuild the heads myself with help from Joe - $100 + lots of time + learning experience.
2. Rebuilt heads from Brothers or Dons - $220
3. Rebuilt big valve heads from Brothers - $320
4. Waiting to hear from Jim's Buggies?????
2/9/2010
I dropped my heads off at Jim's Buggies in Nashville (michigan) last night. They'll be doing new guides, valves, retainers, HD valve springs, locks and fly-cutting.
I just have a few little parts to pick up now and I'll have everything ready for re-assembly.
2/18/2010
This is kind of a boring update but hey, I'm making progress.
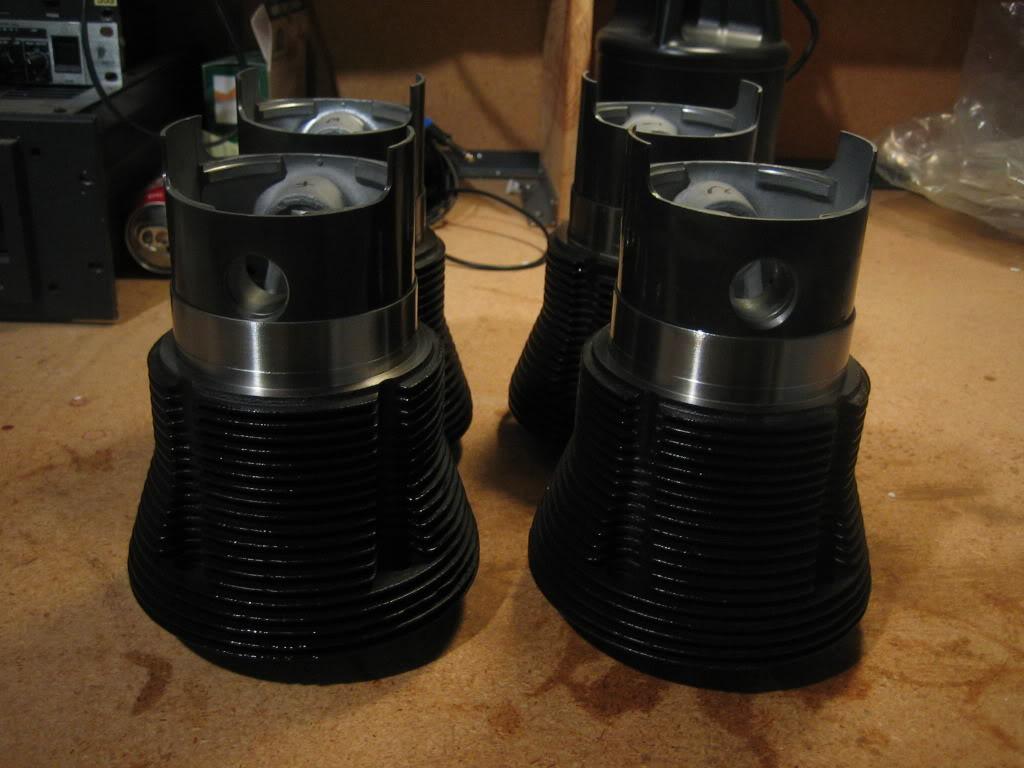
The last couple nights I worked on getting the new pistons and cylinders ready. First I cleaned and painted the cylinders. From what I've read this actually helps heat dissipation. Then I check the ring gaps, cleaned everything again, oriented the rings, lubricated everything and dropped the pistons in.
They are now bagged and ready to slide on.
Hopefully my heads will be ready this weekend and I can make some progress on port matching them. Who knows? Maybe I'll have time to get everything bolted together.
Here are some boring pics of pistons.
3/6/2010
I finally had time to get the heads finished up today.
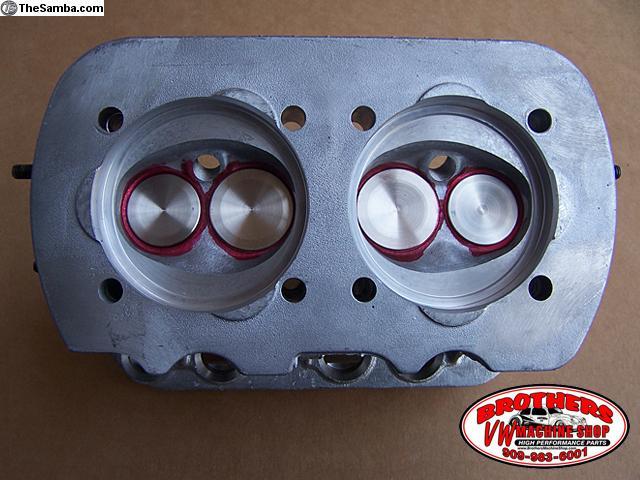
They were first sent off to Jim's Buggies to be rebuilt. Jim bead blasted the castings and fly cut the combustion chambers for more compression and a good sealing surface. They also cleaned up the ports a bit and cut the valve seats. They assembled the heads with all new valves, guides, keepers, retainers and HD valve springs. I could have run them the way they were but I couldn't leave well enough alone. I tore them down again to add some special touches.
What started as a simple port match turned into a mild port and polish. I was pretty conservative but hopefully it will make some difference. If nothing else I learned a lot from it.
The ports were actually pretty close between the head and intake manifolds. The area in black is all I needed to remove. After matching the port size I blended the difference in diameter into the port for a smooth transition.
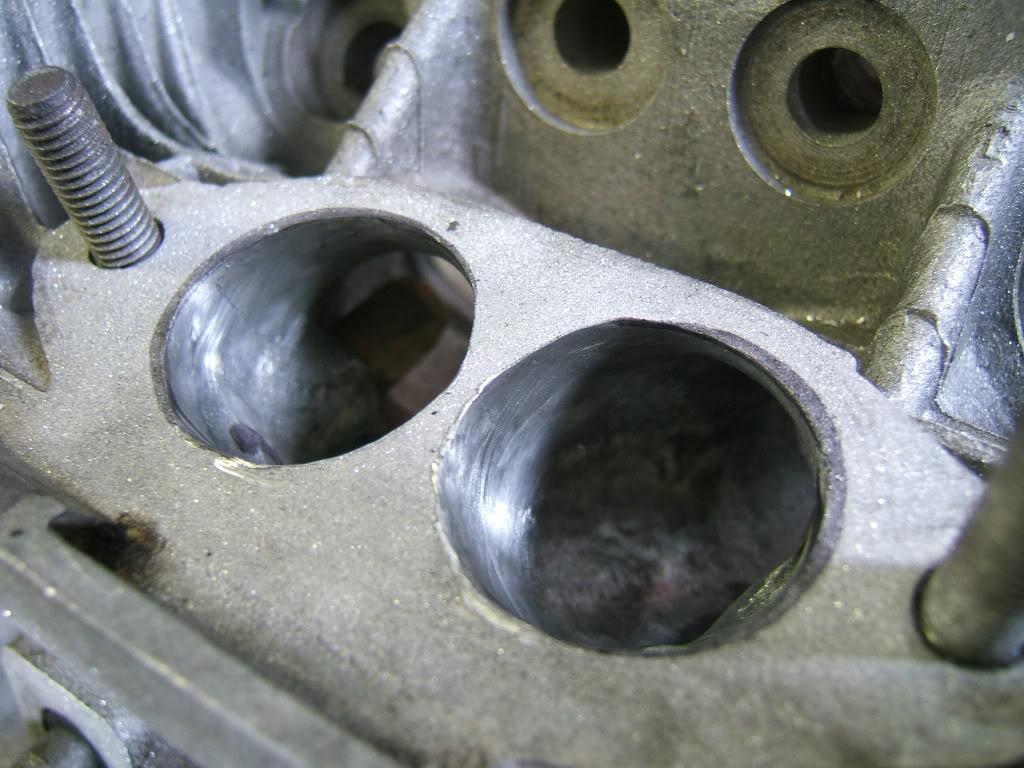
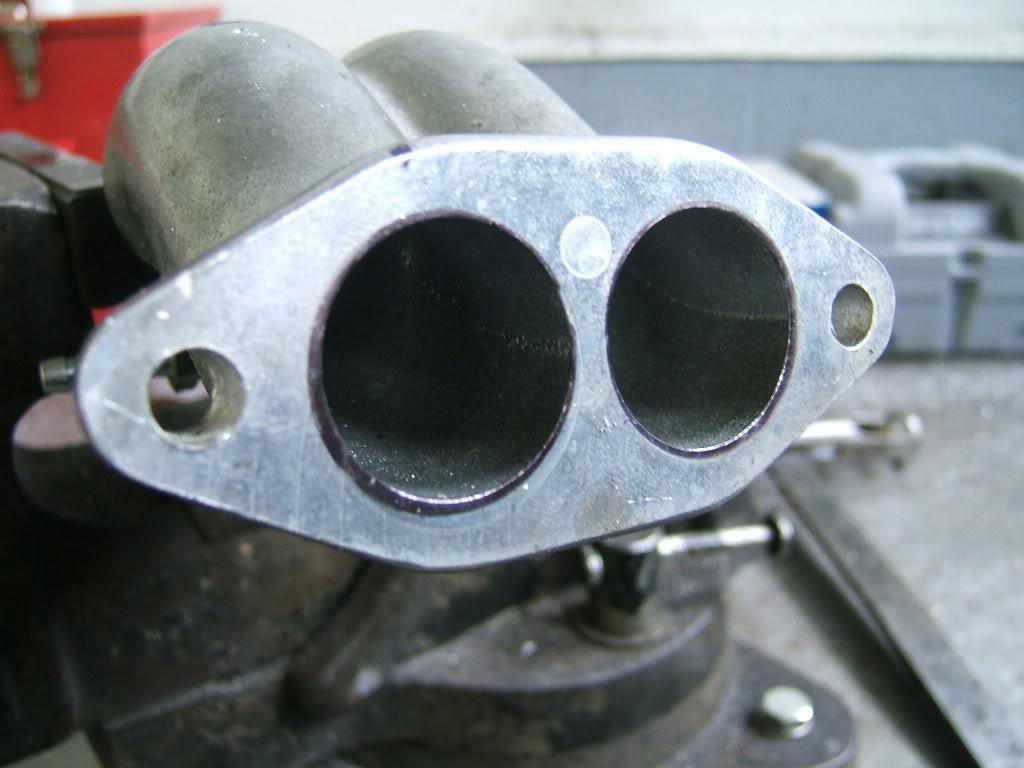
I also tried to straiten out the air flow a bit on both the intake and exhaust. It's really tough to see from the photos but a fair amount of material was removed from the intake manifolds and ports. I finished it off with some 80 grit sand paper to keep the fuel atomized.
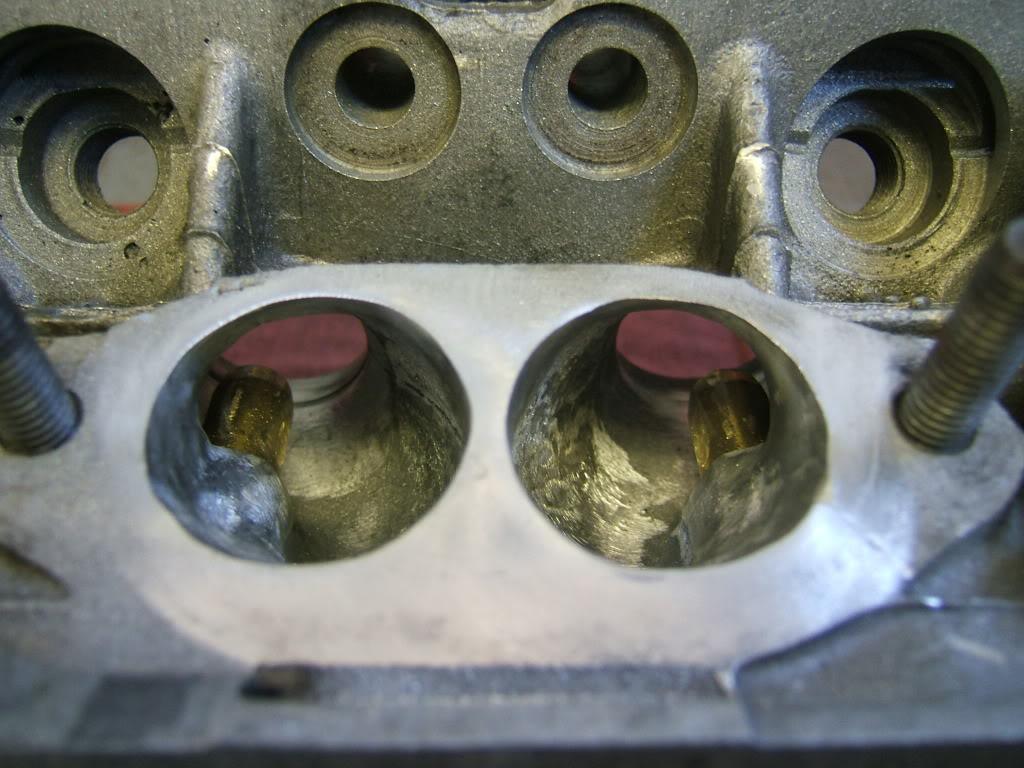
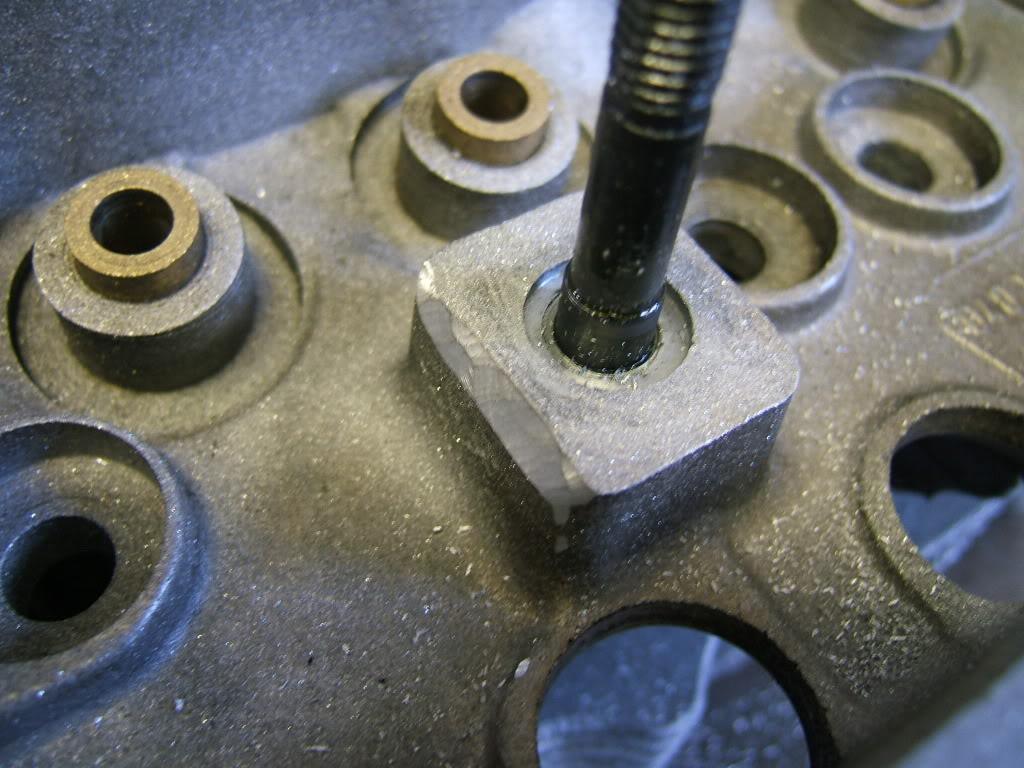
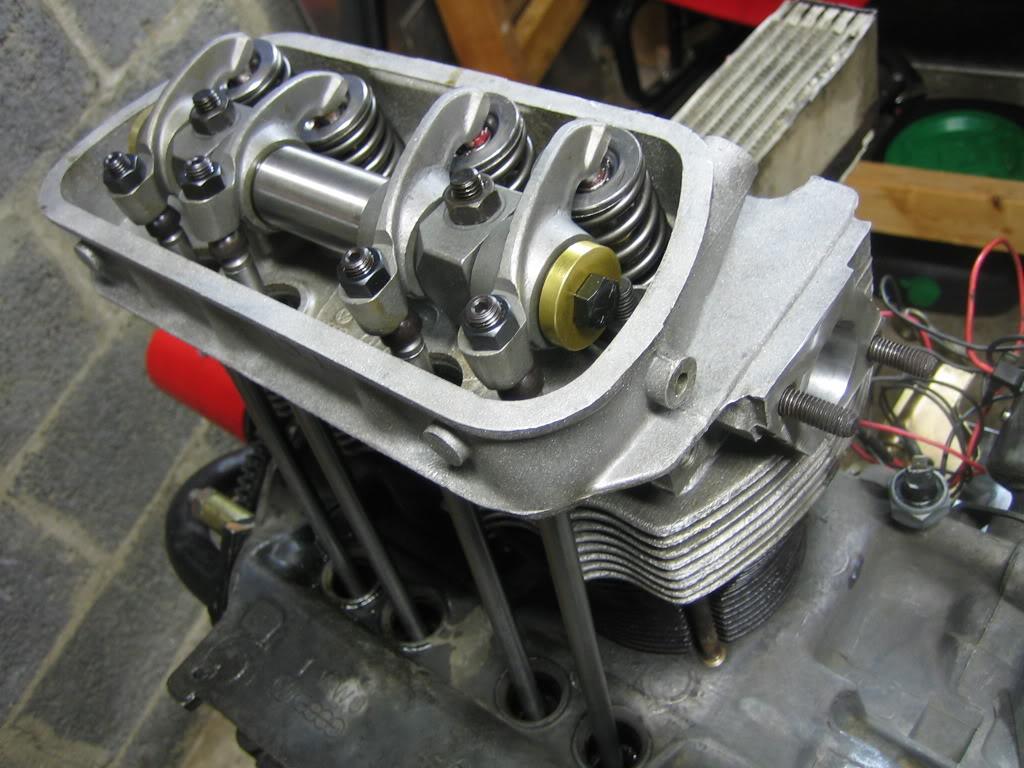
I am a little concerned about what appears to be a small crack in the valve guide boss shown in this picture. At this point I decided to let it go. We'll see how she holds up.
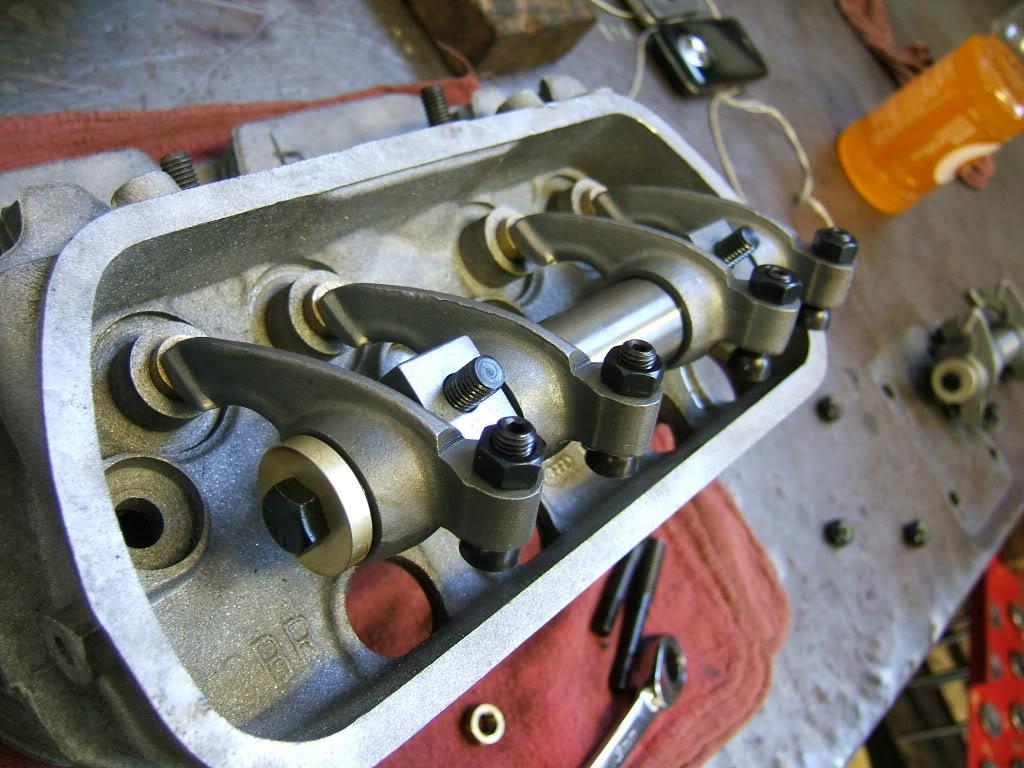
Here are the 1.4:1 ratio rockers test fitted. For those not familiar with these, they increase the valve lift to promote more flow. I had to clearance the rocker shaft stand slightly to make them fit.
I then lapped the valves for good measure. I'm not crazy about the amount of seat surface area the valves are touching but sources assure me it will be fine.
Finally I assembled the heads and did a leak test just to be sure. All appears to be well.
I am now waiting on some new pushrods so I can mock up the motor and do final assembly. Hopefully tomorrow I'll start on the body work.
3/20/2010
I've got a lot of work to do but things are moving along.
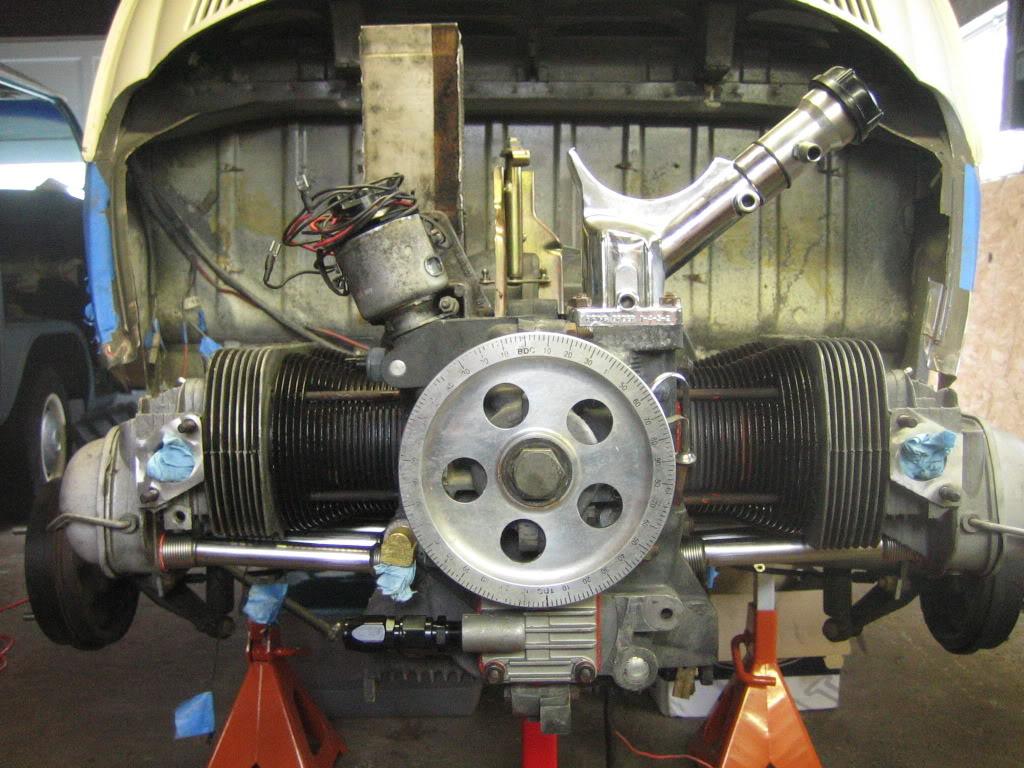
Over the last week I've been getting the motor mocked up and today I did the final (I hope) assembly.
I temporarily mounted the pistons, cylinders and heads on the case to figure out the valvetrain. I started by checking the geometry of the ratio rockers. They looked pretty good so no shims were necessary.
Then I measured and cut the new shorter chromoly pushrods.
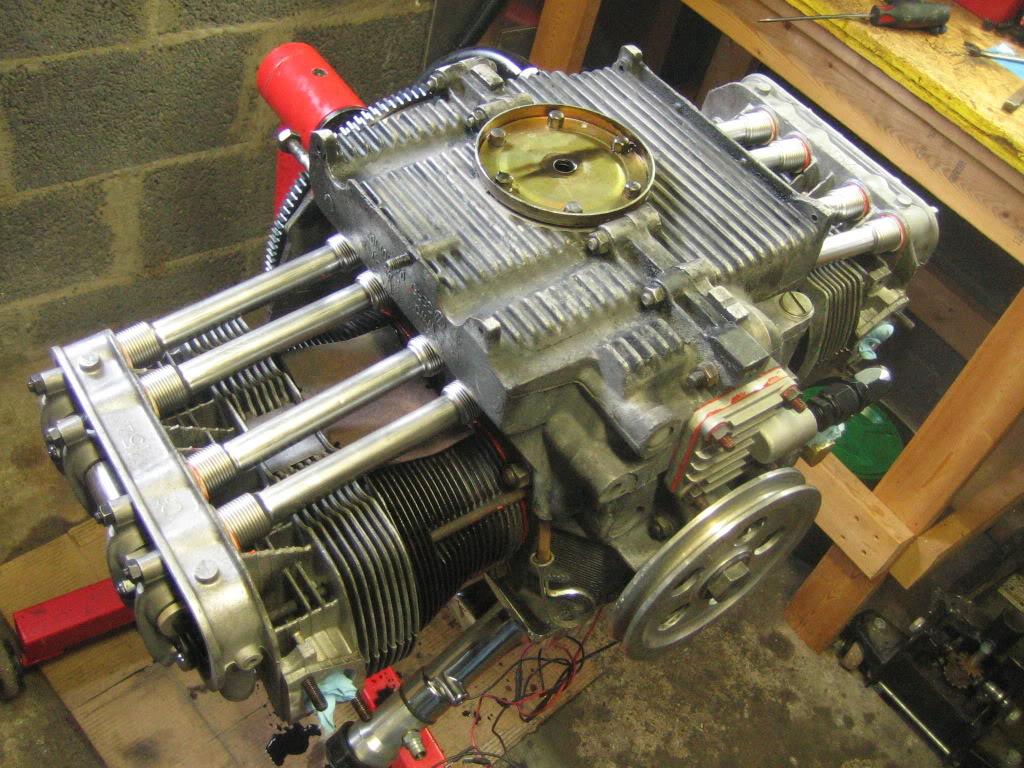
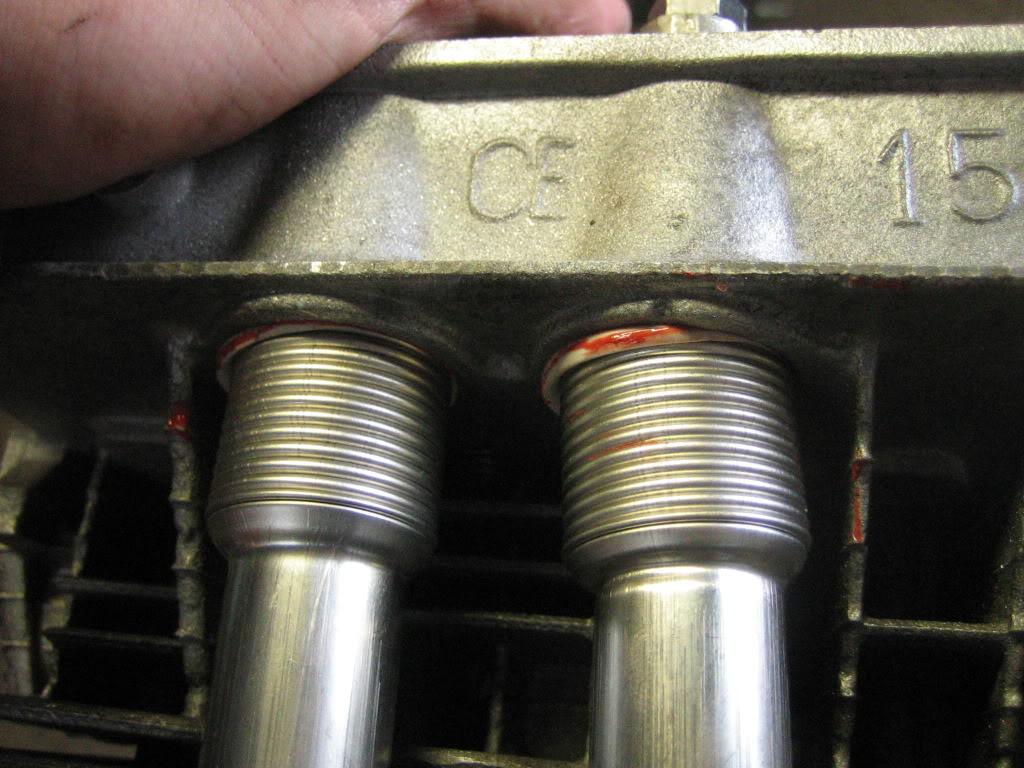
When everything was set I took it all apart again, cleaned it up and did the final assembly. I used stainless steel pushrod tubes with silicon seals. However, they are not really fitting right and I'm a bit concerned they won't seal.
When I bolted the heads on they were 1/4" or more from the cylinders until I torqued them down. It seemed like the pushrods were just too long and didn't have enough space to compress. I've never assembled an aircooled engine before so I decided to proceed anyway just to see what would happen. The tubes compressed enough for everything to fit, but they don't look right now. As you can see from the pictures they are tweaked at either end to fit in the space. This just doesn't seem right to me.
What do you guys think? I'm afraid if I order new tubes I'll end up with the same problem.

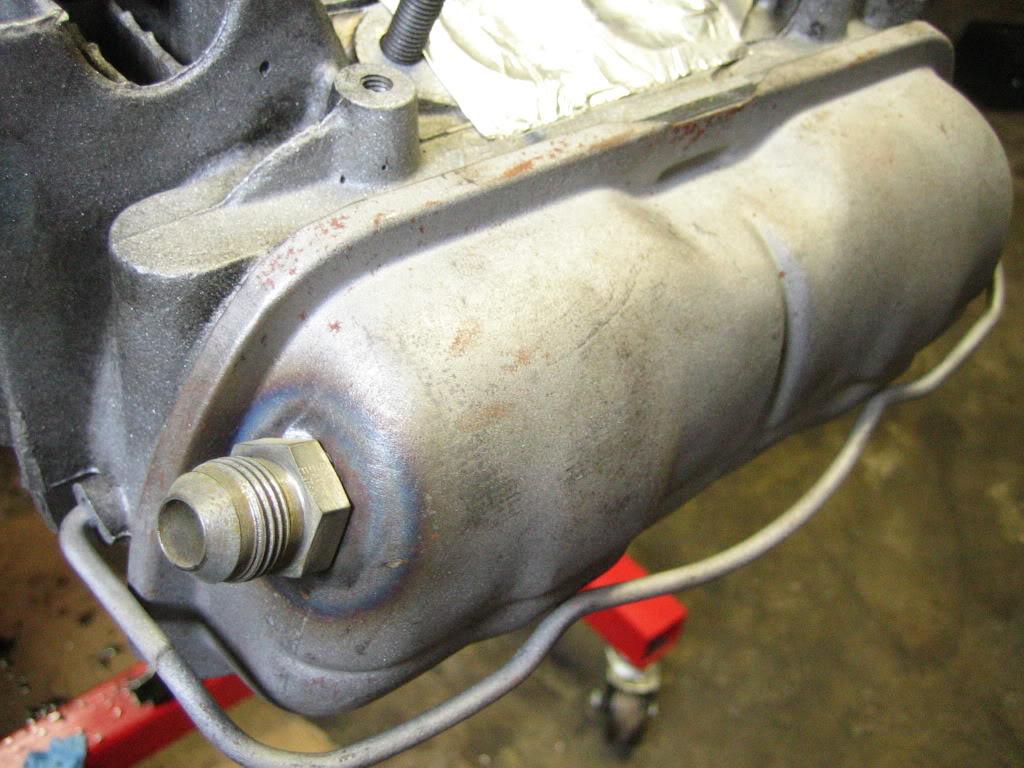
I went ahead and assembled the engine a little bit more just to get things sealed up. The WSAC helped out big time on these valve covers. Darren sand blasted them and Joe welded on some AN fittings for my breather box. They will be powder coated later.
Speaking of Joe, he was over today and got the bus running. It still needs some serious love but it was good to hear it make some noise.
The next step if I don't have to re-do the pushrod tubes is fitting the engine tins. I'm also making some progress on the body work but I'll update the thread with that stuff tomorrow.

Great! Nice job! She looks ????
Posted by Diggymart on 10/29/18 @ 11:40:08 AM