You must be logged in to rate content!
8 minute(s) of a 249 minute read
8-20-2010
Got a little time today, while on the phone.
Cleaned and bolted up the front engine mount subframe. It's from a VW Caddy (Polo based light van) with a diesel engine, so it's the same one that I needed. It's the same style as a mk2/3 Golf/Jetta, but slightly narrower. In fact, I'd tried bolting up a Golf one before checking the part numbers but it was about 1" wider, and before i was able to get the Caddy one I was having bad thoughts about having to cut down and weld the wider Golf one to work. Anyway, problem solved, bolted right up with no problems.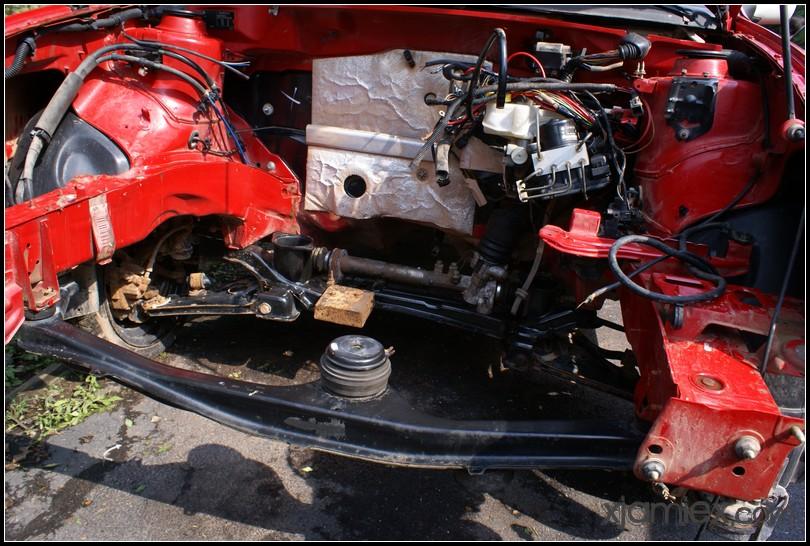
Also washed down the engine bay a little further. With the sun shining on the wax that was retaining a lot of mud on the car, it was easy enough to scrape a lot of it off. It's a bit cleaner, but has a good bit more to go.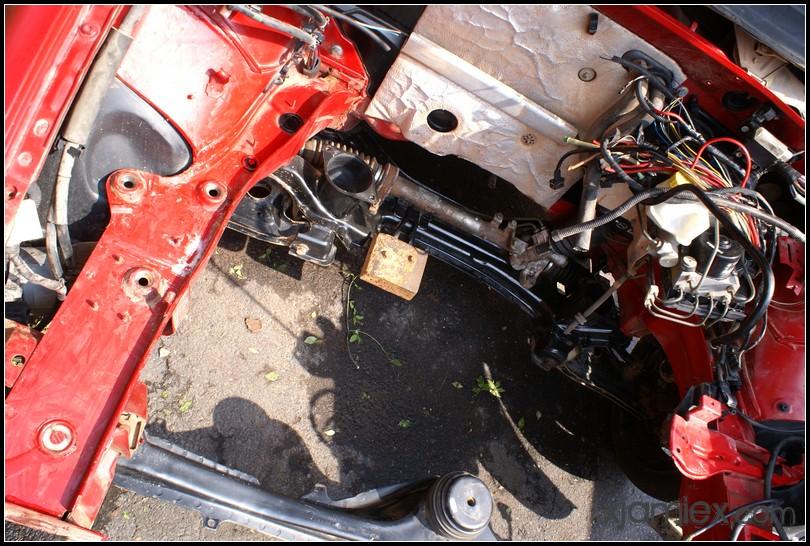
8/21/10
Got some more work done in preparation towards getting the car ready for the engine and transmission to be installed.
I'm doing the work on my driveway currently, before moving it to my warehouse to get it up on the lift to finish everything off. With it being at home it's easier to spend 1/2 hour here or there working on it, and quickly double checking part numbers etc, so for right now it makes up for having to work with jack stands.
This is the underside of the car as it was earlier today. Whoever removed the engine decided to just bend one of the pieces of aluminium heatshield to death, and of course everything's caked in mud: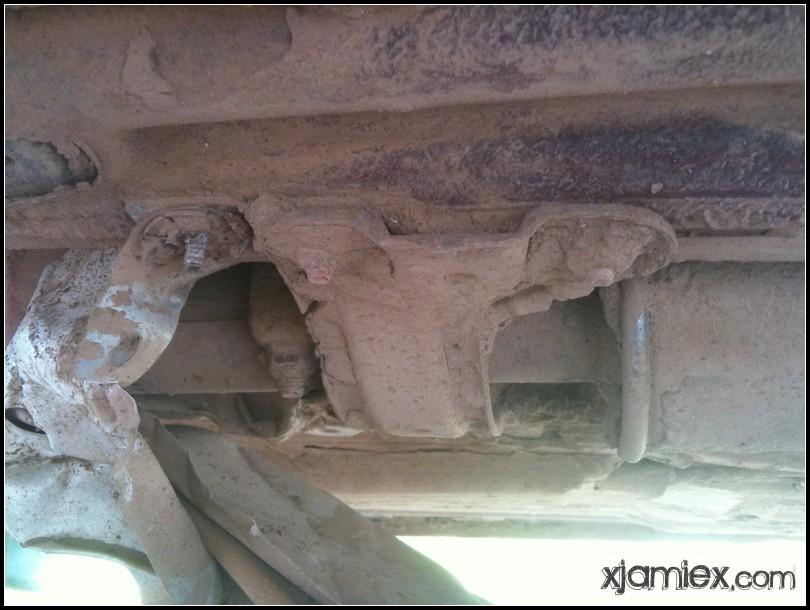
The mud flakes off easily (which sucks when working under it), but it also comes off easily with the pressure washer. I didn't do this today though, as I wanted to get to work underneath the car without soaking everything first.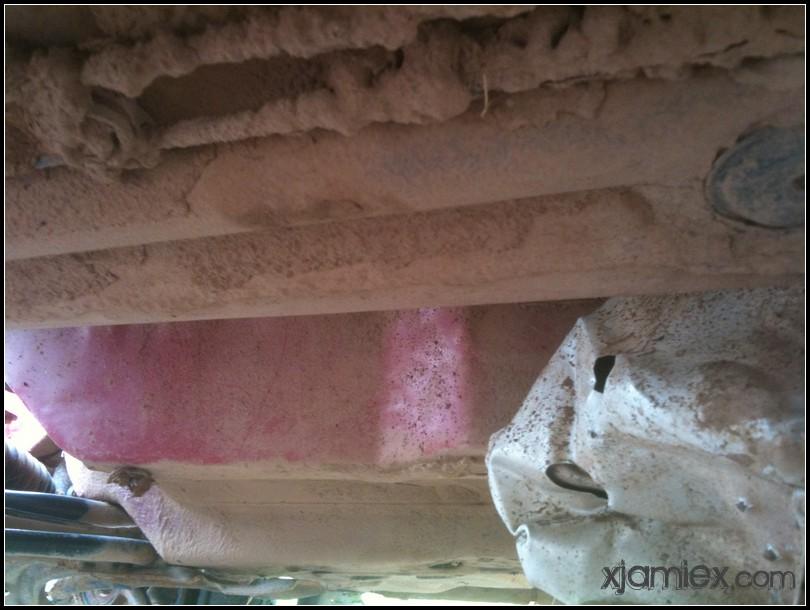
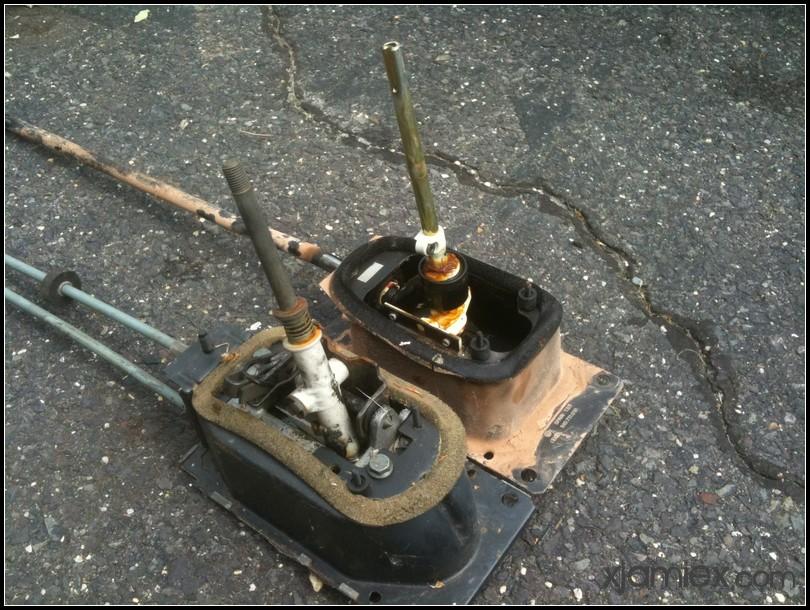
Here's what I removed; two heatshields, two exhaust brackets to gain enough room, and the linkage style shifter: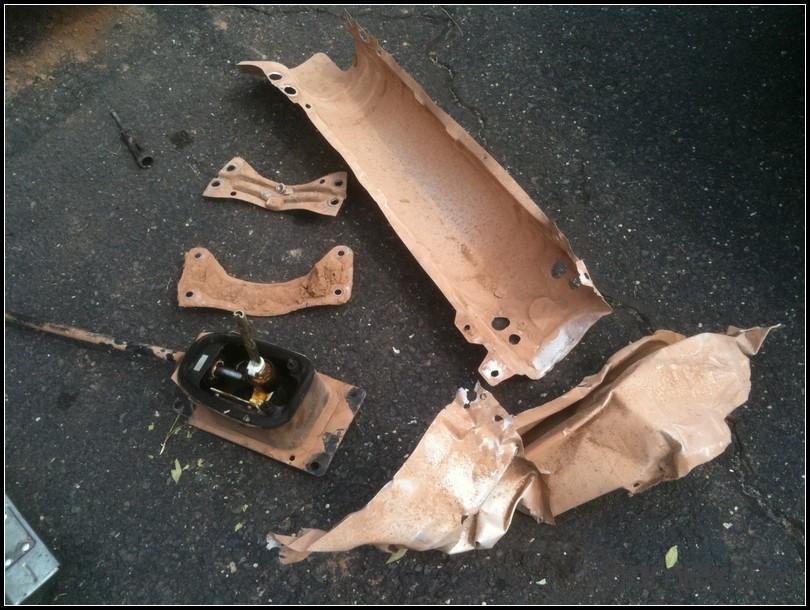
The shifter was the main target. It had been cut off when the engine was removed: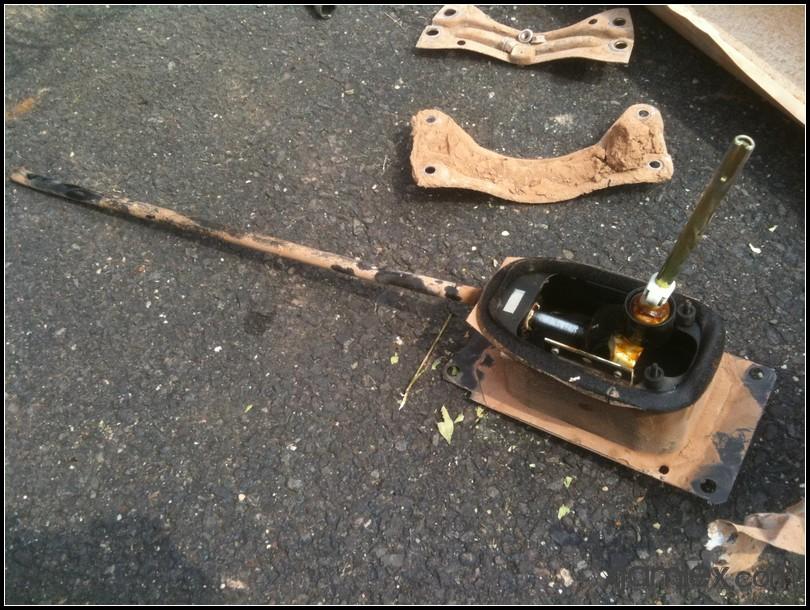
PN to cross reference.. but hold on:
Identical at the back two bolt mounts: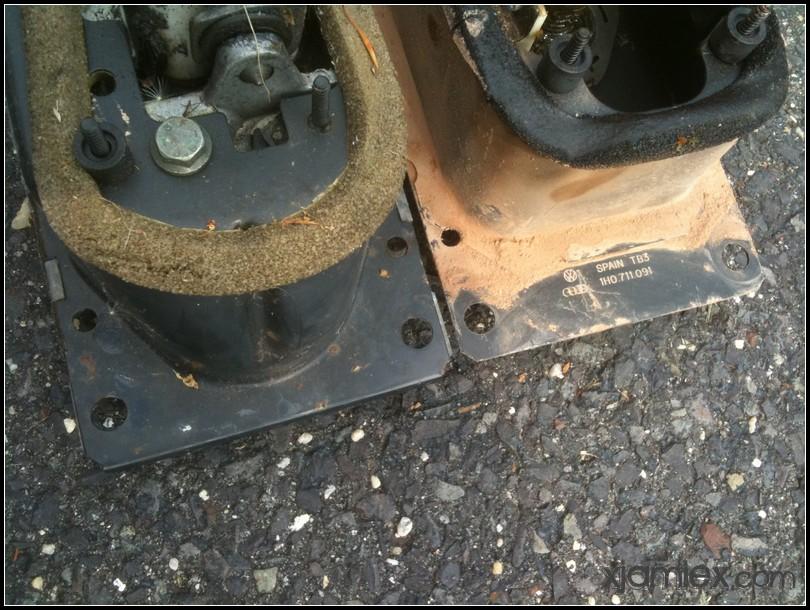
The mk3 cable shifter is slightly shorter at the front, and does not have the two bolt holes. It is retained by the single threaded captive bolt at the top, which goes through the body.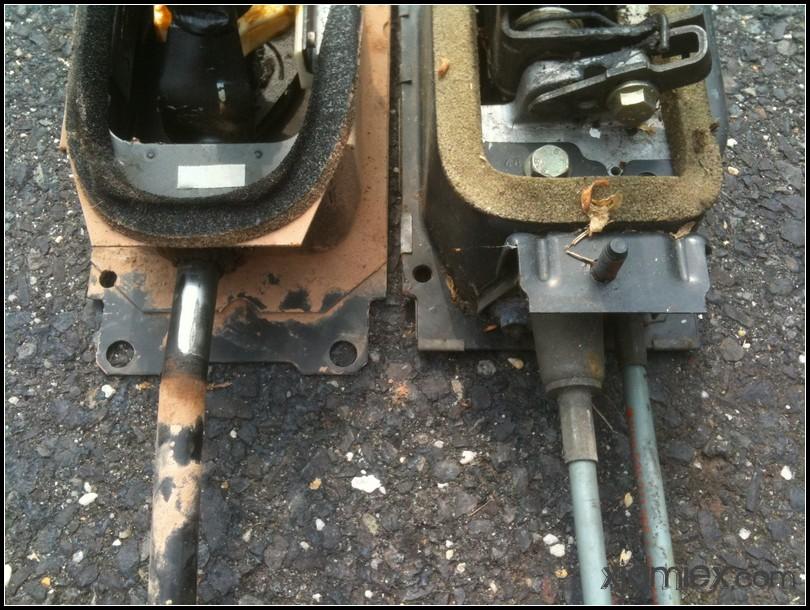
The Polo body of course doesn't have this hole. This is the two stock holes, with the solid metal behind it:
So I have two options, neither of which are very difficult. I can:
1. Drill a hole for the bolt to go through, and use the stock mk3 way of securing it.
2. Make two notches on the mk3 shifter, and bolt it on using the stock Polo bolts in their normal location, with bigger washers to make sure it catches the mk3 shifter.
[2.1. Weld a piece of metal onto the mk3 shifter, drill two holes, use the stock polo bolts and location.]
This is very similar to a fairly common issue when swapping a mk3 cable shifter into a mk2 Golf/Jetta. There's a few solutions, with possibly the most common being to just use overlapping bolts to secure it. I haven't quite decided which way I'll chose. Whatever's easiest in the end, as they're all more than satisfactory. I have to bring home a good condition mk3 shifter box and cables before I can finish installing them, so i've got until Monday to decide which way I want to do it.
So, I also had some time to work on the wiring a little bit. I've seperated off the headlight/turn signal/horn/ground etc wiring from the ECU wiring, just to make it a little less of a mess.
In preparation for the engine bay wiring work, I sat down a few days ago with the mk3 Golf/Jetta USA spec wiring diagrams for the same year 1.9l TDI engine and wrote out all of the ECU Pin wiring: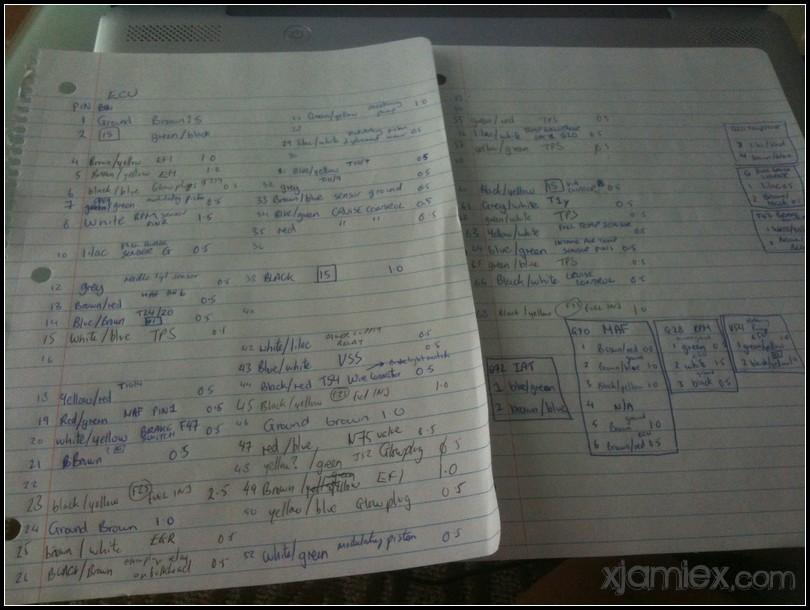
The reason I had to use a Golf/Jetta wiring diagram is that from what I can tell, no-one makes a workshop manual for the Seat Cordoba/VW Polo Classic/Variant. The common advice from europe is to use either a earlier Polo or a Skoda manual for the body, and the Golf/Jetta for the wiring. Well, I don't have a wiring diagram for a european 1.9l SDI engine so I used the closest I had.
Well, it turns out that was a complete waste of time. Almost nothing matches at the ECU at all. Basically the main ground is the same (as is every other one ever), and one or two other wires which may be a coincidence. At least there's a lot less wires on my ECU connector than on the more complicated TDI engine. Here's my notes made while standing in the engine bay with a open ECU connector: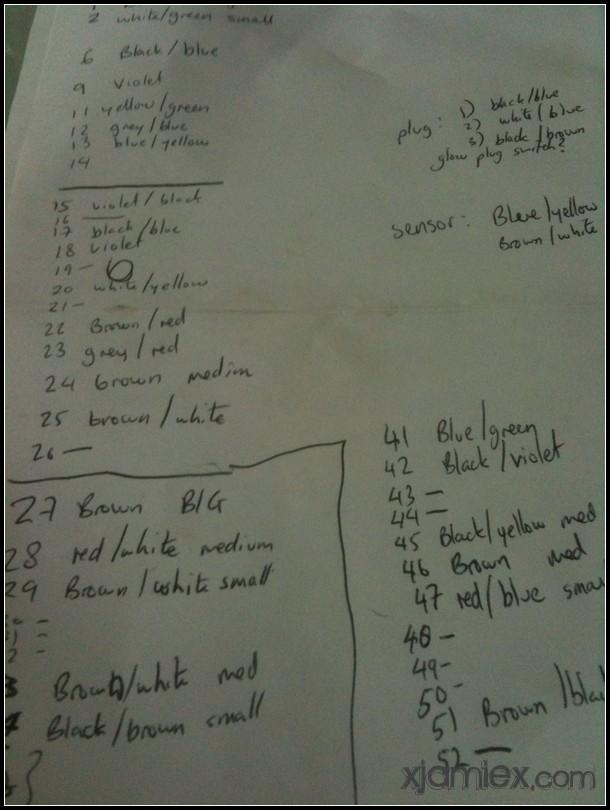
So, to save my sanity I really need to find a engine/ECU wiring diagram for a 1999 Golf/Jetta mk3 1.9l SDI. I can then match up the wiring, delete what is not applicable to the new engine, and splice into things that I do want to use (gauge cluster, switched power etc).
If anyone can find one as a PDF or image file please let me know!
8/26/10
Quick update, nothing too amazing.
Got the cable shifter modified and installed, went in with no issues.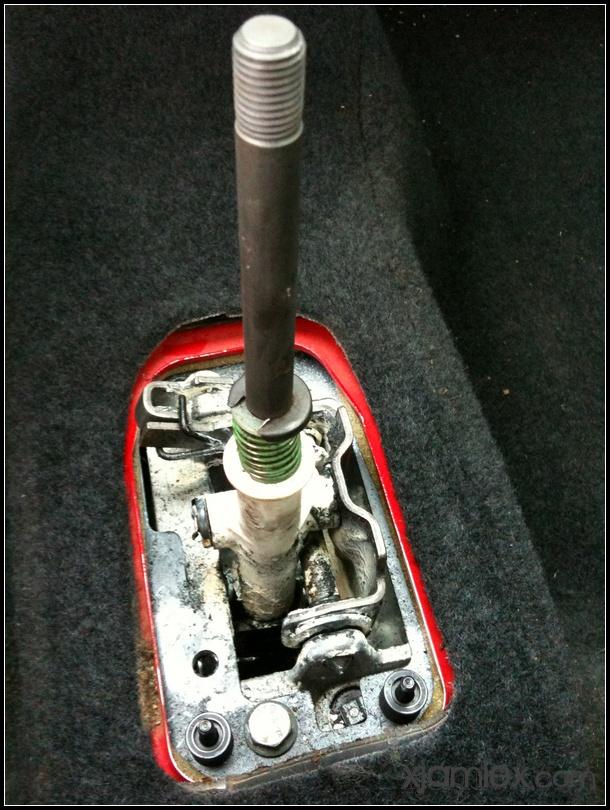
The door with the missing door card also has a shredded vapor barrier: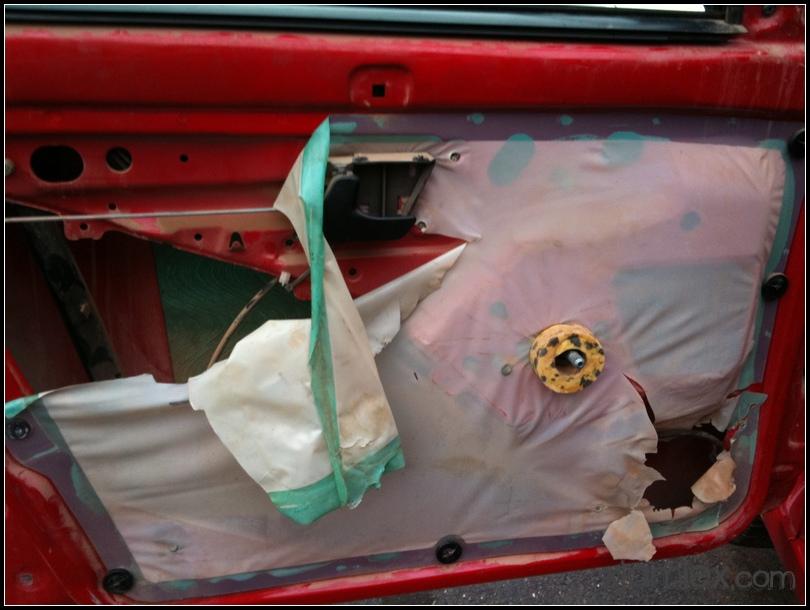
So I've got correct plastic for it, but need to decide on which glue/tape to use. In the meantime I stripped the old junk off to prep it: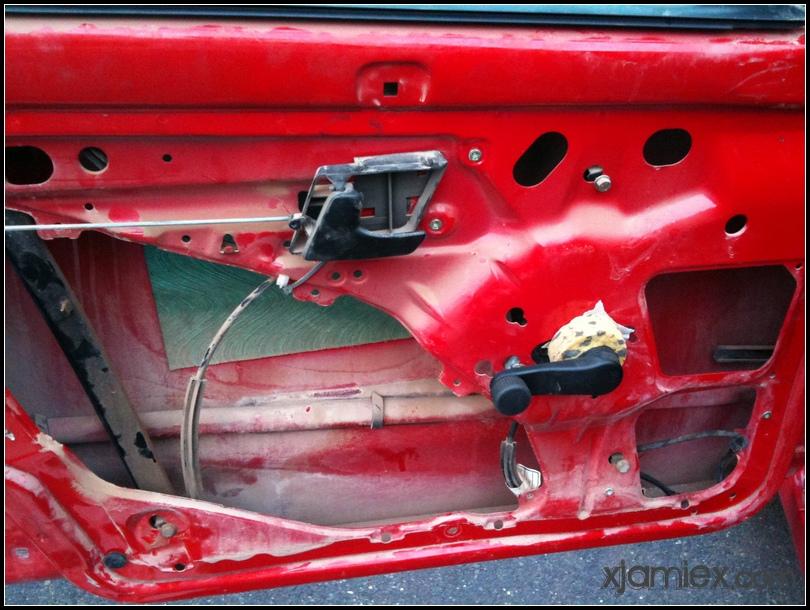
I also noticed that the old cabin filter was incredibly dirty (told you this wasn't exciting!):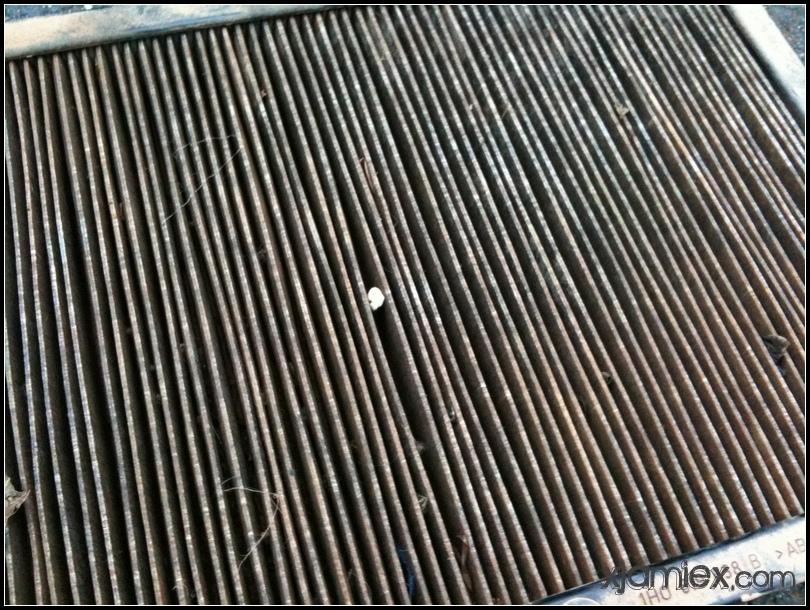
So instead of cross-referencing part numbers, I just held it up to various filters I had sitting around for similar year cars.
Too long: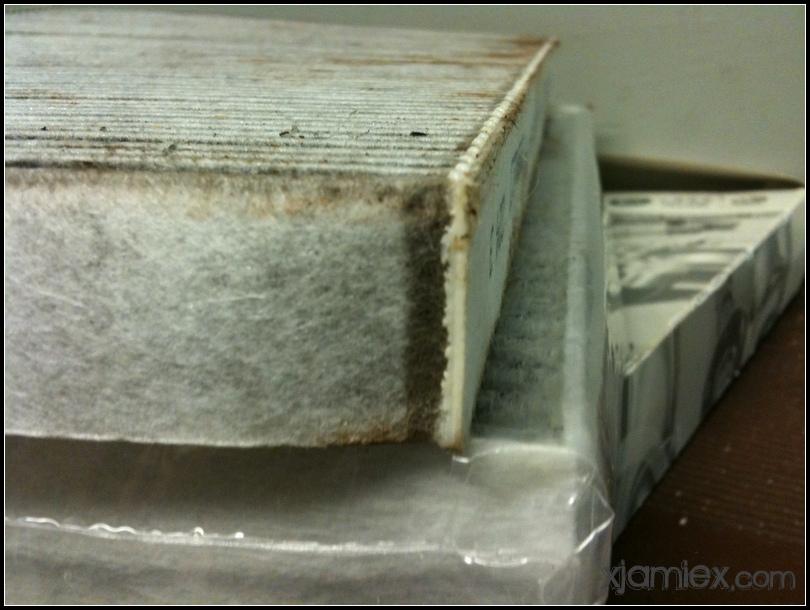
Just right [mk4 Golf/Jetta I believe]: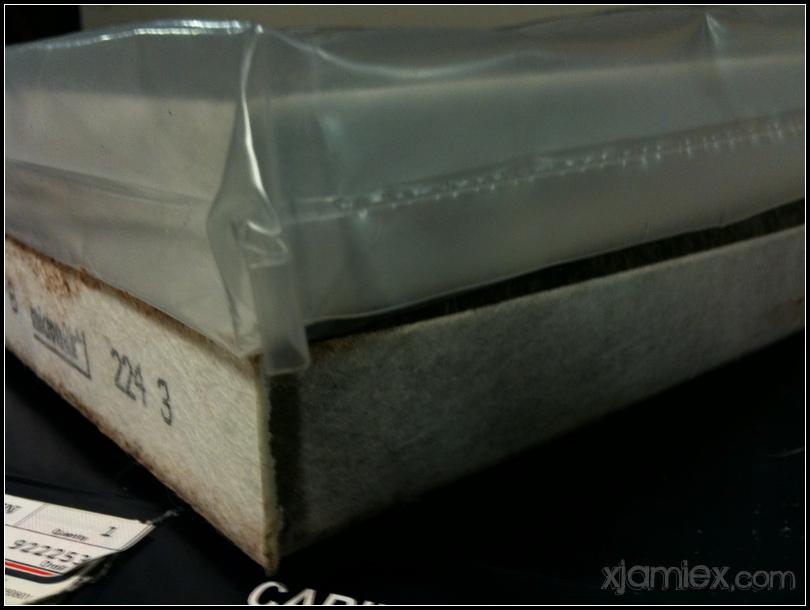
And, if anyone's reading this still.. here's a TCL challenge! I would like to use the original wiring to have a two way radio in the car, hopefully a CB radio setup. Can anyone identify the two connections for the antenna?
Here's the interior connection: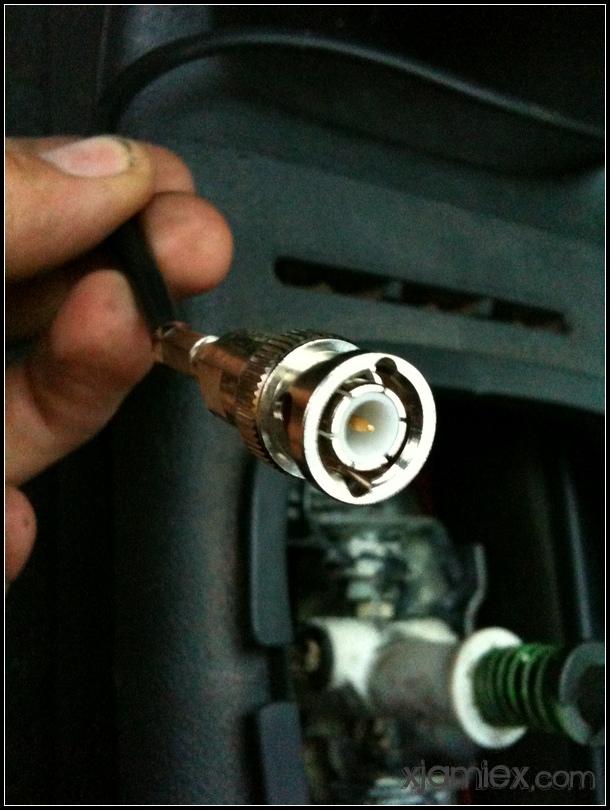
And the exterior: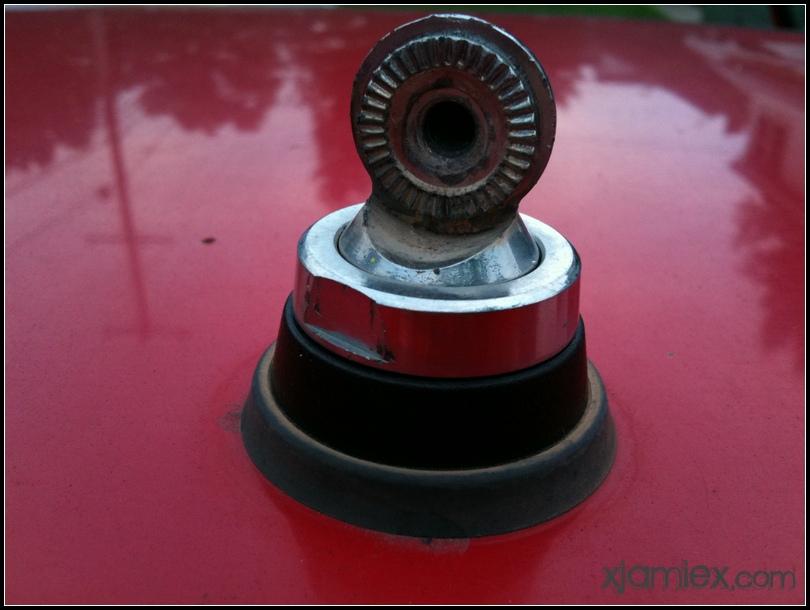
That's about all today. Tomorrow I hope to get the donor suspension parts, and test fit the motor mounts, weather and time permitting.
8/29/10
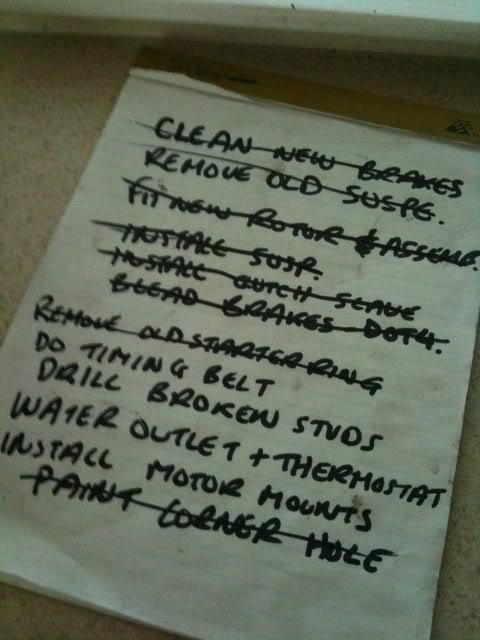
I'm still exhausted after yesterday's solid day of work, with two good friends helping out. I didn't take the photos yesterday, so they'll be emailed to me later so I'll update fully later on. Here's the To-Do list though: