You must be logged in to rate content!
13 minute(s) of a 249 minute read
9-6-2010
Still haven't gotten the photos up from yesterday mammoth day with Ben helping out again.
But here's todays:
Rear clearance where the turbo will go. We couldn't get the turbo bolted up yesterday as I didn't have the correct fittings for the oil/water lines. At least it looks like it *should* fit. Knock on wood..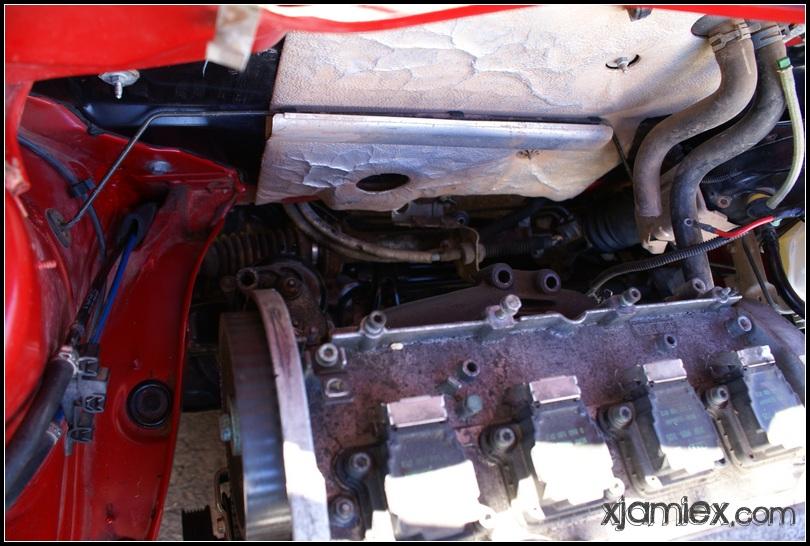
Today I searched through some of my storage boxes marked '20vT parts', and found something that I really did not think I had - one of the two missing lines that we needed yesterday. It's been in there for at least 3 or 4 years, shame I didn't randomly have the other one. Need to buy one ASAP.
The hood wouldn't shut initially, but it still had the extra thick diesel sound deadening mat on it. Once removed, the clearance is pretty good: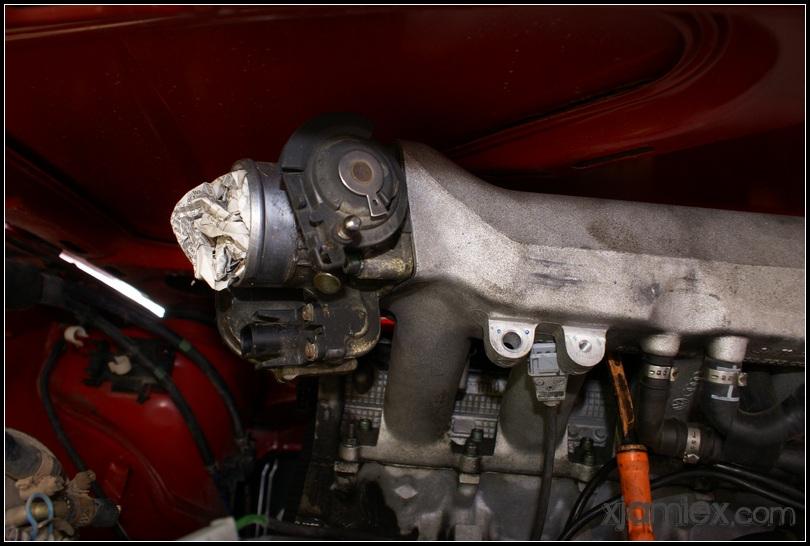
Finally installed the damned water thermostat and wateroutlet. It turns out that with the european small sized radiator, the stock passat one is ideal. Every day for a week I've wanted to do this, it's so small but it's another tick. Hooray.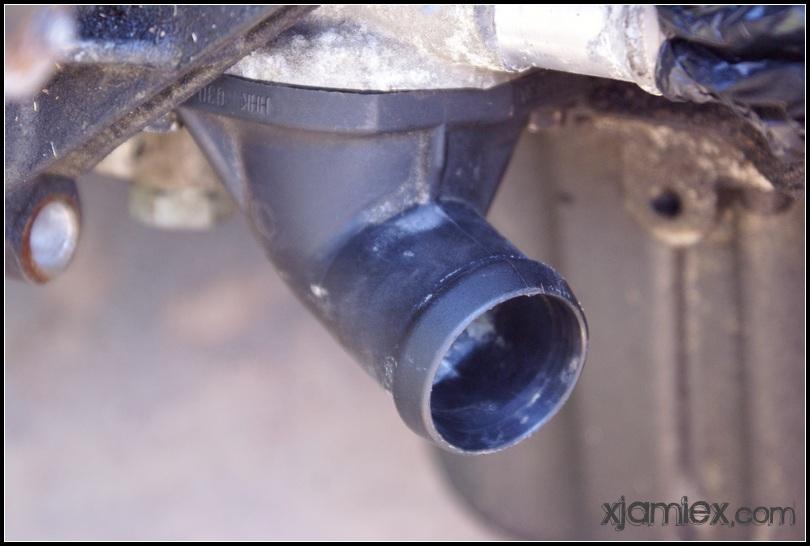
Box o' AEB 1.8T wires.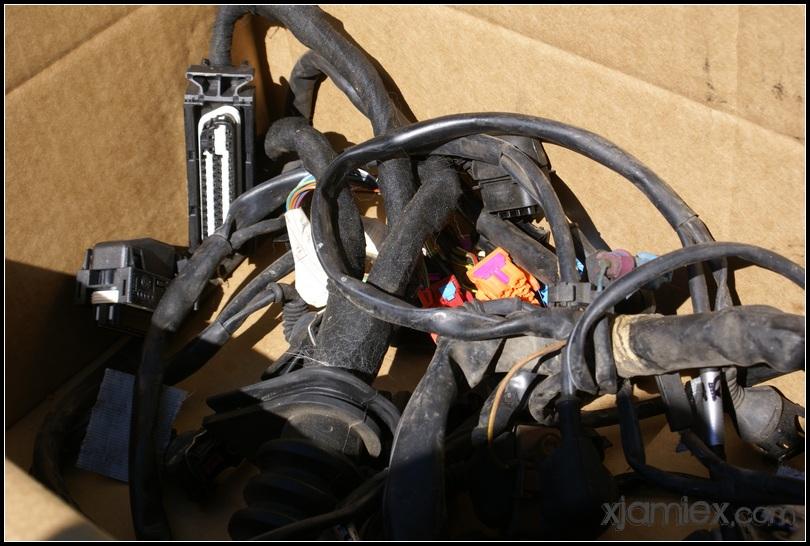
Engine wiring started to be laid out and test connected. With the 90' turn of the engine, I need to make sure everything's neat. I'm not going to the hide the wiring harness like another of my projects in the past, but I do want to make it as neat as possible and avoid any wear and tear to the harness in the future.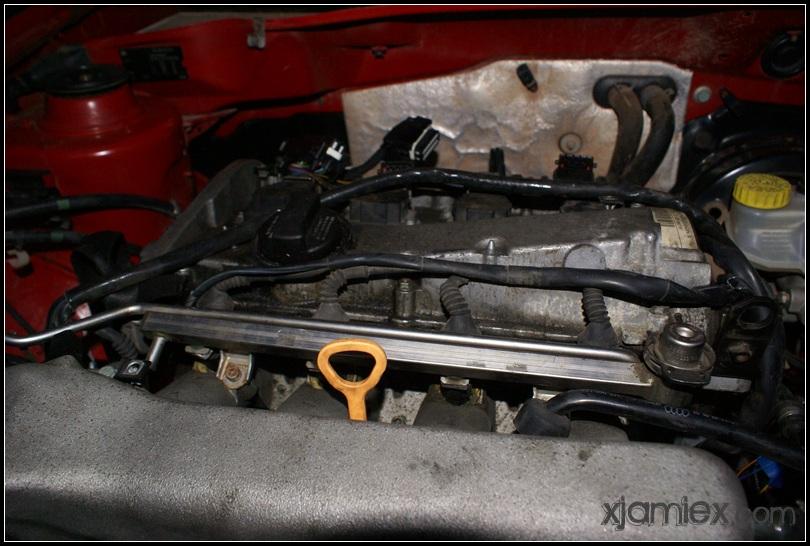
Yikes. This is the AEB factory engine wiring on the left, with the Polo hacked to death wiring on the right. Note how many wires are going to the raintray to the ECU etc up there.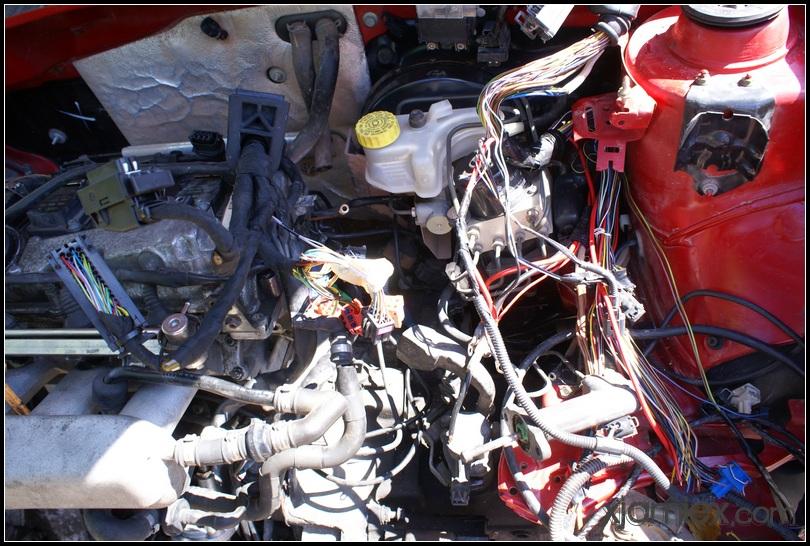
While offering up the AEB wiring, I realised I need to swap this sensor on the intake manifold for the passat one, or else switch the wiring connector housing. The little things like this are always the slowest bit, especially when the Passat intake is 30 miles away now.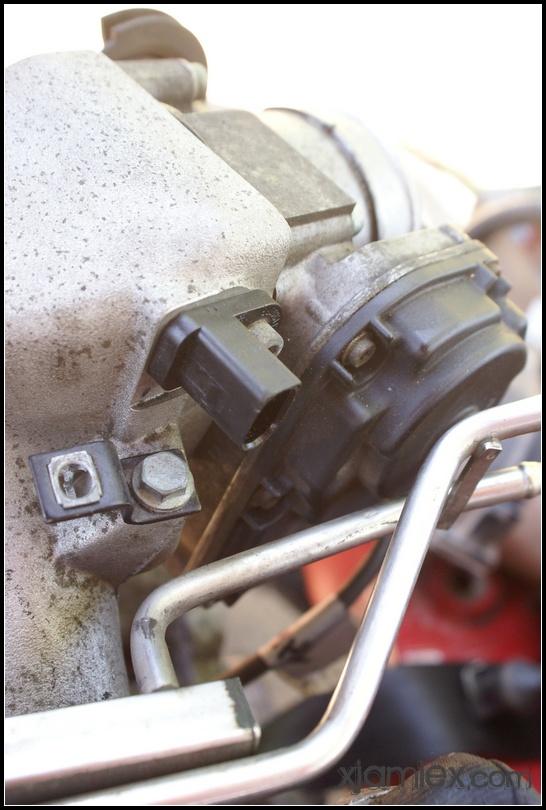
Photos taken with the flash now, again I worked through sunset. The wires wrapped to the right are for the passenger side headlight etc and the wiper. The loose wires on the left are all that's left of the SDI diesel wiring; one full connector deleted and a lot of other wires removed. I'm being careful to not remove anything that I can recycle with the AEB harness as I can switch the pins over to the same connector on the 1.8T ECU, keeping a nice factory finish to the wiring. All the other wires that need to be removed at this point are going to the relay/fuse panel inside the car so they will take a little while longer to remove.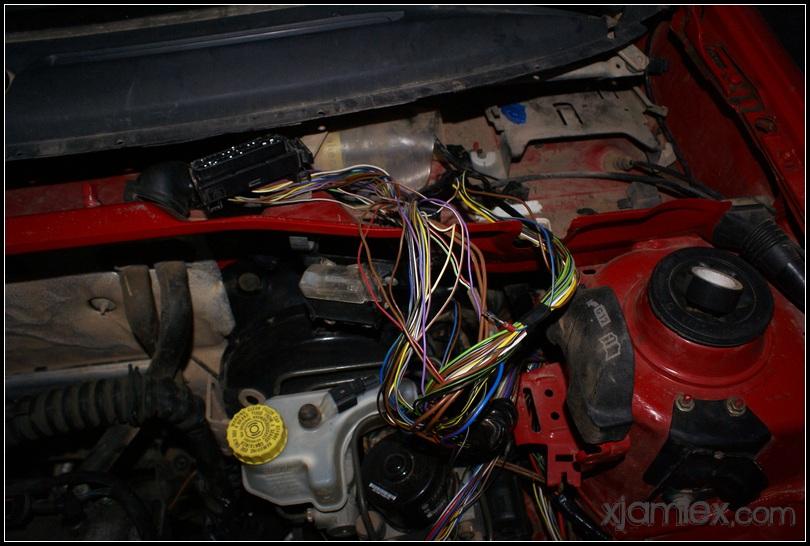
Speaking of fuses.. I finally started to hardwire replacement battery terminals to the car (in case you missed the beginning, all of the wiring going near the engine was chopped out when the car was 'demiliterized'). Connecting up the smaller gauge wires (8 gauge or higher) is easy enough - i'm using the equivalent of the VW wiring repair connectors which is a crimp butt connector with a built in glue/heatshrink which makes a strong but relatively narrow connection that's ideal for the dozen or so wires i'll be doing in one spot. But.. they don't exist for 6ga or thinker wires, or at least I haven't found them.
So I was rummaging through my wiring box, and spotted the fuseable 'tuner / mega sound system OMIGOD gold plated see through' connectors that I think were left over from my 1990 Ford Fiesta that i swapped a 1.6L engine into when I was 18 years old. Yes, I had a couple of subwoofers in there but I was young and it was 1999 so I'm not ashamed. So, now the main positive from the battery to the fuse panel has a sick looking fuse in it, until I find a better solution or just accept what I have done. I'll keep justifying it by saying it's safer, and that no-one except TCL will ever see it. Everything else looking like or better than stock though, IMO.
This side of the wiring in the engine bay feels so much more manageable now. I'm getting close to everything being there for a reason, and actually being able to see what's there instead of the mass of tangled chopped wires that was there yesterday.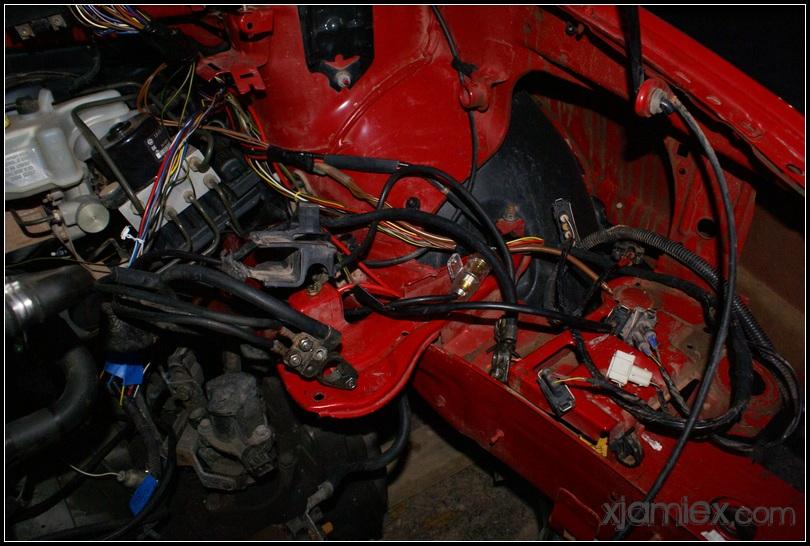
Wiring homework if anyone wants something to research.. (MikkiJayne - any chance of copies of the front harnesses diagrams please?) There's a few cutoff connectors near the battery tray area that I suspect are for things like the windshield washer pump etc, but I'm not sure. For starters, the wires are:
Next to vehicle speed sender.. reverse switch?
Black/Red - ~0.5 / 1.0ga (?)
Black/Blue - ~0.5 / 1.0ga (?)
Next to battery.. washer spray?
Brown/Blue ~0.5 / 1.0ga (?)
Green/Red ~0.5 / 1.0ga (?)
At some point I'll post my wiring notes, as i've probably spend half a day working all of it out and have about 20 pages of notes and diagrams at this point (including the Jetta TDI stuff that was a complete waste of time, before I had the SDI diagrams).
Shopping list for the next day or two:
Turbo oil line + banjo fitting - can't finalise engine install without it.
Coolant flange for side of head. 1.8T Golf/Jetta. On backorder currently.
Coolant lines.. probably have them sitting around, if not, walk storeroom aisles of Advaned Autos with templates to find off the shelf match.
vehicle speed sensor connector + wiring pigtails (if can't find in boxes).
4-6ga crimp connection for ground wire.
Universal / ebay intercooler piping. 2.25" or 2.5" aluminum.
Ebay intercooler (as short as possible) to mock up. Have a stock sidemount, but limited space so want the option.
Same aluminum pipe to use for intake, and same size cone filter. (No room to run stock airbox.)
Last weeks goal was to have the engine at least mock bolted in. Got that done, along with the suspension, brakes and door card etc, thanks to two long Saturdays with friends helping and steady work the rest of the time. To stay on target of driving the car 200 miles about 16 days from now, I think I've got to have the wiring, cooling, vacuum and turbo lines run this week. That will leave me at a position to be able to finalize bolting in the engine next weekend, and being able to read the codes on the engine etc via Vagcom. Then the boost lines etc can be run after that, along with axles and the remaining issues with the fuellines that I'll go into when I upload yesterdays photos.
I have the full wiring diagrams in the B5 Passat Bentley manual, but it's proving to be a PITA as I don't need the ECU in/outputs, just a match of what the wiring that connects to the car is - there's 5 connectors that go into a small panel on the top of the firewall on the passat. If I sit down long enough with the manual, i'll be able to trace them but it was annoying when I used the 1.8T FAQ AEB Wiring notes, and discovered that 50% of the wires didn't match at all Here's notes on the exact wiring that I have from the engine harness to the car: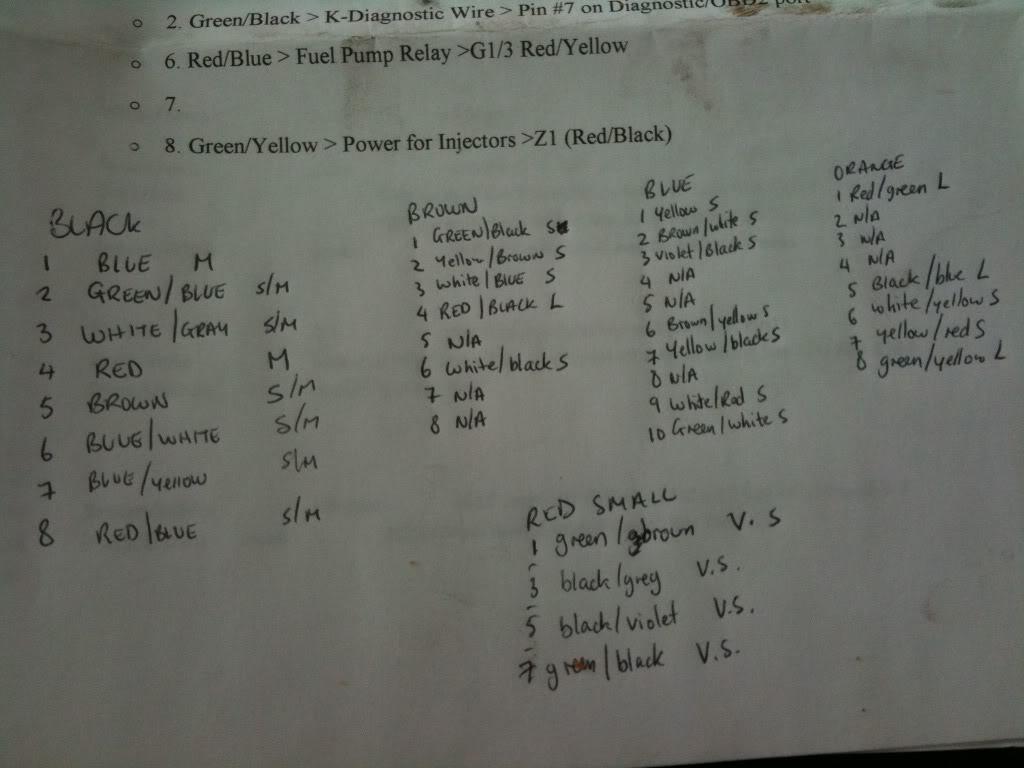
A little out of order, but here's Bens photos from Saturday A lot of progress was made!
This is the top of the fuel tank, with a great deposit of the fine dust or dirt that we've talked about before. I think I described it as toner ink, but I think we've settled on describing as foundation makeup.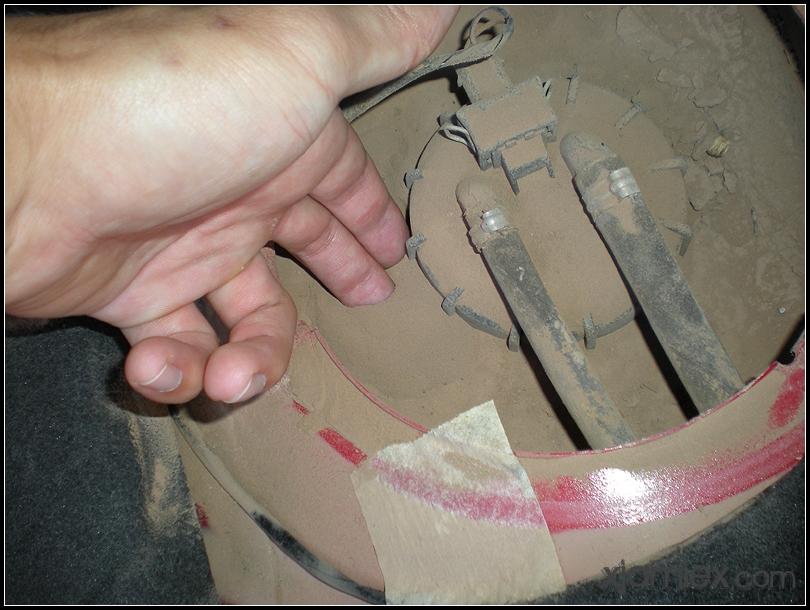
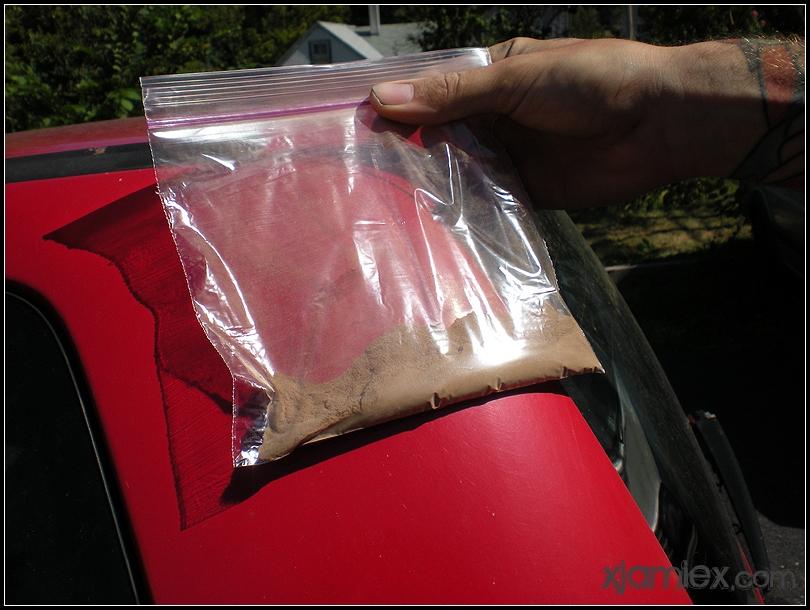
Being geeks, we kept some of it. If you're coming to H2O, you can have some genuine Greenland Polo dirt!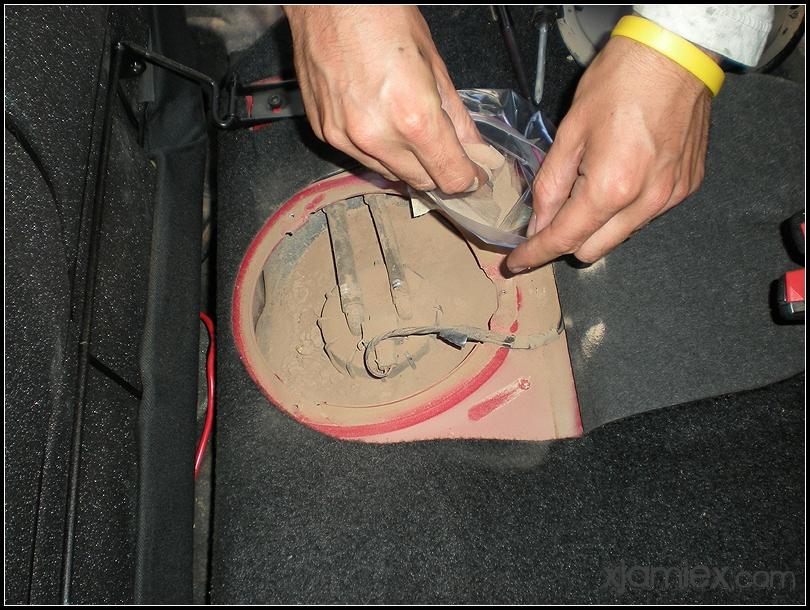
Ben vacuumed it: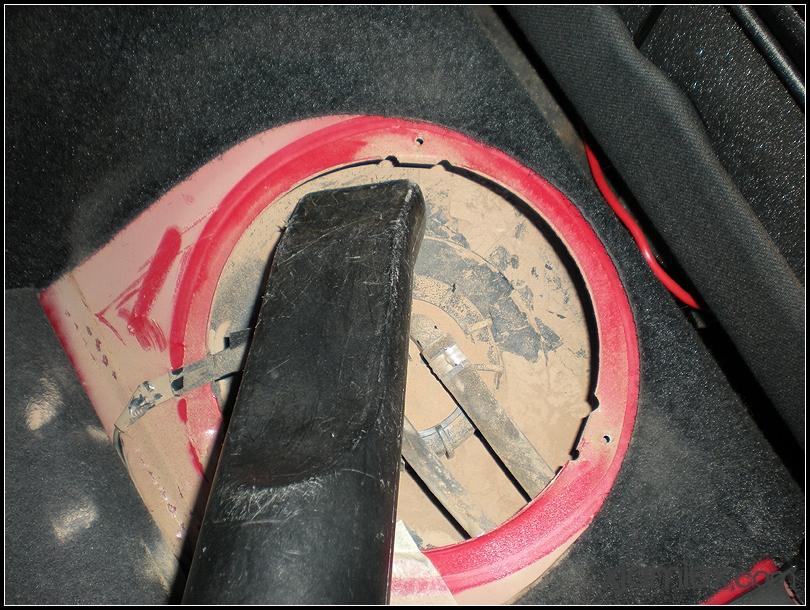
Clean: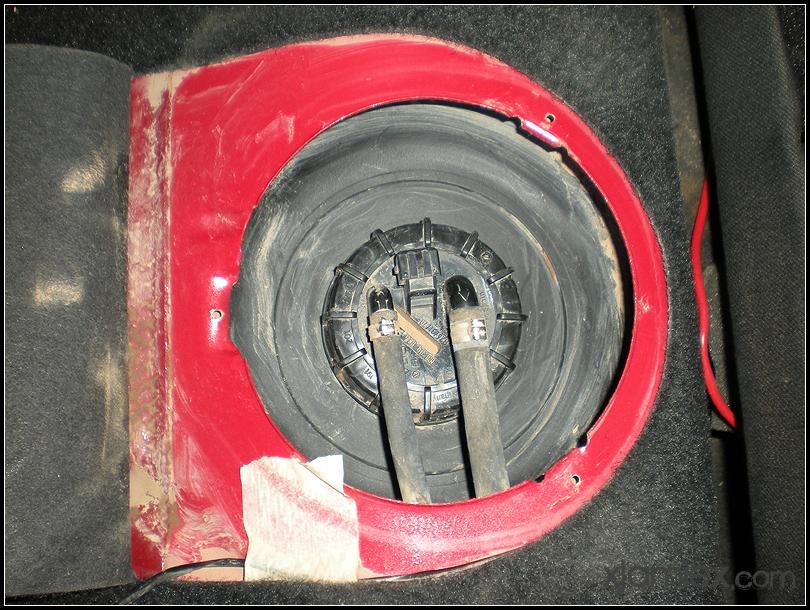
We got stuck with putting the turbo on as the Passat oil and water lines don't fit on the Jetta/Golf style turbo and mainfold.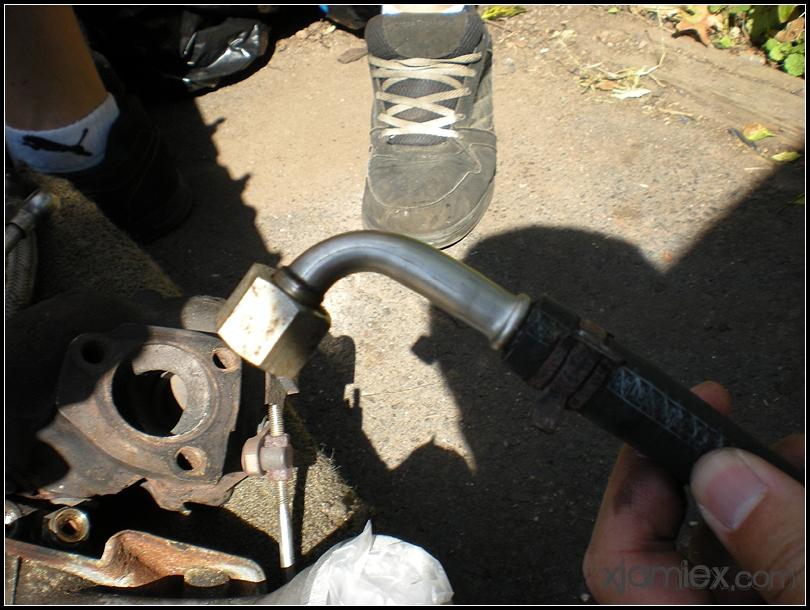
On to important fuel stuff!
This is the Polo diesel fuel pickup and gauge level sender: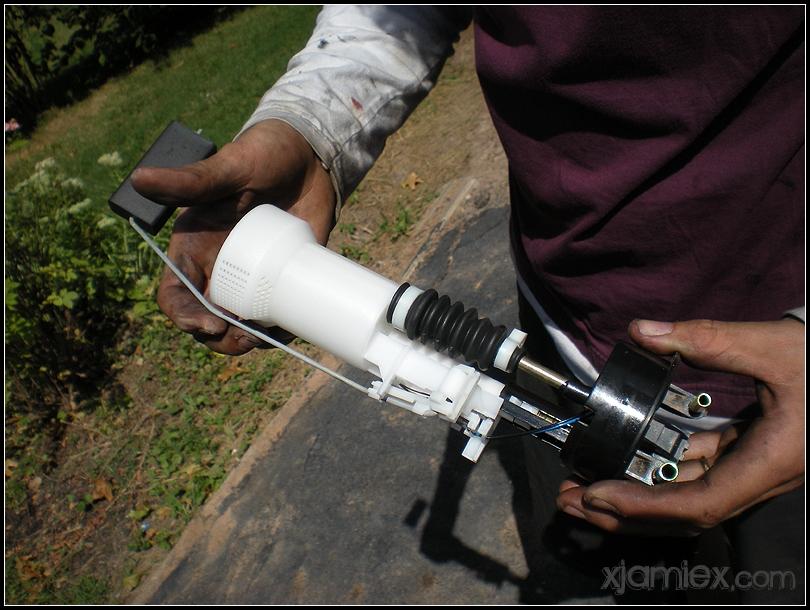
And the spotless diesel fuel tank. It was written and signed off by someone with a very scandinavian sounding name that they had drained the fuel tank, but I didn't believe it based on how they removed the engine and removed all signs etc on the car! We really should envoke the power of TCL and trying finding him on facebook or something.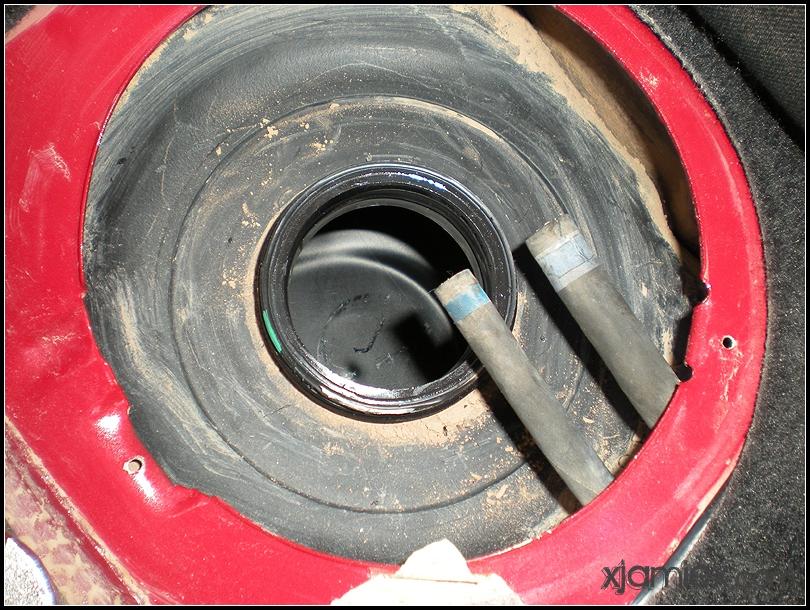
So, with the engine install halted because of not being able to install the turbo and run the lines, we headed off to the local junkyard to do some cross referencing in real life.
First up was a mk4 Jetta 1.8T and 2.0 8v - both had the wider style fuel pump, so no good.
Next up was a mk3 Jetta 2.0 8v.. also too big: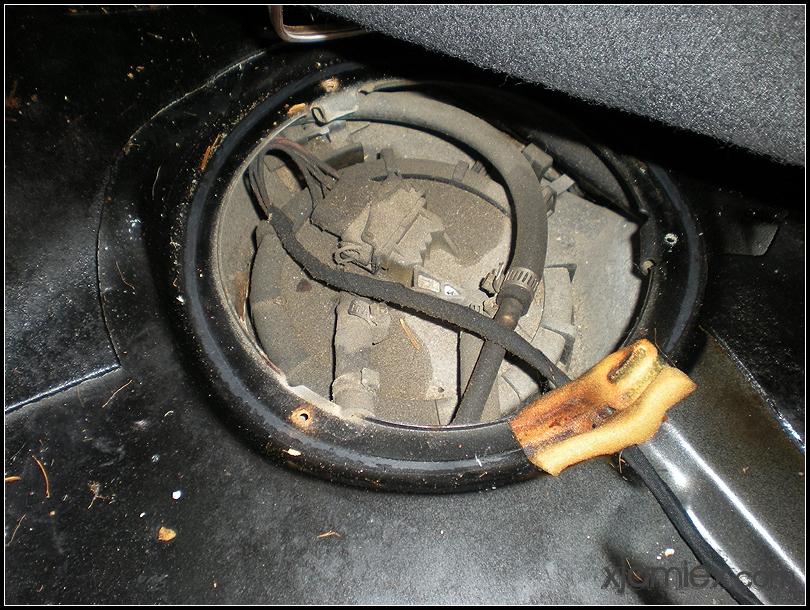
Next was the final choice, a mk2 Jetta 1.8 8v with Digi fuel injection, and a previous owner who liked Light Hawaiian Punch: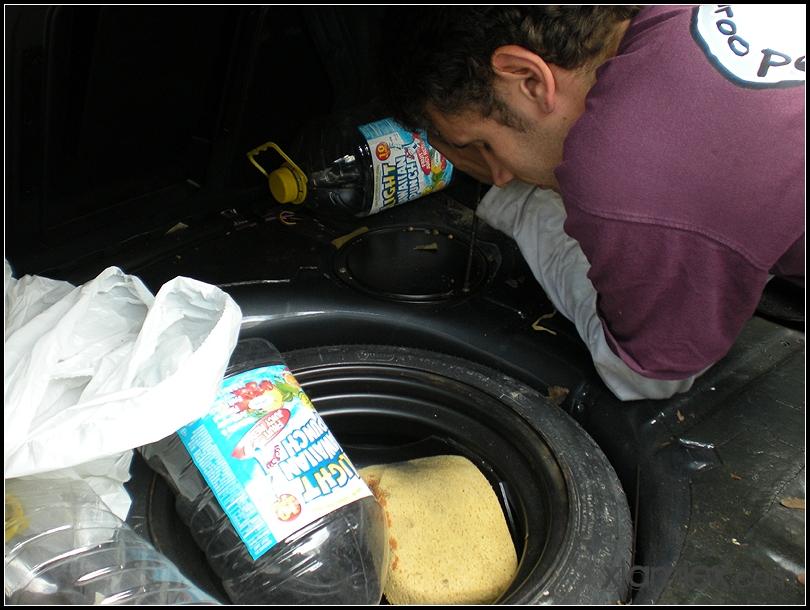
Looks like a match: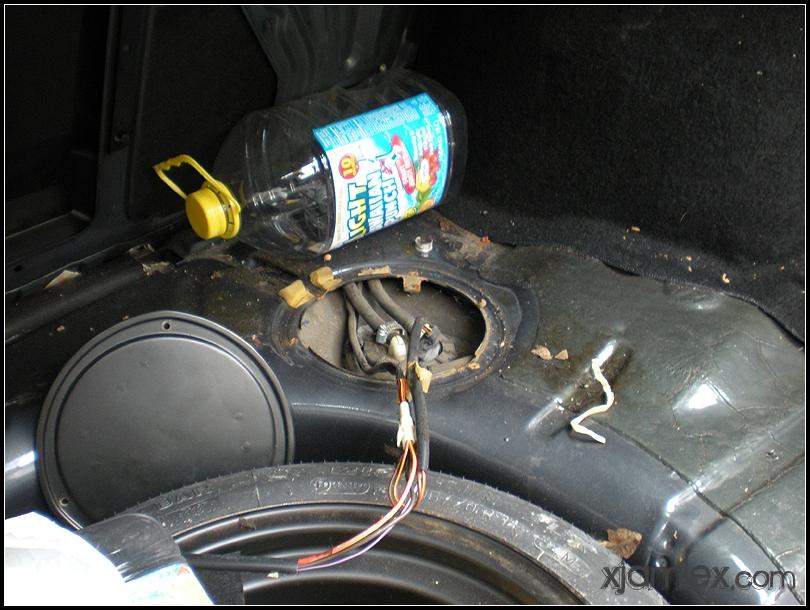
It is a match! Polo ring next to the mk2 ring:
This is the intank fuel pump and gauge sender. Surprisingly clean actually.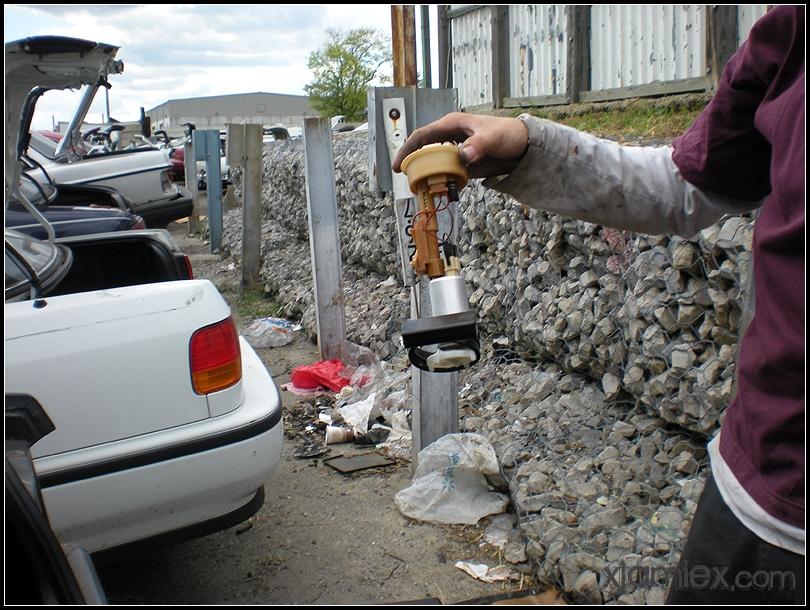
Now, I'll just go ahead and say it, I hate the stupid two pump setup that CIS cars and Digi mk2s etc use. It's overly complicated (still really simple, but just twice as much work), expensive to replace pumps etc etc. But we were there, and the car had the complete system so I removed the external pump and the fuel lines running all the way to the front of the car too, just in case I do need to replace the small blue return line or anything else.
Bonus points for anyone who can find the previous owner of the car on the vortex. It was either bedlinered or it was chalkboard painted by the looks of it, so they've got to be on there.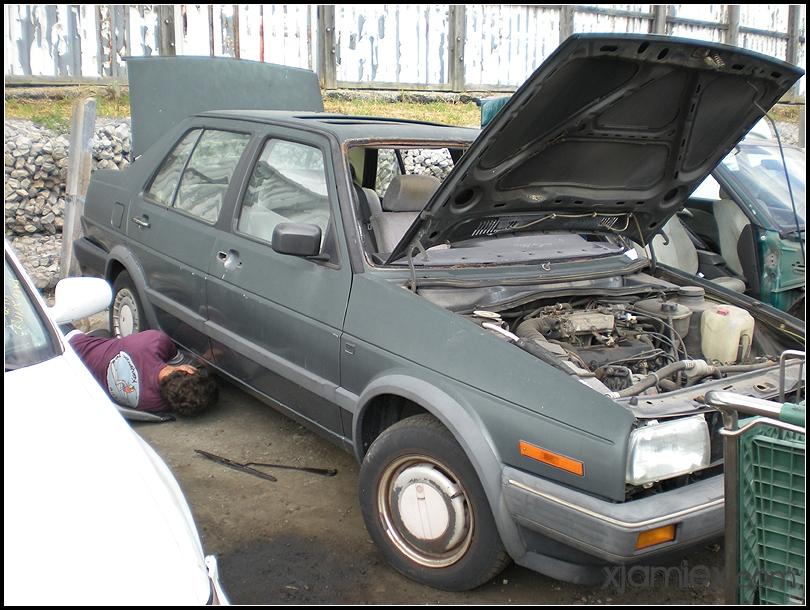
Took the (rusty) mounting bracket too, just in case the Polo has the same mounting points.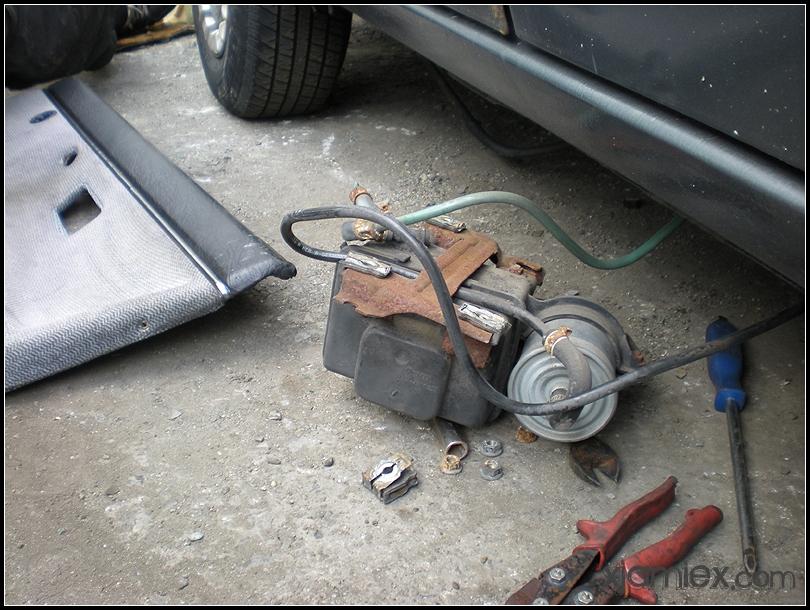
No photos but...
The intank pump bolted right up. 100% success. However.. BIG PROBLEM. The Polo doesn't have the same external pump bolts.. or anywhere to install one at all. The recess in the body is completly filled by the tank. There's room on the other side of rear trailer arm, but that's in the wrong direction and with the car lowered there's going to very little room for the lines to run. Any pump installed towards the engine is going to be the lowest point on the car under the body, which is a no go.
So, I guess I either need to find a suitable intank pump that can supply the complete pressure needs for the system or else work out some way to have a small pump and housing (VW two pump system pump is small enough) tucked up enough right beside the tank, and then install a fuel filter in the engine bay somewhere. Damn, it's annoying that there isn't a spot on the Polo but I guess it's just one of the fun challenges to work around. There's no time for me to get a Polo petrol tank and pump setup sent over at this point, so on to Plan B (whatever that may be).
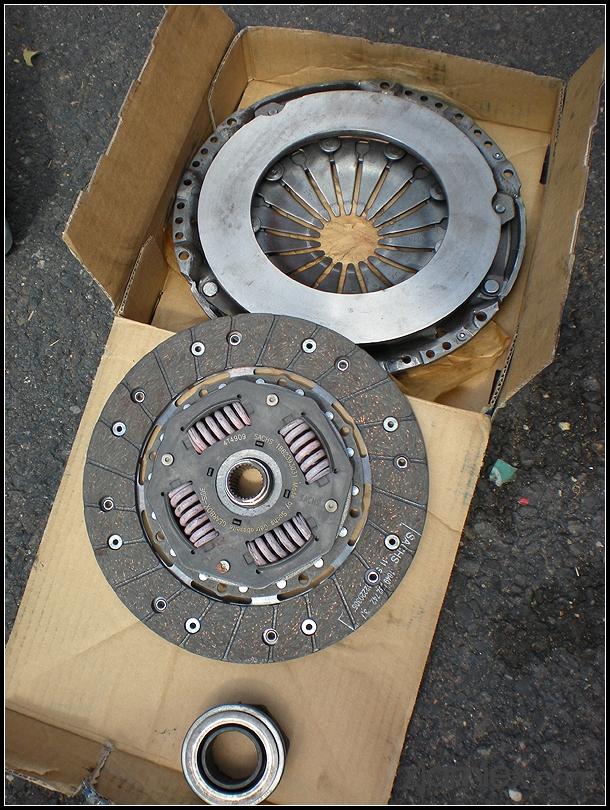
With the rest of the day, we got the clutch installed, the transmission bolted up, the engine mount brackets installed and placed the engine in the bay with the bolts hand tight, to make sure that everything fits correctly and it wasn't going to foul the ABS pump or anything else. As you've seen from the engine bay photo, it fitted just fine (so far!).
Really exciting clutch photo.