You must be logged in to rate content!
12 minute(s) of a 219 minute read
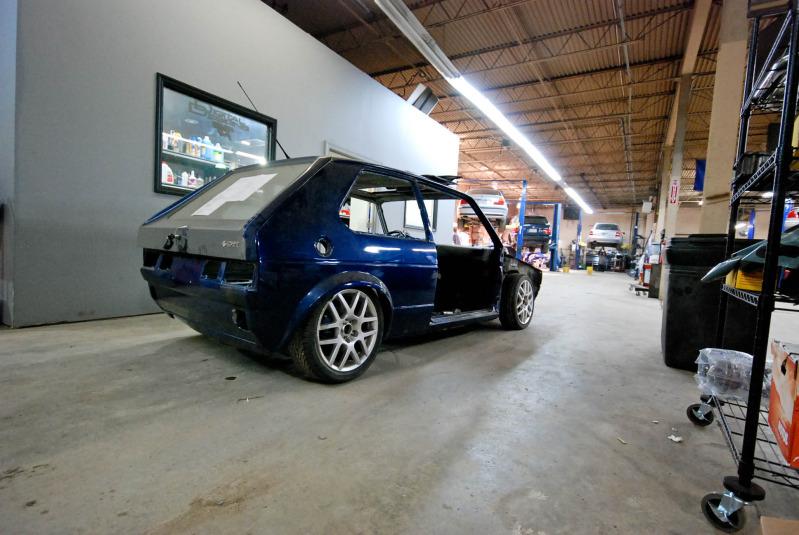
1-8-2011
So.... when things don't fit, make them fit...
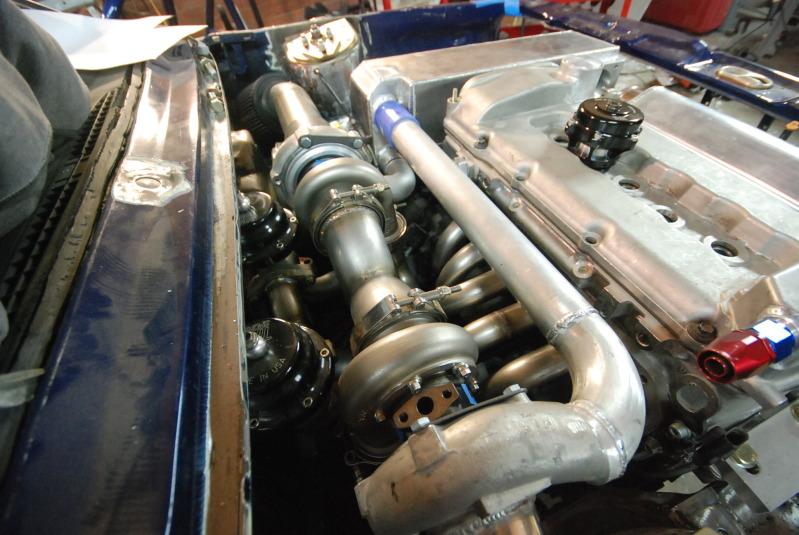
1\2 of the compressor housing was machined off due to the tight clearances they are working with. The room behind the valve cover was saved to run the charge piping using an aluminum 90 degree bend along with a 2.0 straight aluminum pipe.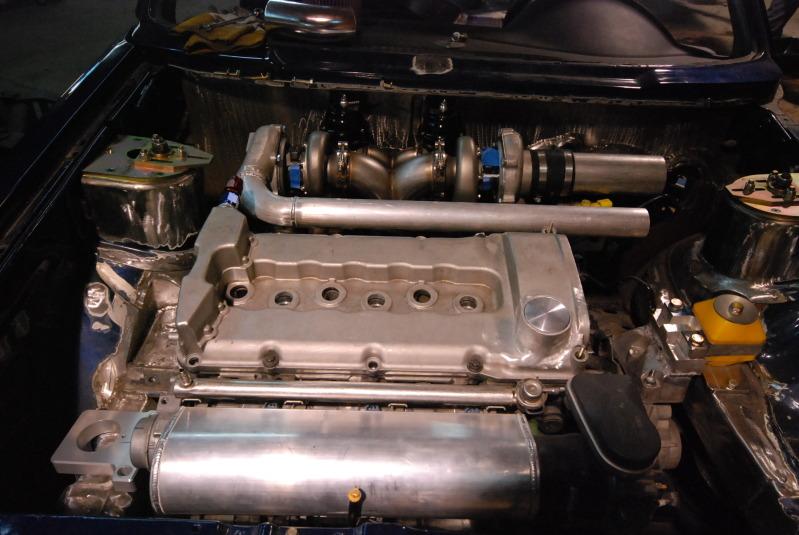
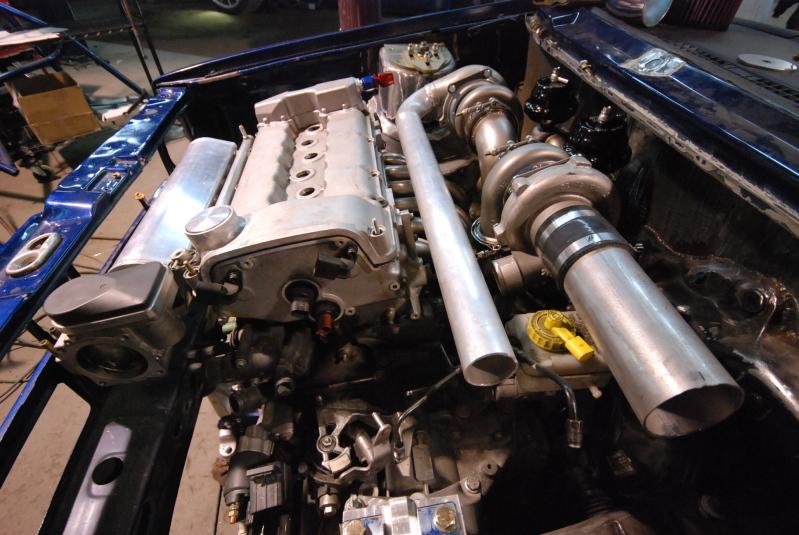
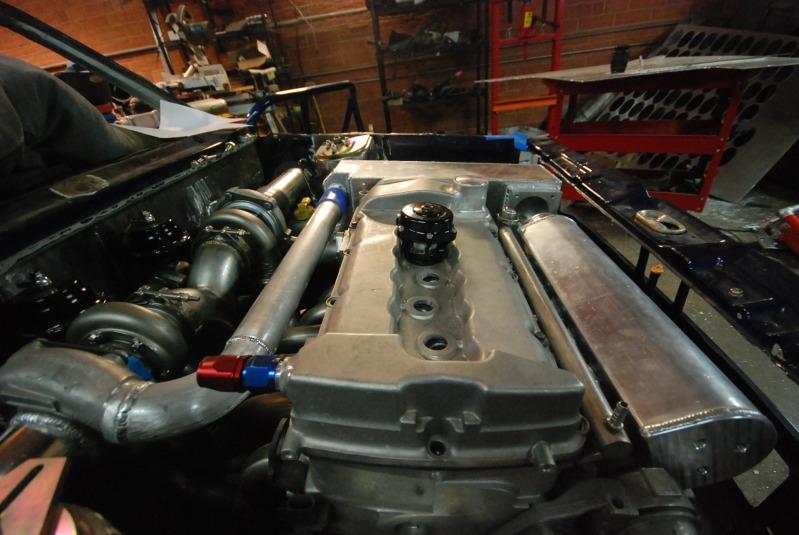
To address the issue in regards to the passenger strut tower, the turbo's were designed to sit further back and the snout of the compressor housing was machined and a 90 degree elbow was welded to it for the air cleaner. I had asked that the filter's be angled slightly downwards to add a little more dimension since alot was going on up top.... Mike agreed and below is the result.... 
snout shaved.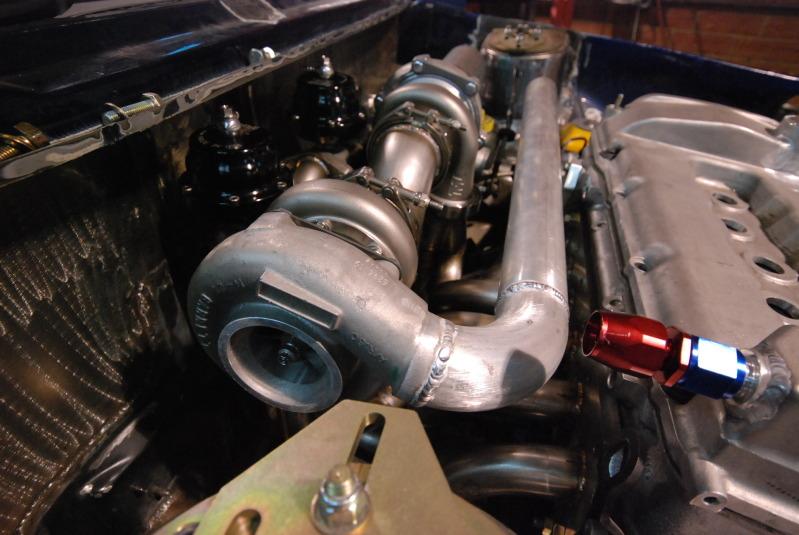
elbow welded angled downwards.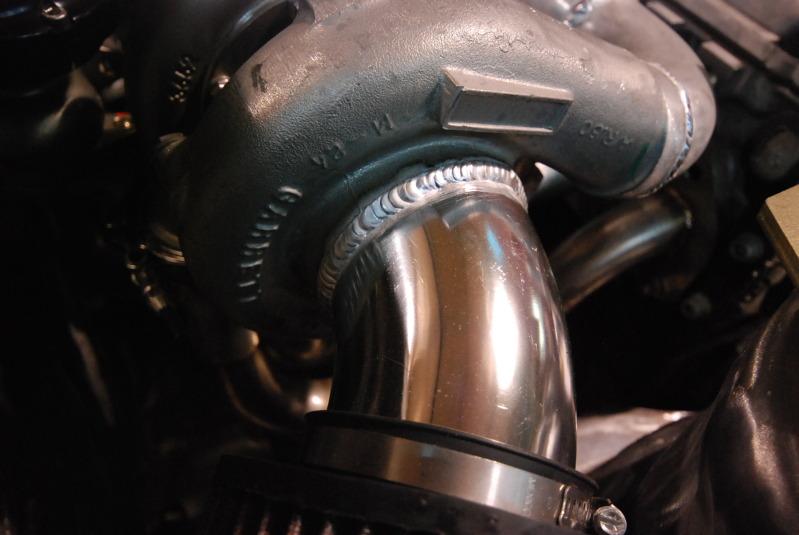
driver's side symmetrically angled down as well.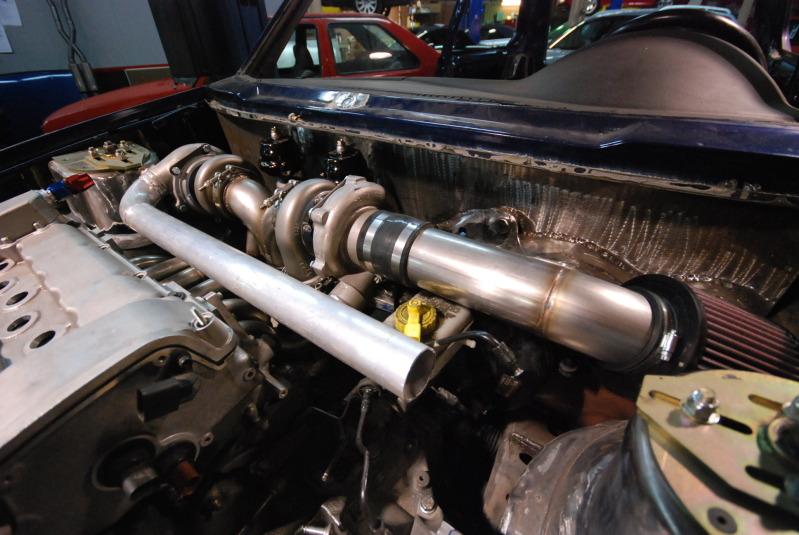
just a fun view of both filters....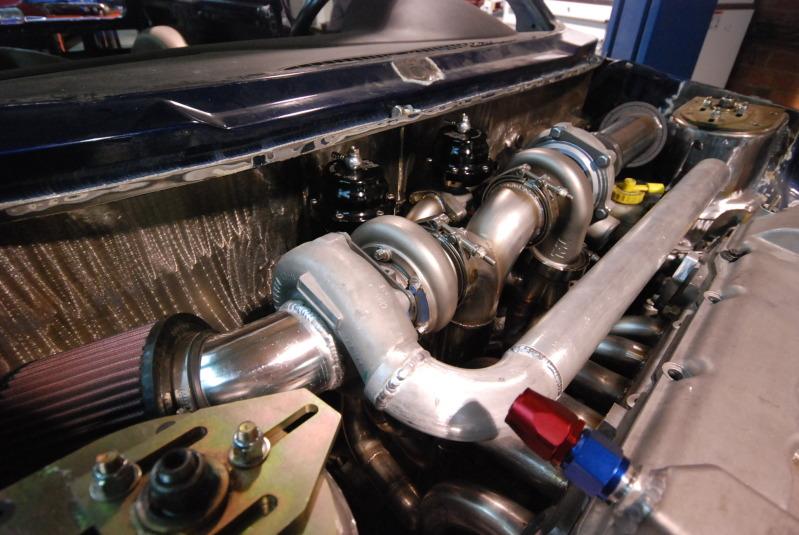
i also mentioned earlier that we had an issue with the turning radious, should have paid more attention to shannon's thread...  so the passenger motor mount was relocated using brackets that they have made. it will be machine down and rounded off to match the drivers side once done. here is the rough base plate they made.
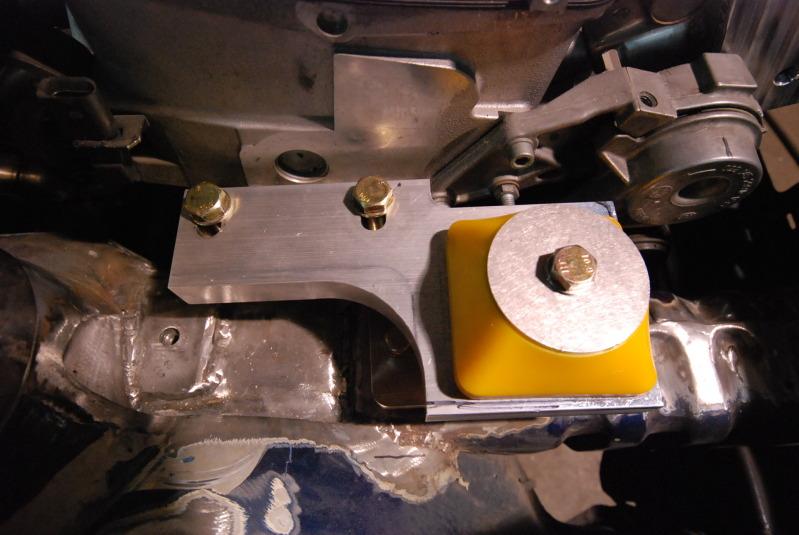
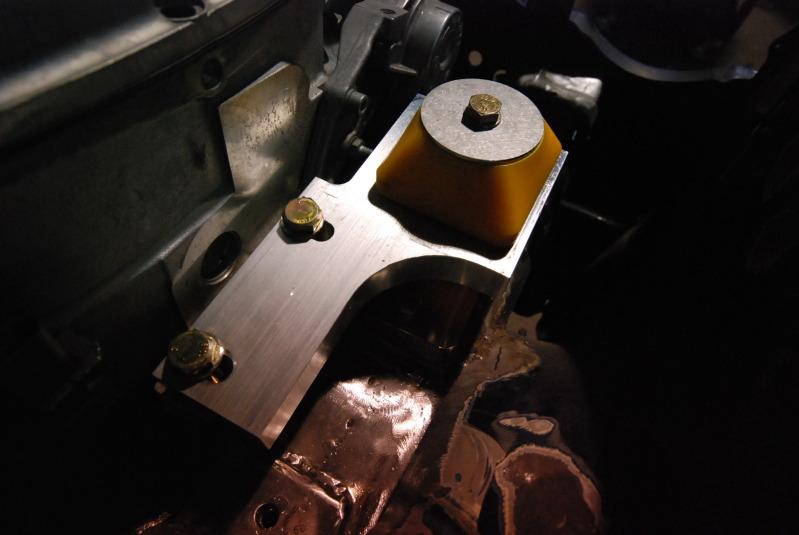
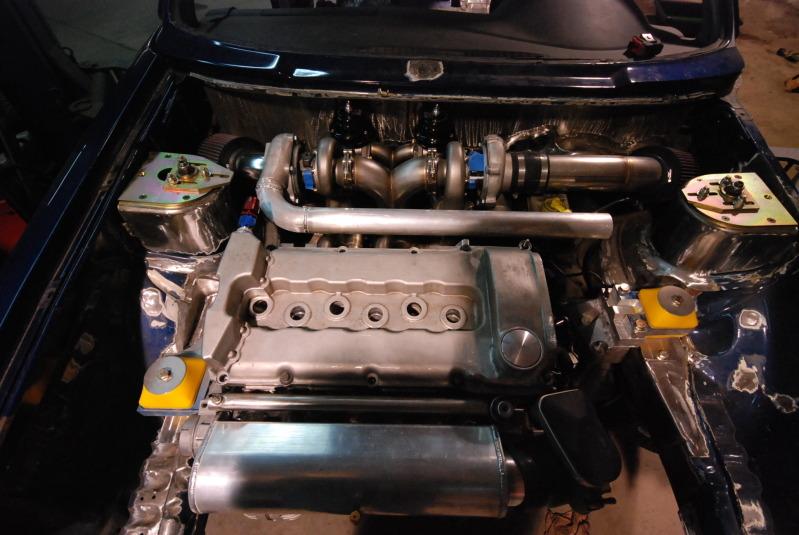
and finally. everything mocked up... 
1/12/2011
so they began the downpipe today....
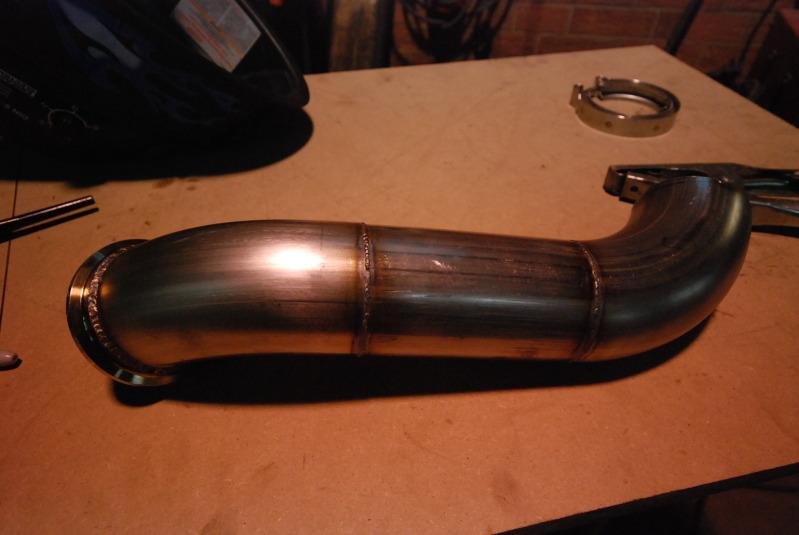
an it mocked up...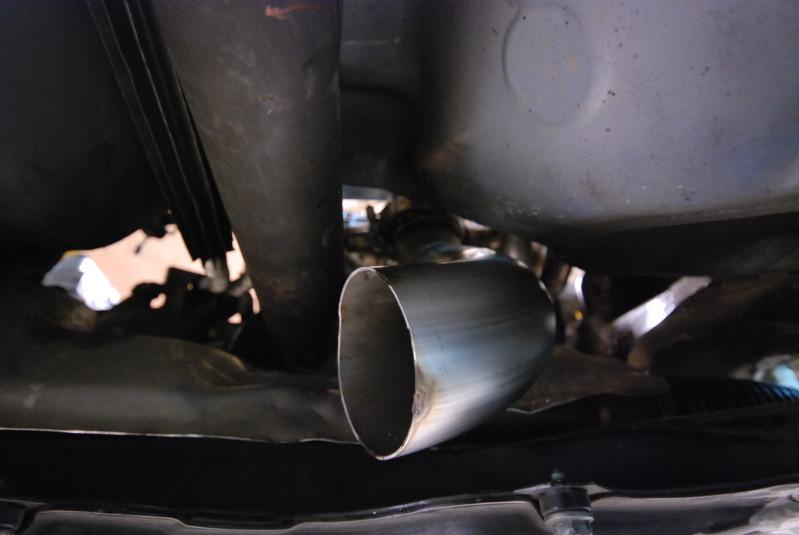
not much, but the weather has thrown them off a good bit, but once this mess clears up, they should be back on track...
1/18/2011
So some good news... Spoke with doug and the penicillin cleared that itch so he should be back in tomorrow. 

Probably not the best idea to talk smack about someone that has access to a plasma cutter and my car... 
Either way, since its going to be a minute before any serious updates, to feed my need, mike took a few random shots of the car rolling on its on.... boy they grow up fast... 

1/27/2011
AS FOR UPDATES: spoke to my wheel "builder" last night and looks like we're on track... hoping to have the new kicks in by SoWo.... 
AS FOR PICS: Again, till i make it up to charolette, they AIN'T touching my car so all you cry babies can kiss my brown persian bottom... 
But will leave a few pics of the custome exhaust eurowise is building.......... 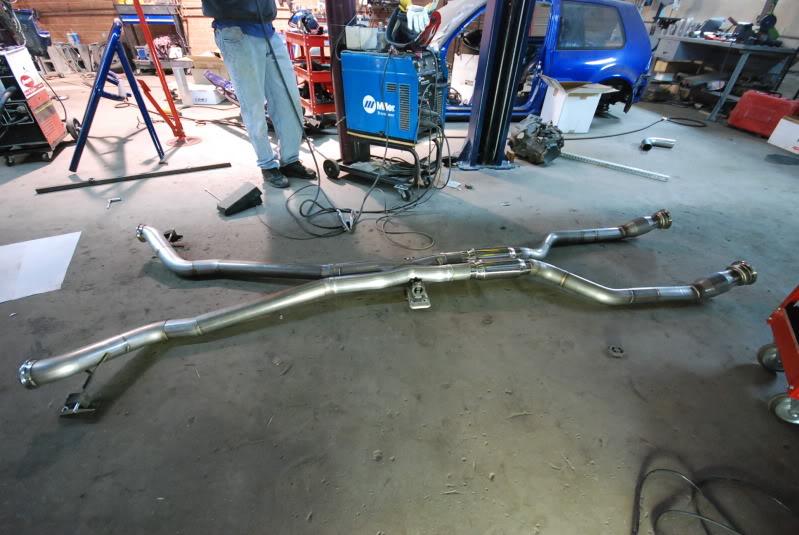
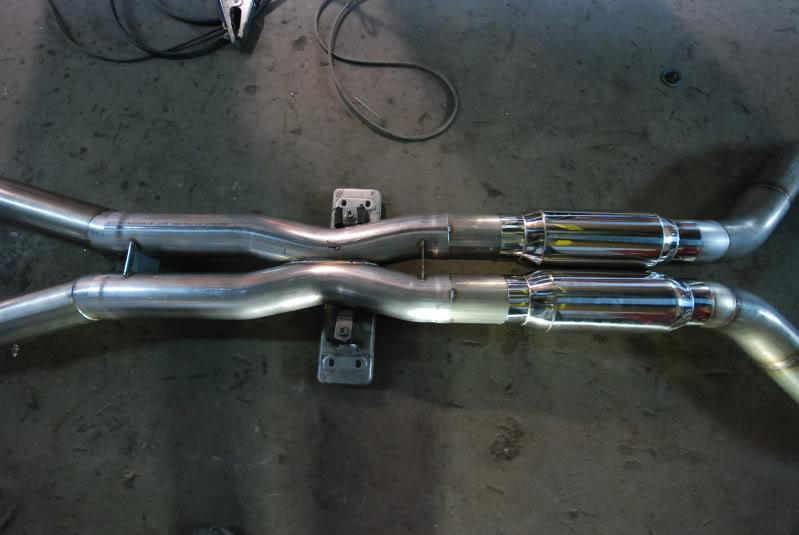
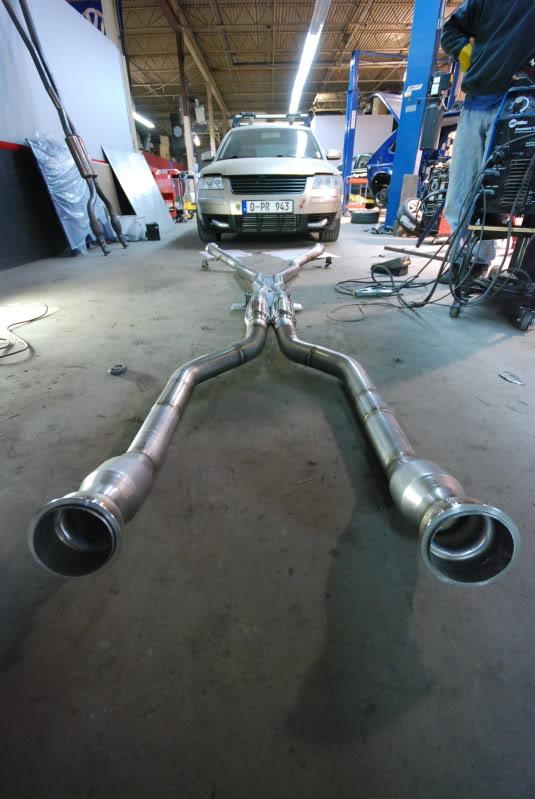
Keep your diapers clean fellas 
1/30/2011
So made it up to charlotte and had a good hour talk with doug..... Doug won today for the most part... 
I really was hoping to run an air/air setup, but due to limited space, it is physically impossible to fit an appropriate IC and radiator up front. So the game plan is a big boy radiator of some sort and a doug special custom made air/water intercooler setup.... After he showed me exactly what he wanted to do, I agreed. Now that we have agreed on that along with the exhaust, he'll begin work on both this week so should have some pics up soon...
Also figured out the core support setup. The top portion of the core support will be removeable, for ease of servicing when need be. We discussed a good bit more, but we'll get there soon enough..... 
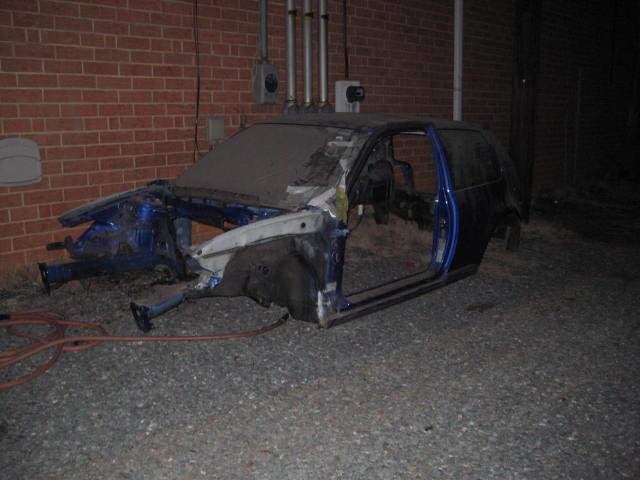
Finally, the r32 has been put out for the voltures.... 
2/2/2011
speaking of charge temps... after all my suggestions, doug got me to tap out and I gave him the green light for the air to water intercooler setup... nothing against the typcical "V" style intercoolers that many run, but i really didn't want that and doug had a great proposal and here it begins..... love ya doug... and you hugged me twice so i know you're starting to love me too...
14 gauge aluminum sheet metal was used.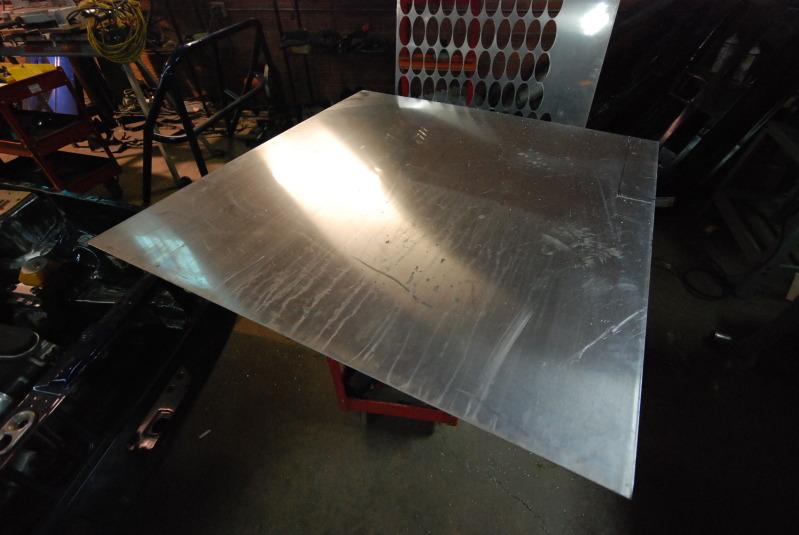
doug donated his bare intercooler core. Either it was an early bday gift, or like i said, he's starting to love me... 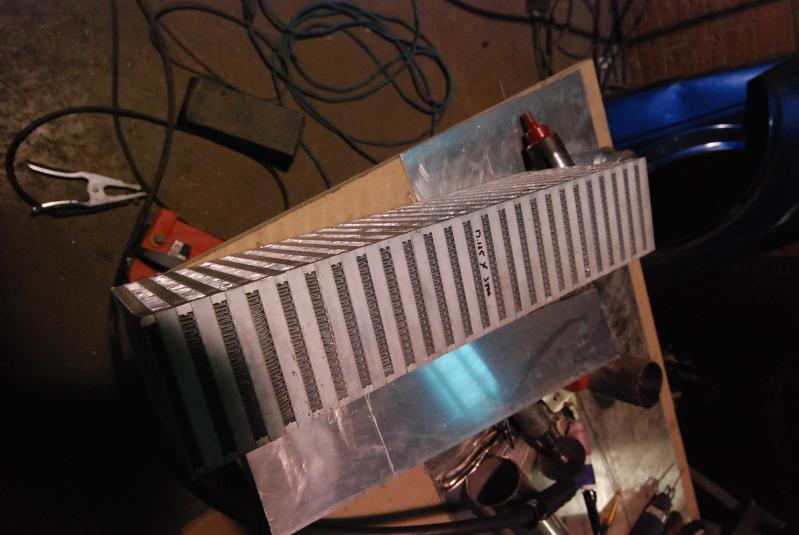
he welded the end tanks on.... not bad welds for a man thats been sick for 3 weeks...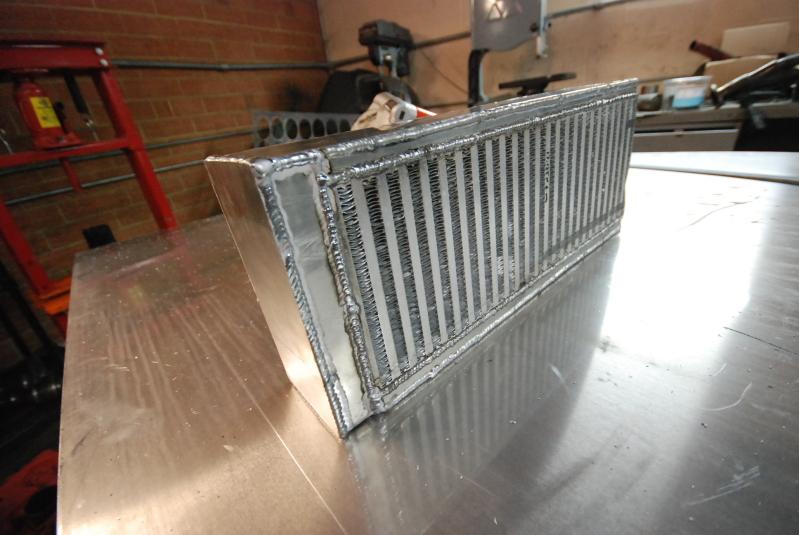
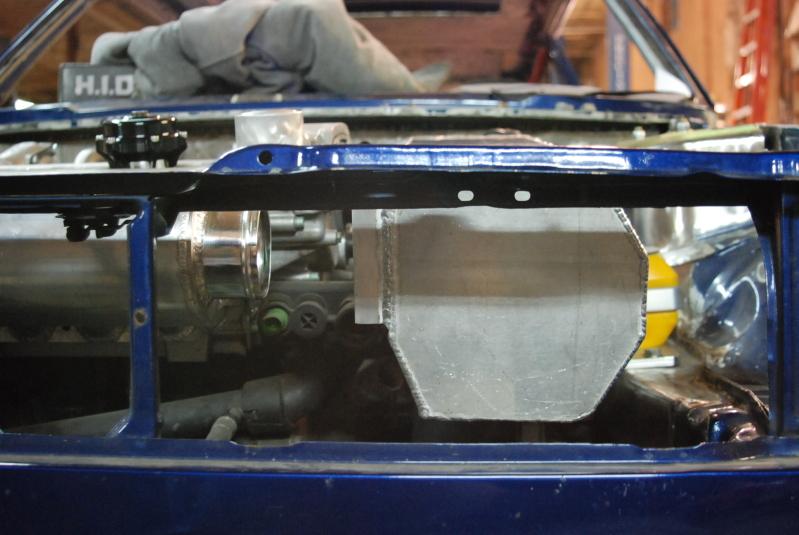
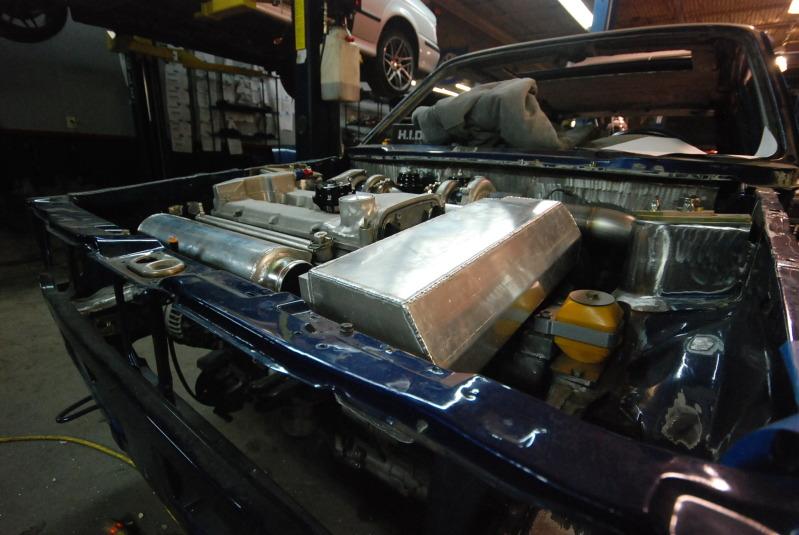
and an idea of how it will sit... the intercooler when positioned and finish built, will be contoured in such a way to compliment the rest of the motor... i hope... 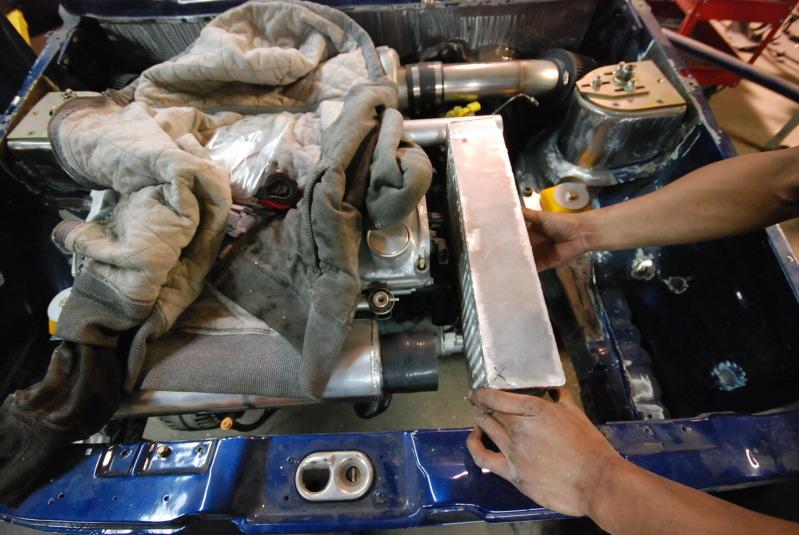
looking good fellas
2/12/2011
so the hold up came down to two things....
took a second for the fittings to come in.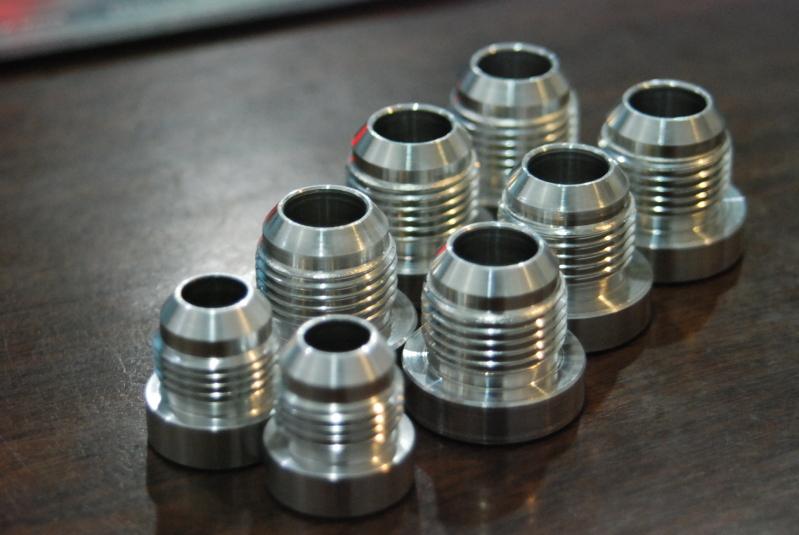
and their metal bending brake was broken when they tried to bend 12 gauge aluminium sheet metal.
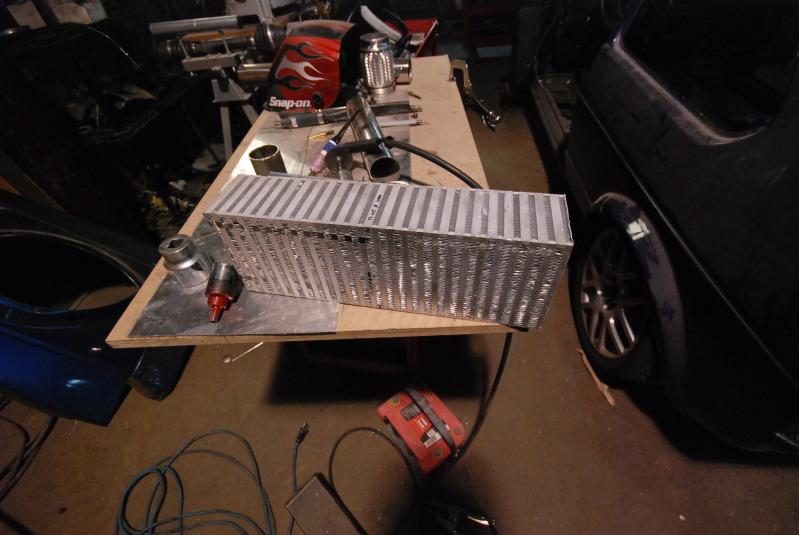
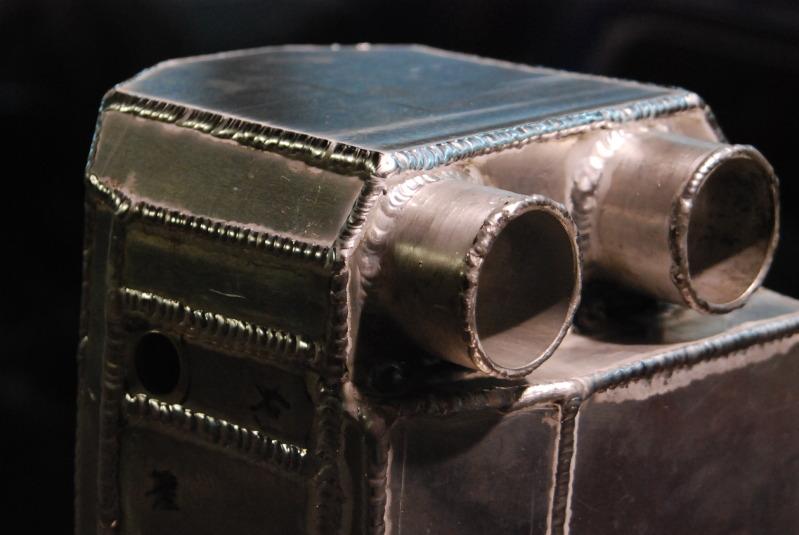
anyways, enough of the excuses and on to the good stuff.... They've gotten up to 80% of the air to water IC completed...
first, from scratch, they built the end tanks and charge pipe inlet and outlet flanges...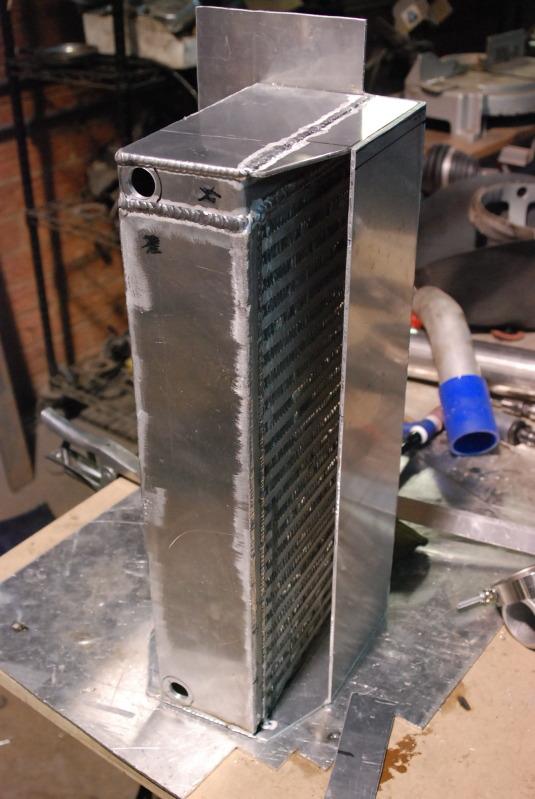

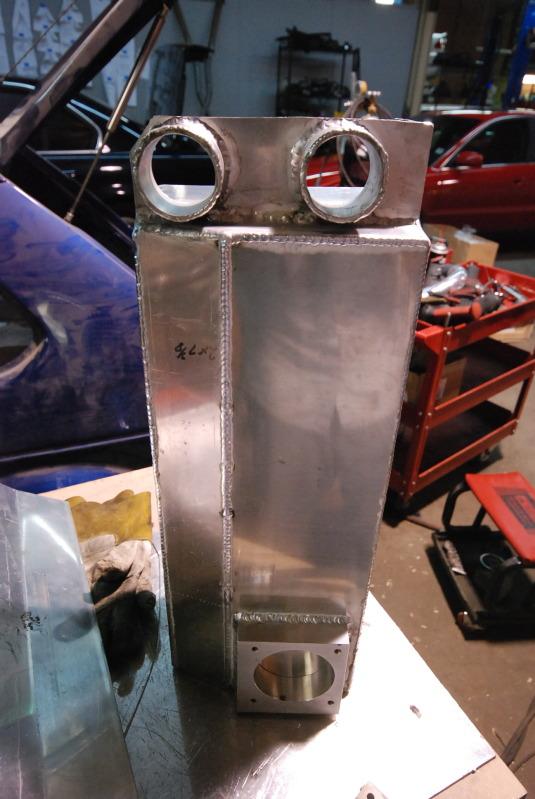
Then the endplates were welded on.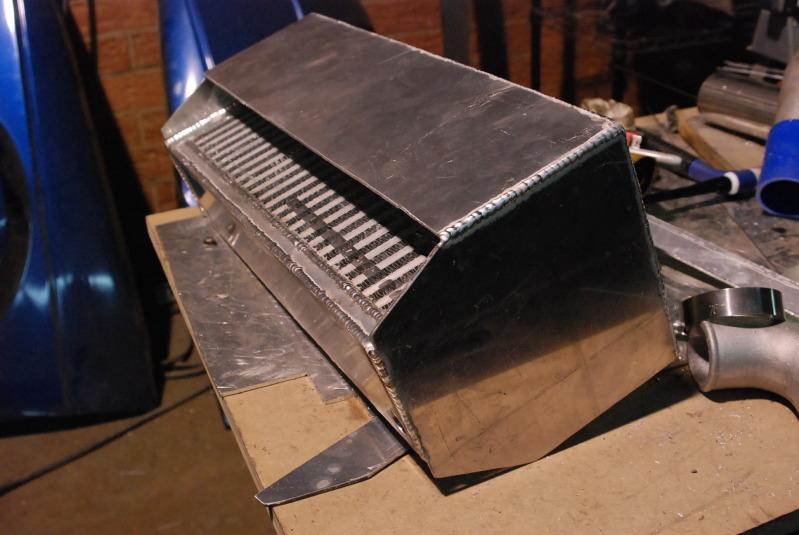
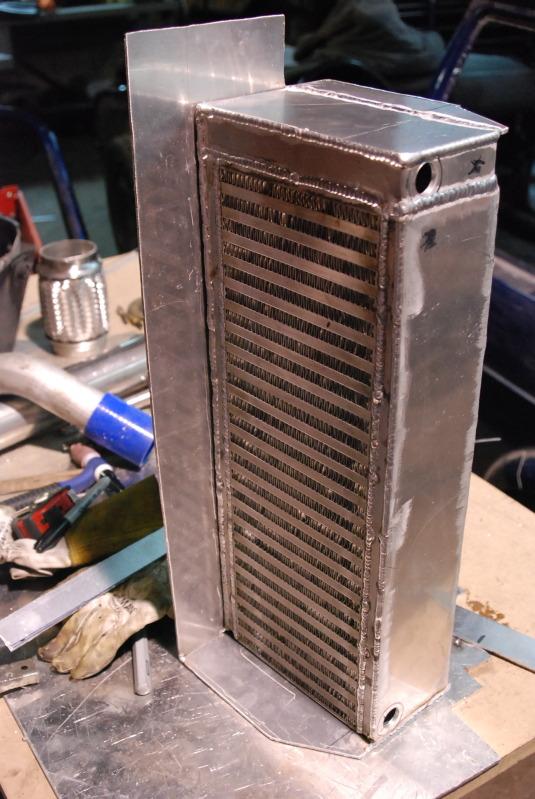
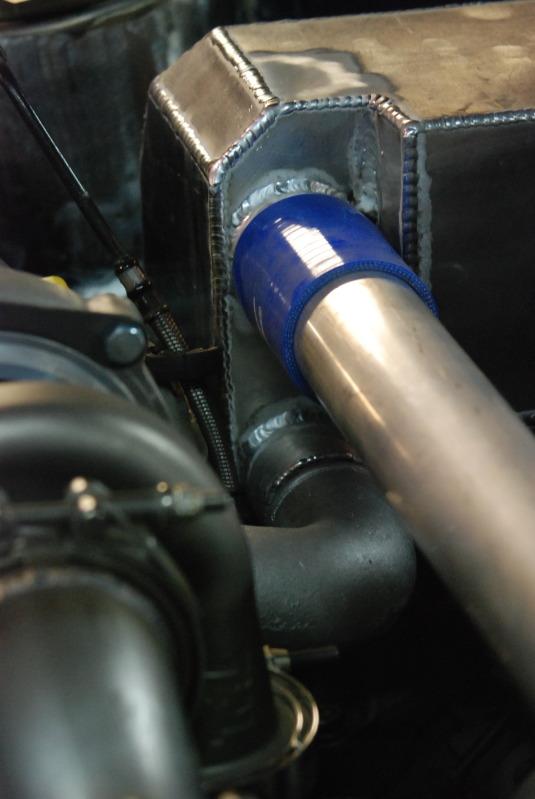
a close up of the compressor charge pipe inlets into the intercooler.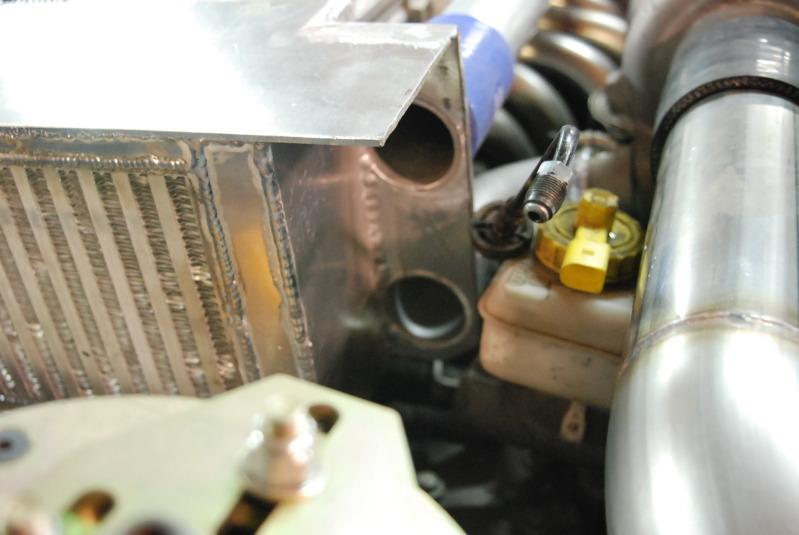
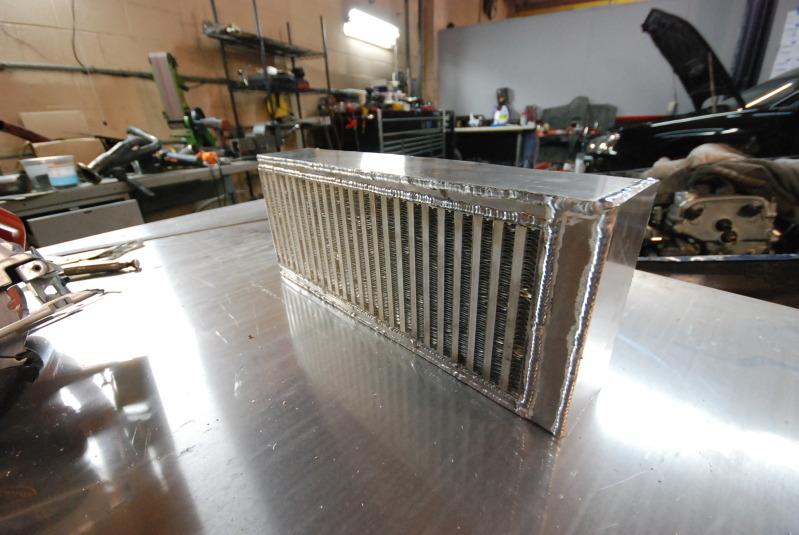
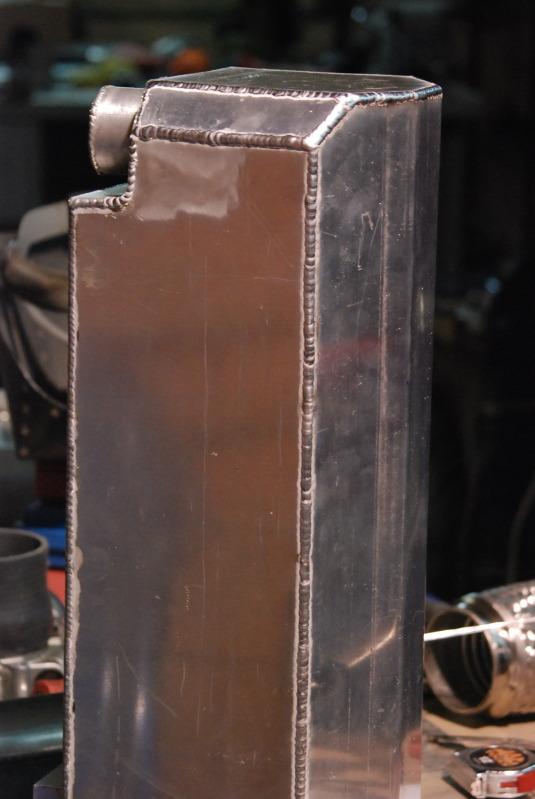
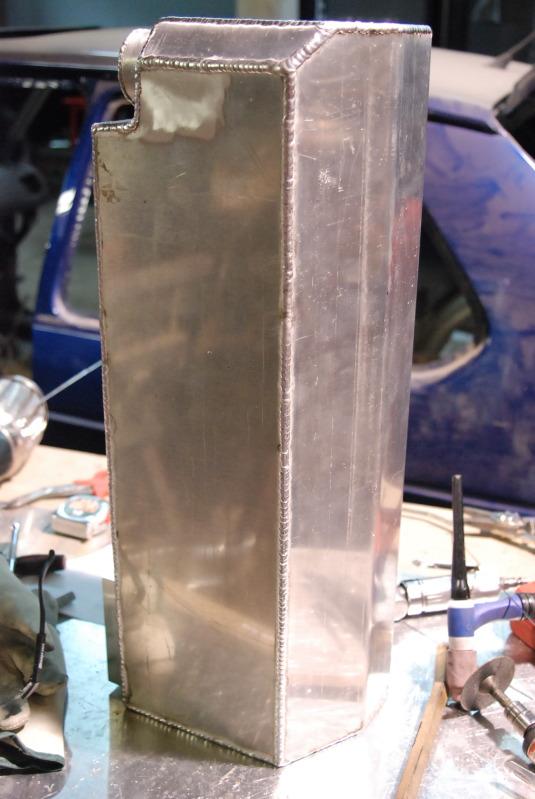
Due to the large size and boxy shape of the IC, i wanted something that flowed a little better so decided to give one side some "shape". Doug did so while still maintaining functionality by bending the passenger side... the picture makes more since. its seamless and clean also to change it up a bit...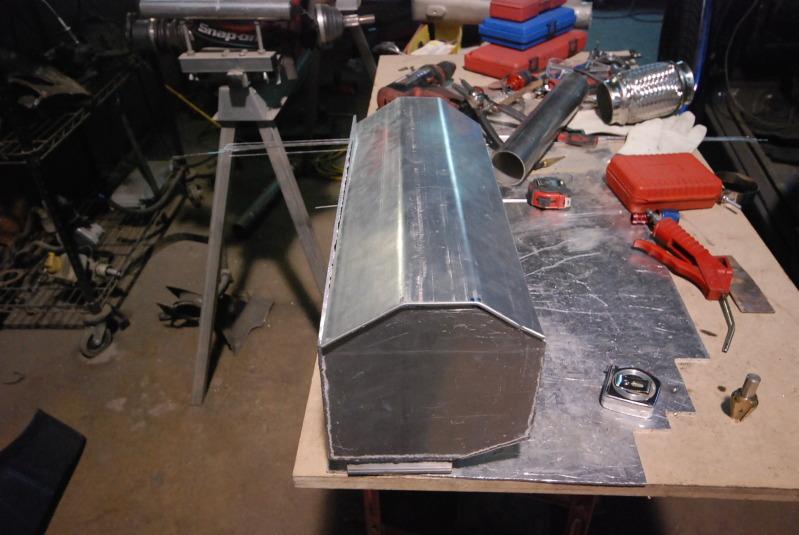
after that, they boxed in the charge section and finished the endcaps...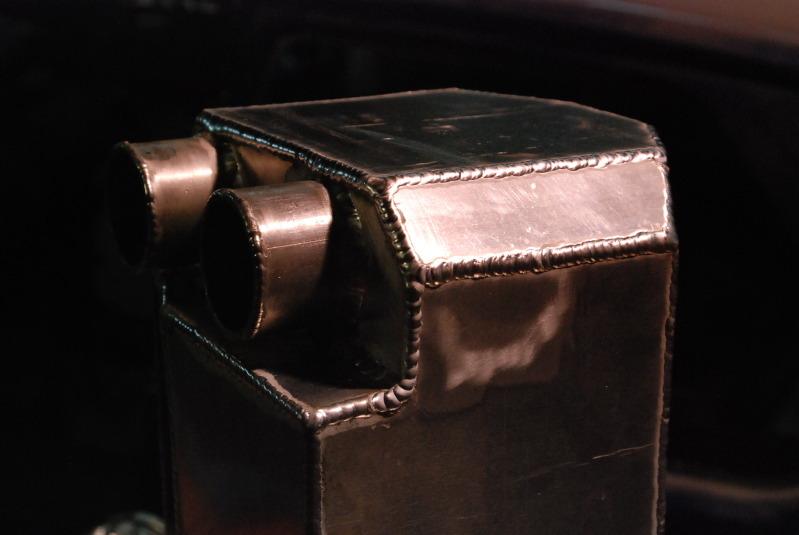
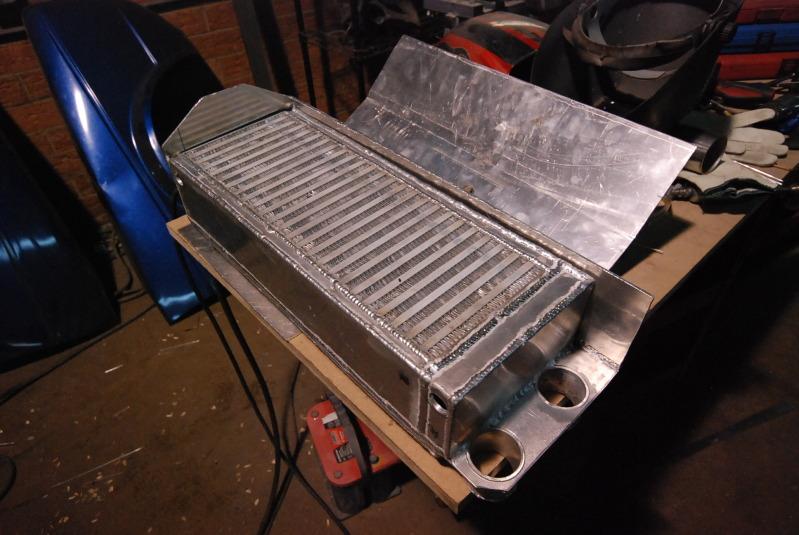
some ransdom detail shots...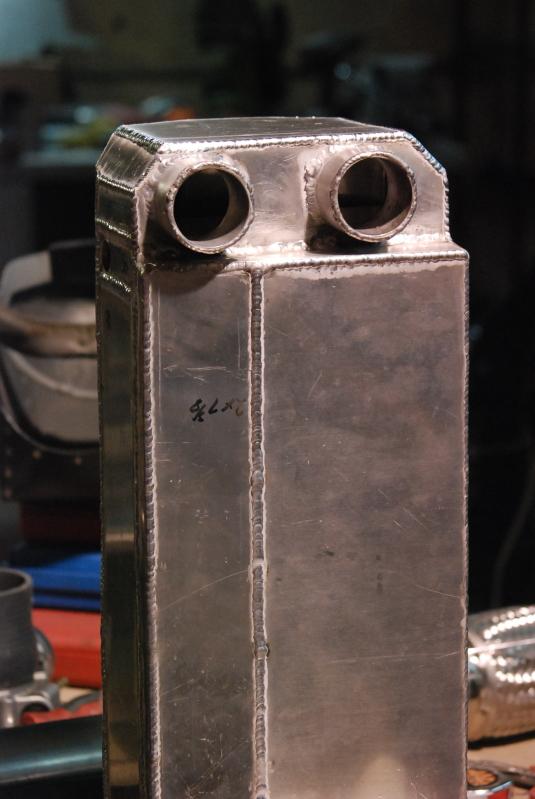
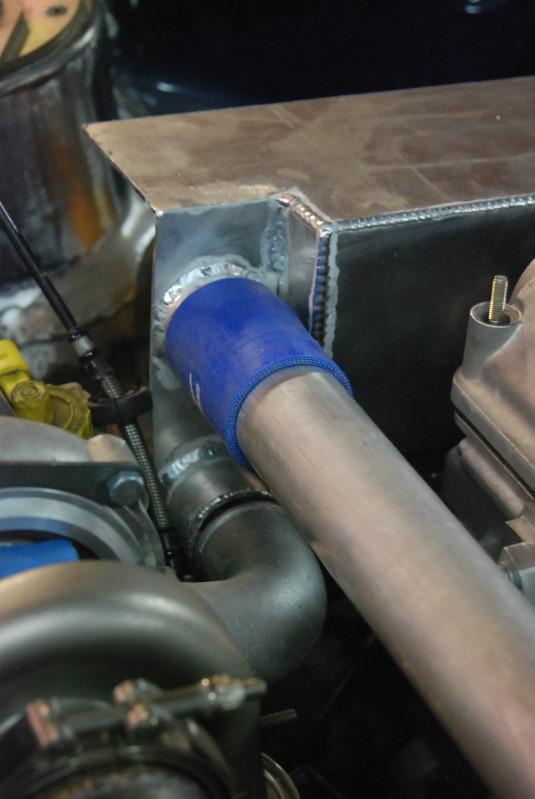
and some mockup shot of the IC in the bay...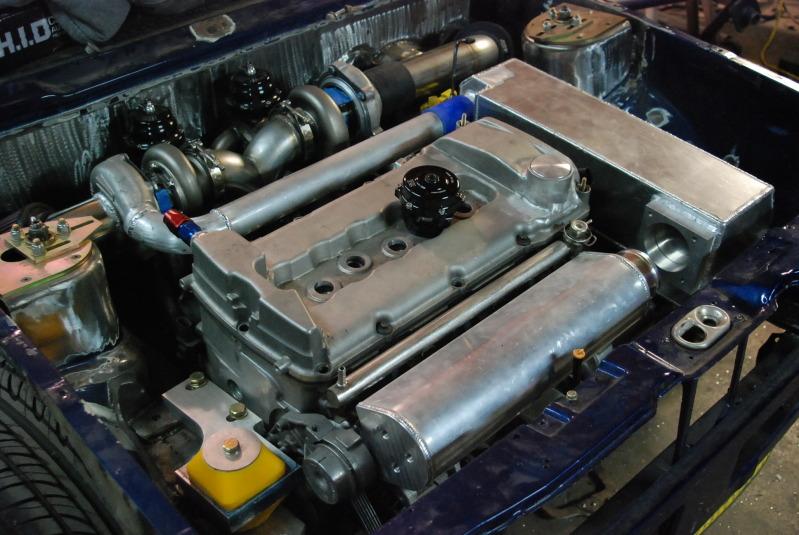
Good one!
Posted by Diggymart on 7/6/20 @ 3:16:11 PM