You must be logged in to rate content!
12 minute(s) of a 173 minute read
5-5-2004
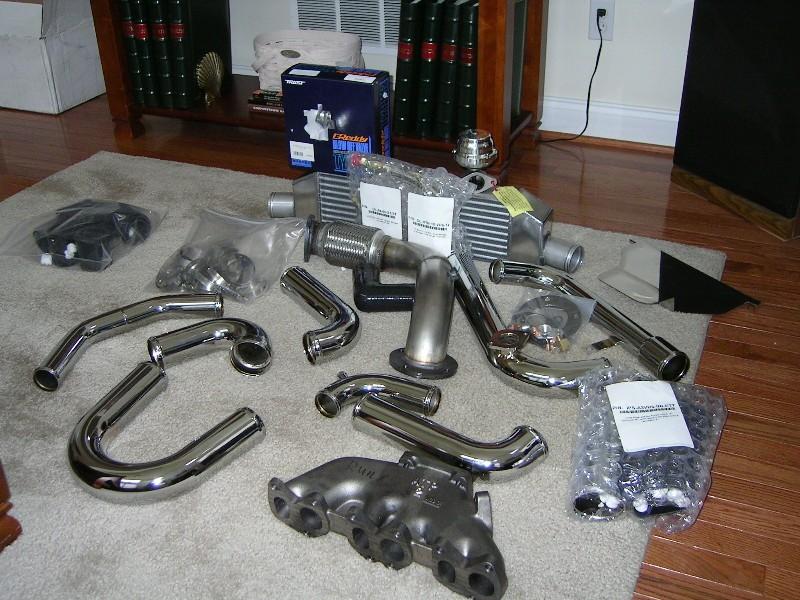
OK. So my entire ATP turbo kit is here: logical first steps??? TIPS??
Compliments of nater @ www.VWVortex.com
May 05, 2004
Let me start off by saying this post has become an incredible source of all sorts of good turbo install info (and it's subsequent "issues" that you encounter during the install). I'll keep these pics as long as I can (in their same address on my website) so that they never become bright red X's (that's the goal). If they do, contact me at ' [email protected] '.
Guys,
I just want to make sure I don't do something (ie. bolt something up) in the "wrong" order.
IE. My first guess would be to mount the exh manny to the head first then put the turbo on???
What I'd like to get from you guys is any TIPS that you've found that make the process a bit easier...
Basically it's an ATP stage 2 (i/c) with a "killa" TO4E Turbo on my GTi VR6 MK3.
TIA, guys...
Later,
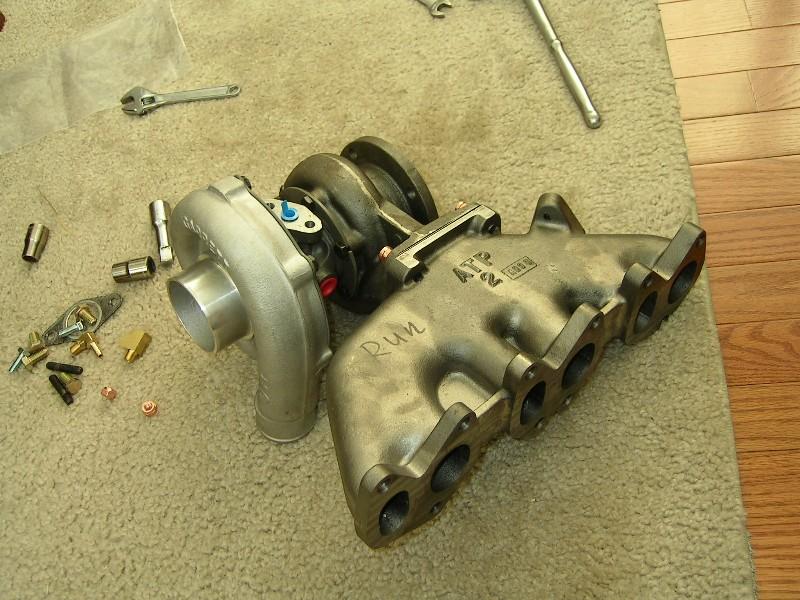
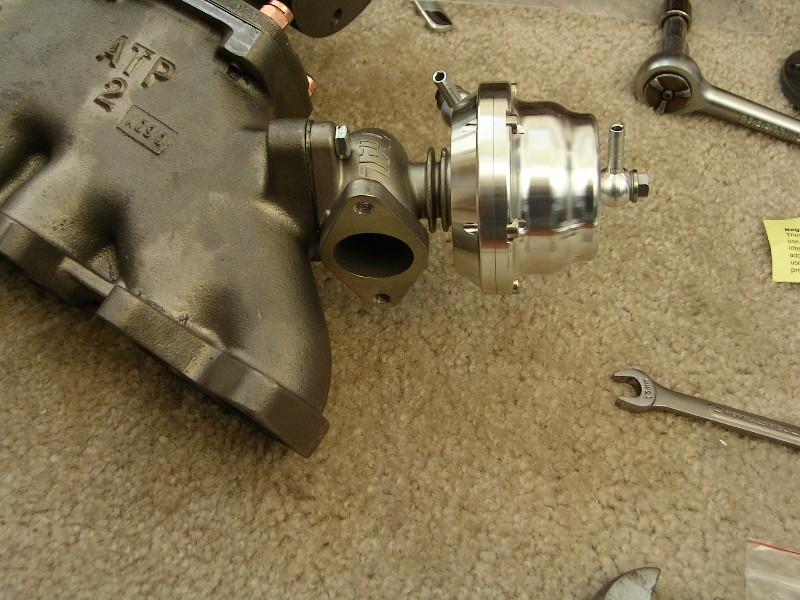
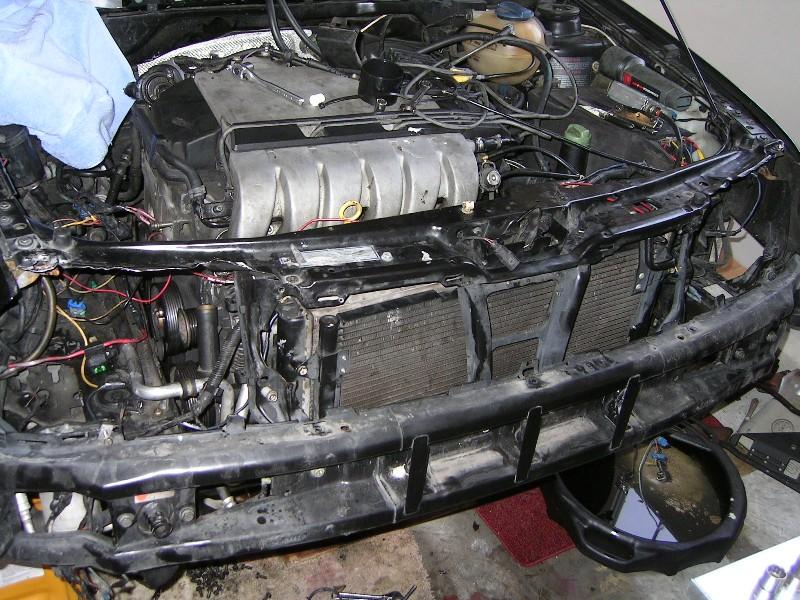
A "normal" sized picture of what I've got so far (I've already got the turbo - see my other thread with the super large pic!).
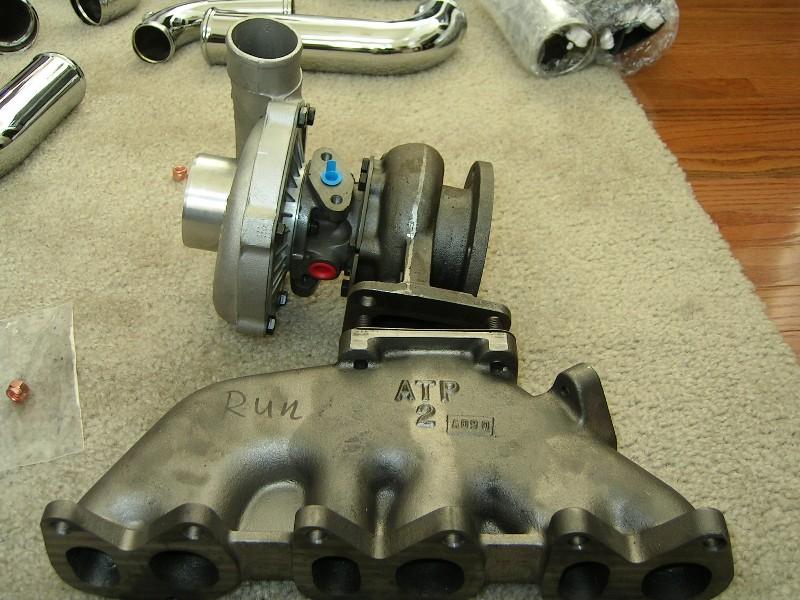
Ok, so I guess it's obvious that I've got to clock this turbo so the it's pointing exactly 180deg from where it is, correct?
And the blue cap on the top is actually the oil feed?
I want to make sure I've got the oil feed and the oil return correct...
My guess is that the oil return is indeed (in these pics) on the bottom (just beyond where you can see)?
And, both flanges look identical to me so how can I tell for sure?
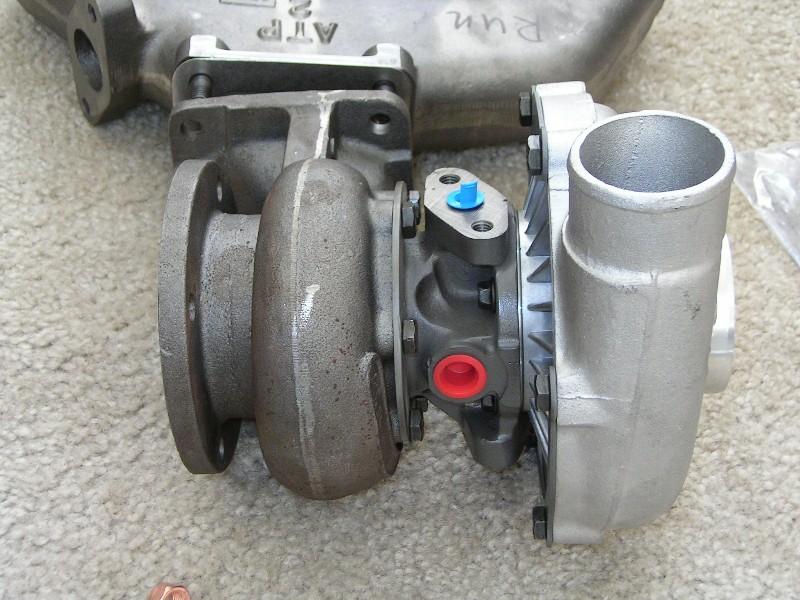
And, the red circular caps are for what purpose??? There are two of them (one is pictured and the other is on the other side).
Oil feed is indeed up. Oil return has a larger, rectangular hole, oil feed is smaller, round, and probably threaded.
clock the turbo 180*
top of the Turbo is for oil inlet
bottom is for outlet (don't forget the teflon tape)
red caps are for water cooling (optional), with very little work you can use your stock TB coolant lines.
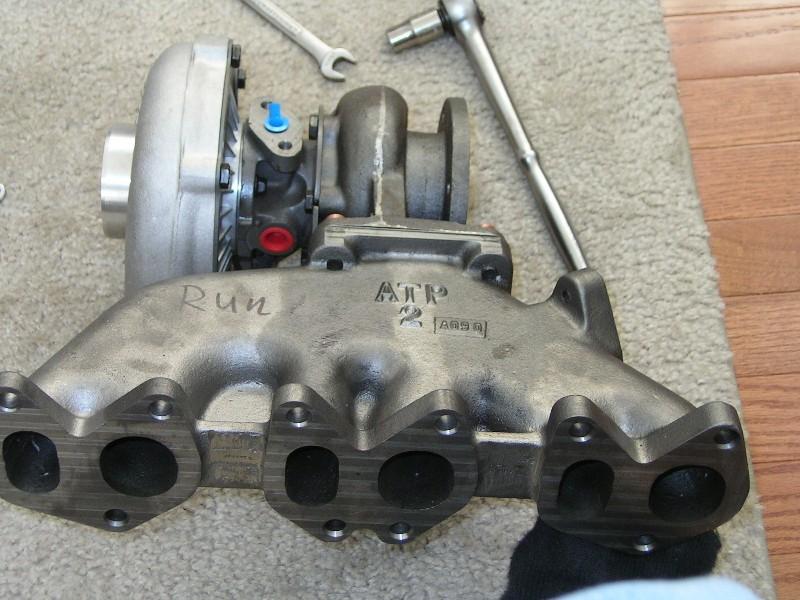
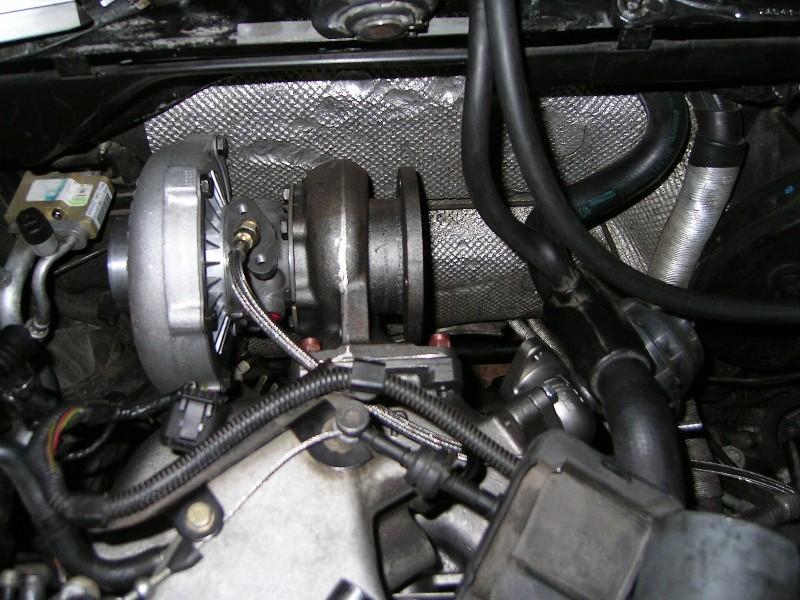
I have clocked the turbo:
Ok, so I can keep the water cooling plugged up for now? Or should I not run it unless it's water cooled?
As for the Tephlon tape...I've got ATP's hardware kit which has a lot of gaskets and stuff...one of them matches up the oil return on the bottom...my guess is that's what I need for it.
So far (with these pics), so good????
Will update with pics as I progress tonight...
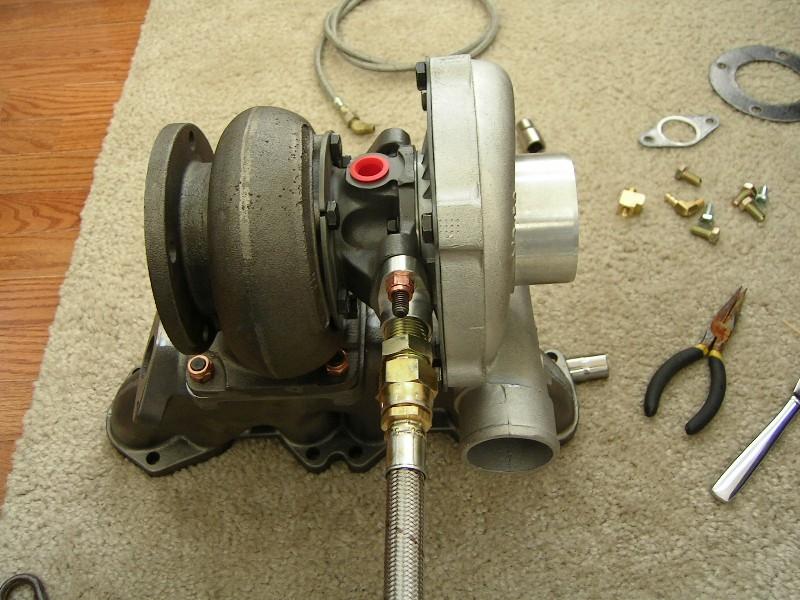
bolted up oil return. Figure if there's anything 'wrong' here let me know...
Thanks for the ongoing help, guys....
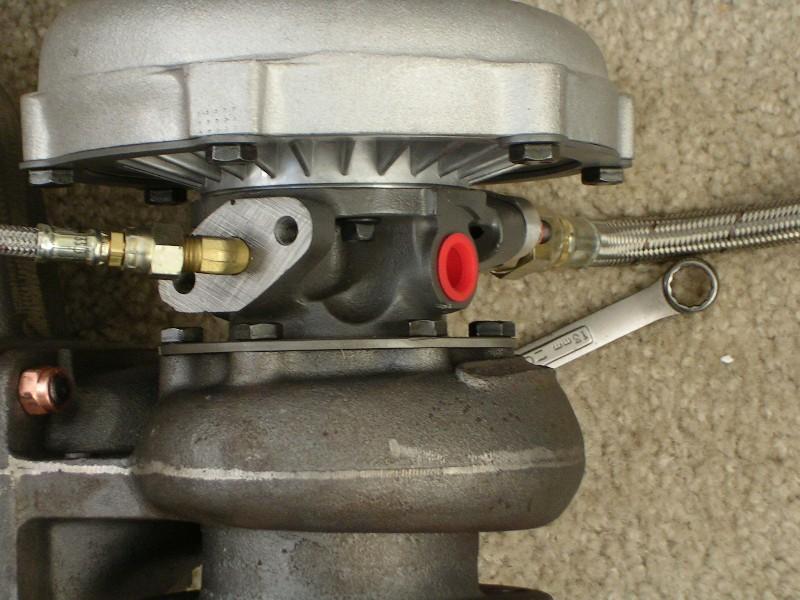
I just screwed in the brass oil feed line as the hardware kit had no "flange" as the oil return DID. I figure this is ok and doesn't need any particular "seal".
My supercharger oil feed/return was just threaded like this too...and had no particular seal on it either...
I assume it all looks good, eh?
Keep the help coming guys...I'm fairly mechanically inclined (installed cams, supercharger, etc...) but this is an entirely different ballgame.
Much appreciated!
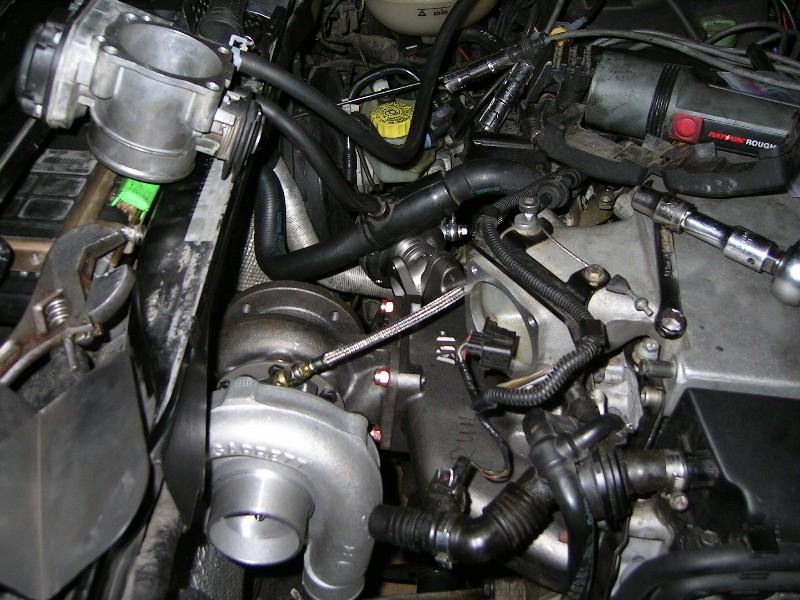
Please don't think I'm a retard but this pic shows how I *thought* the WG is supposed to be attached to the manifold. Please, if I did it backwards or something don't call me a wee-tod...
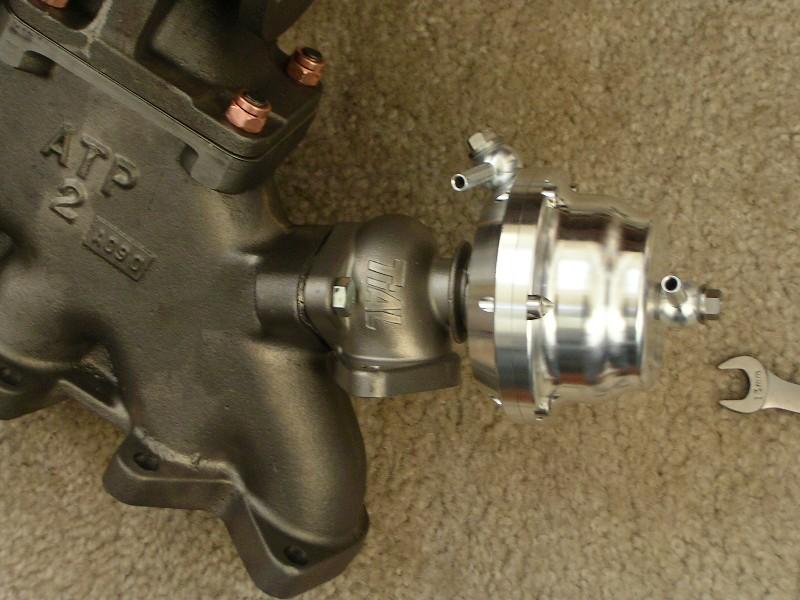
wg fixed and rotated 180degrees. There's no 'easy' way to re-route that wg back into the exhaust or does it just go into the atmosphere? And, if so...does it make the car much louder???
Here's the updated pics:
I did.
I'll use the lines going in and out of my TB, right?
Do you know where I can get the fittings which will allow me to hook these lines up?
And what really happens if I don't run it watercooled when it has that option? Is it really bad for the turbo???
And if I have the water hooked up does it mean I still need a turbo timer b/c doesn't the aux water pump just keep pumping to keep things cool anyway?
Or is it a matter of the oil just caking up inside the turbo???
Oh, by the way...I could really use a diagram of exactly how to plumb this setup (i/c) b/c I'm totally clueless. I've got the atp stage 2 plumbing and intercooler but it's all a big pile if isht right now .
Would an exh shop have those flanges you used on each end of the pipe on either side of that "flex section-looking part"?
That leads me to my next Q...
Is that indeed some type of flex section or is it just the picture playing games with me?
Is that just a straight 1.5" pipe in b/w the curved parts that the shop supplied?
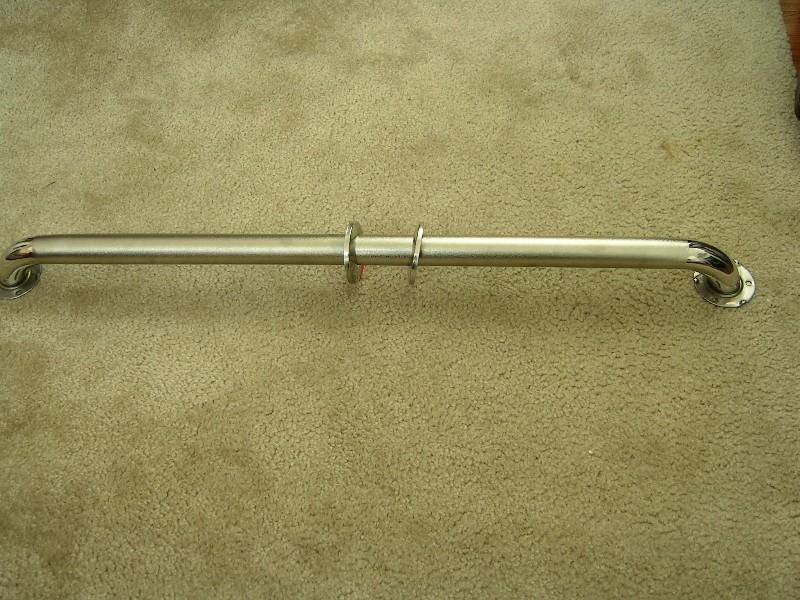
So, if I've got this correct...
You went to HD and bought one of their SS mandrel 1.5" bathroom handle, gave it to the shop and told them what you wanted to do...and they supplied the short straight tube and the flanges and welded it all together, correct?
I'll do this over the weekend then...
Just let me know I've got this correct so I don't walk into this muffler shop and them stare at me like I'm an idiot!
exhaust shop isn't going to have tial 38mm flanges. You'll need to get some from ATP. The stainless bath handle rocks. Flex section is a good idea since stainless expands and contracts quite a bit. I'm not sure where to get one that small. The one Marty has looks like a hydraulics part.
Definitely do a re-route. Open dumps sound ugly (IMO)
May 06, 2004
So, tell me this...
Is this the part I need then???
http://www.atpturbo.com/mm5/merchant...egory_Code=FLS
This is explained on atp's website as:
"Steel - External Wastegate Drilled Flange" and they go on to explain it like this:
"CNC'd steel external wastegate weld flange. Designed for Turbonetics Deltagate or Tial 38mm external wastegate. Perfect for dump tubes. Mounting holes are drilled through. Flange is 3/8" thick to prevent warping in high temperature applications."
So, how many of these flanges do I need for this application? My guess is two is fine? drilled, not tapped?
Here's what I picked up today from The Home Depot:
Am I in the right direction????
Guys,
What fitting(s) do I need to run my TB coolant/water lines in and out of the turbo????
It seems so easy but I need some special fittings for this, correct?
It's really amazing how everybody is actually putting their $.02 in and making this the awesome thread that it is.
I'll keep posting pics as I go AND will try and keep them active for as long as I can on my website. The goal is that these pics don't become X's and others can learn before they get started. Wouldn't that be awesome?!
Now, back to my question I posted two posts up...about fittings for coolant lines...where can I get these and what are they called exactly???
Ok,
So let me understand this right...
The coolant "holes" on the turbo housing are just holes - ie. not threaded?
So, you used a 3/8"-11NPT tap and actually created the thread for the inside of those holes, correct?
Then just screwed in the 5/18"-11 threads?
And you meant, 5/18"-11 not 5/8"-11...
Please correct me if I'm wrong here...just want to make sure I do this correctly.
Nice,
So it's easlier than I thought!!!!
Thanks bro!
Now,
anybody know where I can source these fittings? As simple as hitting The Home Depot or any local hardware store? Or is this more of a specialty item?
Oh, And does it matter which side is intake and exhaust (regarding the coolant)???
Or will it go through either way?
May 07, 2004
OK...
So, here's the update with lots and lots of pictures....
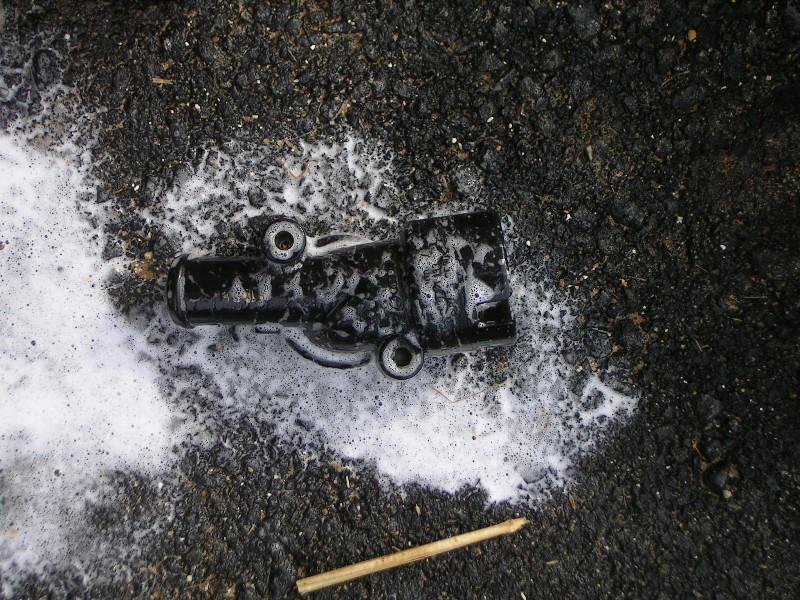
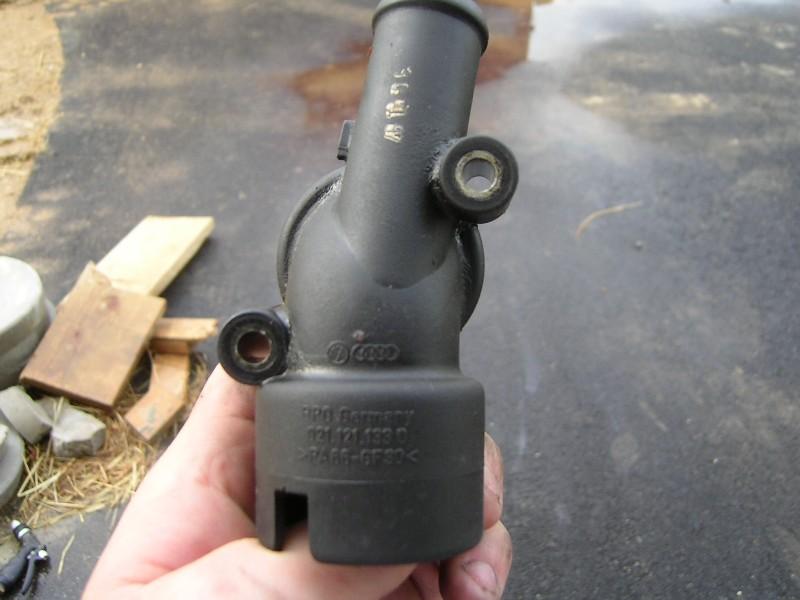
My water pipe (aka "crack pipe") broke so I had to install a new one.
Here's a pic of me cleaning off the thermostat housing:
I installed my waterpipe (shown here attached to the thermostat housing with some grease sprayed around the outside by the seals...
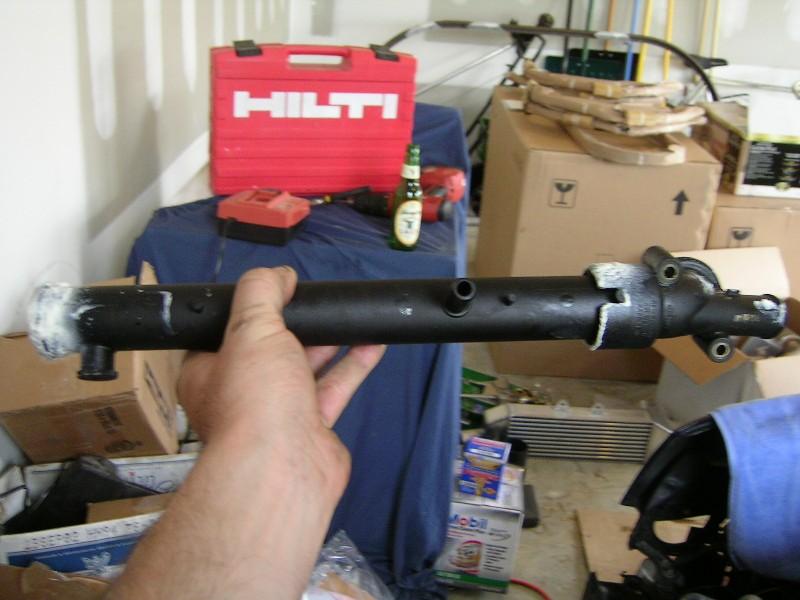
before I re-installed the thermo housing:
http://www.nateronline.com/turbo_project/t2.jpg
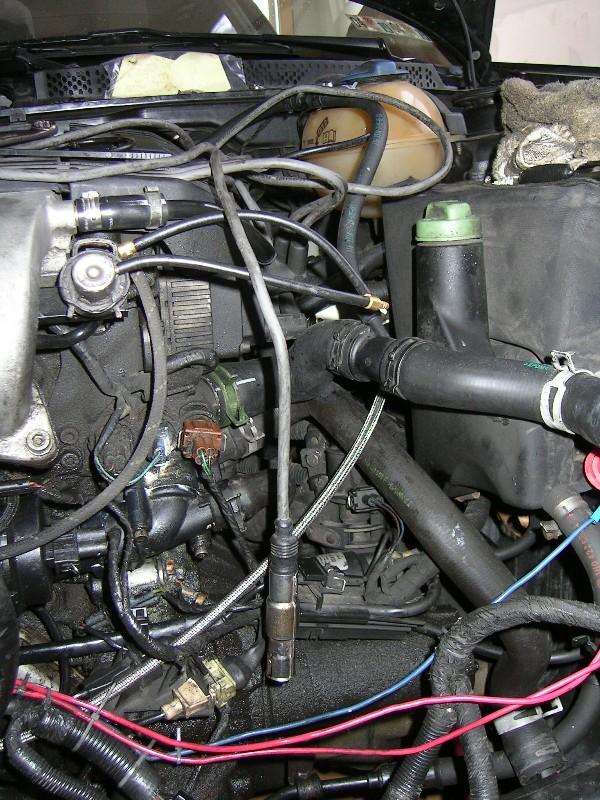
I actually had to pull the waterpipe back out again b/c it was easier to do what I did in the picture above this one and hook them together then push the assembly in as one. This way I was able to line up the "nipples" and stuff with the thermo housing...
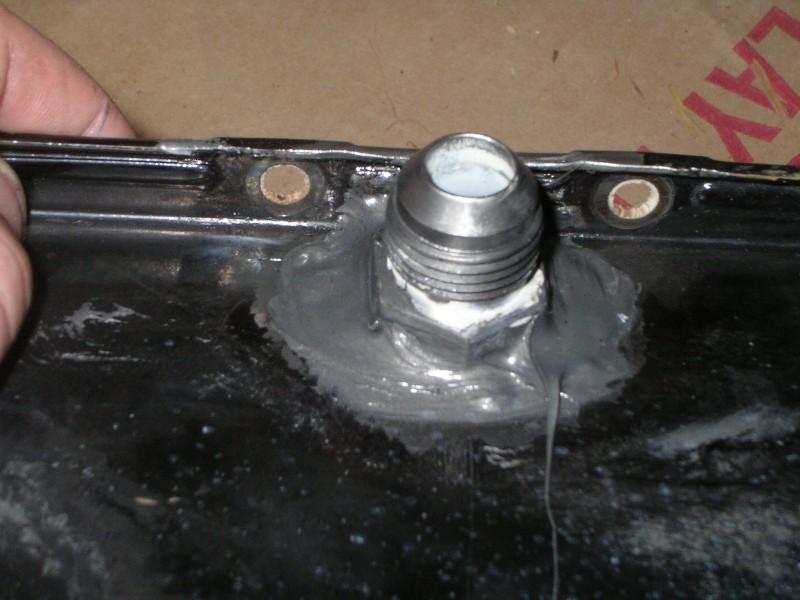
Oh yea, had my oil pan welded today from my buddy. It looked like it would never leak any oil but I am a freakin pessimist so I threw some atv sealant around the outside just to be sure.
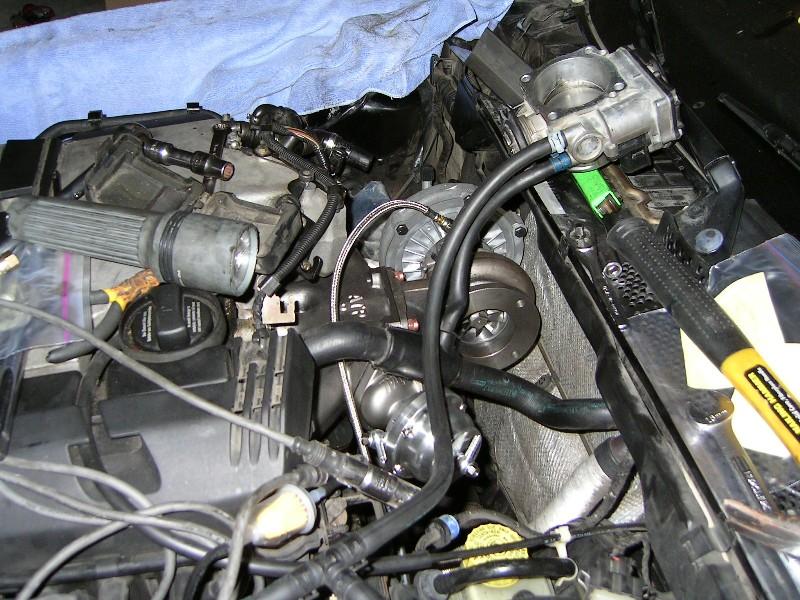
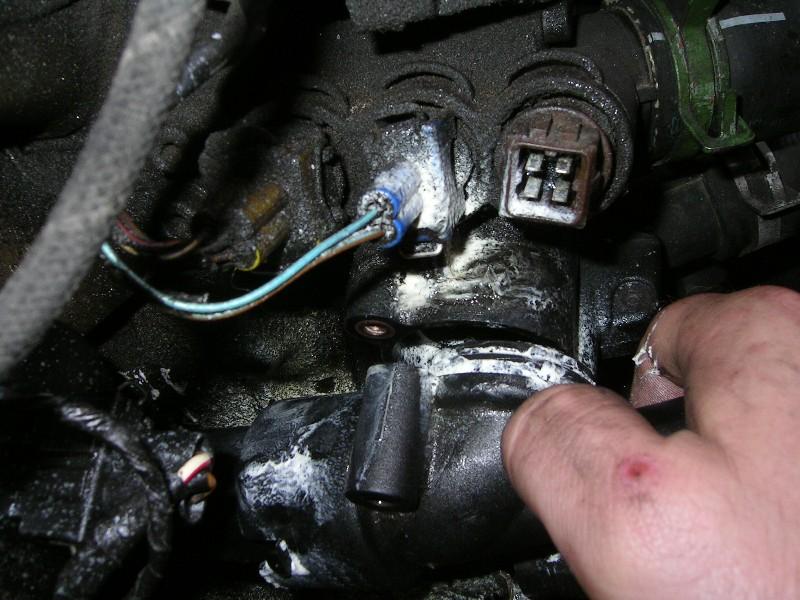
I installed my nice and clean (but old) thermostat housing:
Just snapping the thermo housing back into place along with the waterpipe in one motion:
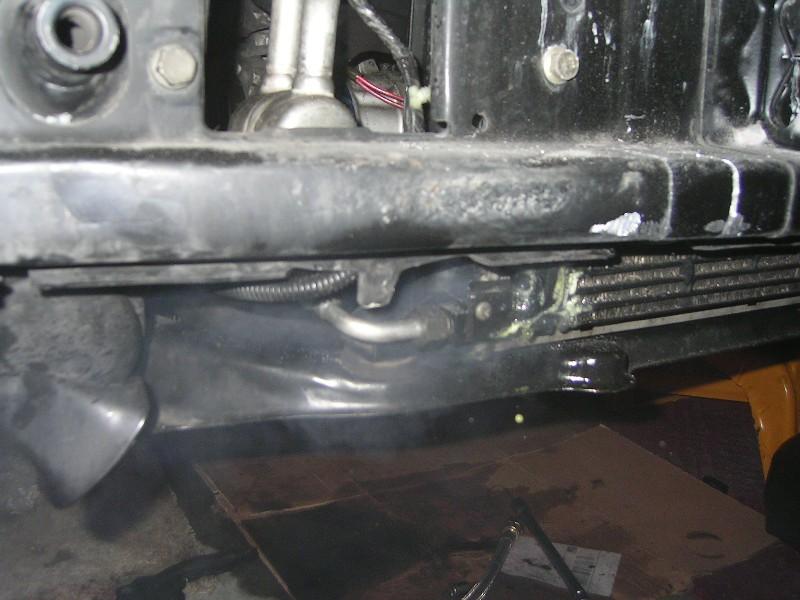
This shot shows everything back together AND also gives you an idea of how I routed the oil feed line...You could probably do it a million different ways but since I had a long line I figured this would be the best way...
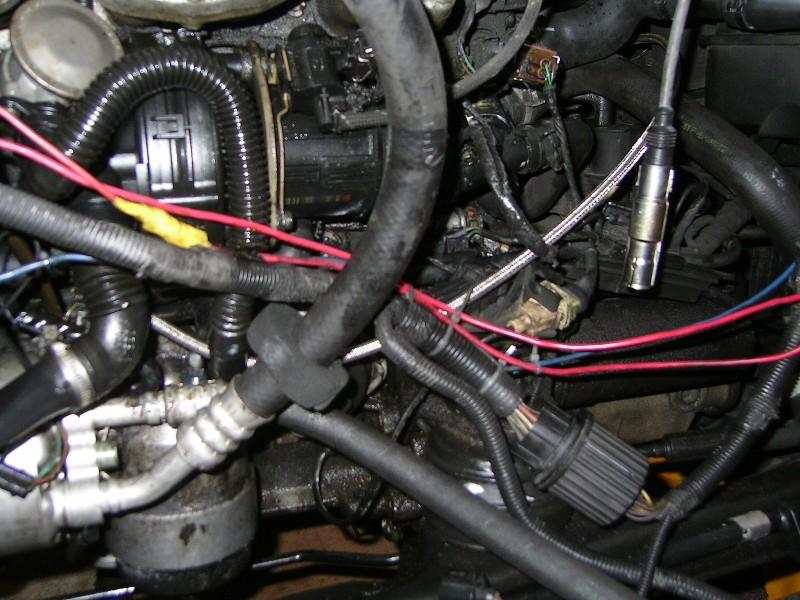
Just another shot:
Ok,
So, I'm ready to start my i/c install...
I put my bumper/rebar back on (by accident). I realized after the fact that I should probably have left it off...But it was nice starting to see the car look like a car again ...
I started to cut but using my recip saw I effin cut into my a/c condensor...
Here's what happens when you aren't careful with your sawzall:
No a/c now...was thinking of just pulling it all out but I'll just replace my condensor at a later point...
Did a crapload of cutting and here's what I ended up with:
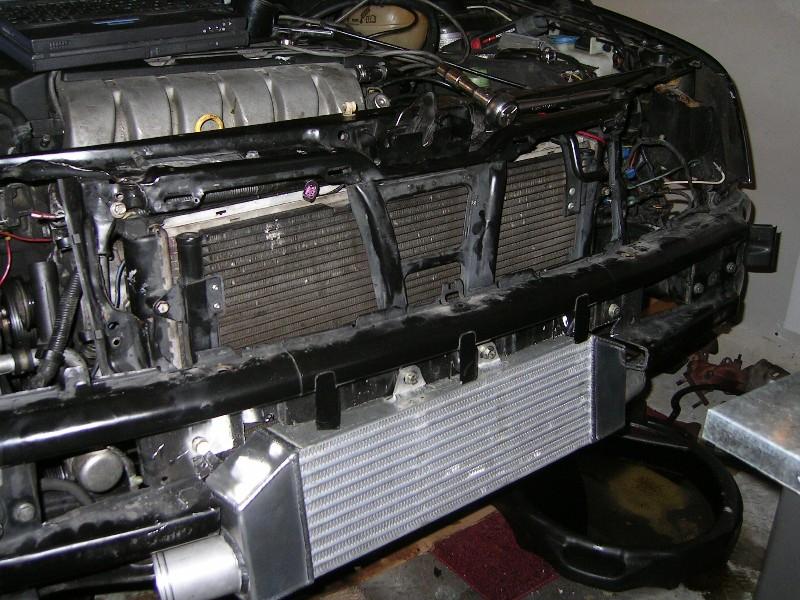
Now it's starting to take shape!!!
I actually almost have the bumper back on but forgot to take pics (was in a serious groove with the dremel tool).
This part is a PITA and I think I've cut too much in a couple spots. To me, it looks pretty bad...but we'll see. I'll post up pics of the bumper once I get the entire thing put together...
Thanks for looking guys...
Will continue to post up on this thread as my project progresses!!!!