You must be logged in to rate content!
3 minute(s) of a 208 minute read
4-17-2008
so...
does anyone know if MS can be configured for a 'target RPM' speed when the throttle is closed. - so that if you turn on your AC or your headlights and stuff the idle wont dive.... if should sense the RPMS are dropping and open the Idle Air Control valve...
Ive been exploring the megatune software and havent even scratched the surface of what can be done with it. the good news is the ECU is working perfectly.
![]()
4-18-2008
the answer to my question is here on the megamanual:
Note that MegaSquirt-II version 1.000 code does not have feedback idle speed control and stabilization based on actual RPM, however. This may be incorporated into later developments of the code. The concern with a closed loop idle (or in decel) is the safety issue - we do not want any runaway or oscillating throttles. However you can tune your temperature vs. stepper position table for best warm-up driveability. After that, deviations from what you are used to would be an indication that something has changed in the motor - something clogged, bad gas, etc.; something you would want to know that rather than masking it.
4-20-2008
you know, I find it really hard to find the information I eed because so much relevant stuff is written about MS and Spark, or extra or whatever on the old cpu, "MS 1"
Im using the MS2 cpu so I can go boost and stuff some day.
yeah, for stage3 - long term. probably not till after I put in a bigger motor.. I dont know..
I might just throw a little turbo on there for a little more oomf, but nothing gigantic. I havent decided.
the good thing is that with Megasquirt, I can swap out the motor with out all the fuss of changing the ECU and wiring and stuff.
adding a turbo will be easy.
4-22-2008
looks like I wont be making any progress on the megasquirt his week. I broke the windshield in the rocco and all my cash will be going to that this paycheck. (and probably next) ![]()
5-15-2008
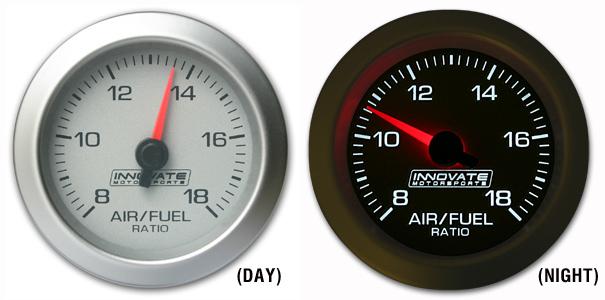
Im going with the LC-1 with g3 gauge. (the analog one with 14.7("stoich") at the top.
http://www.diyautotune.com/cat....html
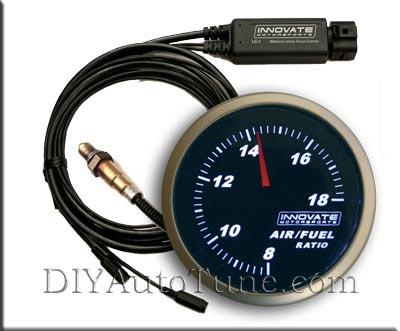
I like the look of the white faced one a little better, but the target stoich is over on the right.
eventually I wont have the gauge in the car at all. but it will be patched into my carputer for logging.
Wow looks good!
Posted by Diggymart on 10/29/21 @ 10:32:42 PM