- - Razor knife (hobby or X-Acto knife works great)
- - Flat Blade Screwdriver
- - Pliers
- - Zip-tie
- - Glue for bonding leather to plastic (we used SuperGlue)
You must be logged in to rate content!
4 minute read

DCT SHIFT BOOT installation
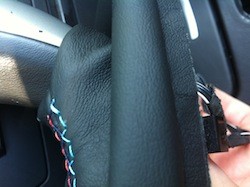
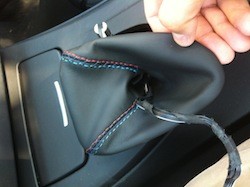
1. The car has to be completely off during this procedure, and secured against rolling away. Pull upwards on the mounting points on the bottom of the boot, there is an integrated frame that will yield if you wiggle it (it's flexible to a point). To remove the shift knob, pull it upwards. Make sure to brace yourself so that you don't pull it too hard, it's best done while seated in either seat using just your forearms with the elbows braced on your thighs and center armrest.
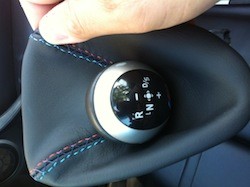
The picture shows the connector providing lighting of the shift knob. The connector is also connected to the side of the shifter assembly with the visible clip. Use a small flat-head screwdriver to push the center part of the clip left. The clip will disengage and you will be able to push the whole connector down (to push it out of the bracket that's holding it) and out.
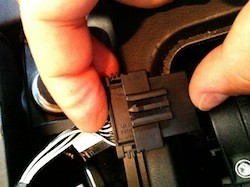
2. Squeeze the sides of the upper part of the connector to make the shift knob part release from the part of the wiring harness that goes back into the center console.
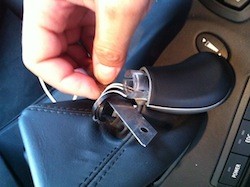
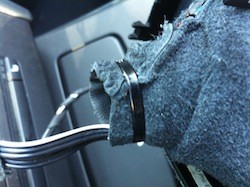
3. Use an x-acto knife to cut the stock boot right under the shift knob. It's easy to do around the front and sides of the knob, as there is a plastic tube that makes it easy to just cut without worrying (worst case you will scratch an invisible piece of plastic). The rear is more tricky as the harness is exposed. Therefore cut the front and sides first, pull the harness out of the boot as pictured, insert the knife between the remaining leather and harness and cut all the way through. Don't worry if you can't, or are afraid to, cut off everything, during our installation a bit of leather remained covering the rear (harness) side of the bottom section of the shift knob. That is fine.
4. Glue the new boot on the shifter frame after removing it from the stock boot. It's the same procedure as for the manual (explained earlier in this write-up). Make sure the alignment is correct and that the glue settles well before proceeding. Once the frame is solid with the new boot, flip the boot inside out and insert the harness from above as pictured.
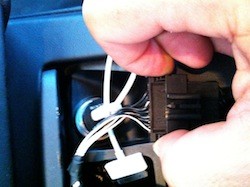
5. Push the shift knob into the boot as far as it will go. Ideally you will want the bottom of the knob to be even, or almost even, with the top edge of the boot.
6. Use a zip-tie to hold them together. Make the zip-tie tight.
7. Flip the boot back out. This requires some dexterity. What helps is holding the zip-tied part of the assembly with one hand and pushing down with the other. If you aren't careful you will push the zip-tie off the knob and will have to get back to previous steps to redo it. Make sure you get it right before you run out of zip-ties. :)
Reinstall the harness and clip the harness to the shifter. Lower the assembly over the shifter and push the shift knob on first, then clip the bottom frame until it holds.