You must be logged in to rate content!
2 minute read

CENTER CONSOLE INSTALL
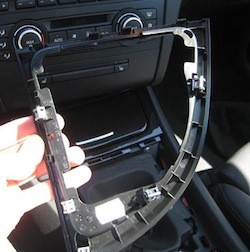
1. To remove the shift boot and trim, just use your trim tool to pry along the edges and then pull straight up. This is what the clips look like on the trim piece.
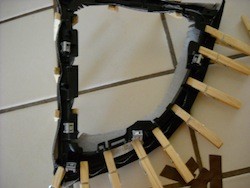
2. As always, test fit the new piece before you glue it down. Then, spray the RedlineGoods piece and the piece you are going to glue down on. Use clothes pins to hold the fabric in place while the glue dries.
3. Once the glue dries, clip the shift boot back into the piece and clip the trim back into the center console.
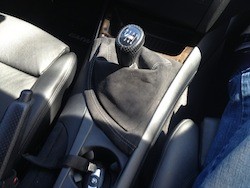
CONGRATULATIONS - YOU HAVE SUCCESSFULLY INSTALLED YOUR NEW LEATHER BOOTS!
Useful tip
You have installed a product made out of genuine leather. As you know, to maintain a leather product in good condition, you should take care of it. We suggest occasionally (every 4-6 week for example) applying some leather conditioner/UV protector to keep your leather from drying up in the sun and cracking.
Redline Automotive Accessories Corp. will not be held liable for any labor, incidental or consequential damages of any kind. Proceed at your own risk.