You must be logged in to rate content!
4 minute read
DIY Supplemental: Crankcase Vent (CCV) Replacement Notes and Photos (97 540i)
Compliments of cerber @ www.bimmerforums.com
4-25-2010
This write-up is meant to supplement this article written for CCV replacement on a 740i M62: Crankcase/Oil Seperator (CCV) (M62)
1997 540i M62
Recently my car started exhibiting the classic symptoms of a CCV failure: choppy idle, blue smoke out the exhaust, massive vacuum at the oil filler cap, and dipstick, and a strange whistling, almost spaceship like noise at idle. Breaking the vacuum on the crankcase would immediately make the noise stop.
Here are the diagrams of the crankcase venting system on the M62 for my car.
Intake Manifold:http://www.realoem.com/bmw/showparts...37&hg=11&fg=40
Oil Seperator: http://www.realoem.com/bmw/showparts...55&hg=11&fg=15
Vacuum system: http://www.realoem.com/bmw/showparts...02&hg=11&fg=45
The cover on the back of the intake manifold is the crankcase vent (CCV). Its function seems to be to regulate the amount of vacuum that pulls on the crankcase to evacuate vapors. When it fails, the crankcase will be subject to full manifold vacuum. Massive amounts of oil will be sucked into the intake tract and burned throught the engine. This vacuum leak will cause very rough idle and possibly some engine knock when accelerating. At highway speeds, the problem becomes almost unnoticable.
I ordered these parts from http://www.autohausaz.com
11617501563 - Intake Manifold Cover
11611729728 - Gasket
Here are some pictures and commentary:
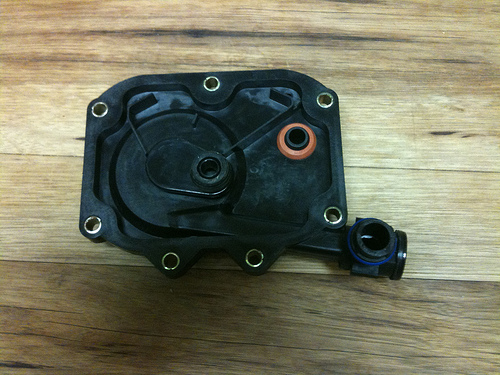
Original intake manifold rear cover. Note the fuel pressure regulator vacuum line and the coolant line. Both of these will be removed during the replacement.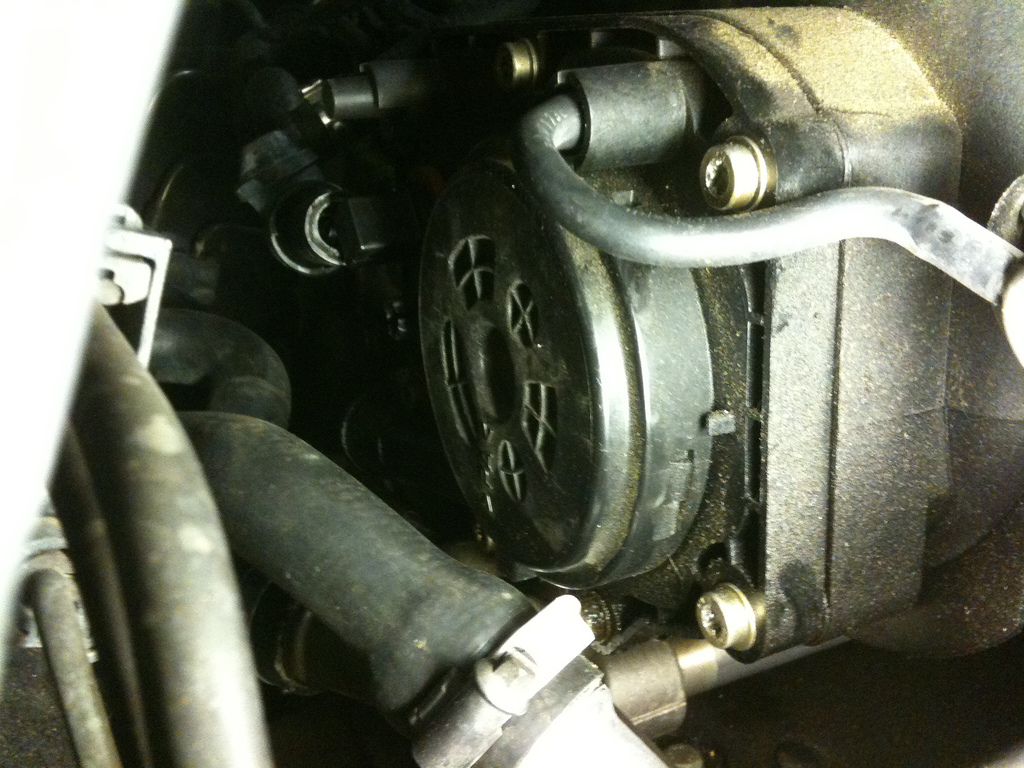
The cover removed and the new gasket in place. Note the removed coolant hose and the location of the vent pipe opening within the manifold. The vent pipe is mounted securely and will not move. When you bolt on the new cover, the nipple should slide right in there without issue.
I had no problem getting a rachet and T30 Torx socket onto these screws. I would recommend replacing them with M6 x 1mm x 25mm socket head cap screws. The Torx screws strip too easily.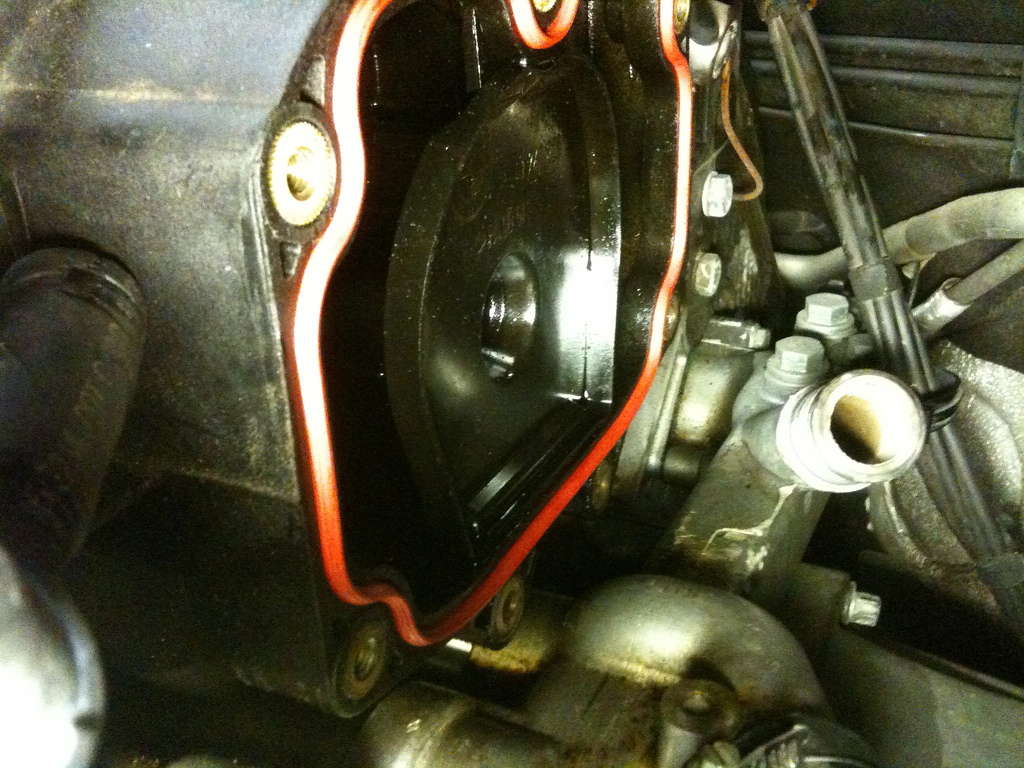
The new cover. When installing the new cover, make sure to grease the connections. The pipe going to the oil seperator (lower right hand corner of the second picture) must be dealt with gently. You don't want to break the top off the oil seperator which is connected to the other end of the tube you are pushing that thing into. Review the Oil Seperator diagram above to understand this.
FYI all connections to this thing are under full engine vacuum.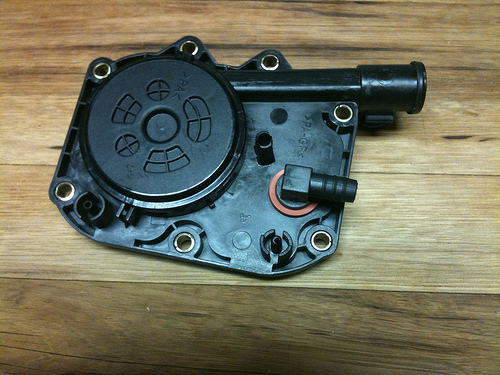
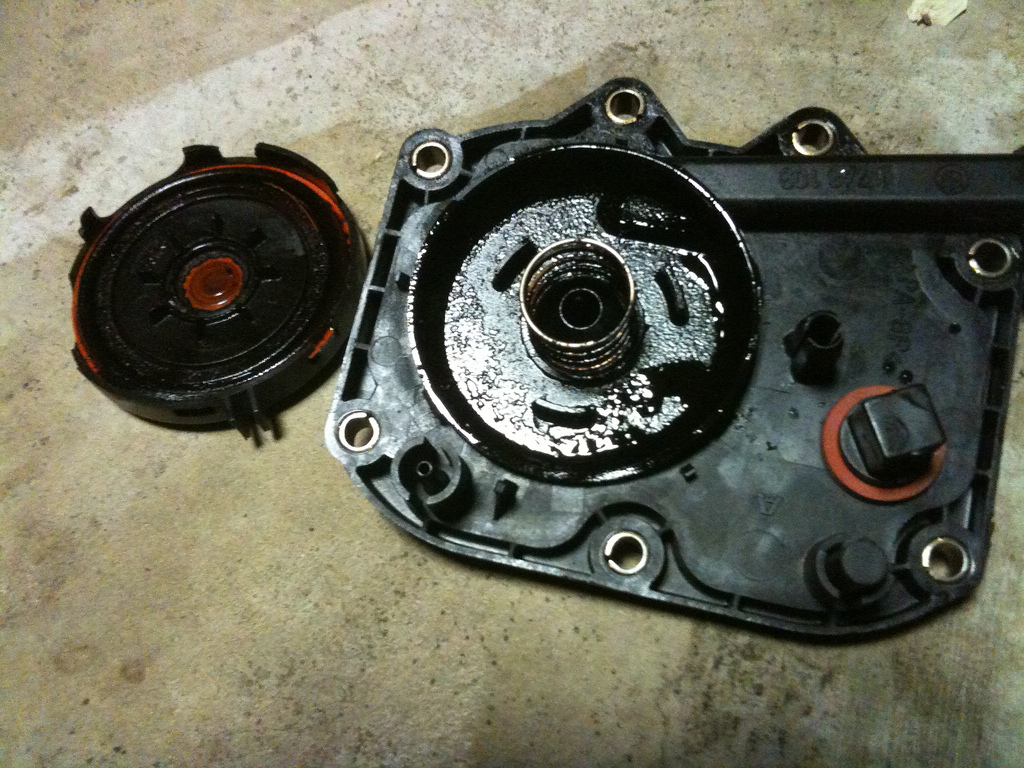
Old cover. The gaskets and diaphrams have completely broken down. It appears that the design of this is for the diaphram to limit or stop vacuum going to the oil seperator under certain circumstances. My guess would be that high vacuum situations such as idle would pull the diaphram/gasket in to block the vacuum.