You must be logged in to rate content!
6 minute read
Aftermarket sub/amp DIY
Compliments of 30yrVeteran @ bimmerfest.com
7-9-2010
I didn't take a whole bunch of pics as I figured anyone who would tackle this should be able to remove the trunk liner and ski boot without visual aids.
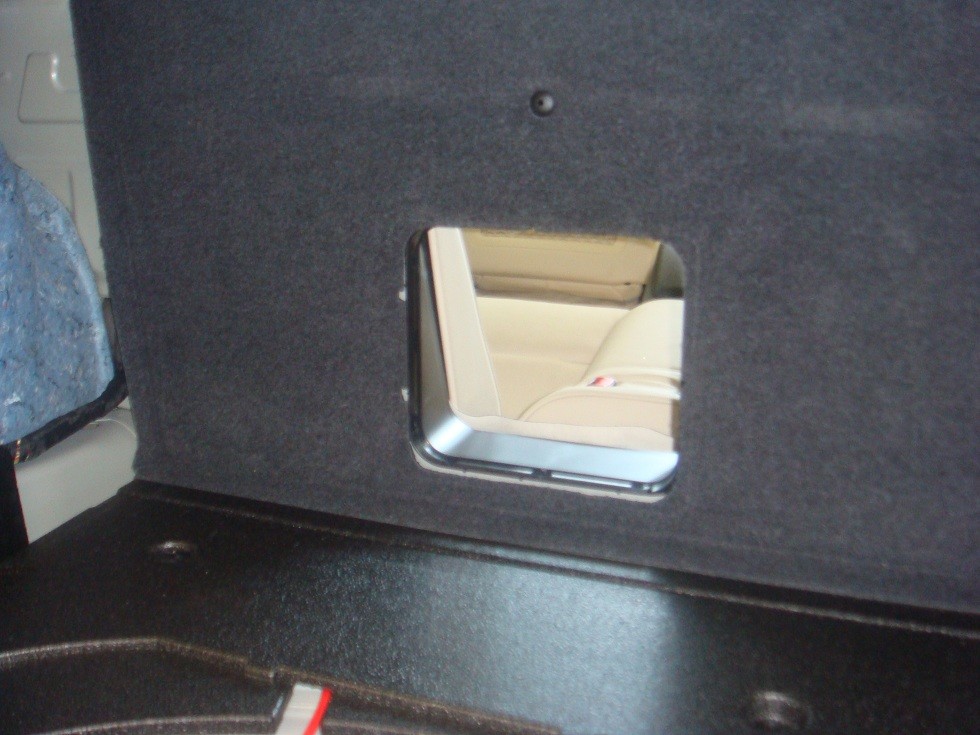
1. Remove ski boot. There are 4 plastic tabs on the seat side that pop out. These are what hold the boot material to the door frame. The the door and trunk-side frame unsnap.
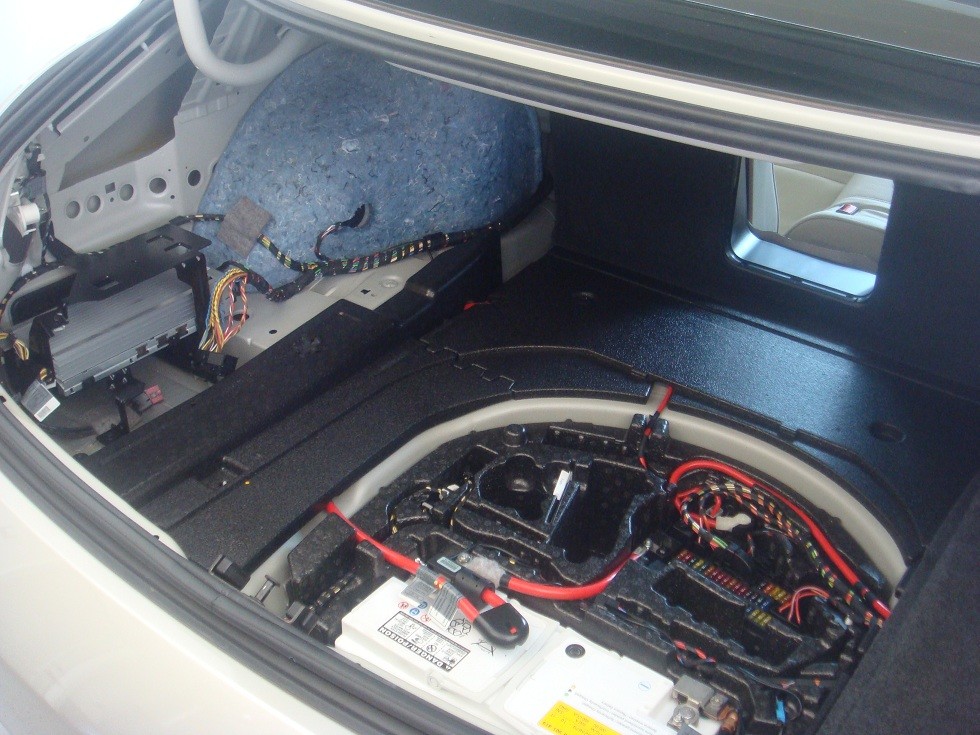
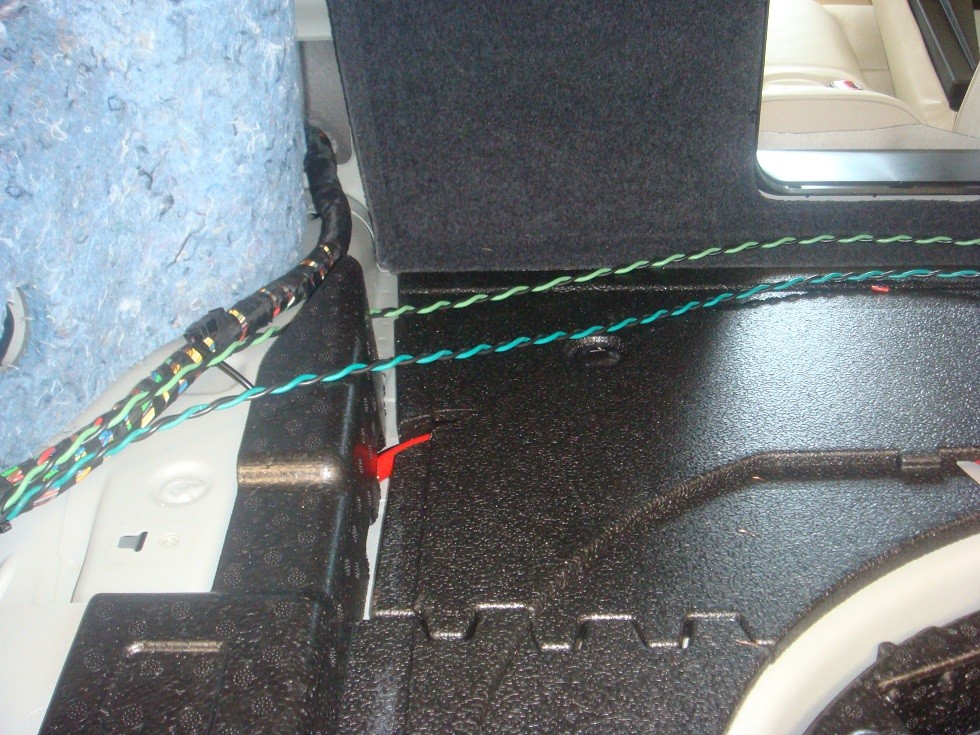
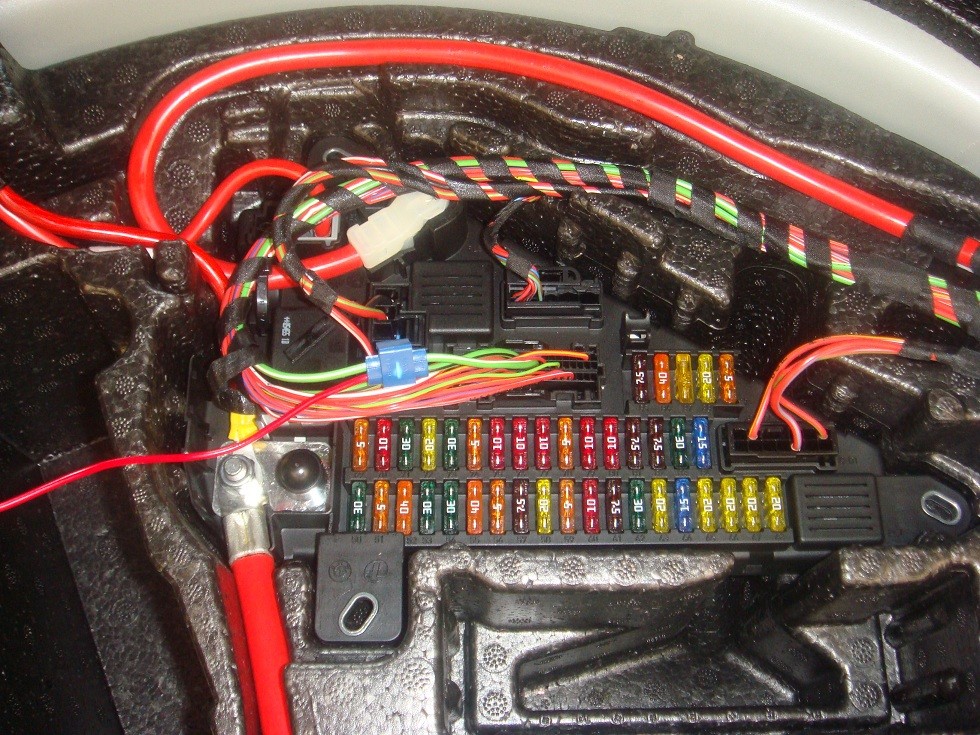
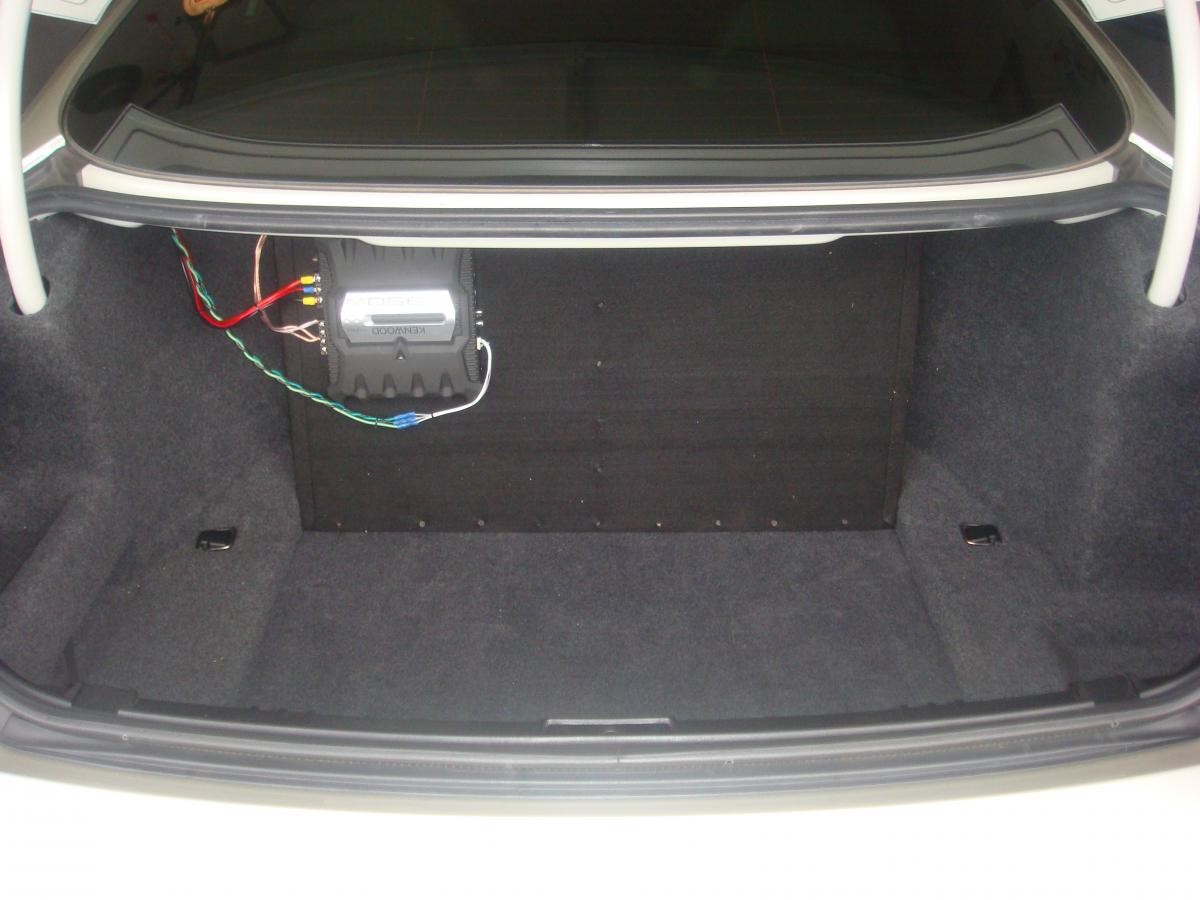
2. Pull floor carpet, tool tray, rear plastic trim on the rear side of the trunk and the left side panel. Your Bose amp will be under that.
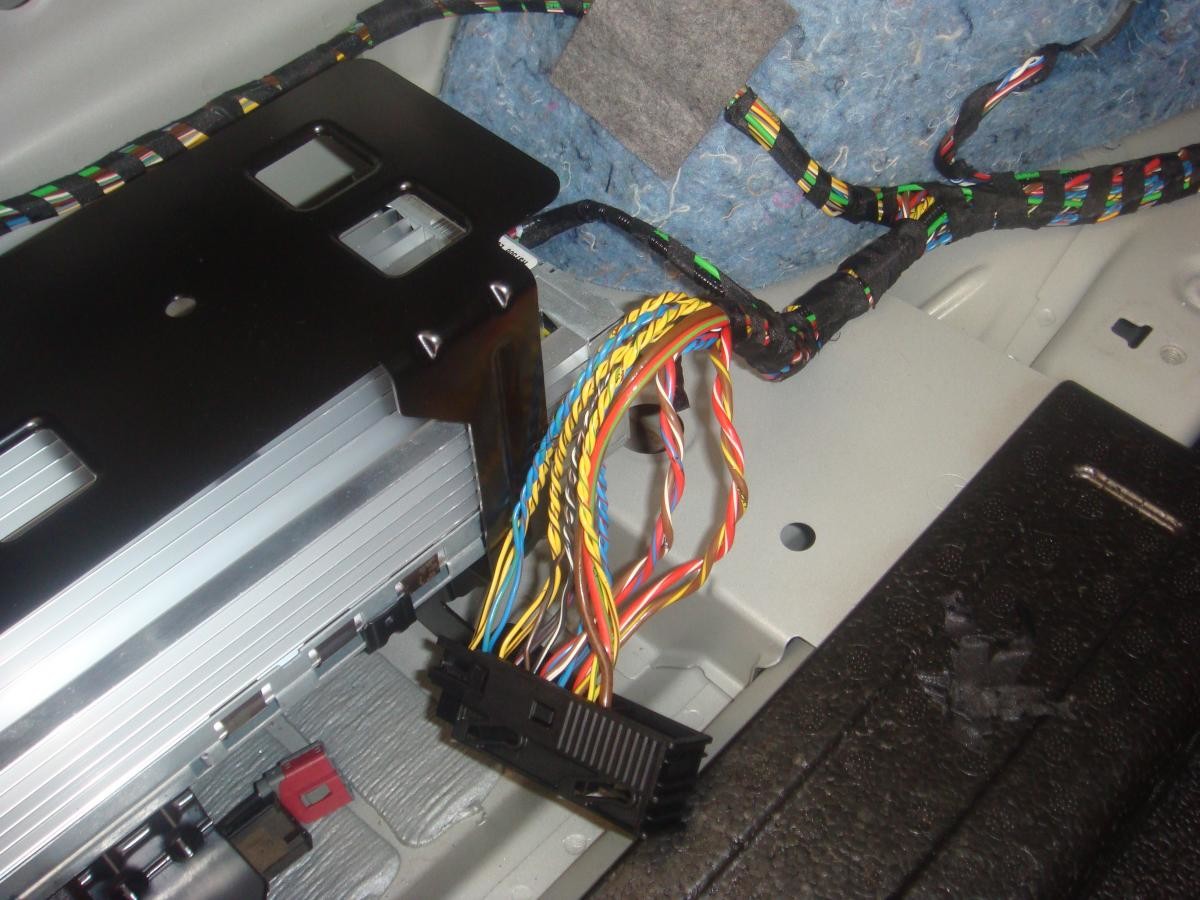
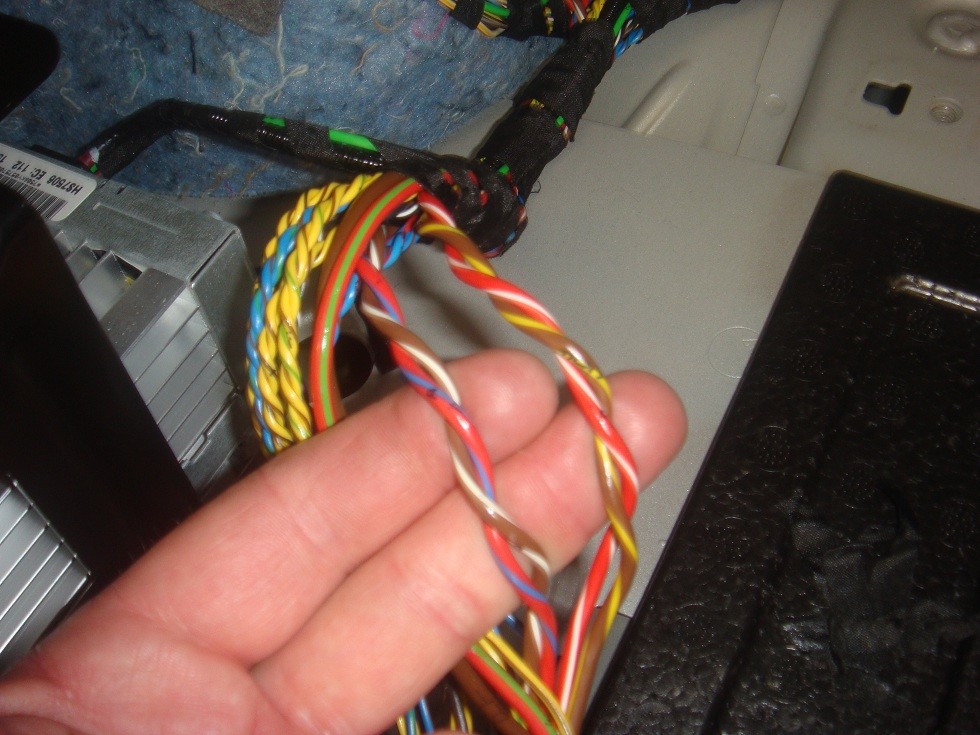
3. Disconnect the large connector on the front of the amp and remove enough tape to separate the twisted pairs of wires.
4. Your factory subs are paired as follows:
+ Left = Brown/Yellow; - Left = Red/White
+ Right = Brown/White; - Right = Red/Blue
5. Once you located these, tap into them. I soldered and put heat shrink and then taped it up, but you could use splice connectors if you want. These are high level inputs. I used a cheap amp for now that has high level inputs, but I'll replace that with a pair of high to low level converters and a Rockford Fosgate amp this weekend.
6. Reconnect connector
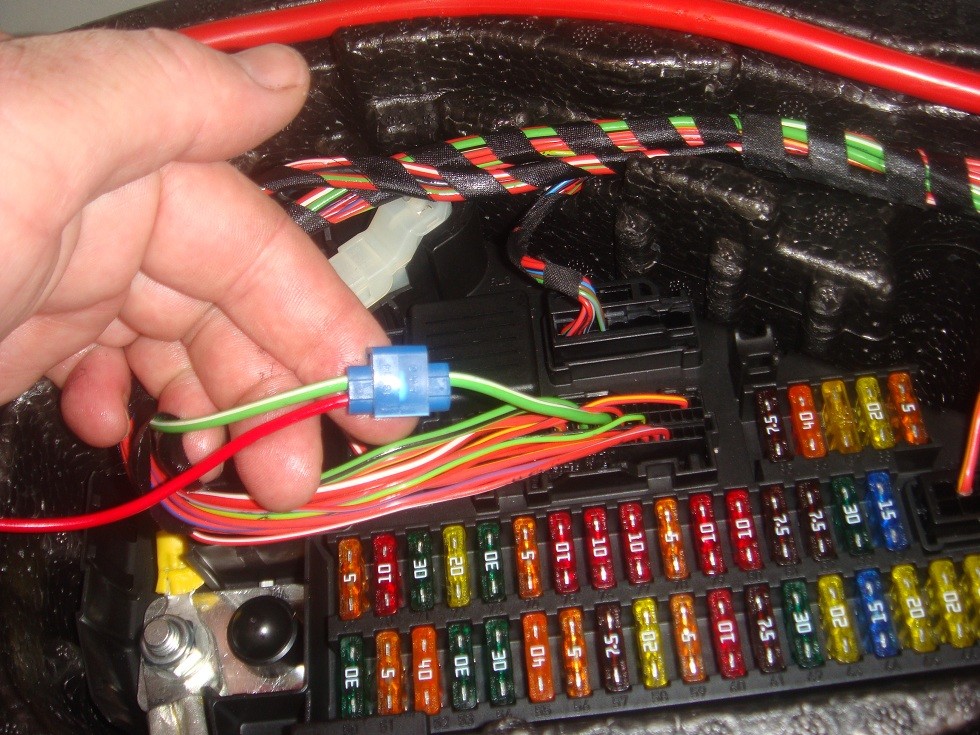
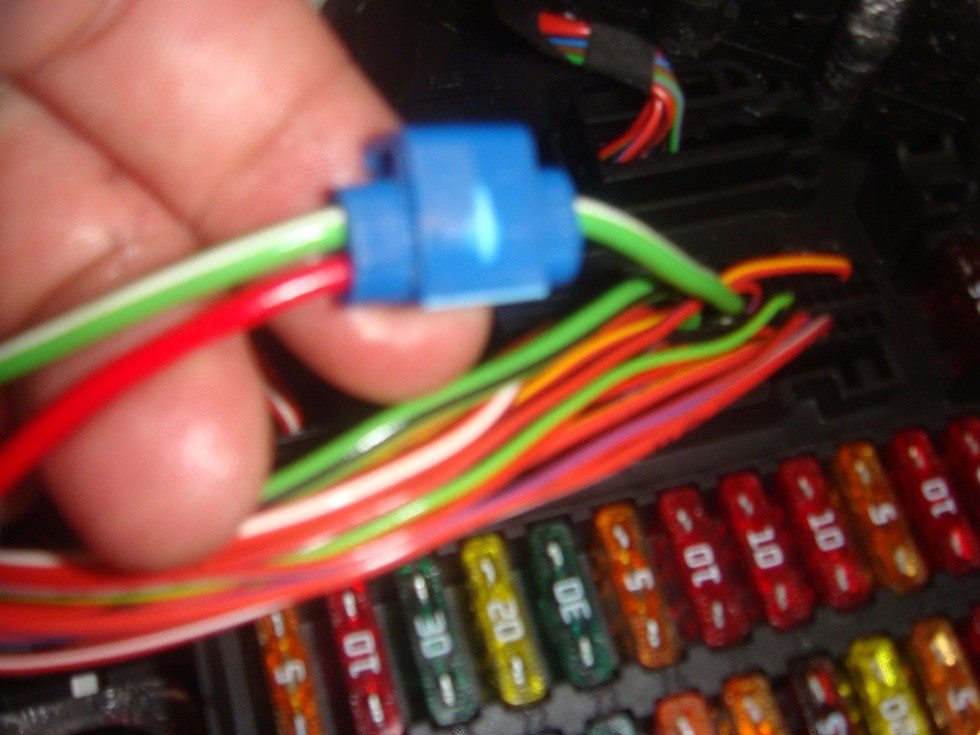
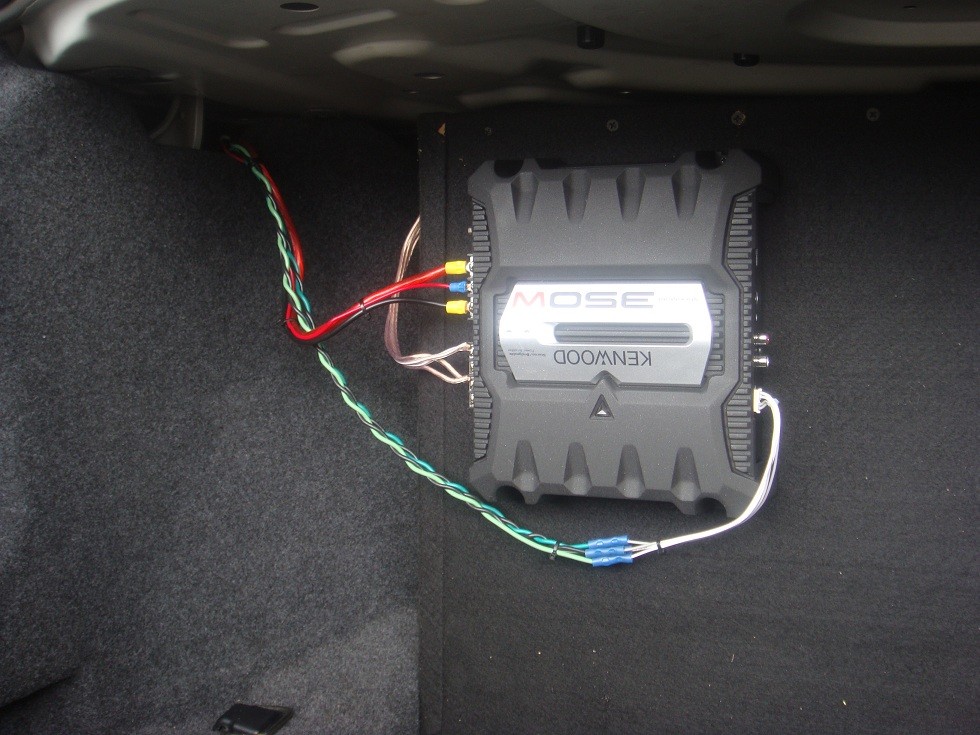
7. Tap into the battery + as you can see in Pic #9. The yellow connector on the large cable is where I tapped it.
8. Pics #7, 8 and 9 show where I tapped the amp power on connector. This Green/White striped wire on has power when the ignition is ON. People have had some battery drain problems by using an accessory powered source.
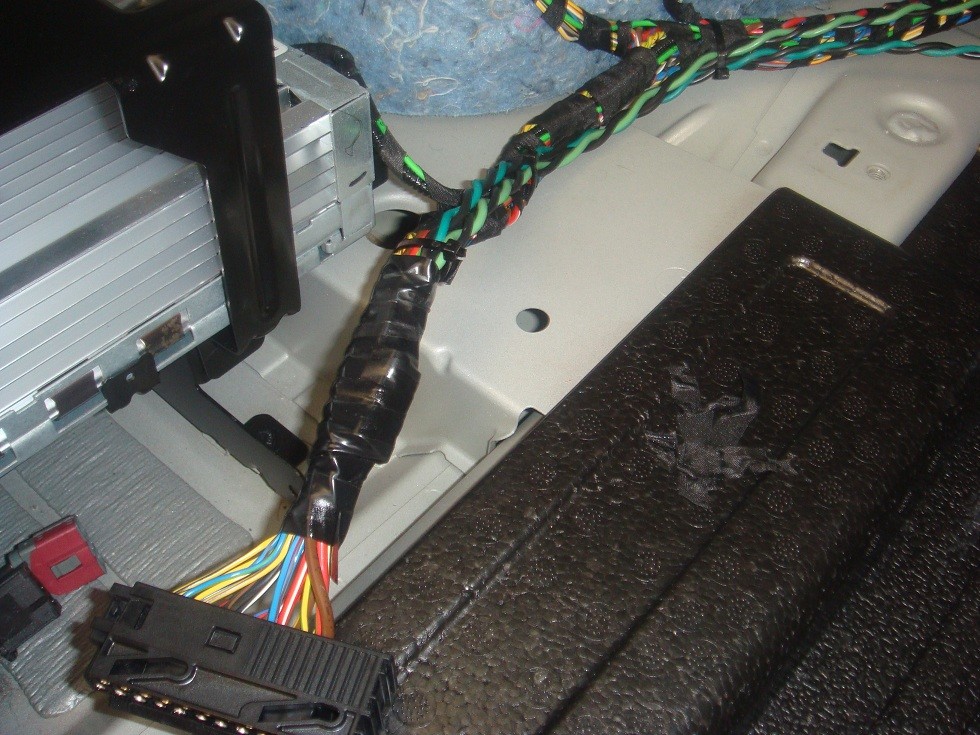
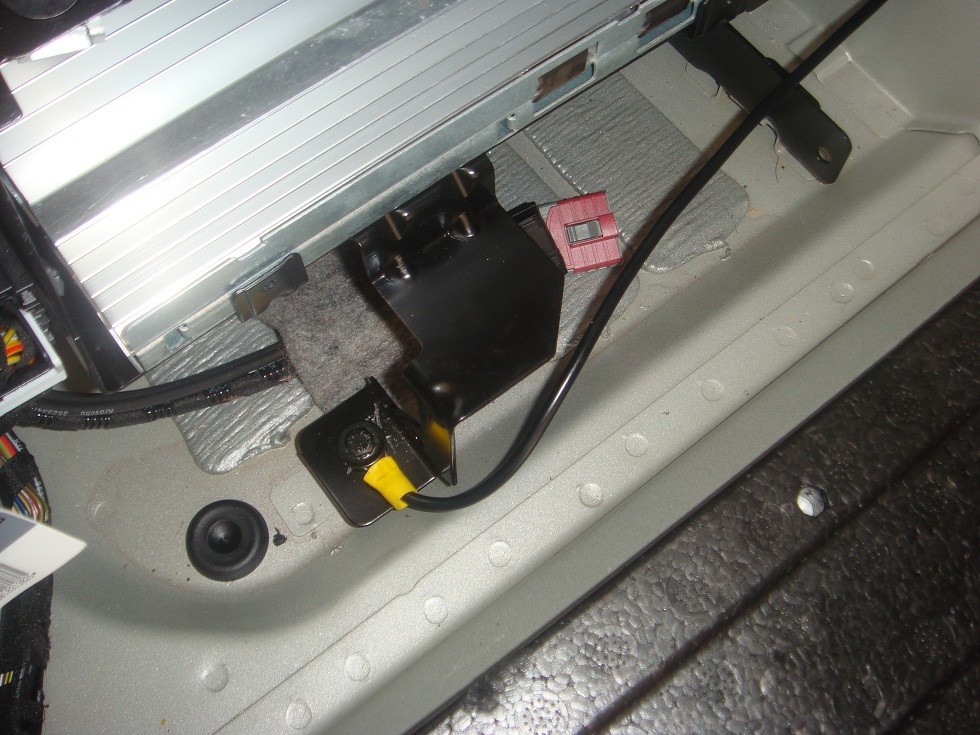
9. Run both of these wires with the battery wire running up under the front foam piece and exiting to the left side just in front of the tie down loop.
10. I pulled ground off the lower mount of the factory amp as you can see in Pic #11. Make sure you scratch up the paint so you get a good connection.
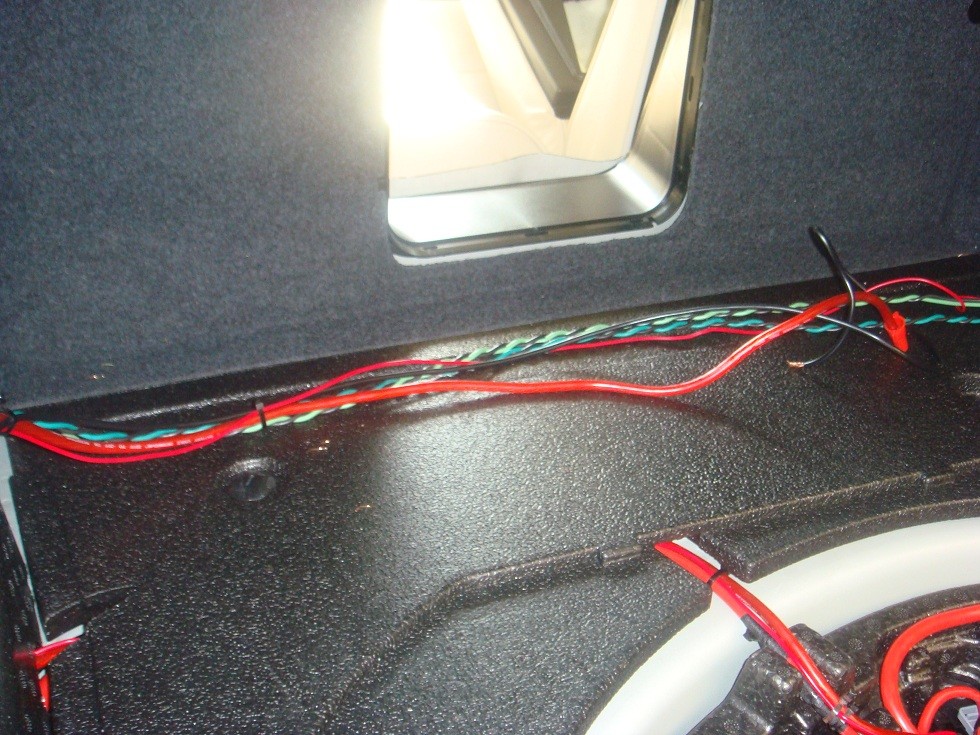
11. Zip tie everything up and leave enough wire to reach the amp and allow you to pull the box back (if you ever want to pull it out) without ripping the wires out 
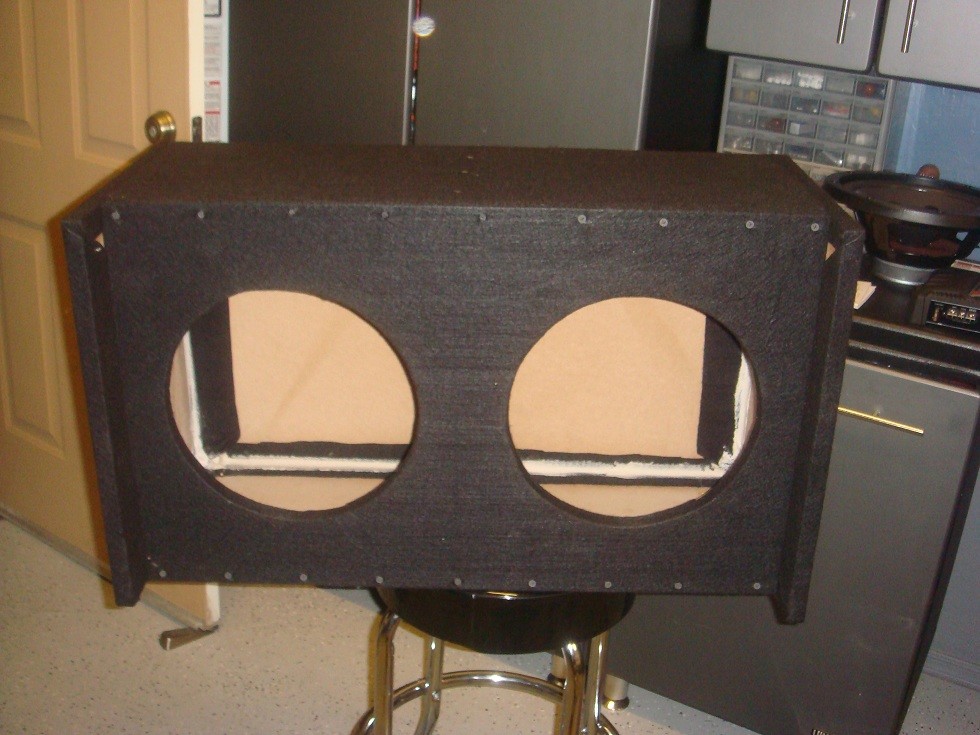
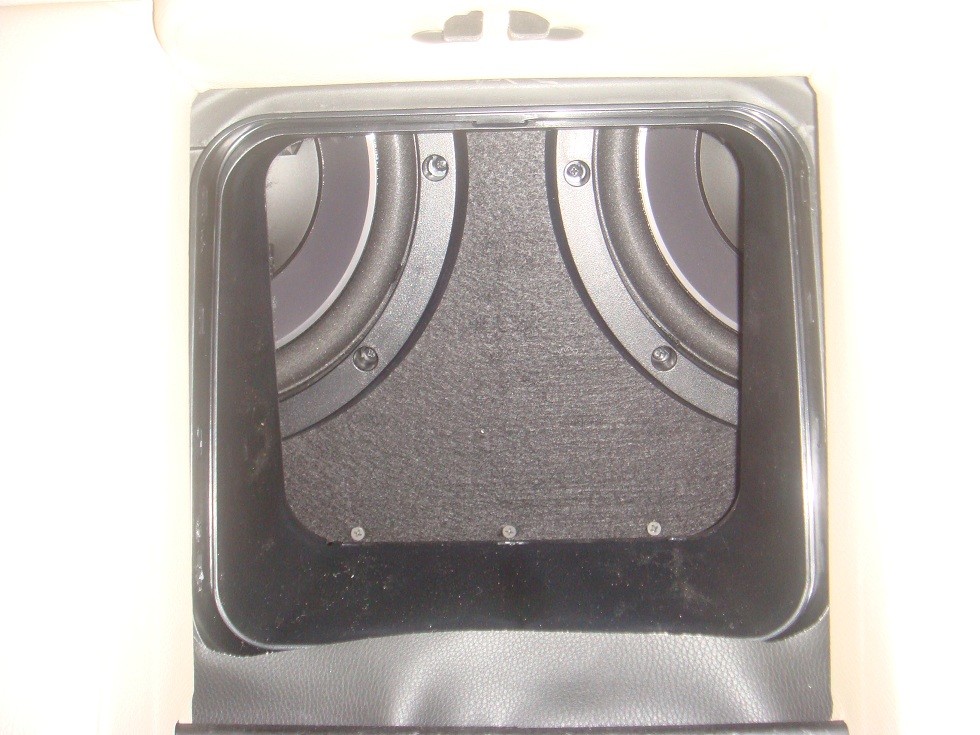
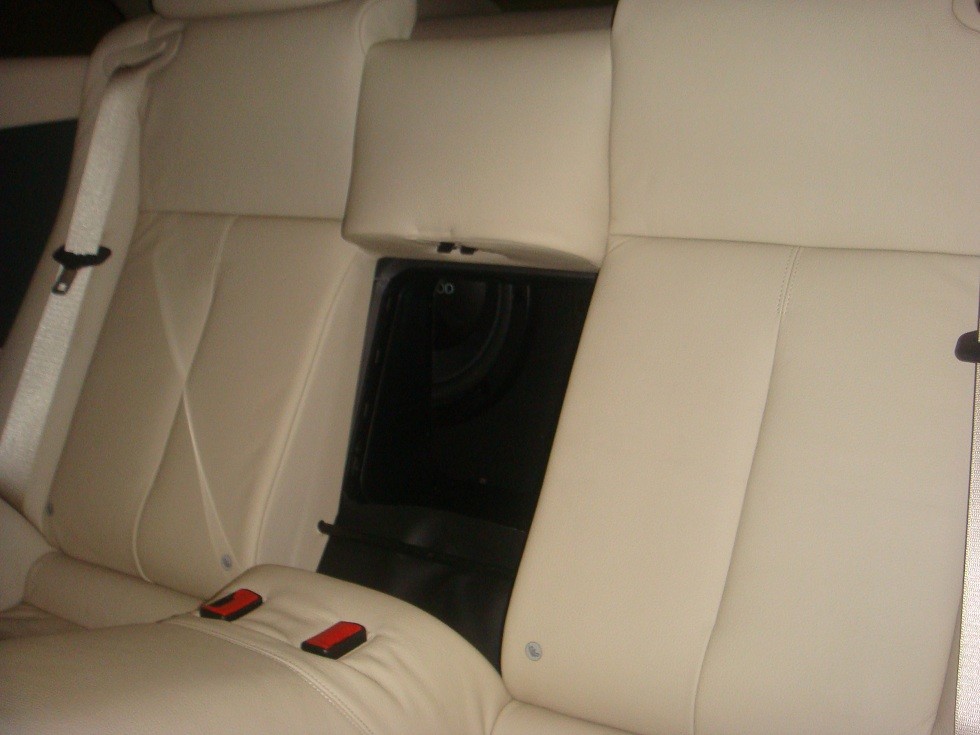
12. Build you a box. I built mine out of 3/4" MDF and covered it with black felt. The speakers needed 1.25 cubic feet each for proper tuning. So using my mad math skillz figured out what size I needed. I wanted to make it as shallow as possible so I made it a tall and wide as I could. It ended up being 18" H x 30 1/2" W x 10 3/4" deep. I added 2 inches to the sides in front to keep it off the seat back and give it a bit of room to blow out the ski boot.
12. Seal it up with silicone/caulk and put some baffling material in there and your ready to go.
13. Mount the amp, hook up wires and bump away!
14. My amp is temp so don't knock the install yet. I'll run the wires through some plastic wire cover and clean it up after I install the new amp. But for a cheap amp I still could only turn it up 1/2 way before my ears hurt.
I may make a grill for the front of the ski boot, but it pounds through it now pretty well. If anyone has any questions, feel free to ask.